X100-4K+ Connecting Power and Devices
Connecting to Power

- Connect the power cord to the AC IN jack at the rear of the projector.
- Plug the power cord into a power outlet.
- NOTE: When installing the projector, incorporate a readily accessible disconnect device in the fixed wiring, or connect the power plug to an easily accessible outlet near the unit. If a fault should occur during operation of the projector, use the disconnect device to switch off the power supply, or disconnect the power plug.
Connecting to External Devices
HDMI Connection

Connect one end of an HDMI cable to the HDMI port of your video device. Then connect the other end of the cable to the HDMI 1/2/3/4 port (each support HDCP 2.0/HDMI 2.2) of your projector.
- NOTE: iPhone/iPad users will need to use an additional adapter.
Audio Connection

You can connect to various external sound delivery devices via the Audio Out, AUX (Audio In), and S/PDIF ports.
- NOTE: AUX(Audio In) is available for VGA input only.
USB and Network Connection
Just like any PC, it is easy to connect various USB devices, dongles, and networking devices.

RS-232 Connection
When you use a RS-232 serial cable to connect your display to an external computer certain functions can be controlled remotely by the PC, including Power On/Off, Volume adjustment, Input select, Brightness, and more.

Additional Connection Options
The X100-4K also supports several additional and convenient connection options such as: 12V Trigger for screens and curtains, VGA for computer connection, and Wired IR for extending the IR receiver range.

vRemote App
Please see vRemote App
Wireless Screen Mirroring
Please see Wireless Screen Mirroring
Connecting to Networks
Wi-Fi Connection
A Wi-Fi dongle is an included accessory for the X100-4K. You can follow the below steps to set the connection.
-
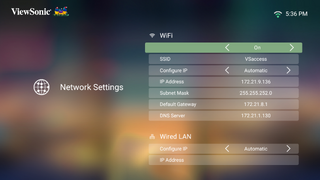 Step 3 - Turn On Wi-Fi
 -
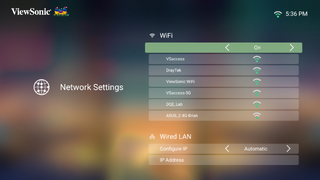 Step 4 - Select Network
 -
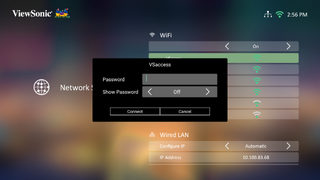 Step 5 - Enter Password if Needed


To connect to a Wi-Fi network:
- Insert the Wi-Fi dongle into the projector’s Wi-Fi dongle socket.
- Go to: Home > Settings > Network Settings > Wi-Fi
- Press Left or Right on the remote control to select On.
- Available Wi-Fi networks will then be displayed. Select one of the available Wi-Fi networks.
- If you connect to a secure Wi-Fi network, you must enter the password when prompted.
Custom SSID
- Ensure the Wi-Fi dongle is plugged into the projector’s Wi-Fi dongle socket.
- Go to: Home > Settings > Network Settings > Wi-Fi
- Press Left or Right on the remote control to select On.
- From the available Wi-Fi networks list select Others and press OK on the remote control.
- Enter the SSID and select the security level.
- Enter the password when prompted.
-
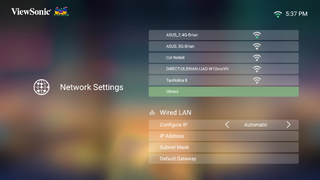 Step 4 - Select Others
 -
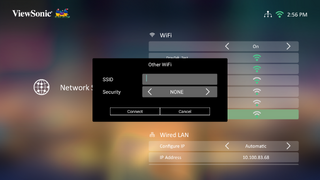 Step 5 - Enter SSID
 -
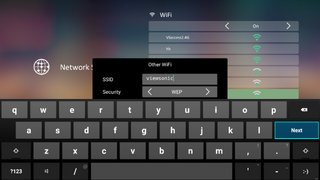 Step 6 - Enter Password


Wired Connection
You can easily connect to wired Internet networks and customize the connection as well.
- Plug the RJ45 cable into the LAN port of the projector, then ensure the other end is plugged into your wired Internet source.
- Go to: Home > Settings > Network Settings > Wired LAN Control
- You can Configure the IP automatically or manually. Choosing Manual will allow access to IP Address, Subnet Mask, Default Gateway, and DNS Server.
- NOTE: It is recommended to let the system configure the network settings automatically by choosing Automatic for Configure IP.