M2W Initial Setup
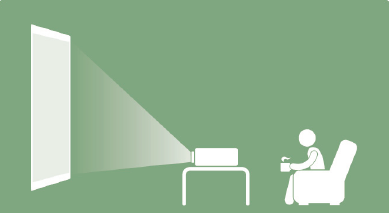
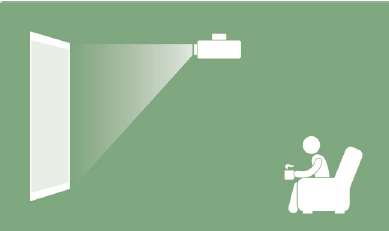
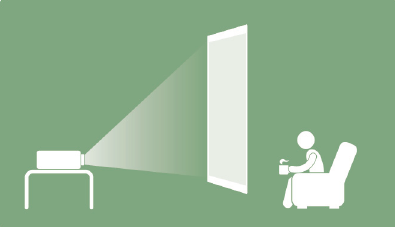
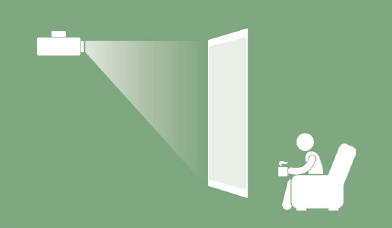
Choosing a Location - Projector Orientation
Personal preference and room layout will decide the installation location. Consider the following:
- Size and position of your screen.
- Location of a suitable power outlet.
- Location and distance between the projector and other equipment.
| Location | Description |
|---|---|
| Front Table | The projector is placed near the floor in front of the screen. |
| Front Ceiling | The projector is suspended upside-down from the ceiling in front of the screen. |
| Rear Table[1] | The projector is placed near the floor behind the screen. |
| Rear Ceiling[1] | The projector is suspended upside-down from the ceiling behind the screen. |
Projection Dimensions
- NOTE: (e) = Screen | (f) = Center of Lens
16:10 Image on a 16:10 Screen
| (a) Screen Size | (b) Projection Distance | (c) Image Height | |||||
|---|---|---|---|---|---|---|---|
| min. | max. | ||||||
| in. | cm | in. | mm | in. | cm | in. | cm |
| 30 | 76.2 | 30.5 | 77.5 | 30.5 | 77.5 | 15.9 | 40.4 |
| 40 | 101.6 | 40.7 | 103.4 | 40.7 | 103.4 | 21.2 | 53.8 |
| 50 | 127 | 50.9 | 129.2 | 50.9 | 129.2 | 26.5 | 67.3 |
| 60 | 152.4 | 61.1 | 155.1 | 61.1 | 155.1 | 31.8 | 80.8 |
| 70 | 177.8 | 71.2 | 180.9 | 71.2 | 180.9 | 37.1 | 94.2 |
| 80 | 203.2 | 81.4 | 206.8 | 81.4 | 206.8 | 42.4 | 107.7 |
| 90 | 228.6 | 91.6 | 232.6 | 91.6 | 232.6 | 47.7 | 121.2 |
| 100 | 254 | 101.8 | 258.5 | 101.8 | 258.5 | 53.0 | 134.6 |
| 110 | 279.4 | 111.9 | 284.3 | 111.9 | 284.3 | 58.3 | 148.1 |
| 120 | 304.8 | 122.1 | 310.2 | 122.1 | 310.2 | 63.6 | 161.5 |
| 130 | 330.2 | 132.3 | 336.0 | 132.3 | 336 | 68.9 | 175 |
| 140 | 355.6 | 142.5 | 361.8 | 142.5 | 361.8 | 74.2 | 188.5 |
| 150 | 381 | 152.6 | 387.7 | 152.6 | 387.7 | 79.5 | 201.9 |
- There is a 3% tolerance among these numbers due to optical component variations. It is recommended to physically test the projection size and distance before permanently installing the projector.
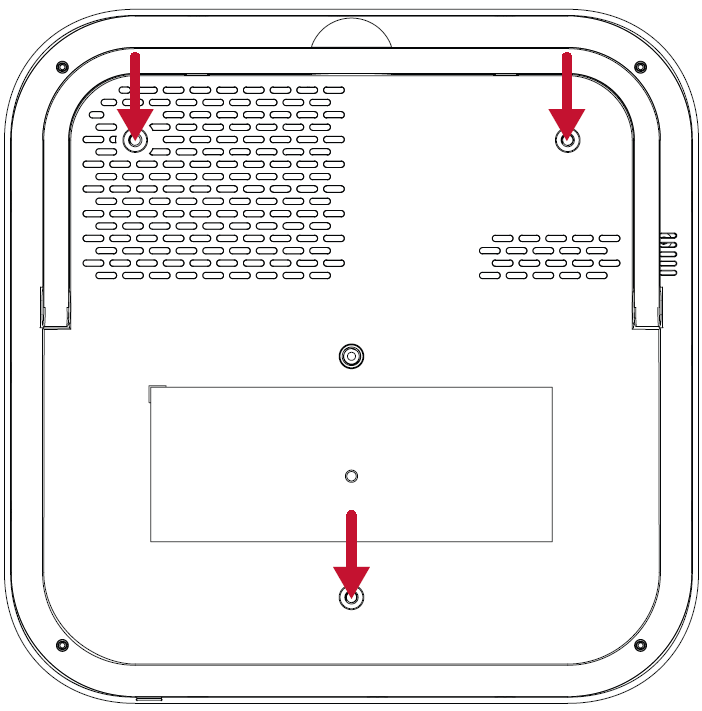
Mounting the Projector
- NOTE: If you buy a third party mount, please use the correct screw size. Screw size can vary depending on the thickness of the mounting plate.
- To ensure the most secure installation, please use a ViewSonic® wall or ceiling mount.
- Ensure the screws used to attach the mount to the projector meet the following specifications:
- Screw type: M4 x 8
- Maximum Screw Length: 8 mm
- To access the ceiling mount points, remove the three (3) foot pads on the bottom of the projector.
- CAUTION
- Avoid installing the projector near a heat source.
- Keep at least a 10 cm (3.9 in.) gap between the ceiling and the bottom of the projector.

