
| Sub-menu | Menu Option | ||
|---|---|---|---|
| Color Mode | Brightest | ||
| TV | |||
| Movie | |||
| Low Blue Light | |||
| Brightness | (-/+, 0~100) | ||
| Contrast | (-/+, -50~50) | ||
| Color Temp | 6500K | ||
| 7500K | |||
| 9300K | |||
| User | Red Gain | (-/+, 0~100) | |
| Green Gain | (-/+, 0~100) | ||
| Blue Gain | (-/+, 0~100) | ||
| Red Offset | (-/+, 0~100) | ||
| Green Offset | (-/+, 0~100) | ||
| Blue Offset | (-/+, 0~100) | ||
| Wall Color - Pink | |||
| Wall Color - Yellow | |||
| Wall Color - Blue | |||
| Tint | (-/+, -50~50) | ||
| Saturation | (-/+, 0~100) | ||
| Sharpness | (-/+, 0~50) | ||
| Gamma | 1.8 | ||
| 2.0 | |||
| 2.2 | |||
| 2.5 | |||
| Light Source Level | Full | ||
| Eco | |||
| Battery Saving | |||
| Test Pattern | OK | ||
| Reset Current Color Settings | Yes | ||
| Cancel | |||
M1X On-Screen Display Menu Tree: Difference between revisions
From ViewSonic Documentation
// via Wikitext Extension for VSCode |
// via Wikitext Extension for VSCode |
||
| Line 210: | Line 210: | ||
Press '''Setting''' [[File:LS710HD_LS751HD_Setup_Icon.png|30px]] on the remote control. | Press '''Setting''' [[File:LS710HD_LS751HD_Setup_Icon.png|30px]] on the remote control. | ||
</p> | </p> | ||
<div class="res-img">[[File:M1X_OSD_Image_Setting-1.png|400px|alt=M1X's Advanced | <div class="res-img">[[File:M1X_OSD_Image_Setting-1.png|400px|alt=M1X's Advanced OSD Menu]]</div> | ||
</li> | </li> | ||
<li> | <li> | ||
| Line 216: | Line 216: | ||
Use the '''Right ''' ▶ directional buttons to access the '''Advanced''' menu. | Use the '''Right ''' ▶ directional buttons to access the '''Advanced''' menu. | ||
</p> | </p> | ||
<div class="res-img">[[File:M1X_OSD_Advanced-2.png|400px|alt= | <div class="res-img">[[File:M1X_OSD_Advanced-2.png|400px|alt=Entering M1X's Advanced OSD Menu item]]</div> | ||
</li> | </li> | ||
<li> | <li> | ||
| Line 237: | Line 237: | ||
=Home Screen - On-Screen Display (OSD) Menu Tree= | =Home Screen - On-Screen Display (OSD) Menu Tree= | ||
==Home Screen== | |||
<p>The '''Home Screen''' is displayed every time you start the projector. To navigate the '''Home Screen''', simply use the directional buttons on the remote control.<br>You can return to the main '''Home Screen''' at any time by pressing the '''Home''' button on the remote control, regardless of what page you are on.<p> | |||
<div class="res-img">[[File:M1X_Home_Screen.png|400px|alt=M1X's Home Screen]]</div> | |||
===[[M1X_Operation#File_Management| File Management]]=== | ===[[M1X_Operation#File_Management| File Management]]=== | ||
Revision as of 08:43, 4 July 2024
Input Source Selected - On-Screen Display (OSD) Menu Tree
After your input source is selected, you can adjust the Image Setting and Advanced menus.
| Sub-menu | Menu Option | |
|---|---|---|
| Aspect Ratio | Auto | |
| 4:3 | ||
| 16:9 | ||
| HDMI Setting | Auto | |
| Full | ||
| Limited | ||
| 3D Settings | 3D Format | Disable |
| Frame Sequential | ||
| Frame Packing | ||
| Top-Bottom | ||
| Side-by-Side | ||
| 3D Sync Invert | Disable | |
| Invert | ||
| Audio Settings | Audio Mode | Movie |
| Music | ||
| Audio Volume | (-/+, 0~50) | |
| Mute | Disable | |
| Enable | ||
| Information | Source | Ex. HDMI |
| Rsolution | Ex. 1920 x 1080 @60Hz | |
| 3D Format | Ex. Frame Packing | |
Image Setting Menu
After your input source is selected, you can adjust the Image Setting menu.
To access the Image Setting menu:
-
Press Setting
 on the remote control.
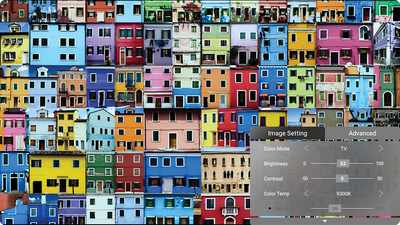
-
Use the Up ▲ / Down ▼ directional buttons to select a menu.
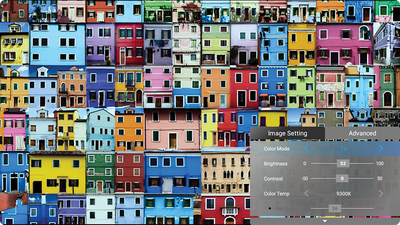
-
Then use the Left ◄ / Right ► directional buttons to enter the sub-menu(s) and/or adjust the settings.
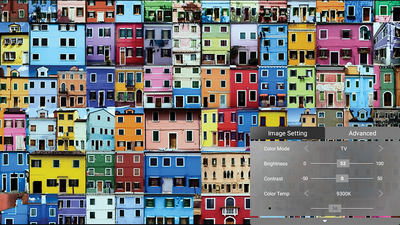
-
Press the Return
 button to go to the previous menu or exit.
Note: USB device source does not support the Image Setting function.
button to go to the previous menu or exit.
Note: USB device source does not support the Image Setting function.


Advanced Setting Menu
After your input source is selected, you can adjust the Advanced menu.
To access the Advanced menu:
-
Press Setting
on the remote control.
-
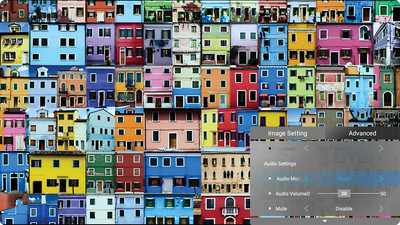
Use the Right ▶ directional buttons to access the Advanced menu.
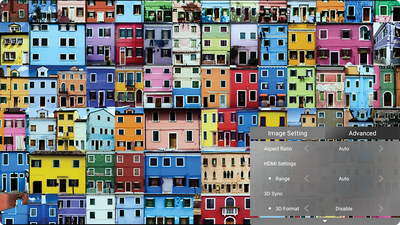
-
Use the Up ▲ or Down ▼ directional buttons to select a menu.
-
Then use the Left ◄ / Right ► directional buttons to enter the sub-menu(s) and/or adjust the settings.
-
Press the Return
button to go to the previous menu or exit.


Home Screen - On-Screen Display (OSD) Menu Tree
Home Screen
The Home Screen is displayed every time you start the projector. To navigate the Home Screen, simply use the directional buttons on the remote control.
You can return to the main Home Screen at any time by pressing the Home button on the remote control, regardless of what page you are on.

File Management
Basic Settings
| Sub-menu | Menu Option | ||
|---|---|---|---|
| Language | English | ||
| French | |||
| German | |||
| Italian | |||
| Spanish | |||
| Russian | |||
| 繁體中文 | |||
| 簡體中文 | |||
| 日本語 | |||
| 韓語 | |||
| Swedish | |||
| Dutch | |||
| Turkish | |||
| Czech | |||
| Portuguese | |||
| Thai | |||
| Polish | |||
| Finnish | |||
| Arabic | |||
| Indonesian | |||
| Hindi | |||
| Vietnam | |||
| Greek | |||
| Projector Position | Front Table | ||
| Front Ceiling | |||
| Rear Table | |||
| Rear Ceiling | |||
| Keystone | Manual | (-/+, -40~40) | |
| Auto V Keystone | Disable | ||
| Enable | |||
Source
Audio Mode
Advanced Settings
| Sub-menu | Menu Option | ||
|---|---|---|---|
| Advanced Settings | Power On Source | Home | |
| HDMI | |||
| USB-C | |||
| Power On/Off Ring Tone | Off | ||
| On | |||
| Smart Energy | Auto Power Off | Disable | |
| 10 minutes | |||
| 20 minutes | |||
| 30 minutes | |||
| Sleep Timer | Disable | ||
| 30 minutes | |||
| 1 hour | |||
| 2 hours | |||
| 3 hours | |||
| 4 hours | |||
| 8 hours | |||
| 12 hours | |||
| Power Saving | Enable | ||
| Disable | |||
| harmon/kardon | Audio Mode | Movie | |
| Music | |||
| User | |||
| Audio Volume | (-/+, 0~20) | ||
| Mute | Off | ||
| On | |||
| Light Source Level | Full | ||
| Eco | |||
| Extended Eco | |||
| Battery Saving | |||
| High Altitude Mode | Off | ||
| On | |||
| Reset Settings | Yes | ||
| Cancel | |||
| Reset to Factory Default | Yes | ||
| Cancel | |||
Information
| Sub-menu | Menu Option | |
|---|---|---|
| Information | Light Source Hours | |
| System Version | ||
| Memory Information | XX GB of XX GB Used | |
| Wi-Fi Mac Address | ||
| Serial Number | ||