M1X Operation
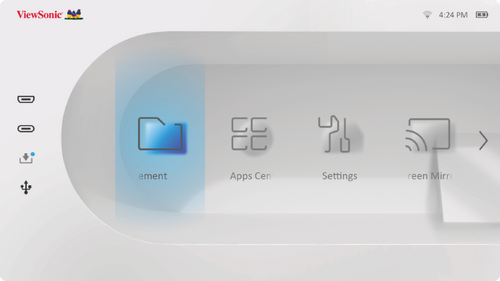
Home Screen
The Home Screen is displayed every time you start the projector. To navigate the Home Screen, simply use the directional buttons ▶ / ◀ / ▲ / ▼ on the remote control. You can return to the main Home Screen at any time by pressing the Home button on the remote control, regardless of what page you are on.

| Menu | Description |
|---|---|
| File Management | Provides a user interface to manage files and folders. |
| Apps Center | Access and view all installed applications. |
| Settings | Manage various categories such as: Network settings, Basic and Advanced settings, Date & Time, Firmware update, and System Information. |
| Screen Mirroring | Mirror your personal device’s screen through the projector. |
| Bluetooth | Select the appropriate Bluetooth mode. |
| Add App | Select your favorite Apps and add them to the Home Screen. |
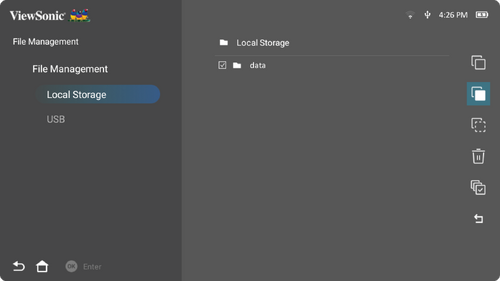
File Management
Easily manage files and folders.
-
Select: Home > File Management.
-
Select a device on the source list: USB, Local Storage, MicroSD, etc. Use the directional buttons ▶ / ◀ / ▲ / ▼ to select the desired file. Then press OK on the remote control to open the selected file.
-
Press the Return
 button to go to a previous level.Note: Press the Home button on the remote control to return to the Home Screen at anytime.
How to Edit a File
- While in File Management, press and hold the OK button for three seconds.
-
A check box will appear at the front of each file. Use the directional buttons ▶ / ◀ / ▲ / ▼ and press OK to select one or more files.
-
By pressing the Right ▶ button, Copy, Paste, Cut, Delete, Select All, and Return boxes will be available for use.

- Select your desired action xand press OK to execute.
- If you are Copying or Cutting, select your destination folder to complete the process.


How to Use the Media Control Bar Buttons
The media control bar buttons will appear on screen if a video, music, or photo file are selected to be opened.

Tips for using USB
When using USB for reading and/or storage please keep in mind the following:
- Some USB storage devices may not be compatible.
- If you use an USB extension cable, the USB device may not recognize the USB.
- Only use USB storage devices formatted with Windows FAT32 or NTFS file system.
- Larger files will need extra time to load.
- Data on USB storage devices may be damaged or lost. Back up important files.
Supported File Formats
| Extension | Type | Codec |
|---|---|---|
| .avi | Audio | MP3 |
| .mp4 .m4v .mov |
Video | H.264/MPEG-4 |
| .mkv | Video | H.264 |
| .ts .trp .tp .mts .m2ts |
Video | H.264, MPEG-2 |
| Audio | MP3 | |
| .vob | Video | MPEG-1, MPEG-2 |
| Audio | DVD-LPCM | |
| .mpg | Video | MPEG-1 |
| Items | Indicators | |||
|---|---|---|---|---|
| I. | Document Viewing Function | 1 | doc/docx | Able to open and read documents in doc/docx |
| 2 | xls/xlsx | Able to open and read documents in xls/xlsx | ||
| 3 | ppt/pptx | Able to open and read documents in ppt/pptx | ||
| 4 | Able to open and read documents in PDF | |||
| II. | Supporting Interface Language | 1 | Supporting 44 Interface Languages | English, Simplified Chinese, Chinese (TW), Chinese (HK), Spanish (LA), French (EU), PT (EU), PT (BR), German, Russian, Italian, Swedish, Spanish (EU), Korean, Arabic, Farsi, Serbian, Bosnian, Macedonian, Bulgarian, Ukrainian, Greek, Norwegian, Danish, Czech, Hungarian, Slovak, Polish, Romanian, Finnish, Estonian, Latvian, Lithuanian, British English, Slovenian, Croatian, Turkish, Vietnamese, Bahasa Indonesia, Dutch, Malay, Thai, Hindi, Hebrew, Burmese, Catalan. |
| Format | Type | Maximum Resolution |
|---|---|---|
| .jpg/.jpeg | Progressive JPEG | 7680 x 4320 |
| Baseline JPEG | 7680 x 4320 | |
| .bmp | 9600 x 6400 | |
| .png | 7680 x 4320 |
| Device | Support Size (Max. Size) |
NTFS Format | FAT32 Format | exFAT | |||
|---|---|---|---|---|---|---|---|
| Read | Write | Read | Write | Read | Write | ||
| USB Memory Stick | 256 GB | V | N/A | V | V | N/A | N/A |
| USB HDD | 2 TB | V | N/A | V | V | N/A | N/A |
- Windows 10 built-in format tool only supports FAT32 format up to 32 GB.
- Firmware upgrade only supports FAT32 format.
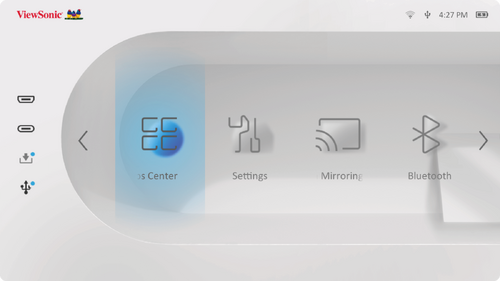
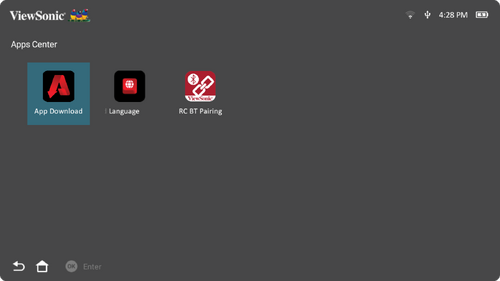
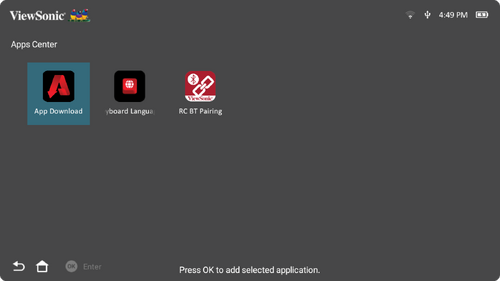
Apps Center
View, launch, and uninstall Apps.
-
To view your Apps, select: Home > Apps Center.
-
Use the directional buttons ▶ / ◀ / ▲ / ▼ to select the desired App. Then press OK on the remote control to launch the App.
 Note: Press the Home button on the remote control to return to the Home Screen at anytime.


ViewSonic App Download
Use the directional buttons ▶ / ◀ / ▲ / ▼ to navigate the menu options. When you find the preferred App, press the OK button on the remote control to install the App.

- Note:
- Users can install third-party Apps by .apk file in File Management. However, some third-party Apps may have compatibility issues.
- Apps not pre-loaded by ViewSonic may not be compatible or work properly.
- Some Apps may require a keyboard or mouse.
- Some Apps may be Region-Specific.
To Uninstall Apps
- Open the Apps Center by selecting: Home > Apps Center.
- Use the directional buttons ▶ / ◀ / ▲ / ▼ to select the desired App.
-
Press and hold OK on the remote control for three seconds. The below dialogue box will appear:
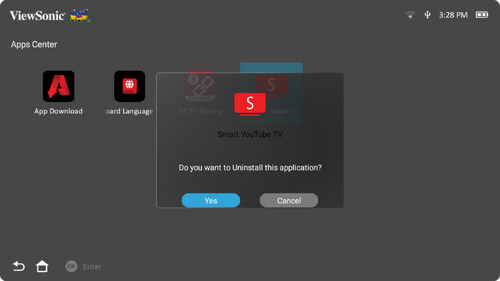
-
Select Yes to uninstall the App.
Note: Press the Home button on the remote control to return to the Home Screen at anytime.

Settings
Under Settings you can adjust Network, Basic, and Advanced settings, Date & Time, Firmware Upgrade, and view Information.

Network Settings
-
Select: Home > Setting > Network Settings.
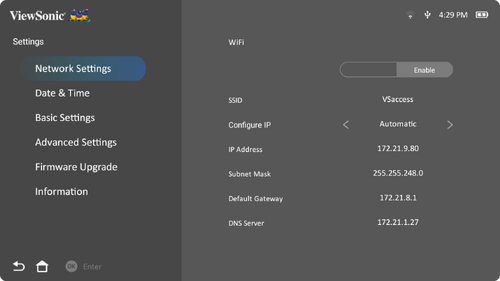
-
View and adjust your Wi-Fi and network settings.
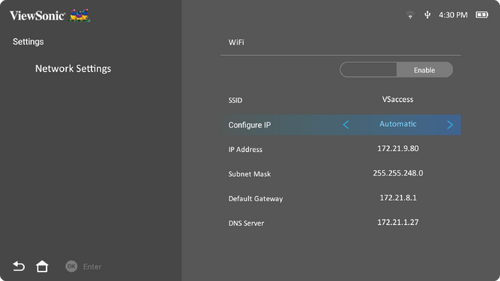
-
To setup a Wireless connection, see Connecting to Networks.


Basic Settings
-
Select: Home > Setting > Basic Settings.
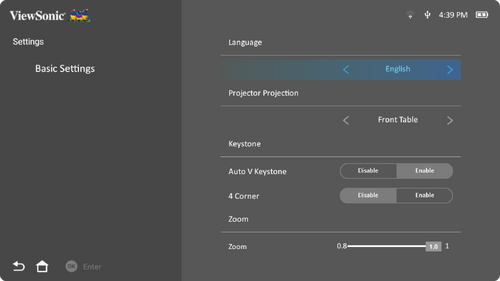
-
Use the Up ▲ and Down ▼ directional buttons to select the desired option and press OK. Then use the Left ◀ and Right ▶ buttons to make adjustments or selections.
-
To return to a previous menu press the Return
button.
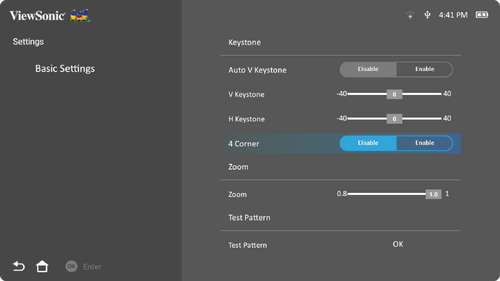
Note: Press the Home button on the remote control to return to the Home Screen at anytime.Menu Description Language Select your desired language. Projector Position Select the preferred projection position. Keystone Adjust trapezoidal screen image distortion.
Auto V Keystone
Provides a rectangular screen image by automatically adjusting the keystone number when there is a trapezoidal screen image caused by the tilting of the projector.- Enable: Automatically adjust the keystone number.
- Disable: Manually adjust the keystone number.
V Keystone
Keystone can be adjusted vertically manually.H Keystone
Keystone can be adjusted horizontally manually.4 Corner
Enable or disable 4 Corner Adjustment.4 Corner Adjustment
Adjust each corner individually for maximum projection flexibility.Zoom Adjust the digital zoom setting. Test Pattern Test the color presentation of the projector and/or adjust the focus of the projected image.


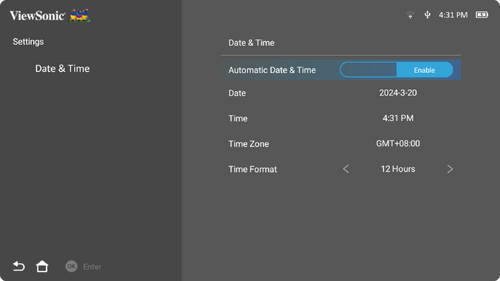
Date & Time
Adjust Date, Time, Time Zone, and Time Format.
-
Select: Home > Setting > Date & Time.
-
Use the Up ▲ and Down ▼ directional buttons to select the desired option and press OK. Then use the Left ◀ and Right ▶ buttons to make adjustments or selections.


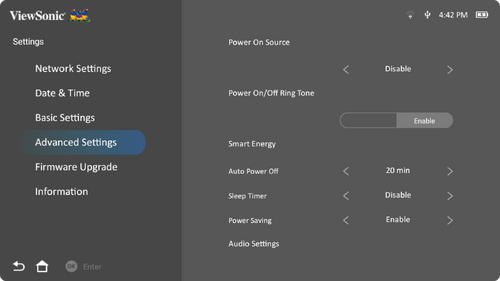
Advanced Settings
-
Select: Home > Setting > Advanced Settings.
-
Use the Up ▲ and Down ▼ directional buttons to select the desired option and press OK. Then use the Left ◀ and Right ▶ buttons to make adjustments or selections.
-
To return to a previous menu press the Return
button.
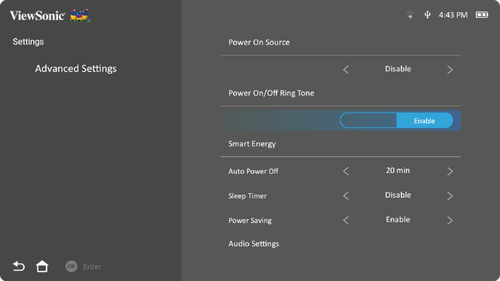
Note: Press the Home button on the remote control to return to the Home Screen at anytime.Menu Description Power On Source Enter the desired input source directly after turning on the projector. Power On Ring Tone Enable or disable the power on ring tone. Smart Energy Auto Power Off
The projector can turn off automatically after a set period of time once no input source is detected.Sleep Timer
Turn offautomatically after a set period of time.Power Saving
Lower power consumption if no input source is detected after five minutes.- NOTE: The power consumption of the LED will be changed to 30% after no signal is detected for five minutes.
Audio Settings Audio Mode
- Movie: Default audio mode.
- Music: Optimized for music playback.
Audio Volume
Adjust the volume from 0 to 50.Mute
Mute or unmute the volume.Light Source Level Select the suitable power consumption of the LED. Screen Saver On the homepage and folder pages, if there is no action within five minutes, the screen saver and time display will be activated. Power Bank Mode Enable or disable to turn on or charge the projector.
- NOTE: The power bank should be at least 45W (15V/3A) and support Power Delivery (PD) protocol output.
High Altitude Mode It is recommended that you use High Altitude Mode when your environment is between 1,500~3,000 m above sea level, and a temperature between 5°C~25°C.
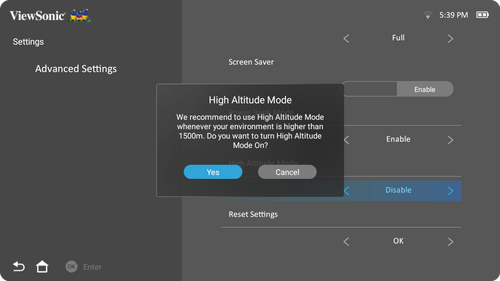
- NOTE: If you use this projector under other extreme conditions excluding the above, it may display auto shut-down symptoms, which is designed to protect your projector from over-heating. In cases like this, you should switch to High Altitude Mode to solve these symptoms. However, this is not to state that this projector can operate under any and all harsh or extreme conditions.
Reset Settings Reset the Settings to default. - NOTE: Language, High Altitude Mode, Projector Position, Network Settings, All installed Apps in the Apps Center, Add App, Bluetooth, Keystone, 4 Corner Adjustment, and Light Source Hours will remain unchanged.
Reset to Factory Default Restore all settings to their default values. - NOTE: Light Source Hours will remain unchanged.


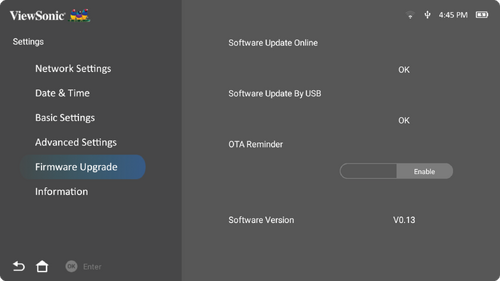
Firmware Upgrade
Users can update the firmware by internet or USB, and check the version number.
-
Before entering the Firmware Upgrade menu, ensure the projector is connected to the Internet.
-
To enter the menu, select: Home > Setting > Firmware Upgrade.
Firmware Update Online
-
Go to: Home > Setting > Firmware Upgrade > Software Update Online.
-
Select Enter by pressing OK on the remote control.
-
The system will check the ViewSonic website (OTA) and display the below dialog message if there is new Firmware.
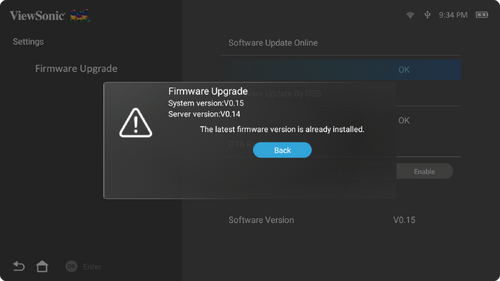
-
After selecting Yes, a progress bar will appear as the update process begins.

-
After reaching 100% the projector will restart.
Note: The whole process will take about 10 minutes. -
After updating the Firmware, it will take a few minutes to restart the projector.


Firmware Update by USB with FAT32 Format
- Download the latest version from the ViewSonic website and copy the file to a USB device.
- Plug the USB into the projector, then go to: Home > Setting > Firmware Upgrade > Software Update By USB.
- Select Enter by pressing OK on the remote control.
- The system will detect the Firmware version and display a dialog message.
- After selecting Yes, a progress bar will appear as the update process begins.
- After reaching 100% the projector will restart. The whole process will take about 10 minutes.
- After updating the Firmware, it will take a few minutes to restart the projector.
Information
-
Select: Home > Setting > Information.
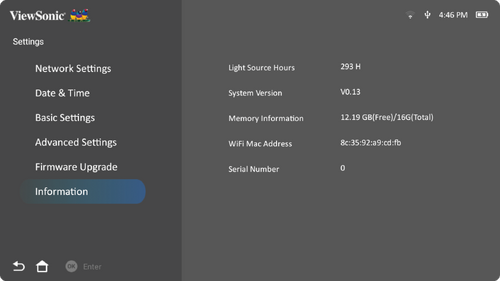
- View system status and information.

Screen Mirroring
Mirror your personal device’s screen. To setup wireless Screen Mirroring, see Wireless Screen Mirroring.

Bluetooth
The projector is equipped with that allows the user to connect their device wirelessly for audio playback. For more information, see Bluetooth.

Add App
Adding Apps
Add your favorite Apps to the Home Screen.
-
From the Home Screen, select Add App and then press OK on the remote control.
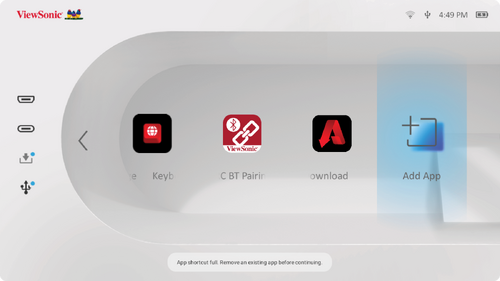
-
Use the directional buttons ▶ / ◀ / ▲ / ▼ to select the desired App and press OK.
-
Now your favorite App will appear on the Home Screen.


Delete Apps from the Home Screen
- From the Home Screen, select the App you want to delete and press and hold OK for three seconds.
-
The message, “Do you want to Delete this application from My Favorites?” will appear.
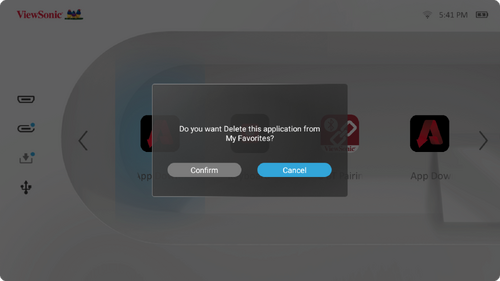
- Select Yes, and press OK to delete the App.
