M10 Initial Setup
From ViewSonic Documentation
Choosing a Location - Projector Orientation
Personal preference and room layout will decide the installation location. Consider the following:
- Size and position of your screen.
- Location of a suitable power outlet.
- Location and distance between the projector and other equipment.
-
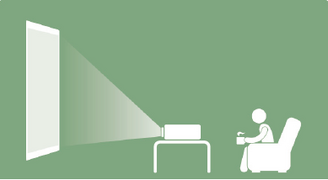 Front Table
 -
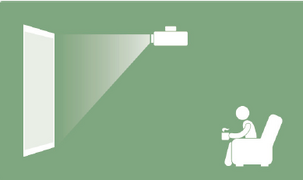 Front Ceiling
 -
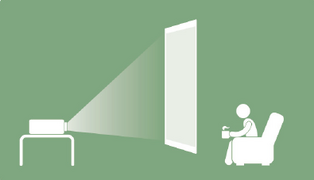 Rear Table
 -
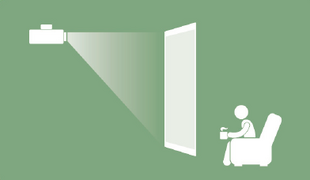 Rear Ceiling


| Location | Description |
|---|---|
| Front Table | The projector is placed near the floor in front of the screen. |
| Front Ceiling | The projector is suspended upside-down from the ceiling in front of the screen. |
| Rear Table[1] | The projector is placed near the floor behind the screen. |
| Rear Ceiling[1] | The projector is suspended upside-down from the ceiling behind the screen. |
Projection Dimensions
16:9 Image on a 16:9 Screen

Note: e = Screen / f = Center of Lens
| (a) Screen Size | (b) Projection Distance | (c) Image Height | Image Width | ||||
|---|---|---|---|---|---|---|---|
| in. | mm | in. | mm | in. | mm | in. | mm |
| 40 | 1016 | 41.85 | 1063 | 19.4 | 494 | 34.86 | 886 |
| 60 | 1524 | 62.75 | 1594 | 29.2 | 742 | 52.29 | 1328 |
| 80 | 2032 | 83.66 | 2125 | 38.9 | 987 | 69.73 | 1771 |
| 90 | 2286 | 94.13 | 2391 | 44.13 | 1121 | 78.44 | 1992 |
| 100 | 2540 | 104.60 | 2657 | 49.01 | 1245 | 87.16 | 2214 |
| 110 | 2794 | 115.03 | 2922 | 53.93 | 1370 | 95.87 | 2435 |
| 120 | 3048 | 125.51 | 3188 | 58.81 | 1494 | 104.59 | 2657 |
| 150 | 3810 | 156.88 | 3985 | 73.54 | 1868 | 130.74 | 3321 |
| 180 | 4572 | 188.26 | 4782 | 88.18 | 2240 | 156.92 | 3986 |
Note: It is recommended that if you intend to permanently install the projector, please physically test the projection size and distance using the actual projector before you permanently install it.
First Time Activation
When the projector is activated for the first time, you will need to Pair the Bluetooth Remote Control, select your Preferred Language, Projection Orientation, and Network Settings.
Follow the on-screen instructions using the OK and Up/Down/Left/Right buttons on the remote control. Upon completion, the projector is ready to use.
Bluetooth Remote Pairing

- Press and hold the Settings and Return button for three seconds to enter pairing mode.
- The LED on the remote control will flash blue.
- A “Successfully Paired” message will show. If not, please try again or select Next and go to: App Center > Bluetooth Remote app.
Preferred Language
Select the desired language and press OK to confirm the selection.

Projection Orientation
Select the preferred projection orientation and press OK to confirm the selection. For more information, see Projector Orientation.

Network Settings
Select one of the available Wi-Fi options. For more information, see Connecting to Networks.
