IFP4320 On-Screen Display Menu
On-Screen Display (OSD) Menu
Access General Settings, Input Settings, and Widgets through the OSD Menu.
ViewBoard has two options for opening the OSD Menu:
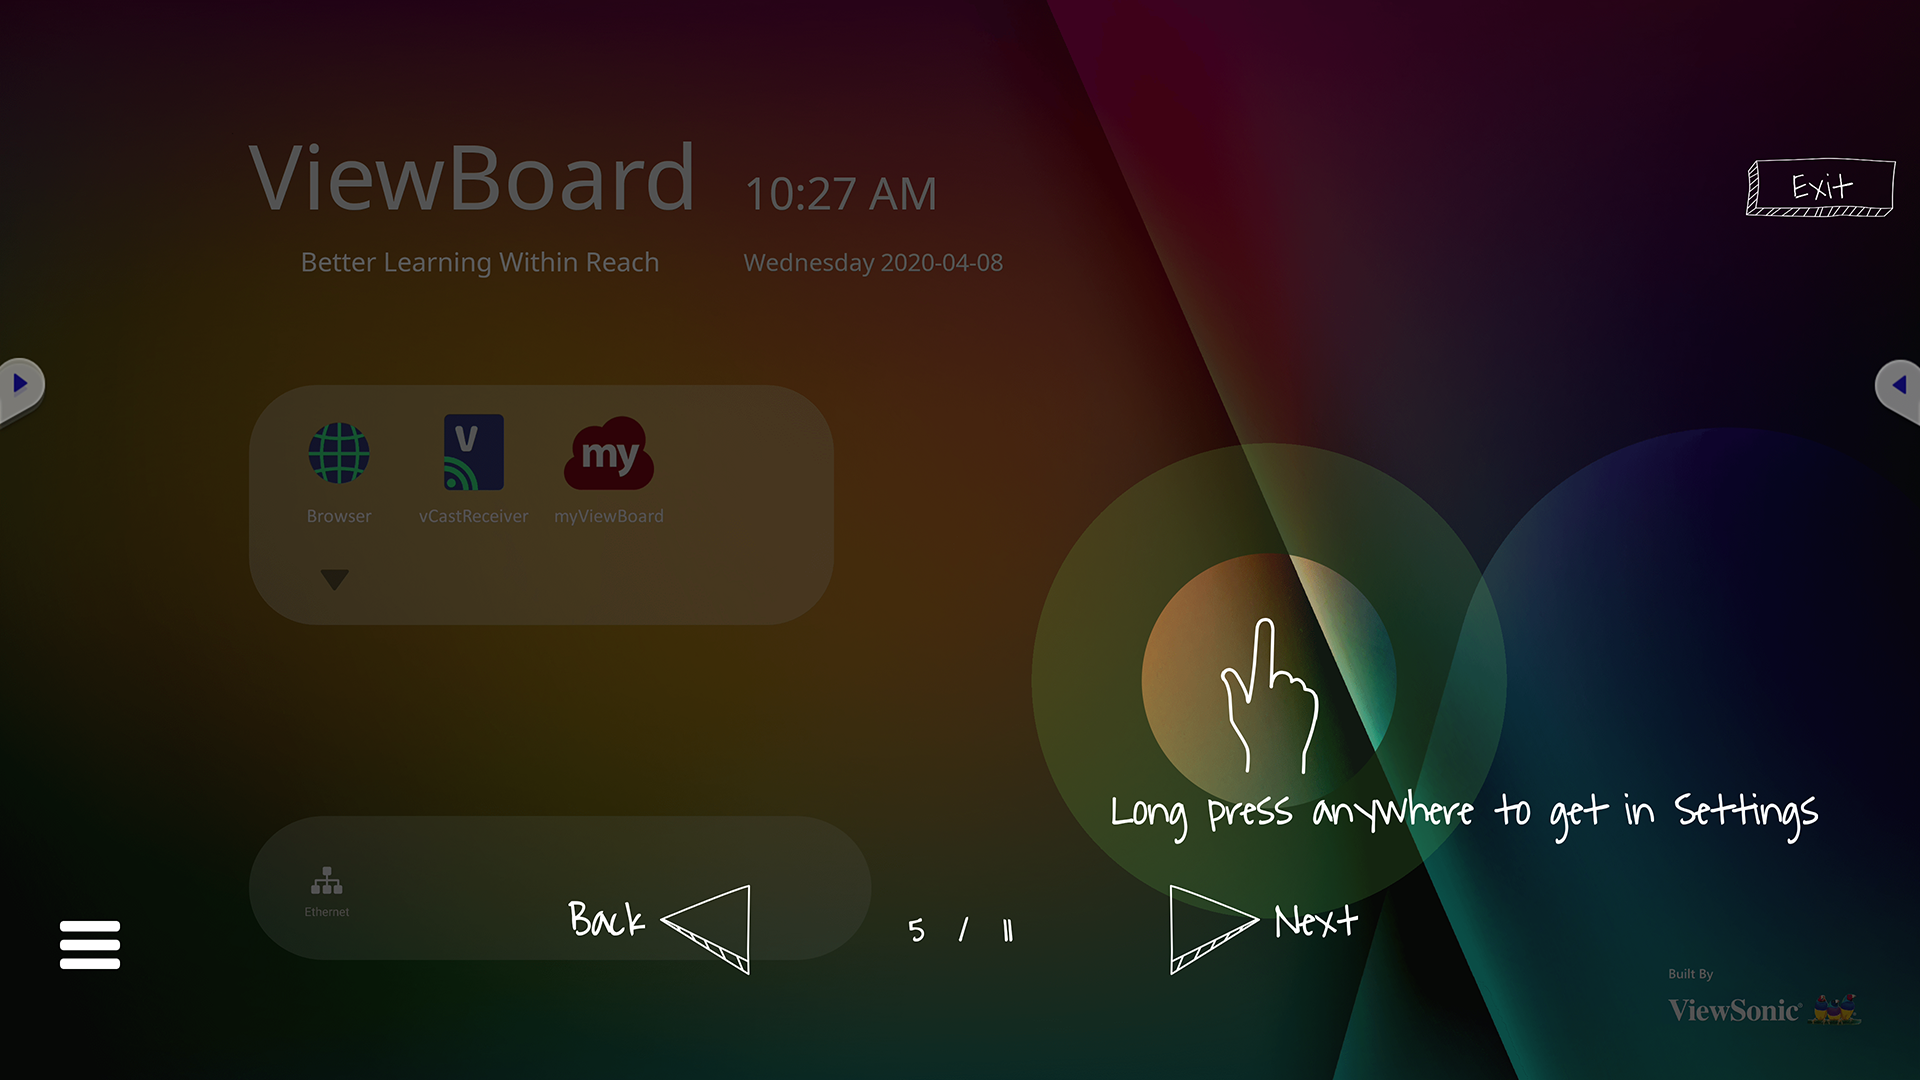
Option 1
Long press anywhere on the vLauncher background.
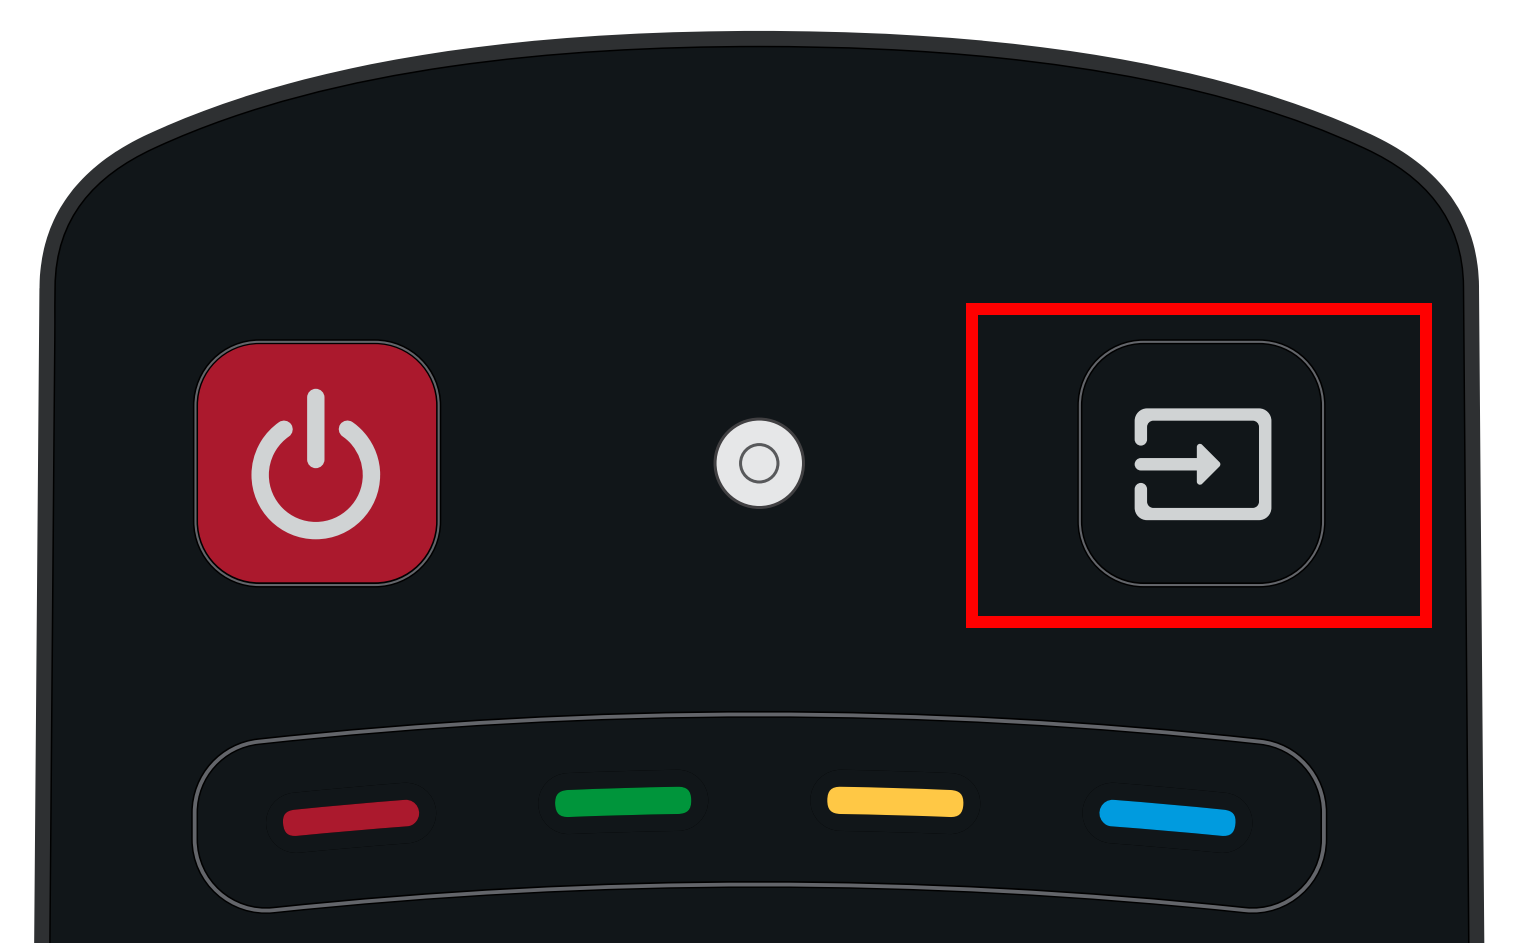
Option 2
Press the INPUT button on the remote control.
General Settings
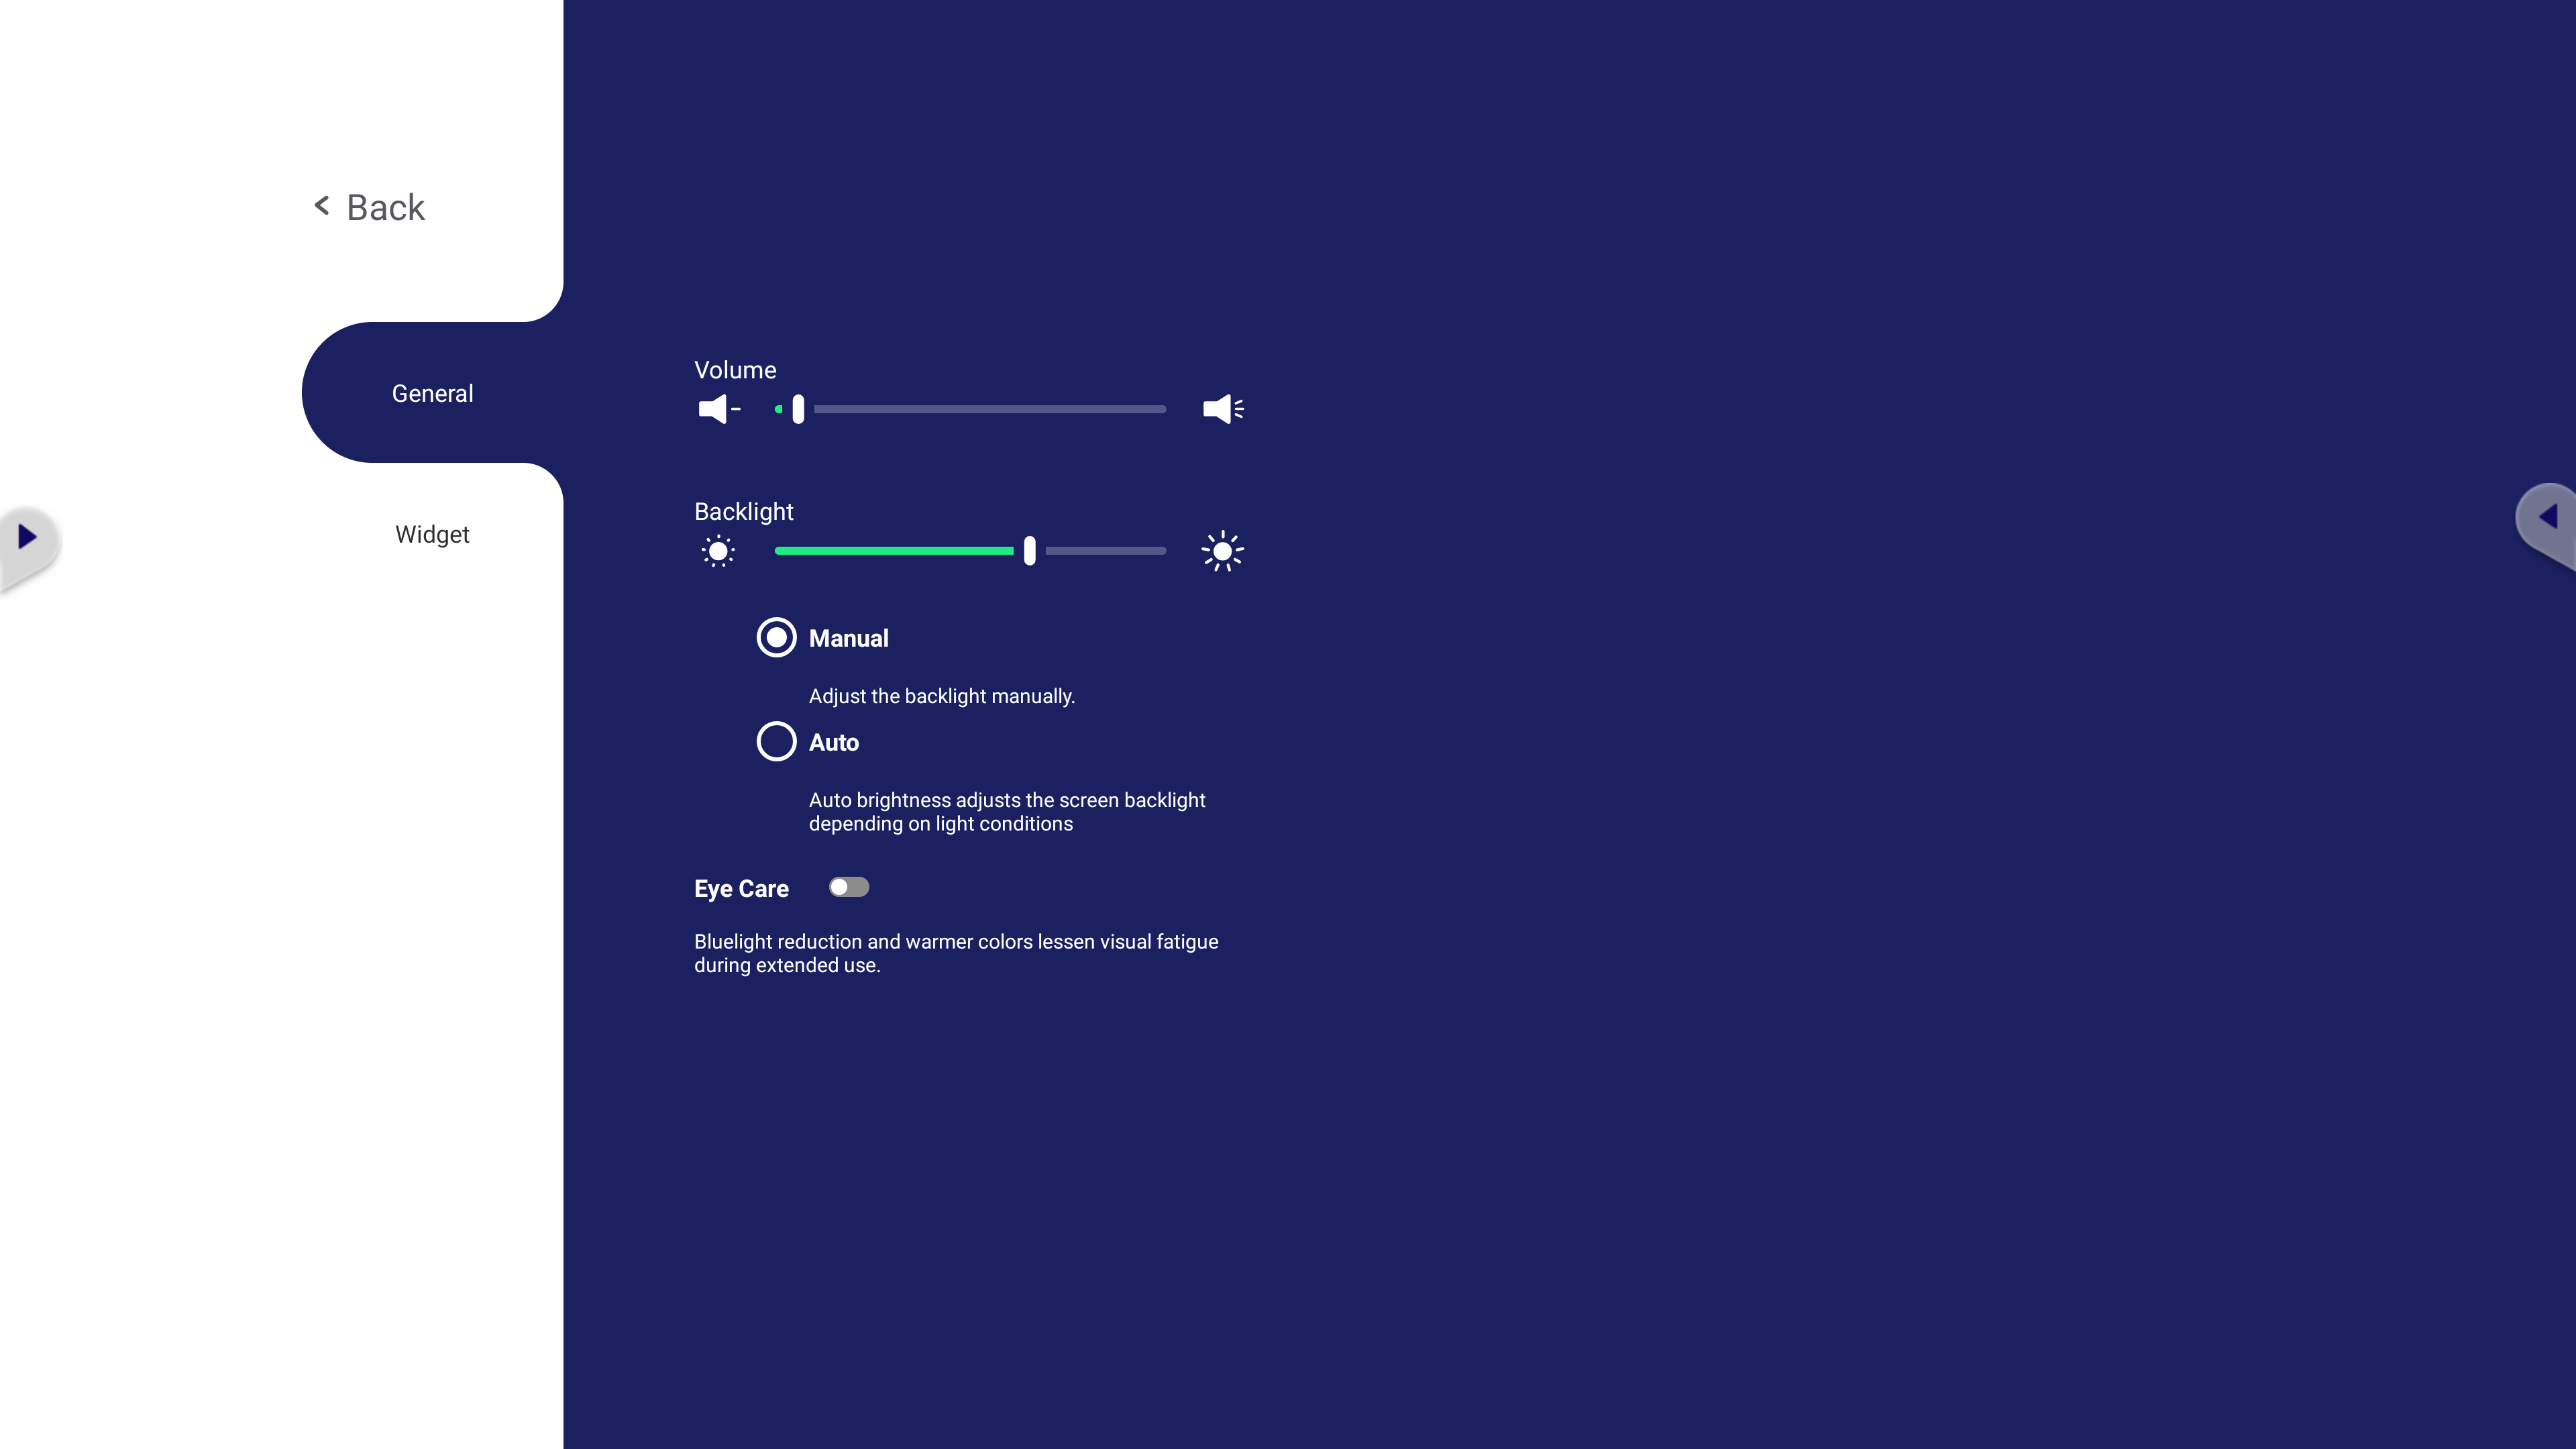
To adjust the Backlight and enable/disable Eye Care:
- Press INPUT on the remote control or long press the vLauncher background and touch General on-screen (if needed) to display the General Settings menu.
- Drag the brightness slider directly to adjust the backlight value, and/or touch On or Off to enable/disable the function.
- Press BACK on the remote control, or touch a blank area outside of the menu to exit.
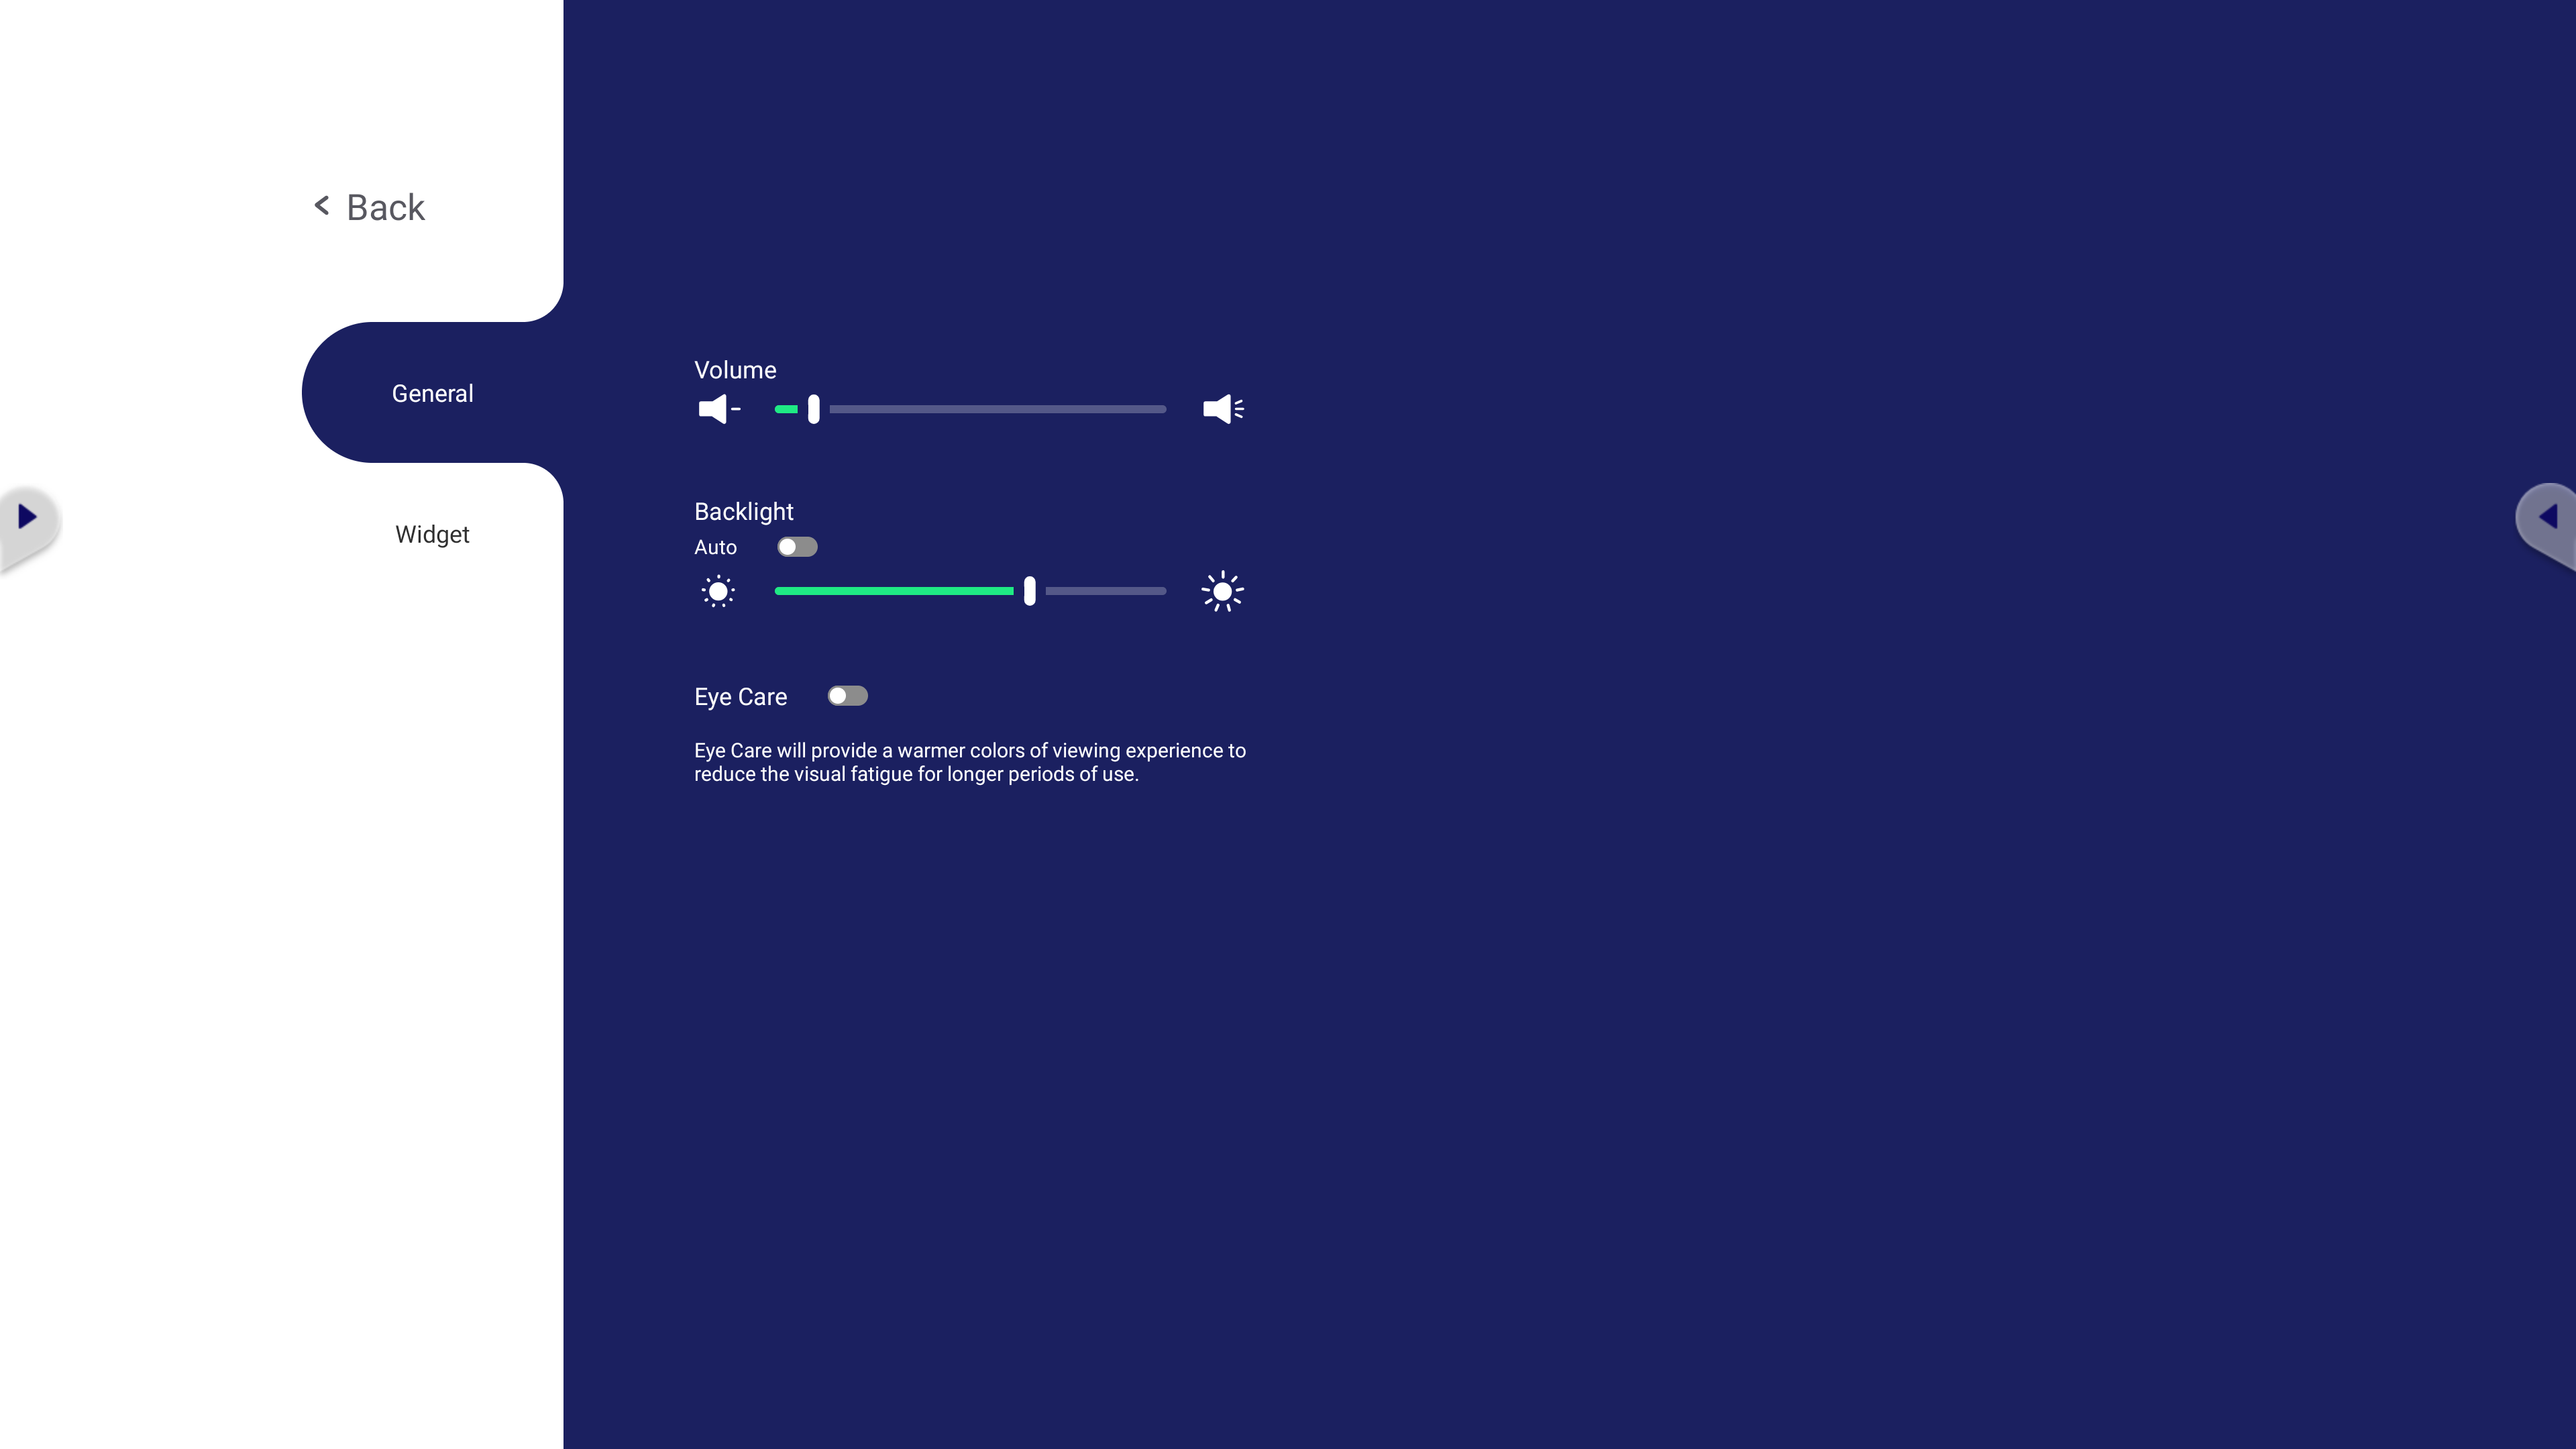
To adjust the Volume:
- Press INPUT on the remote control or long press the vLauncher background and touch General on-screen (if needed) to display the General Settings menu.
- Drag the volume slider directly to adjust the value.
- Press Mute on the remote control to enable or disable the mute function.
- Press BACK on the remote control, or touch a blank area outside of the menu to exit.
Input Settings
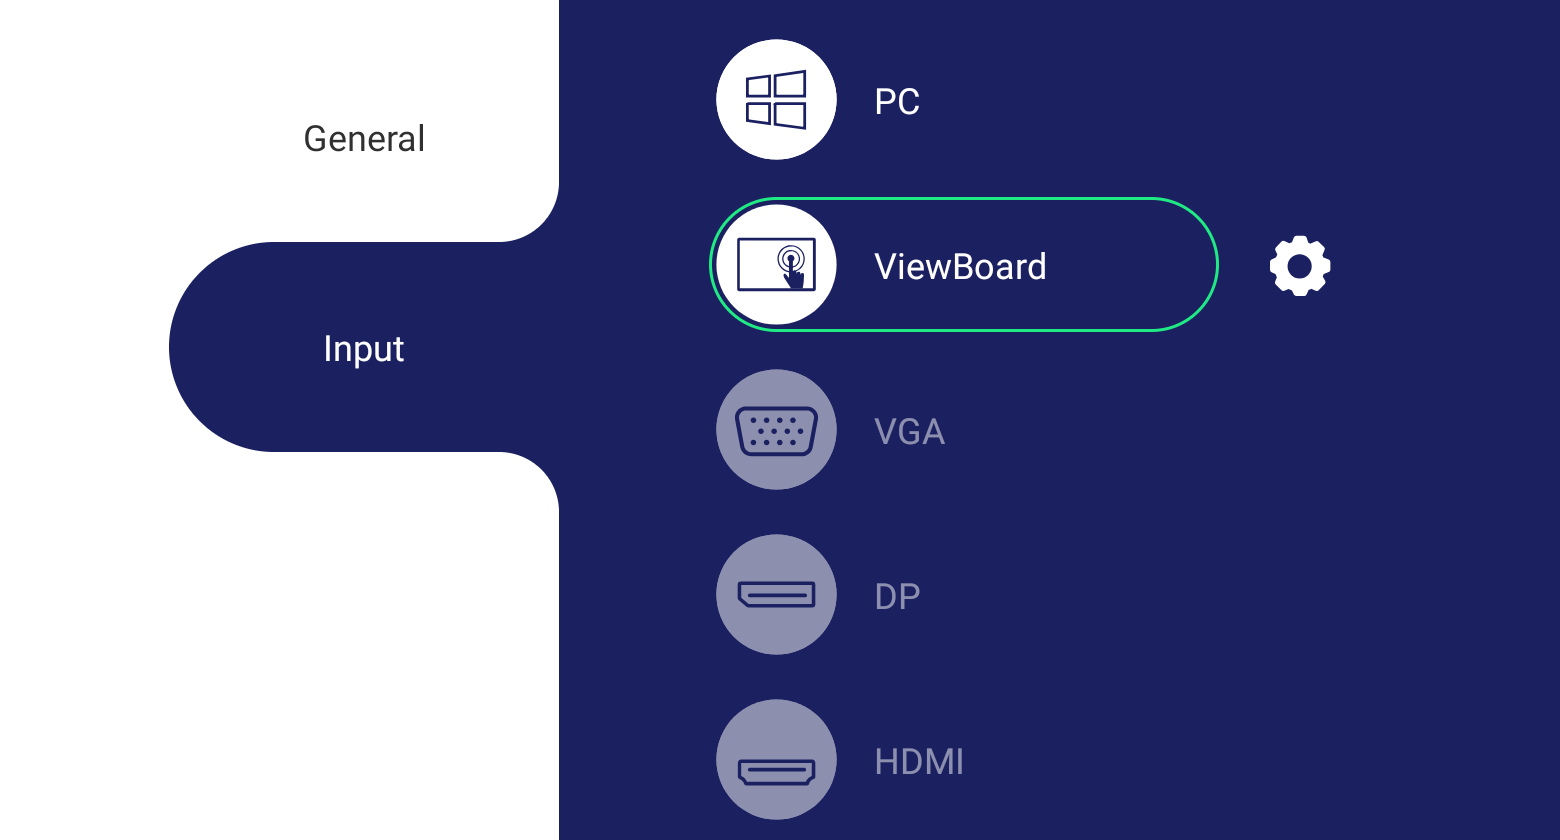
To select an Input Source:
- Press INPUT on the remote control, press the setting button on the front panel, or press the setting icon from the toolbar to display the Input Settings
- Press ▼/▲/◄/► to select the input source you want.
- NOTE: PC source will only display when the slot-in computer is connected.
- Press ENTER on the remote control, or touch the input source.
- Press BACK on the remote control, or touch a blank area outside of the menu to exit.
- NOTE: To adjust the settings of an input source, touch the setting icon next to the highlighted input source.
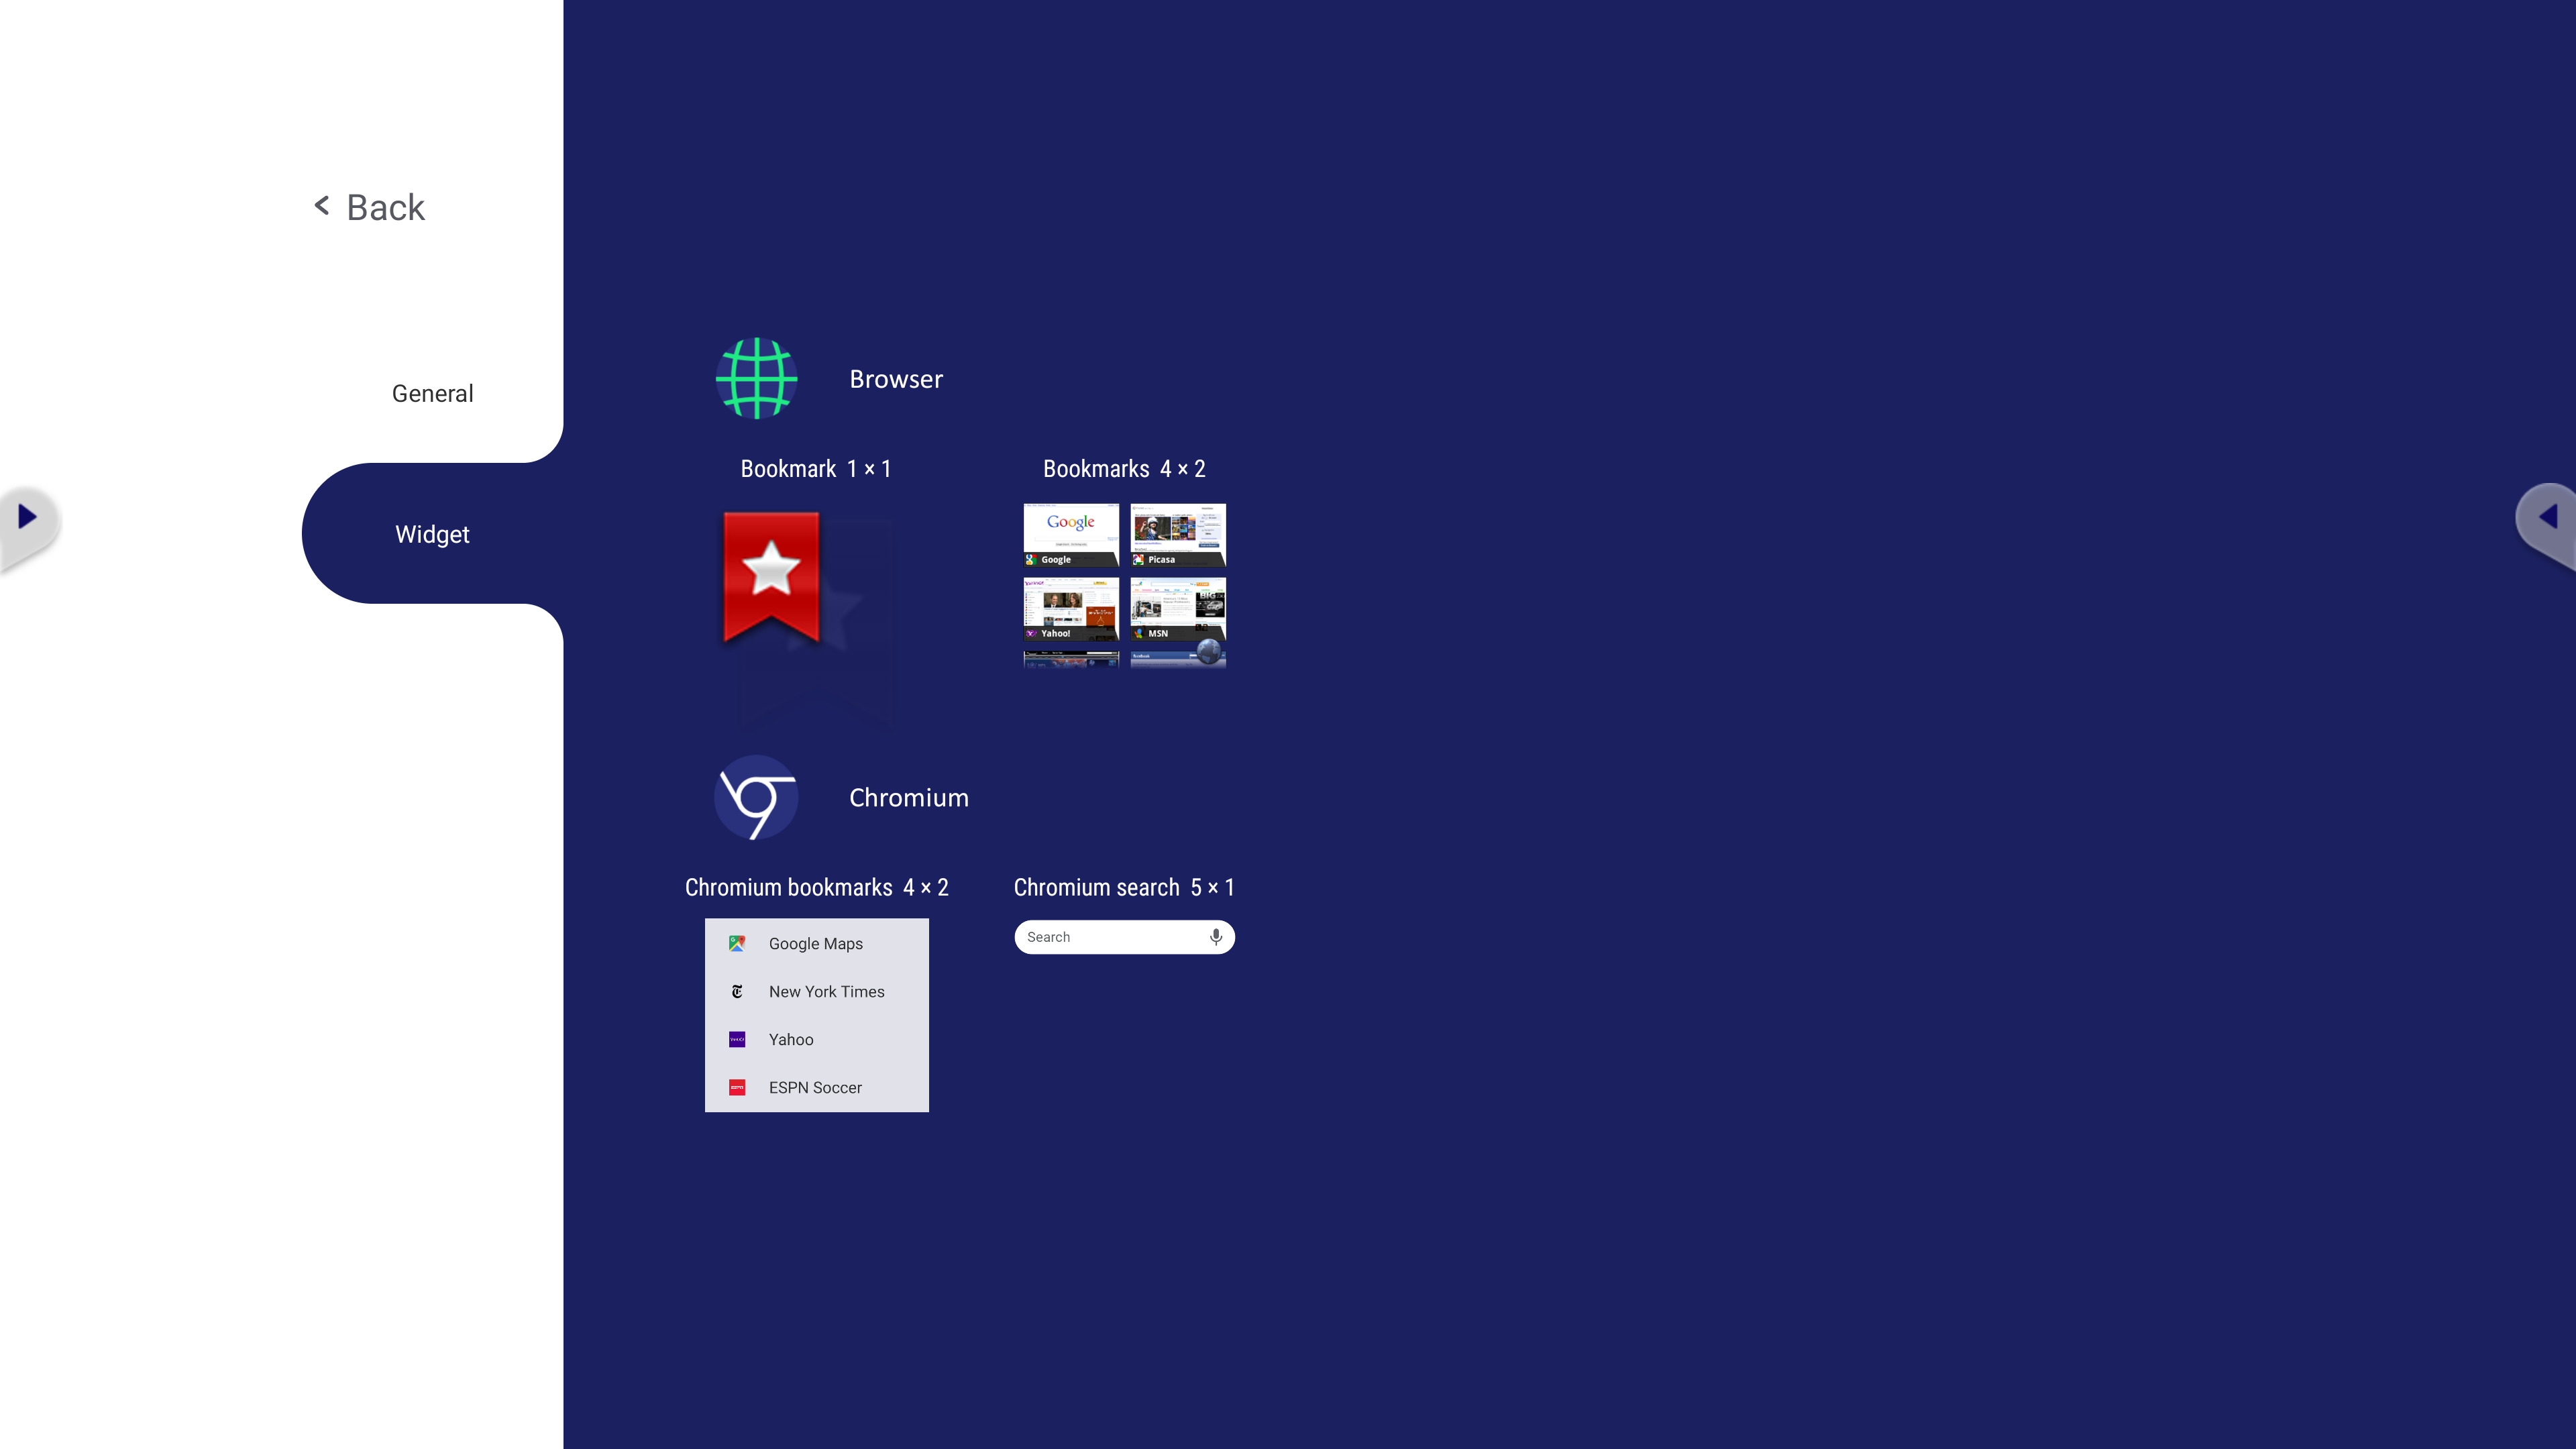
Widget
- NOTE: Only available for the Embedded Player source.
To add a widget to the vLauncher welcome screen:
- Long press the vLancher background via touch to launch the OSD Menu.
- Select Widget.
- Touch and hold the desired widget.
- Drag the widget onto the vLauncher background.
Settings - HDMI & VGA Input Source
Press MENU on the remote control or select the setting icon next to the input source in Input Settings to launch the Settings menu. Settings include: Audio, Screen, Display, and Adjust.
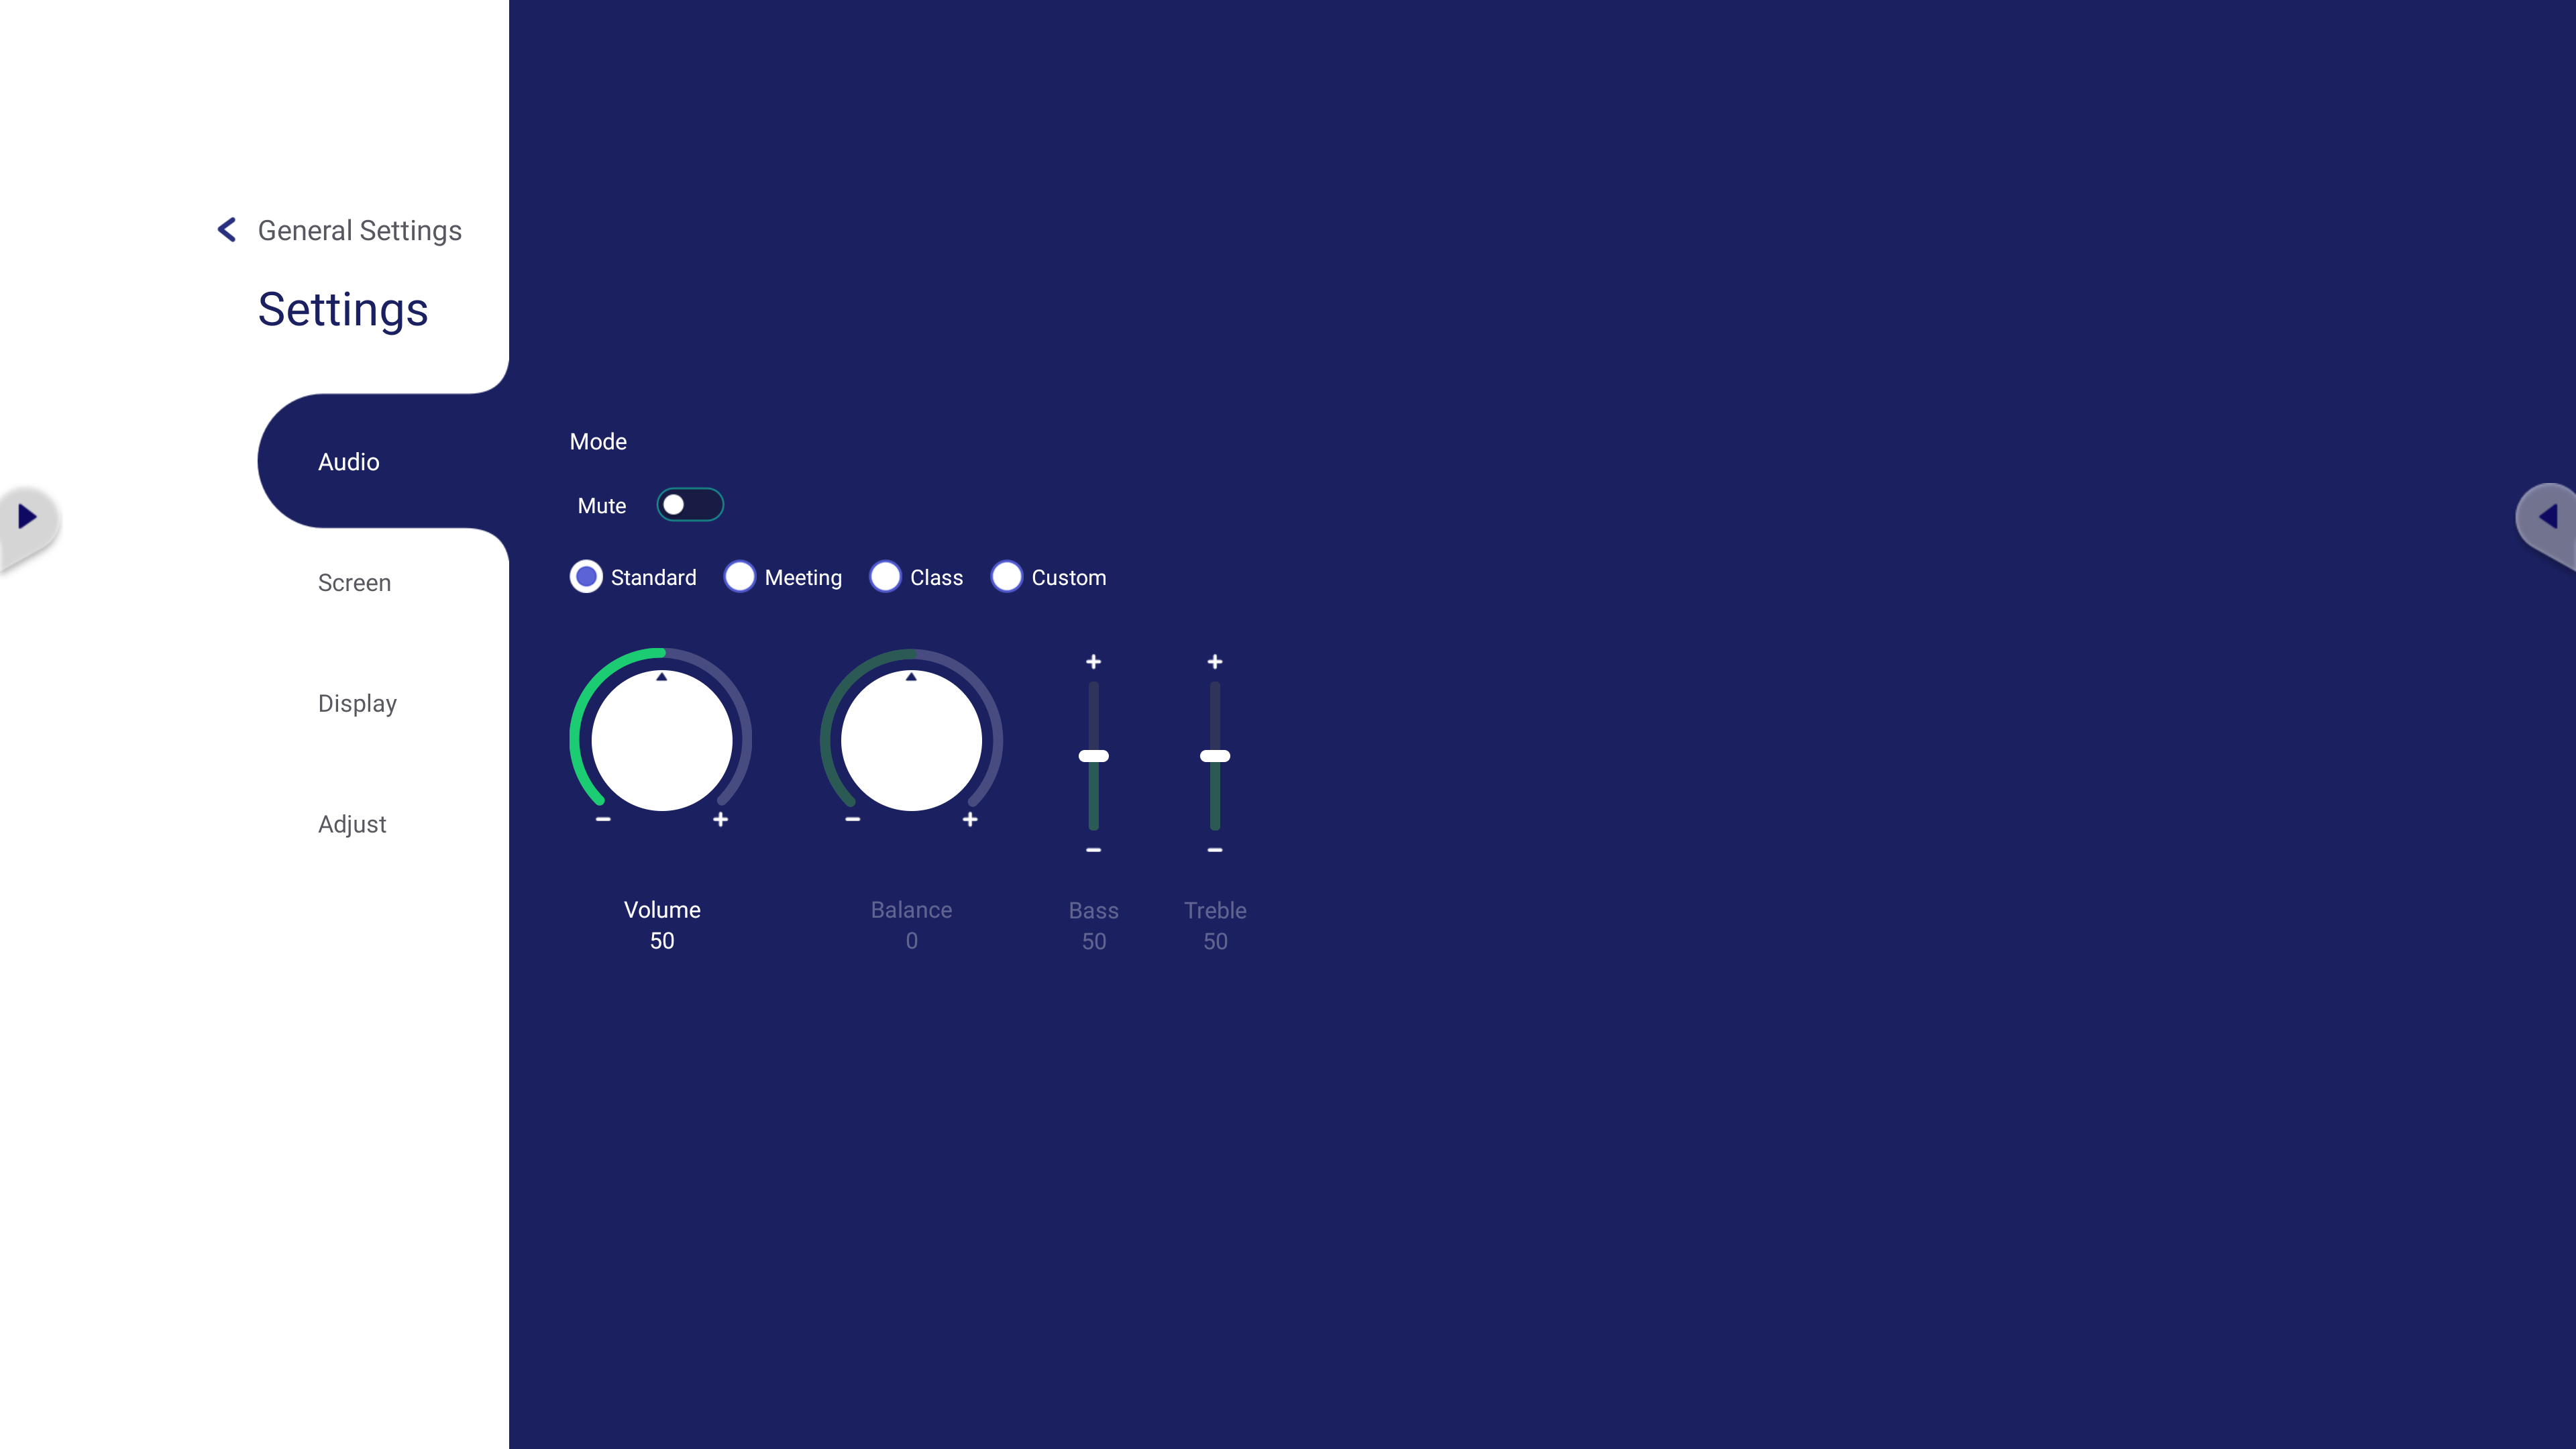
Audio Settings
- Press ▼ on the remote control and select the Audio menu.
- Press ▼/▲/◄/► on the remote control or directly touch the option to select it.
- Adjust the Volume, Bass, Treble, and Balance directly by touching and adjusting each value, or with the remote control by pressing OK to adjust the option.
- Touch the Mute slider directly to enable/disable mute, or press Mute on the remote control.
- Press BACK on the remote control, or touch a blank area outside of the menu to exit.
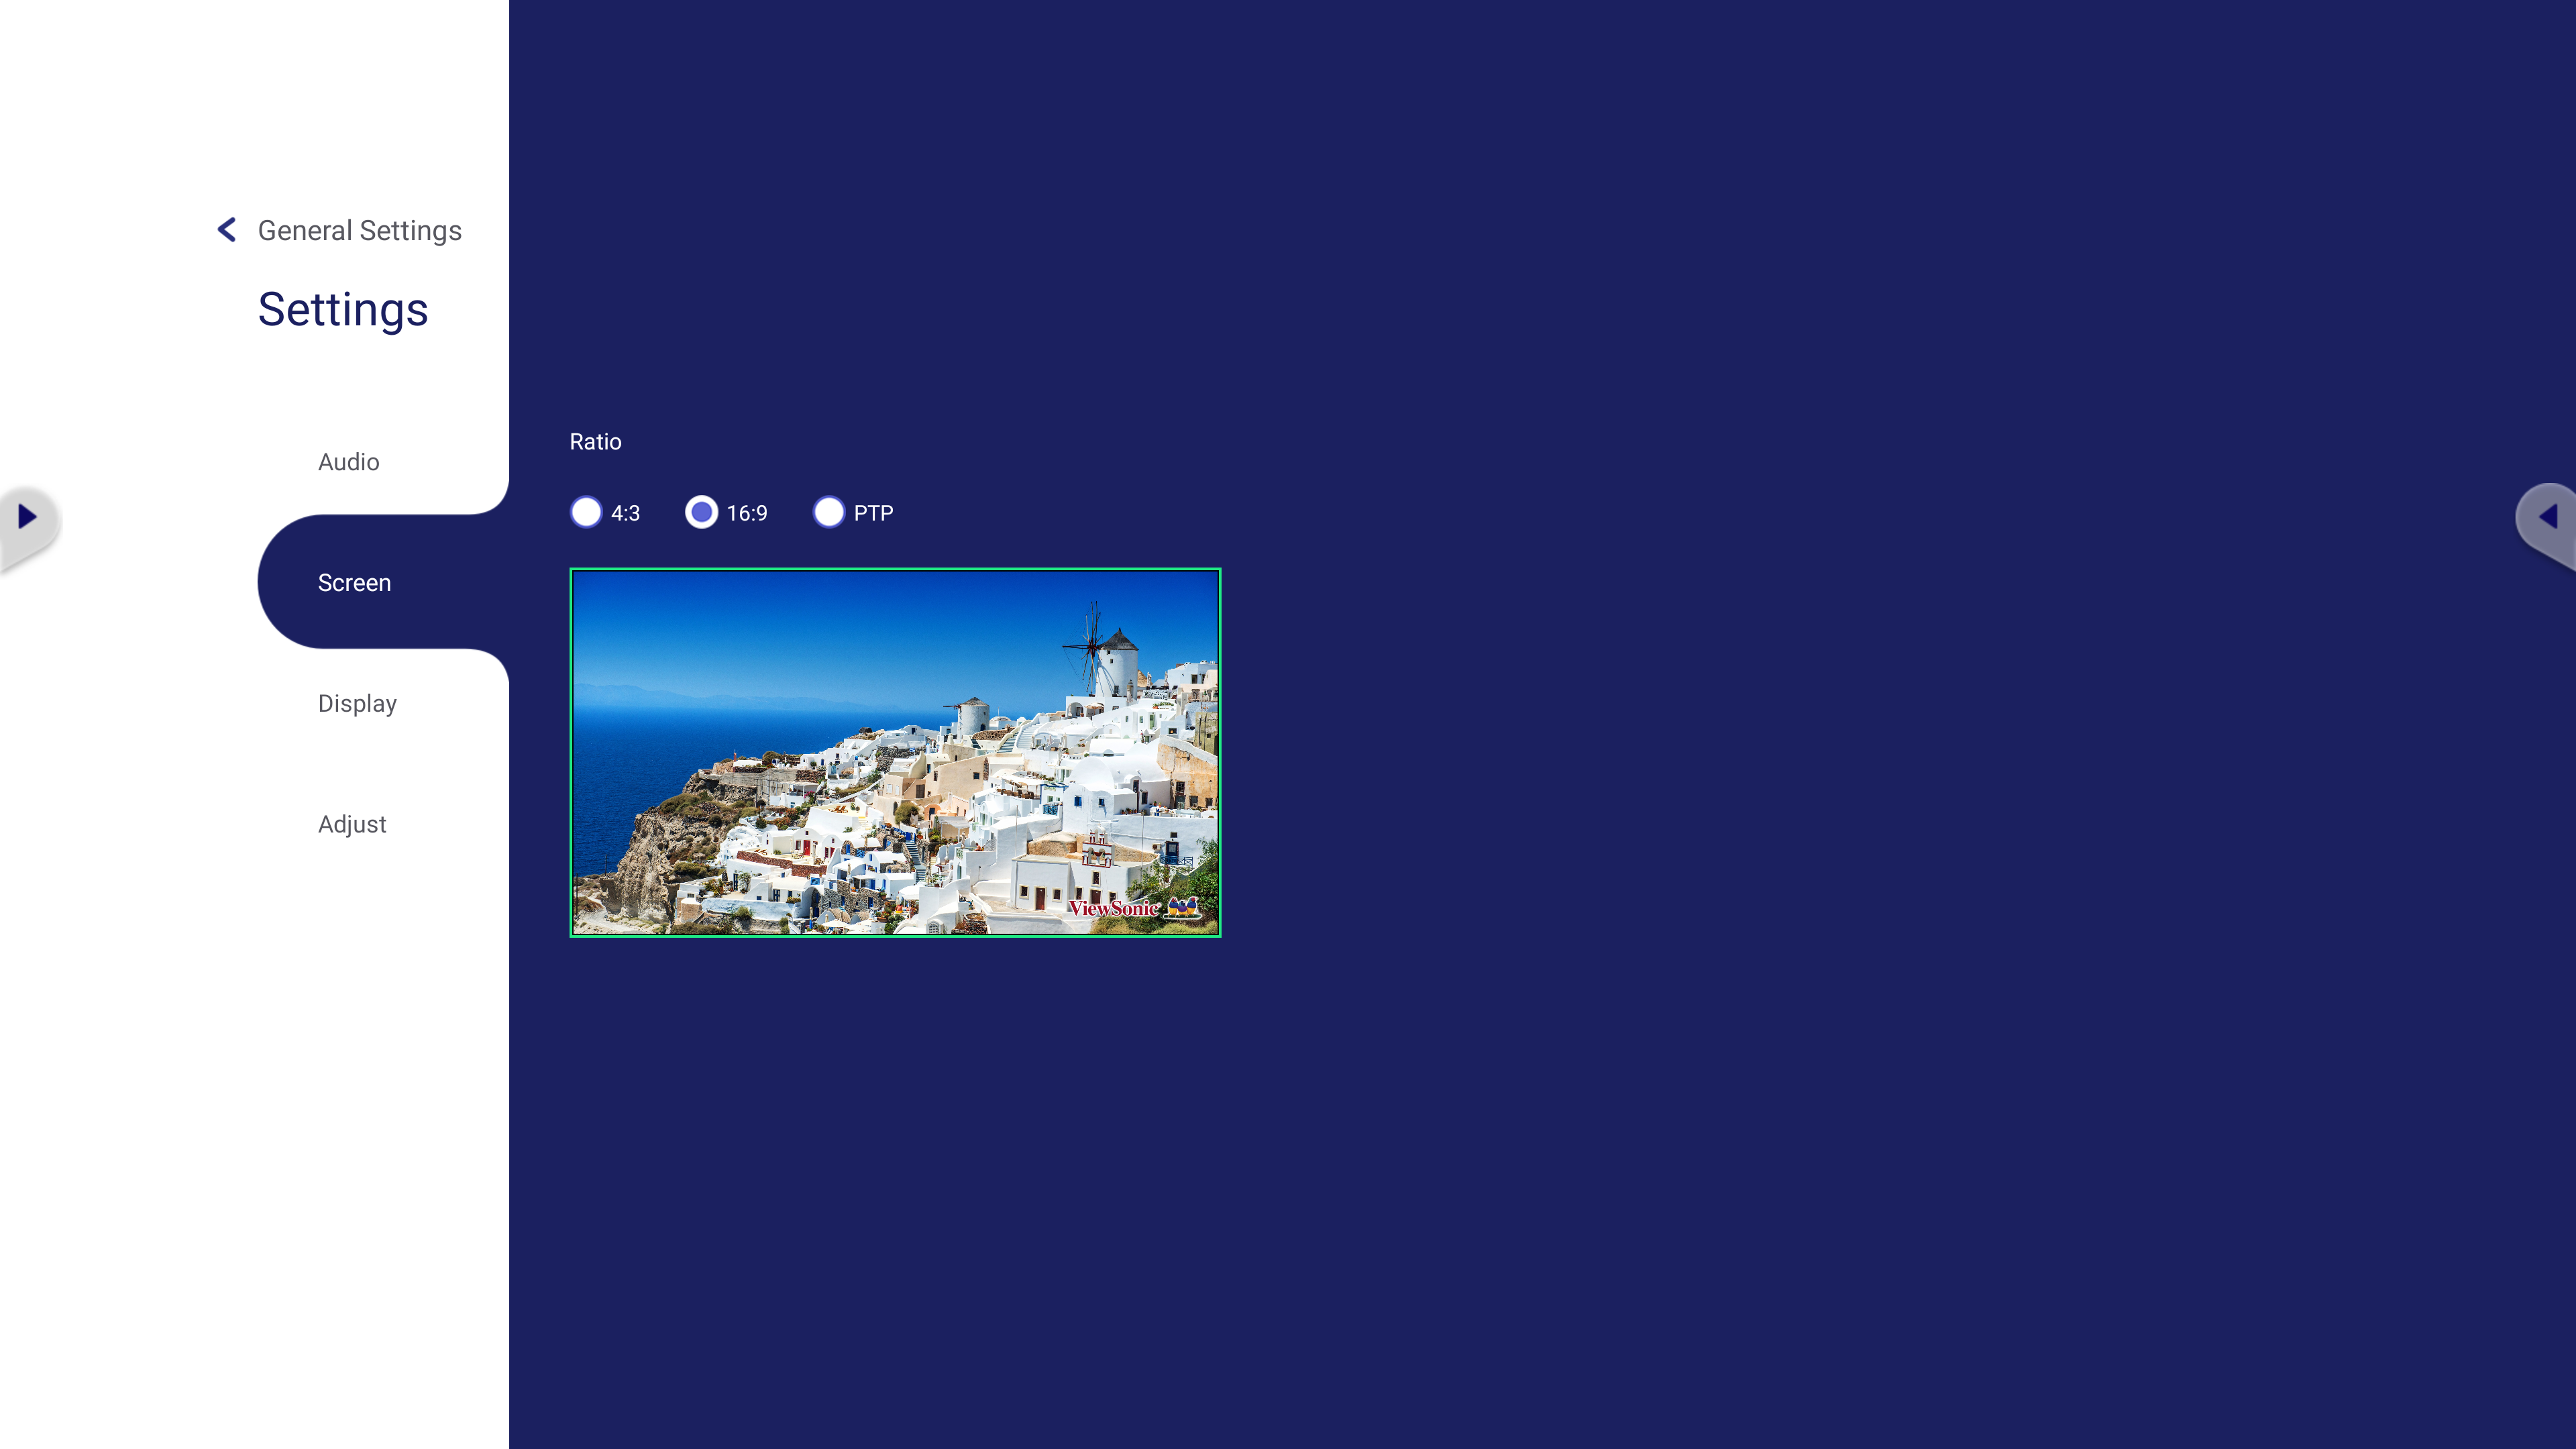
Screen Settings
- Press ▼ on the remote control and select the Screen menu.
- Press ▼/▲/◄/► on the remote control or directly touch the option to select it.
- Adjust your preference by touching each value directly, or with the remote control by pressing OK.
- Press BACK on the remote control, or touch a blank area outside of the menu to exit.
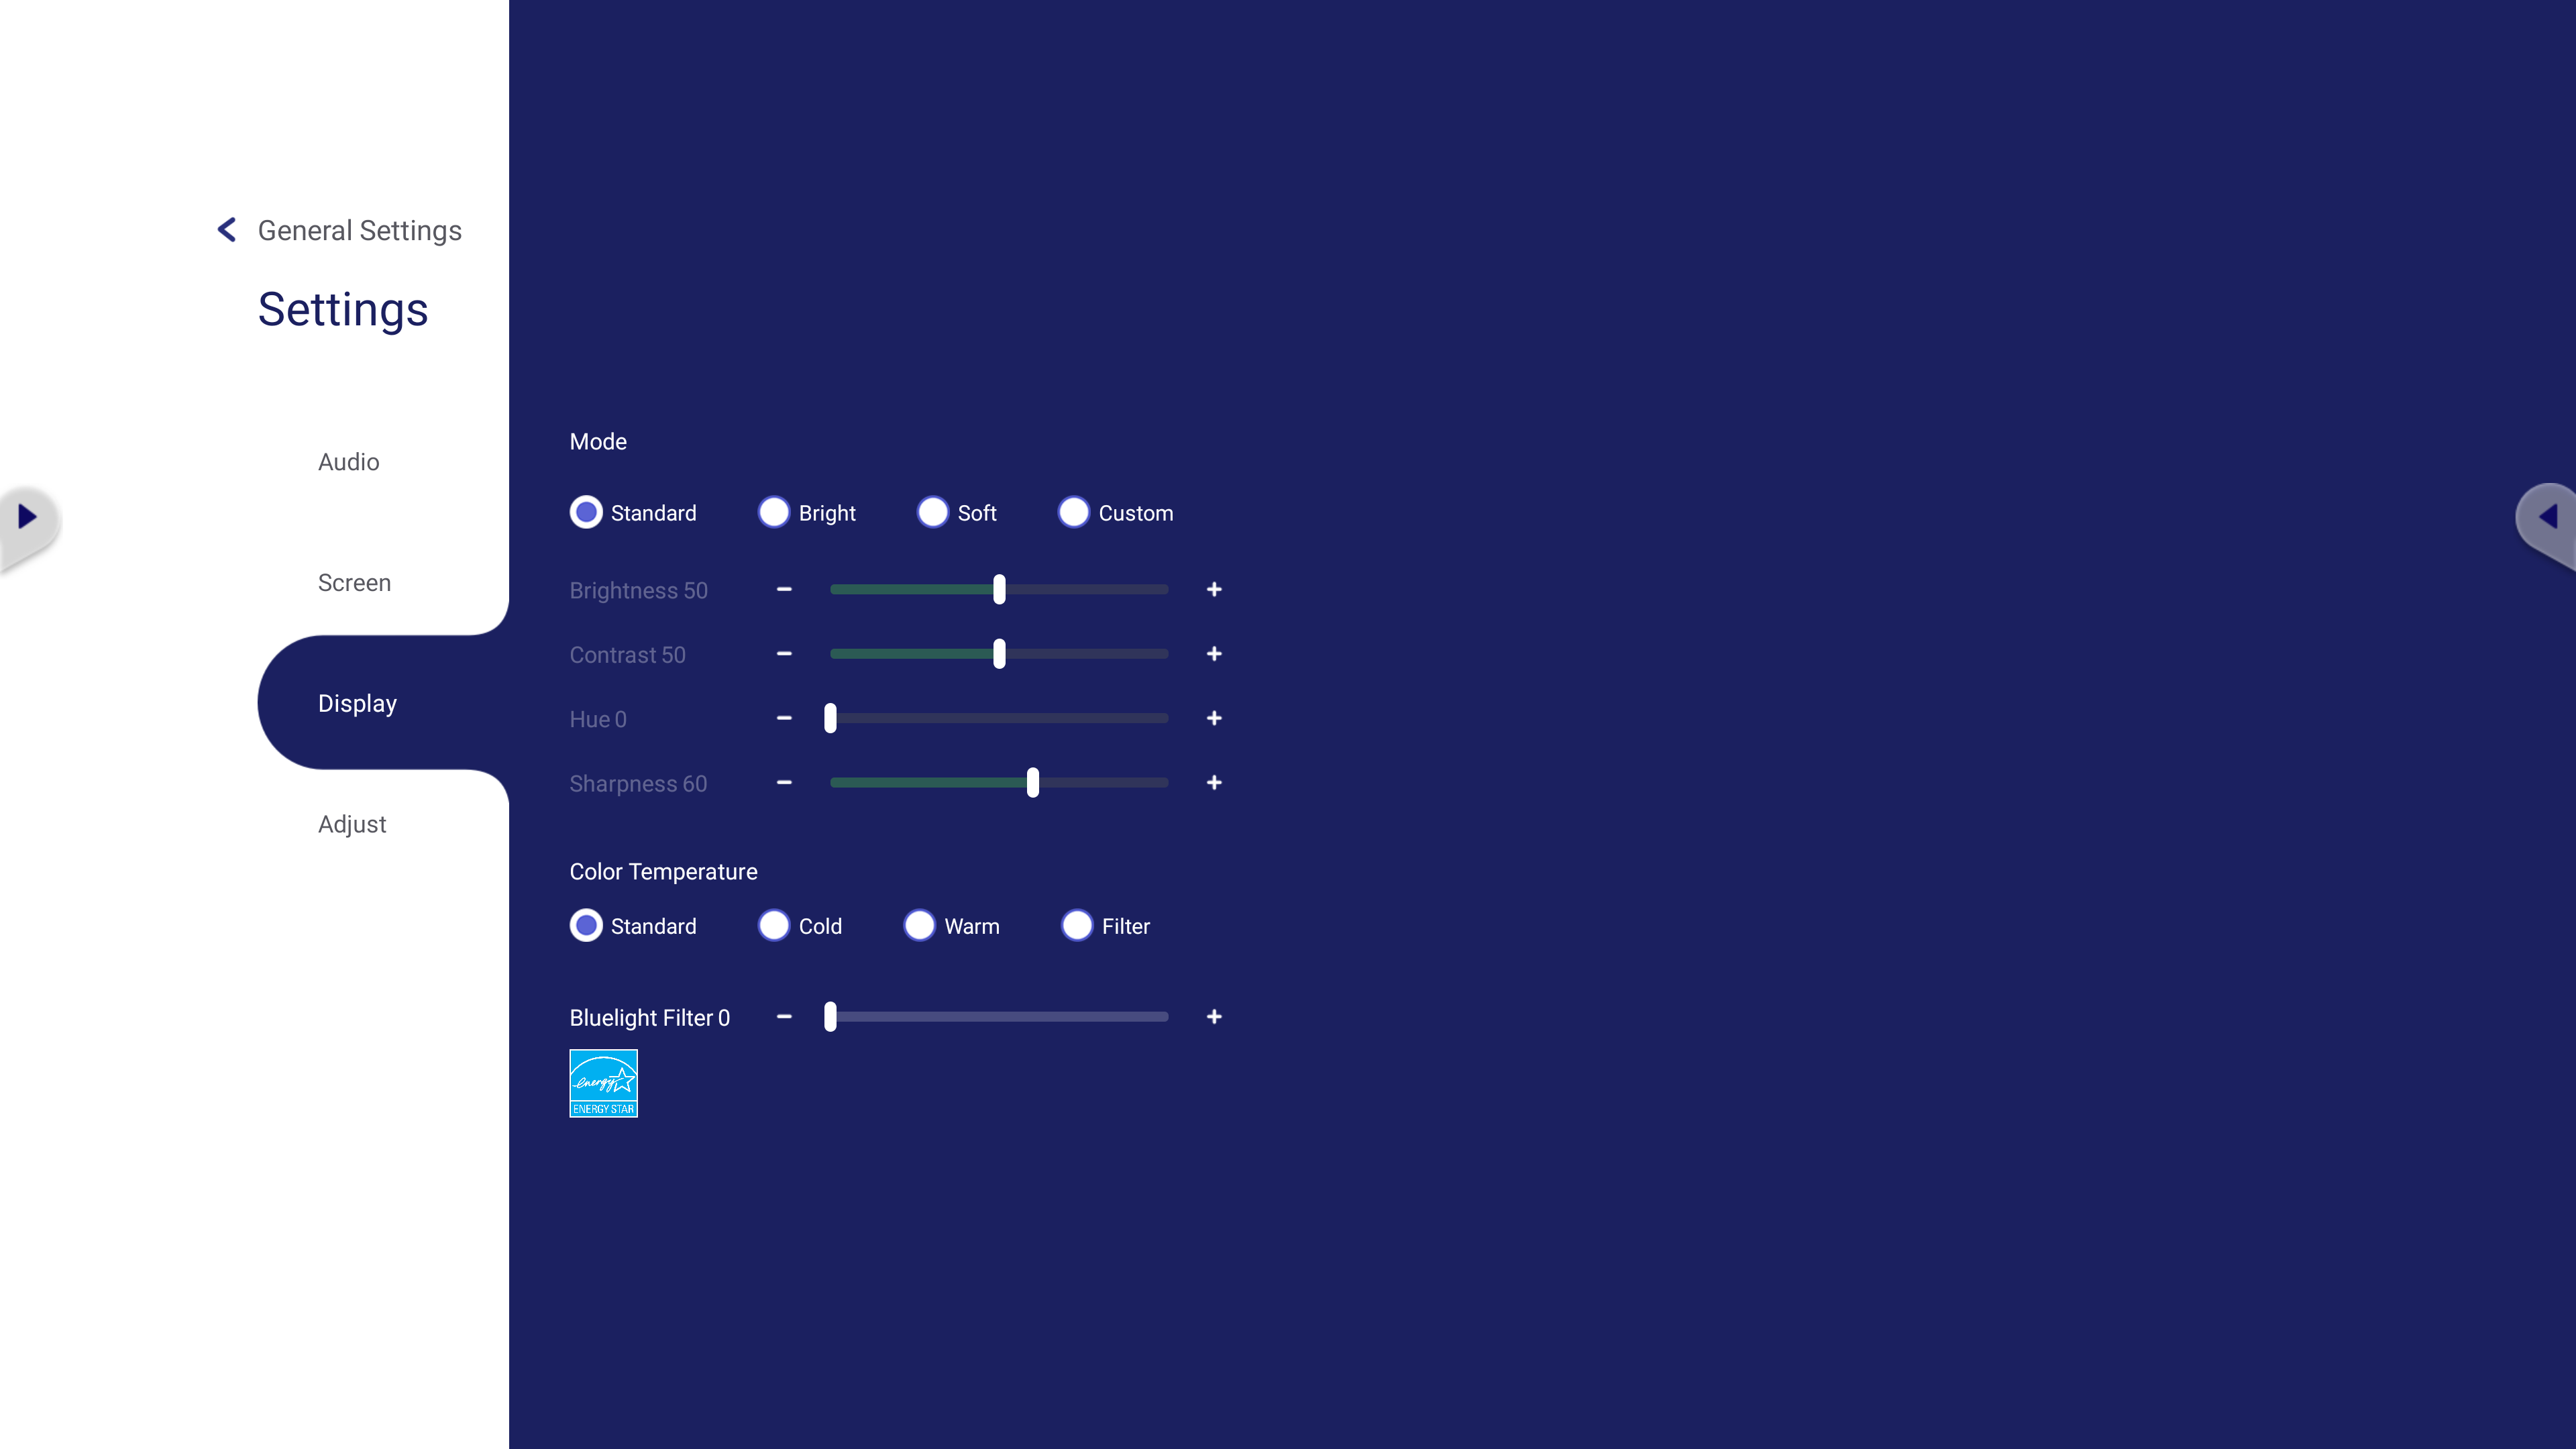
Display Settings
- Press ▼ on the remote control and select the Display menu.
- Press ▼/▲/◄/► on the remote control or directly touch the option to select it.
- Adjust the Brightness, Contrast, Hue, and Sharpness directly by touching and adjusting each value, or with the remote control by pressing OK to adjust the option.
- Drag the blue light slider directly to adjust the blue light value.
- Press BACK on the remote control, or touch a blank area outside of the menu to exit.
Low Blue Light Filter and Eye Health
The Blue Light Filter blocks high-energy blue light for a more comfortable viewing experience.
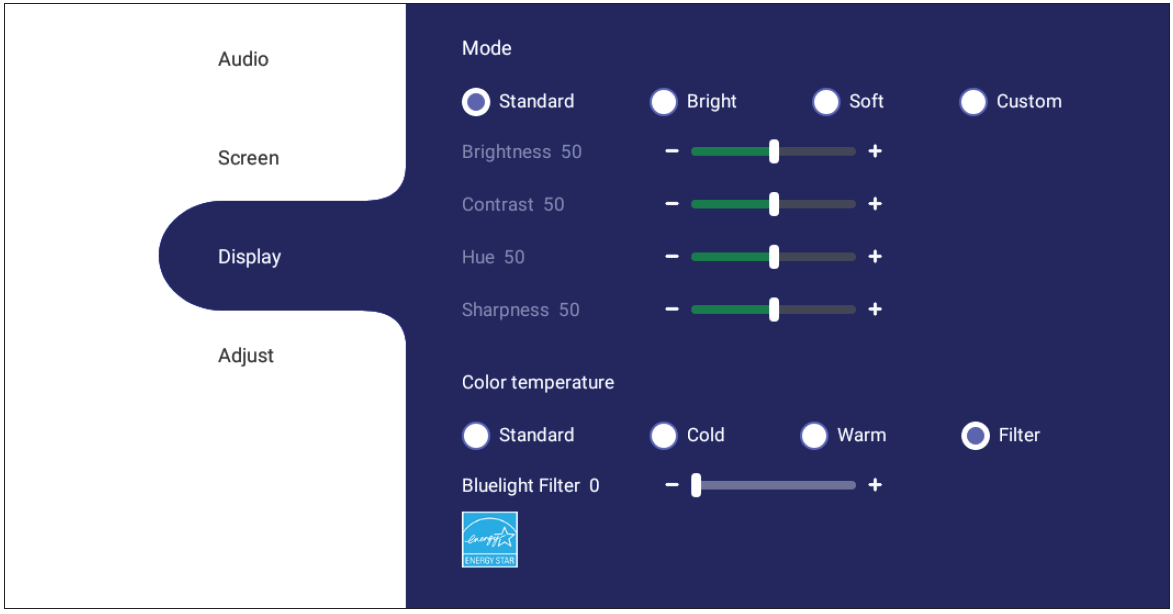
NOTE: To meet TÜV Rheinland low blue light certification, the Display Settings must be:
- Mode: Standard (Brightness and Contrast are 50)
- Color Temperature: Filter
- Blue light Filter: 0
Calculating Breaks
When viewing screens for extended periods, it is recommended to take periodic breaks from viewing. Short breaks of at least 10 minutes are recommended after one (1) hour of continuous viewing.
Taking shorter, more frequent breaks are generally more beneficial than longer, less frequent breaks.
Focus Fatigue (20-20-20 Rule)
To reduce the risk of eye fatigue by constantly looking at the screen, look away from the screen at least every 20 minutes and gaze at a distant object (at least 20 feet away) for at least 20 seconds.
Looking at Distant Objects
While taking breaks, users can further reduce eye strain and dryness by focusing on objects that are further away from them for 10-15 seconds, then gaze at something up close for 10-15 seconds. Repeat this up to 10 times. This exercise reduces the risk of your eyes’ focusing ability to “lock up” after prolonged computer work.
Eye and Neck Exercises
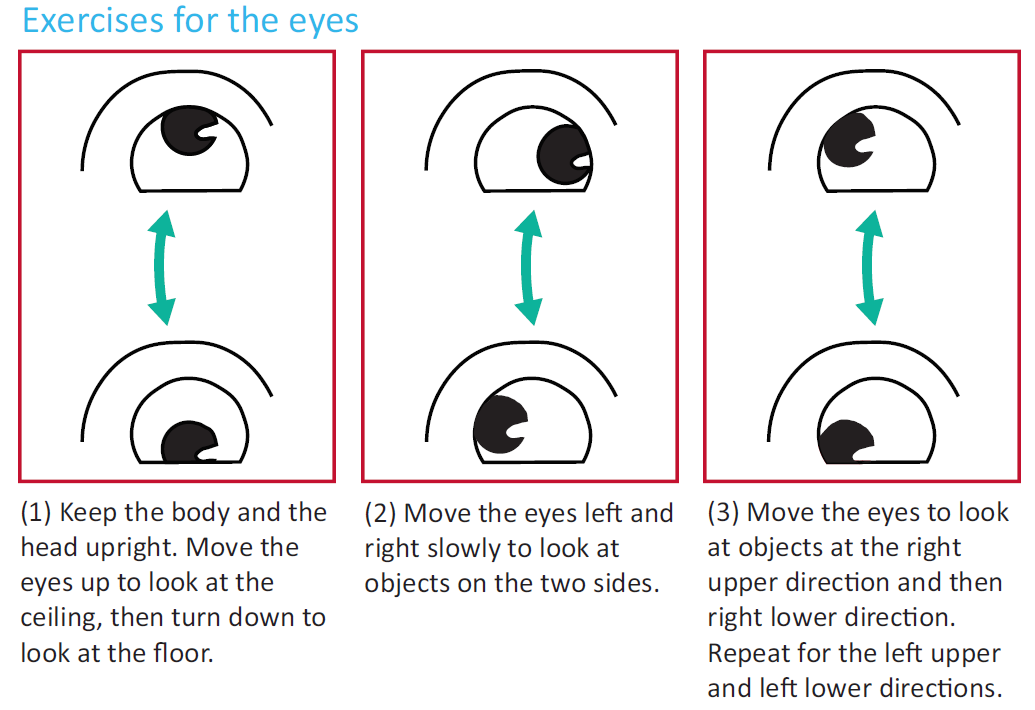
Eye Exercises
Eye exercises can help minimize eye strain. Slowly roll your eyes to the left, right, up, and down. Repeat as many times as needed.
Neck Exercises
Neck exercises can also help minimize eye strain. Relax your arms and let them hang at your sides, bend forward slightly to stretch the neck, turn your head to the right and to the left. Repeat as many times as needed.
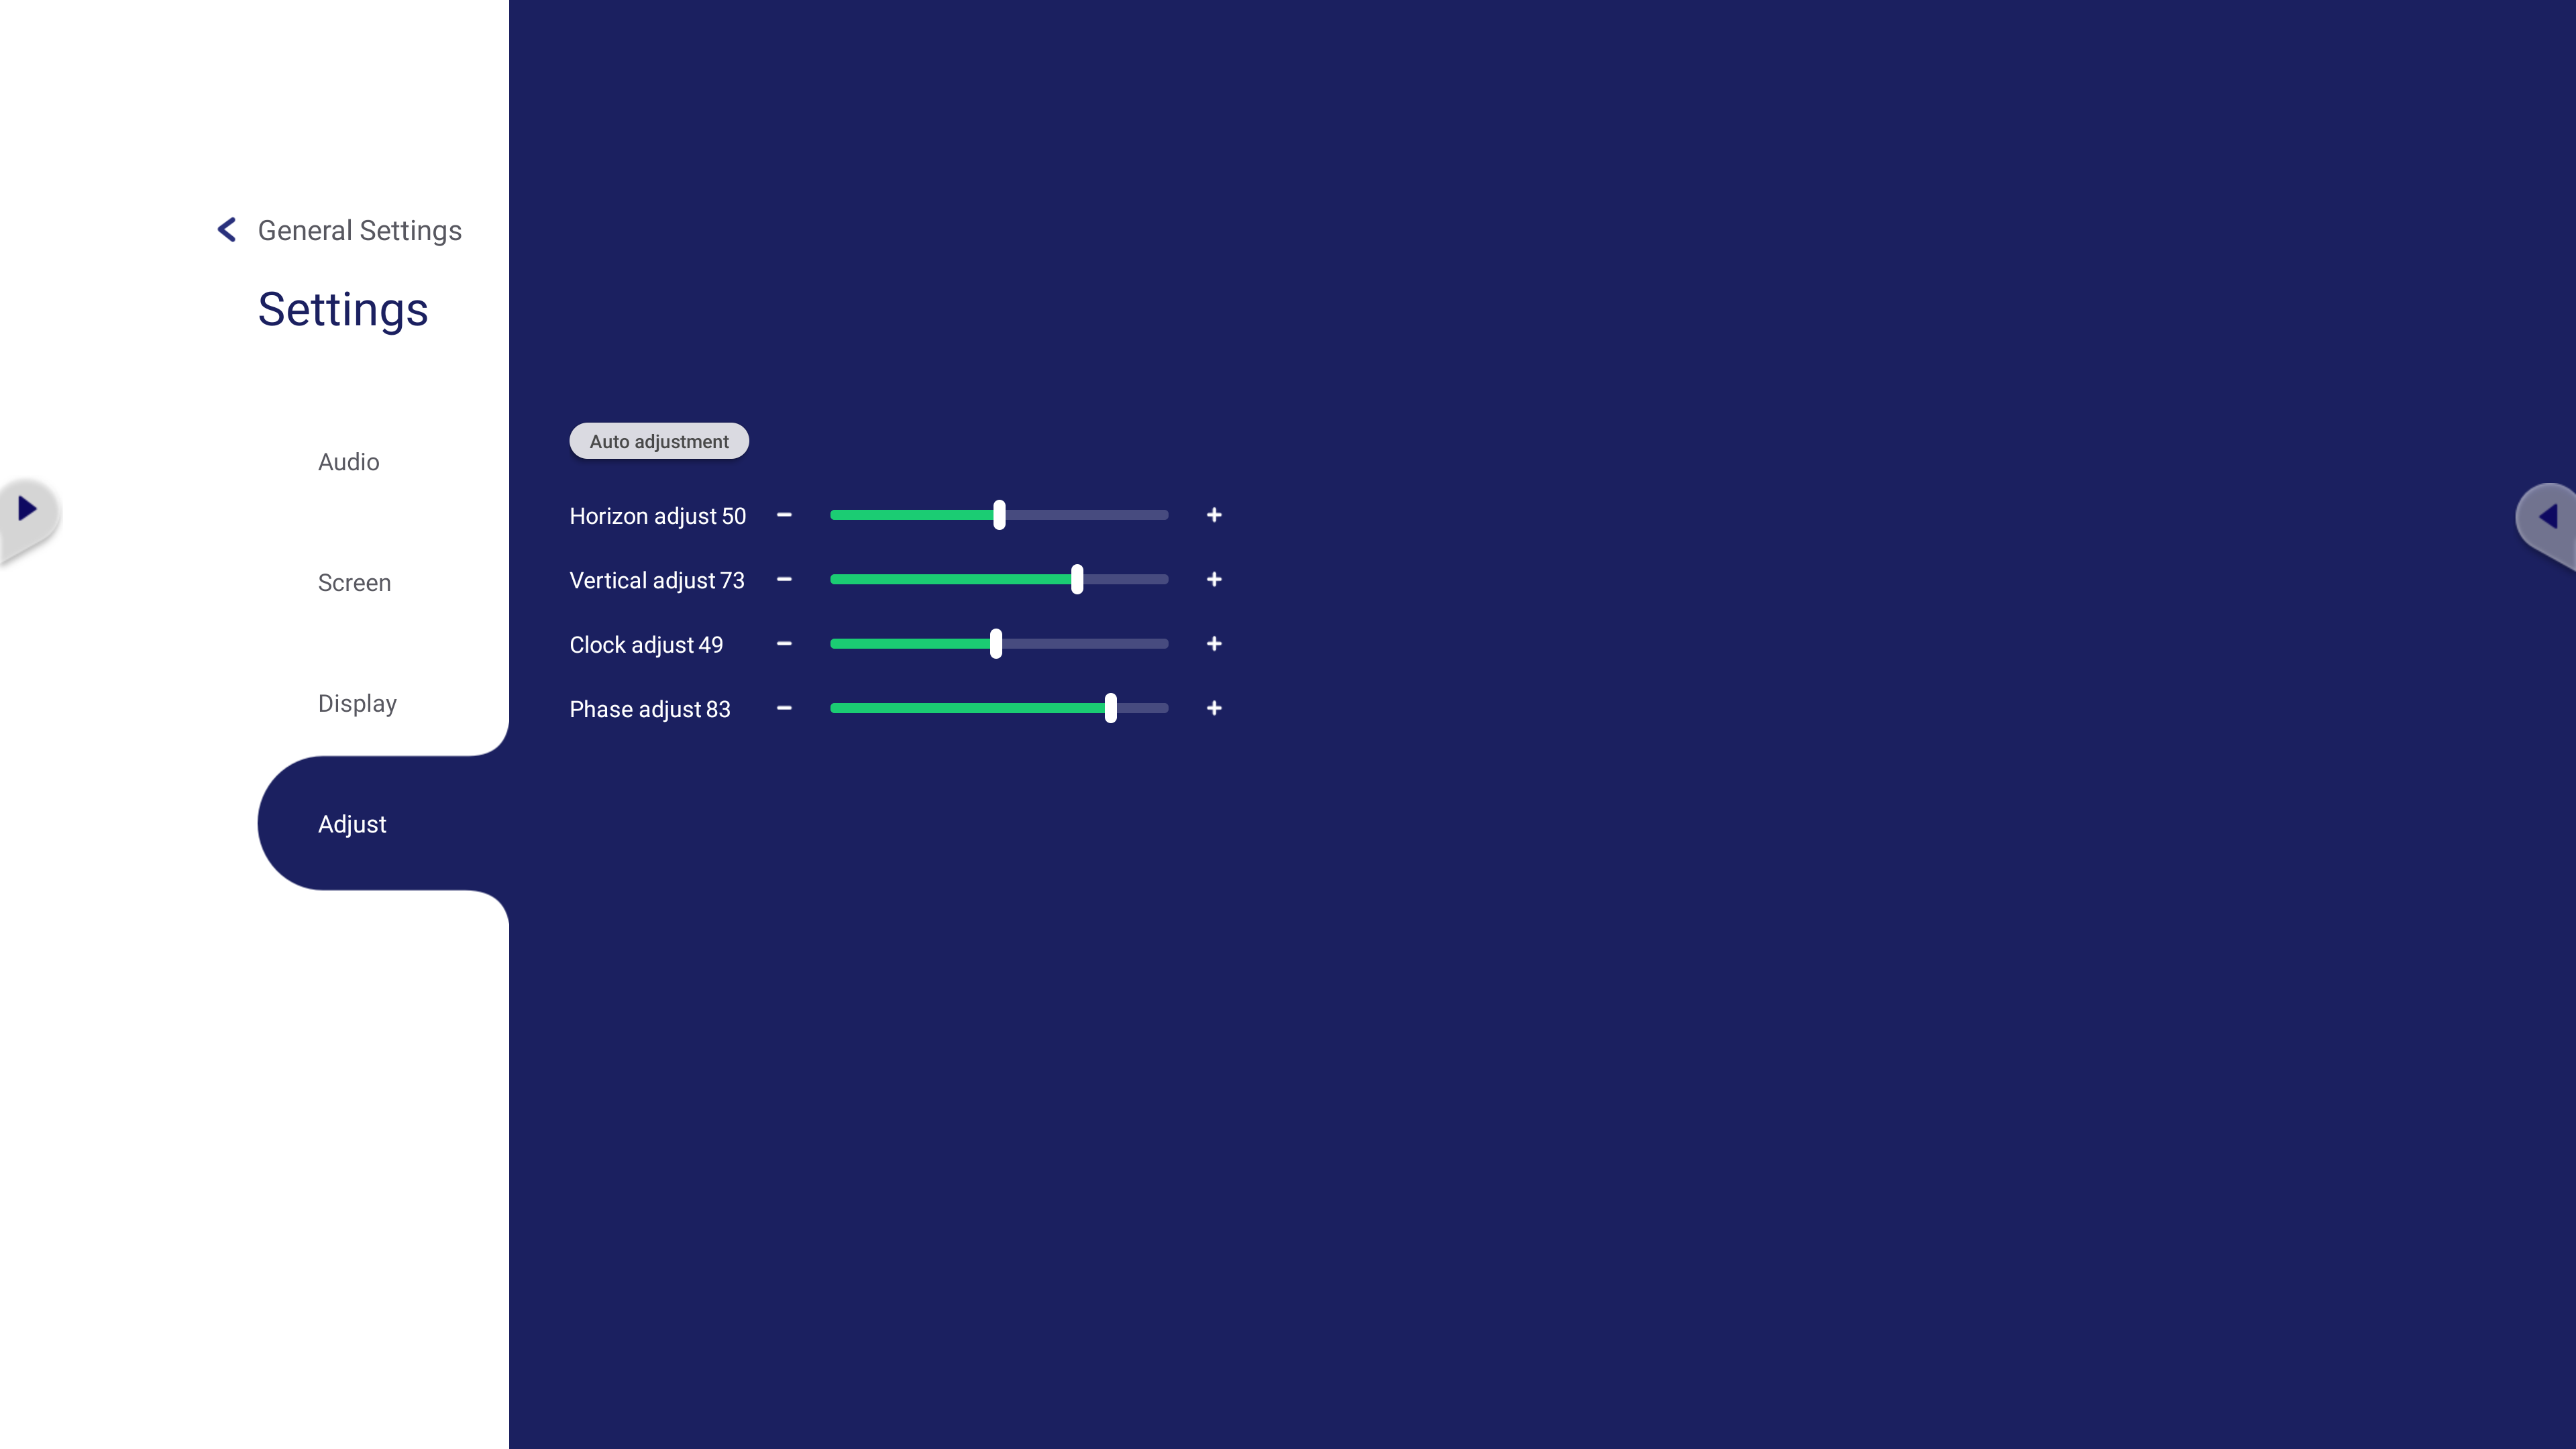
Adjust Settings (VGA only)
- Press ▼ on the remote control and select the Adjust menu.
- Press ▼/▲/◄/► on the remote control or directly touch the option to select it.
- Adjust your preference by touching each value directly, or with the remote control by pressing OK.
- Press BACK on the remote control, or touch a blank area outside of the menu to exit.

