IFP110 Embedded Player
ViewBoard Input Source Settings
The ViewBoard input source is the default source that is active when turning on the ViewBoard. Press MENU ![]() on the remote control or tap the setting icon
on the remote control or tap the setting icon ![]() next to the input source in the On-Screen Display (OSD) Menu’s Input Settings to enter the Settings menu.
next to the input source in the On-Screen Display (OSD) Menu’s Input Settings to enter the Settings menu.
Network & Internet
Check current network connection status, set up and manage Wi-Fi, Ethernet, Bluetooth, and VPN, and establish a Wireless hotspot.

- Wi-Fi, Wireless Hotspot, and Bluetooth settings will appear when an optional Wi-Fi card (e.g., VB-WIFI-005) has been installed in the Wi-Fi slot.
- Ethernet will disable automatically when Wi-Fi is enabled. Wi-Fi will disable automatically when Ethernet is enabled. Wi-Fi will disable when Hotspot is enabled.
- The device cannot connect to the Internet when Wireless Hotspot is enabled.
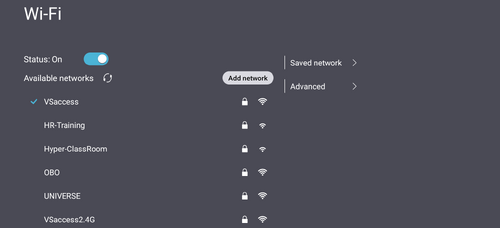
Wi-Fi
Setup and manage wireless access points.
- Tap the toggle button to turn Wi-Fi On or Off.
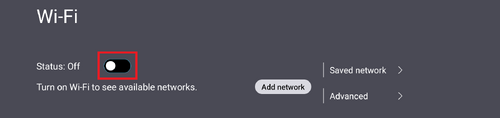
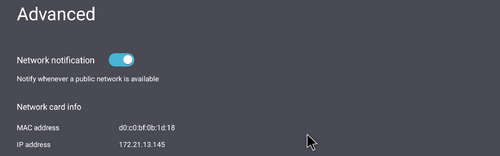
- Once On, you can: Add a Network, view Saved Networks, Refresh the network list, or view Advanced settings.
- In Advanced settings, you can toggle Network notifications On or Off and view Network card info.


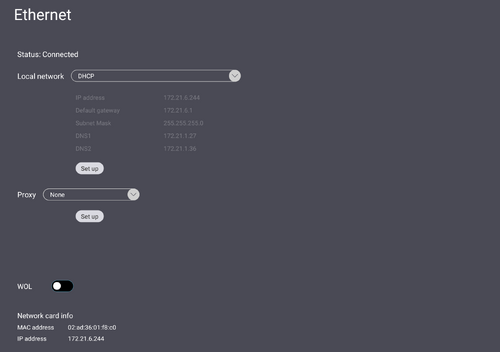
Ethernet
Set the local network and proxy.
- Tap the drop down menu to connect/disconnect the Ethernet.
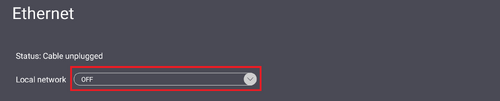
- You can adjust Local network and Proxy settings as well.


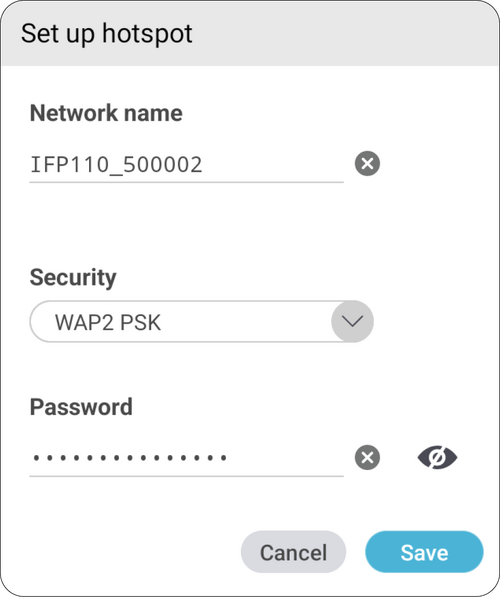
Wireless Hotspot
Set and share your internet connection with other devices.
- Tap the toggle button to turn Wireless hotspot On or Off.

- Tap Set up to set the Network name, Security, and Password.


Bluetooth
Manage connections, set the device name and discoverability.
- Tap the toggle button to turn Bluetooth On or Off. Once On, users can select a listed device to pair and connect to, rename their device, or remove a device.

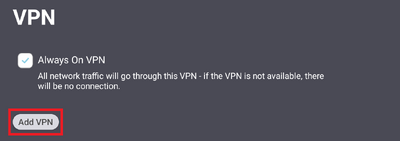
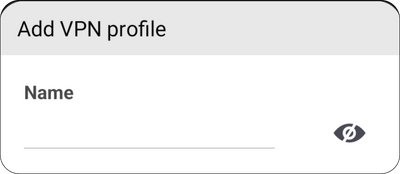
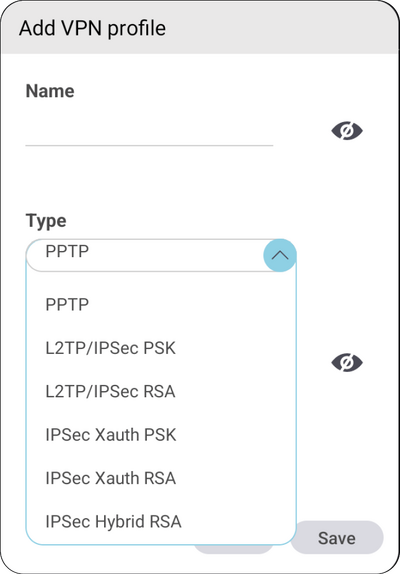
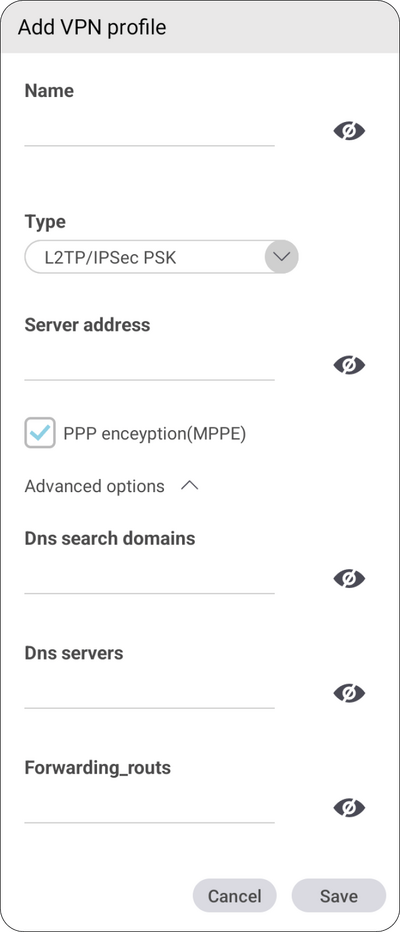
VPN
Setup and manage Virtual Private Networks.

To create a VPN profile:
- Go to: Settings > Wireless & Network > VPN and tap Add VPN.
- Key in the Name.
- Select the VPN Type.
- Choose to enable/disable PPP encryption (MPPE) and/or show Advanced options.


File Sharing

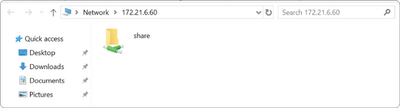
SAMBA
The SAMBA Service provides file sharing via LAN. When the SAMBA Service is enabled, the user can explore the ViewBoard file system with a PC or mobile equipment.
- Go to: Settings > File Sharing > SAMBA.
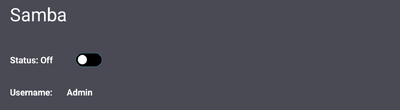
- Tap the toggle button to enable the SAMBA Service.
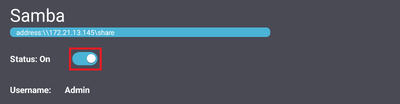
- Ensure the ViewBoard and client equipment are connected to the same network.
- Log in to the ViewBoard with the client equipment. Input the ViewBoard’s IP address.
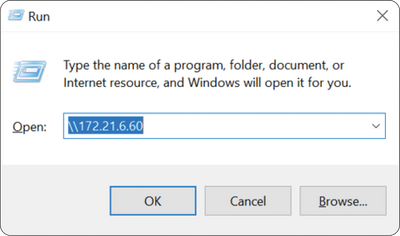
- After a successful log in, the ViewBoard files will be available.


Display
Adjust the Wallpaper, Protection, and HDMI Out settings.

Wallpaper
Users can change their wallpaper with default images, or use their own by tapping the "Add" icon and selecting the image file.


Protection
Set a HDCP & Copyright On or Off.

HDMI Out
Adjust the HDMI Out Resolution setting, enable video output, and mute/unmute the display speaker when connected via HDMI Out.

Preferences
View and adjust Touch, Language, Keyboard & Input Method, Date & Time, Boot Mode & Advanced, Start up & Shut down, and Toolbar settings.

Touch
Adjust Touch Settings and toggle Touch Sounds and Windows Ink On/Off.

Language
Adjust and choose the preferred language from the available languages.

Keyboard & Input Method
Enable/disable the visual keyboard and/or change the default input method.

- Tap on the Settings button to adjust the advanced keyboard settings.

Date & Time
Set the system time and format.

| Item | Description |
|---|---|
| Automatic Date & Time | When enabled, the ViewBoard will automatically synchronize the date and time via the Internet. |
| Time Zone | Select the appropriate time zone. |
| Time Format | Choose from 12-hour or 24-hour time format. Simply toggle 24-hour format On/Off. |
| Date Format | Select from the available date formats. |
Boot Mode & Advanced Settings
Adjust the preferred boot up mode and set/reset a password.


| Item | Description |
|---|---|
| Normal Mode | The embedded screen sharing Apps will run normally. |
| Secured Mode | The embedded screen sharing Apps will be removed. |
| Disable Embedded OS | The system will automatically reboot, and then the Embedded OS will not appear. |
| ViewBoard Settings Access Password | Toggle to lock/unlock the ViewBoard Settings. |
| Password for Protection | Modify the Boot mode and ViewBoard Settings entry password. |
| Local File Protection Policy | Choose how long to keep local storage files in the Folder application. |
| Color Correction | Color correct the ViewBoard display screen. |
| Reset ViewBoard | Reset the ViewBoard to its factory default settings. |
Startup & Shutdown
Set the Startup Input, Standby Mode, EnergyStar Mode, Black Screen After Startup, Power off Reminder timer and Schedule settings.


| Item | Description |
|---|---|
| Startup Input | Adjust the Startup Input preference. |
| Standby Mode | Decide what happens when you press the Power button while the ViewBoard is On. |
| Energy Star | Enable to automatically initiate Sleep Mode when the screen is idle for one hour. |
| Black Screen After Startup | When enabled, the ViewBoard will turn off the backlight automatically after booting up. |
| Schedule | Schedule a Boot and Shut off time. |
Toolbar Setting
Adjust the Side toolbar setting.

Input Source
Adjust the input source names and settings, as well as the side toolbar settings.

Label Input Source
Set labels for each input source that will be easily recognized when displayed.

Source
Toggle Wake up by active HDMI input and HDMI CEC and select Auto switch input ports.

| Item | Description |
|---|---|
| Wake up by Active Source | The screen will turn on automatically after plugging in an HDMI cable when the screen is off. |
| Auto switch input ports | The original signal will automatically switch to a new cable after it’s plugged in. |
| Energy Saving | Set a time period to power off if no signal is detected. |
| HDMI CEC | Enable/disable HDMI CEC functions. |
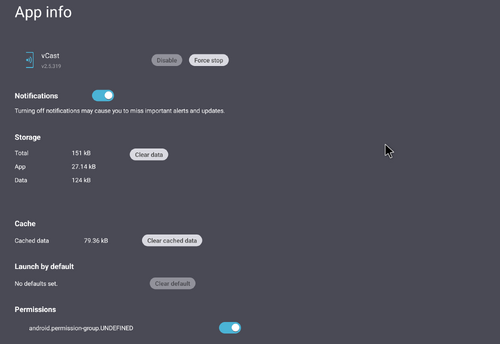
Apps
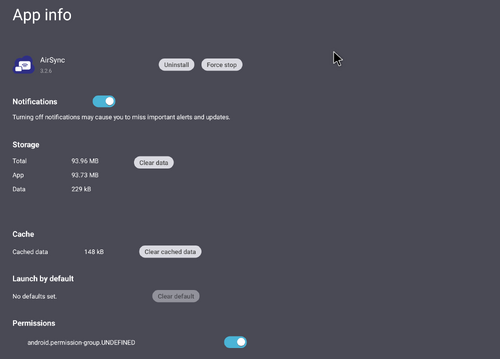
The user can view application information and force stop, uninstall, move to USB storage, clear data, clear cache, and clear defaults.

- Pre-loaded apps cannot be uninstalled.
- Not all apps support the move to USB storage feature.
- Not all apps support Clear Defaults.
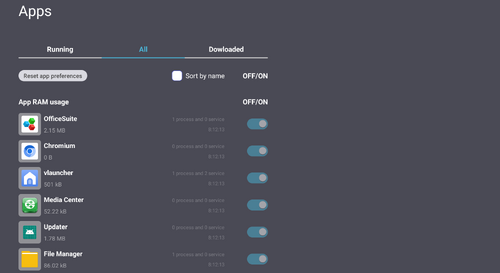
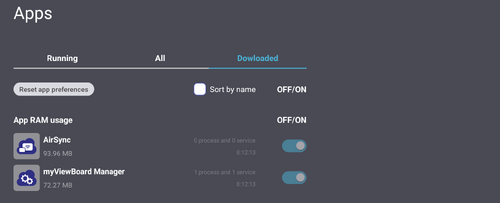
Apps
View any running or installed applications. Tap on them for more detailed information and options.

- By tapping on a running application, you can see more information, stop, or report the application.
- Selecting All will list all installed applications.
- Tapping on any application will display further information and options.
- Selecting Download will list all installed applications that can be uninstalled.
- Tapping on any application will display further information and options.


System
View and adjust Storage, Clone to USB, Display ID, Security, System Update, and About device settings.

Clone to USB
Copy settings to an external USB drive.

Display ID
Assign a number to remote control the display by RS-232/LAN.

- To assign or change the Display ID, tap Change and input a number.

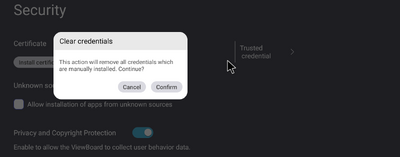
Security
Review Certificate, Trusted Credential storage, and Unknown sources install settings.

- Tap on Install certificate from storage to add additional certificates.
- Selecting Clear Credentials will remove all manually installed credentials.
Note: Pre-loaded credentials cannot be cleared.
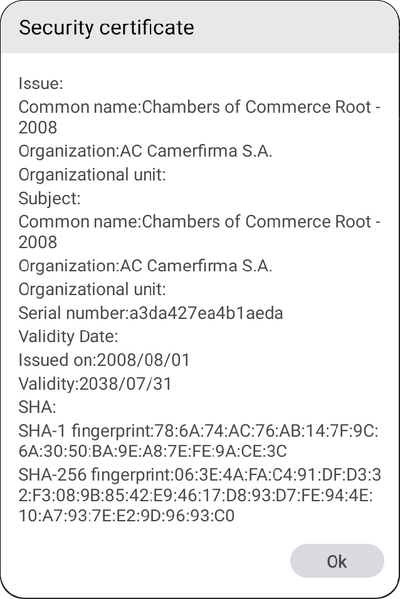
- Under Trusted Credentials view and edit all trusted and installed CA certificates.
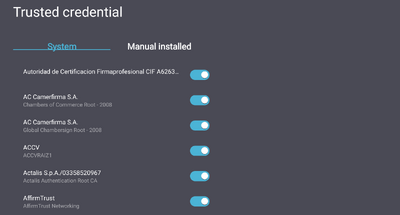
- Tapping on a credential will provide more detailed information.
- Allow the installation of applications from unknown sources by selecting the box under Unknown source security.
Note: Apps from unknown sources may not be compatible or work properly.


System Update
The ViewBoard automatically searches for software updates whenever connected to the Internet (OTA). With just one click, users can update their version of ViewBoard software.

| Item | Description |
|---|---|
| Online Update | Manually check online for a new software version. |
| Local Update | Update the software manually with a local file. |
| Android Version Upgrade | Manually check for a new Android version. |
| Auto Update | When the display is off, the system will automatically check for a new version. If a new version is found, the system will automatically update. After the update is complete, the system will turn off. |
| Schedule | Set the update time. |
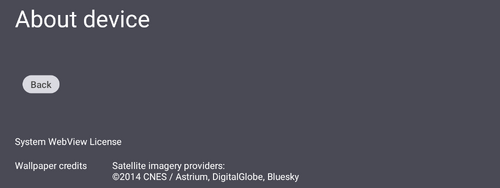
About Device
Display Embedded Player information, Legal information, and Asset Tagging.

- By selecting Edit, the asset information can be adjusted.
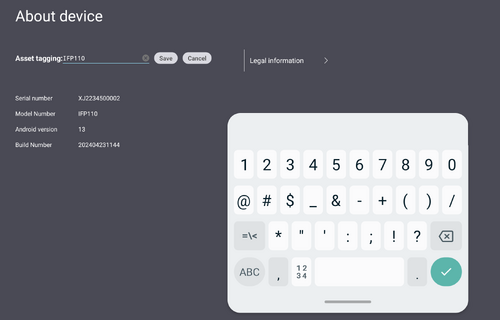
- Tap on Legal information to check open source licenses.