|
|
| Line 189: |
Line 189: |
| | Shows Input Source, Resolution, and 3D Format. | | | Shows Input Source, Resolution, and 3D Format. |
| |} | | |} |
|
| |
| =Home Screen - On-Screen Display (OSD) Menu Options=
| |
|
| |
| ===File Management===
| |
| Provides a user interface to manage files and folders.
| |
| <div class="res-img">[[File:M1X_File_Management_2.png|500px|]]</div>
| |
|
| |
| ===Basic Settings===
| |
| Manage Language, Projector Projection, and Keystone settings.
| |
| {| class="wikitable" style="width:60%; background-color:#ffffff;"
| |
| ! style="text-align: center; font-weight:bold; background-color:#c41230; color:#ffffff;" width=25% | Menu Option
| |
| ! style="font-weight:bold; background-color:#c41230; color:#ffffff;" | Description
| |
| |-
| |
| | style="font-weight:bold;" | Language
| |
| | Select your desired language.
| |
| |-
| |
| | style="font-weight:bold;" | Projector Position
| |
| | Select the preferred projection position.
| |
| |-
| |
| | style="font-weight:bold;" | Keystone
| |
| | Adjust trapezoidal screen image distortion.
| |
|
| |
| <u>Manual</u><br>
| |
| Keystone can be adjusted manually from -40 to 40.
| |
|
| |
| <u>Auto V Keystone</u><br>
| |
| Provides a rectangular screen image by automatically adjusting the keystone number when there is a trapezoidal screen image caused by the tilting of the projector.
| |
|
| |
| * '''Enable:''' Automatically adjust the keystone number.
| |
| * '''Disable:''' Manually adjust the keystone number.
| |
| ::'''NOTE:''' If '''Manual''' is selected, '''Auto V Keystone''' will change to '''Disable''' automatically.
| |
| |}
| |
|
| |
| ===Source===
| |
| Select the preferred input source.
| |
| <div class="res-img">[[File:M1X_Source_2.png|500px|]]</div>
| |
|
| |
| ===Audio Mode===
| |
| Set the projector for audio playback.
| |
| <div class="res-img">[[File:M1X_Audio_Mode_2.png|500px|]]</div>
| |
|
| |
| ===Advanced Settings===
| |
| Manage Power, Audio, and other advanced settings.
| |
| {| class="wikitable" width=60%
| |
| ! style="text-align: center; font-weight:bold; background-color:#c41230; color:#ffffff;" width=25% | Menu Option
| |
| ! style="font-weight:bold; background-color:#c41230; color:#ffffff;" | Description
| |
| |-
| |
| | style="font-weight:bold;" | Power On Source
| |
| | Allows the user to enter the desired source directly after turning on the projector.
| |
| |-
| |
| | style="font-weight:bold;" | Power On/Off Ring Tone
| |
| | Enable or disable the power on/off ring tone.
| |
| |-
| |
| | style="font-weight:bold;" | Auto Power On
| |
| | <u>Direct Power On</u><br>
| |
| Turn on the projector automatically once plugged into an outlet.
| |
| |-
| |
| | style="font-weight:bold;" | Smart Energy
| |
| | <u>Auto Power Off</u><br>
| |
| The projector can turn off automatically after a set period of time once no input source is detected.
| |
|
| |
| <u>Sleep Timer</u><br>
| |
| Turn off automatically after a set period of time.
| |
|
| |
| <u>Power Saving</u><br>
| |
| Lower power consumption if no input source is detected after five (5) minutes.
| |
| :<small>'''NOTE:''' The power consumption of the LED will be changed to 30% after no signal is detected for five (5) minutes.</small>
| |
| |-
| |
| | style="font-weight:bold;" | harman/kardon
| |
| | <u>Audio Mode</u><br>
| |
| * '''Movie:''' Default audio mode.
| |
| * '''Music:''' Optimized for music playback.
| |
| * '''User:''' Allows the user to customize the audio equalizer.
| |
| ::<small>'''NOTE:''' In Custom mode, 100Hz, 500Hz, 1500Hz, 5000Hz, and 10000Hz can be selected.</small>
| |
|
| |
| ::<div class="res-img">[[File:M1_mini_Plus_Audio_Mode.jpg|300px]]</div>
| |
|
| |
| <u>Audio Volume</u><br>
| |
| Adjust the volume from 0 to 20.
| |
|
| |
| <u>Mute</u><br>
| |
| Mute or unmute the volume.
| |
| |-
| |
| | style="font-weight:bold;" | Light Source Level
| |
| | Select the suitable power consumption of the LED.
| |
|
| |
| <u>Full</u><br>
| |
| 100% power consumption
| |
|
| |
| <u>Eco</u><br>
| |
| 70% power consumption
| |
|
| |
| <u>Extended Eco</u><br />
| |
| 55% power consumption
| |
|
| |
| <u>Battery Saving</u><br />
| |
| 30% power consumption
| |
| |-
| |
| | style="font-weight:bold;" | High Altitude Mode
| |
| | It is recommended that you use High Altitude Mode when your environment is between 1,500-3,000 m above sea level, and a temperature between 5°C-25°C.
| |
|
| |
| :<div class="res-img">[[File:M1_mini_Plus_High_Altitude.png|300px]]</div>
| |
|
| |
| :<small>'''NOTE:''' If you use this projector under other extreme conditions excluding the above, it may display auto shut-down symptoms, which is designed to protect your projector from over-heating. In cases like this, you should switch to High Altitude Mode to solve these symptoms. However, this is not to state that this projector can operate under any and all harsh or extreme conditions.</small>
| |
| |-
| |
| | style="font-weight:bold;" | Reset Settings
| |
| | Reset the Settings to default.
| |
| :<small>'''NOTE:''' Language, High Altitude Mode, Projector Position, Network Settings, All installed Apps in the Apps Center, Add App, and Light Source Hours will remain unchanged.</small>
| |
| |-
| |
| | style="font-weight:bold;" | Reset to Factory Default
| |
| | Factory reset.
| |
| :<small>'''NOTE:''' Light Source Hours will remain unchanged.</small>
| |
| |}
| |
|
| |
| ===Information===
| |
| View usage hours, system version, and other details.
| |
| <div class="res-img">[[File:M1X_Information_2.png|500px|]]</div>
| |
|
| |
|
| [[Category:M1X]] | | [[Category:M1X]] |
M1X On-Screen Display Menu Options
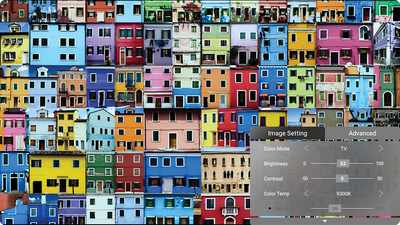
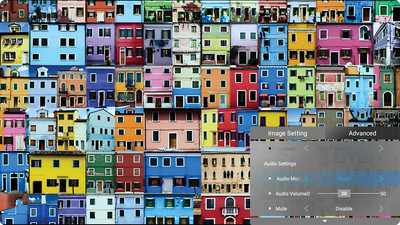
After your input source is selected, you can adjust the Image Setting and Advanced menus.
After your input source is selected, you can adjust the Image Setting menu.
To access the Image Setting menu:
-
Press Setting  on the remote control.
-
Use the Up ▲ / Down ▼ directional buttons to select a menu.
-
Then use the Left ◄ / Right ► directional buttons to enter the sub-menu(s) and/or adjust the settings.
-
Press the Return  button to go to the previous menu or exit.
Note: USB device source does not support the Image Setting function.
| Menu Option
|
Description
|
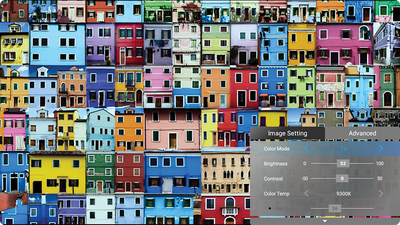
| Color Mode
|
The projector is preset with several predefined picture modes so that you can choose one to suit your operating environment and input signal.
Brightest
Maximizes the brightness of the projected image. This mode is suitable for environments where extra-high brightness is required, i.e. well-lit rooms.
TV
Optimized for viewing sports in well-lit environments.
Movie
Appropriate for colorful movies, video clips from digital cameras, or DVs through the PC input. Best for low-light environments.
Gaming
Designed for playing video games.
User 1/User 2
Recalls the customized user settings.
- NOTE: Only supports HDMI/USB-C signal input.
|
| Brightness
|
The higher the value, the brighter the image. Lower values will result in a darker image.
|
| Contrast
|
Use this to set the peak white level after you have previously adjusted the Brightness setting to suit your selected input and viewing environment.
|
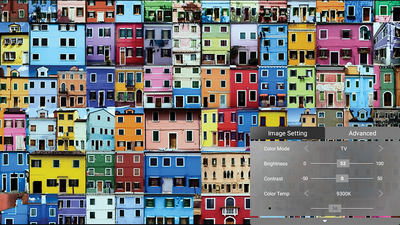
| Color Temp
|
Select the color temperature setting.
- 6500K: Maintains normal white coloring.
- 7500K: A higher, cooler color temperature than 6500K.
- 9300K: The highest color temperature; makes the image appear the most bluish-white.
- User Color: Adjust red, green, and blue values as desired.
|
| Tint
|
The higher the value, the more greenish the picture becomes. The lower the value, the more reddish the picture becomes.
|
| Saturation
|
Refers to the amount of that color in a video picture. Lower settings produce less saturated colors; in fact, a setting of “0” removes that color from the image entirely. If the saturation is too high, that color will be overpowering and unrealistic.
|
| Sharpness
|
A high value results in a sharper picture; a low value softens the picture.
|
| Gamma
|
Reflects the relationship between input source and picture brightness.
|
| Reset Current Color Settings
|
Return current color settings to their default values.
|
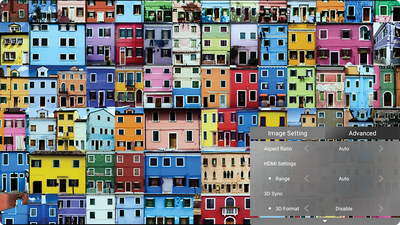
After your input source is selected, you can adjust the Advanced menu.
To access the Advanced menu:
-
Press Setting on the remote control.
-
Use the Right ▶ directional buttons to access the Advanced menu.
-
Use the Up ▲ or Down ▼ directional buttons to select a menu.
-
Then use the Left ◄ / Right ► directional buttons to enter the sub-menu(s) and/or adjust the settings.
-
Press the Return button to go to the previous menu or exit.
| Menu Option
|
Description
|
| Aspect Ratio
|
The Aspect Ratio is the ratio of the image width to the image height. With the advent of digital signal processing, digital display devices, like this projector, can dynamically stretch and scale the image output to a different aspect than that of the image input signal.
- NOTE: Only supports HDMI/USB-C signal input.
Auto
Scales an image proportionally to fit the projector’s native resolution in its horizontal width. This is suitable for the incoming image which is neither 4:3 nor 16:9 and you want to make the most use of the screen without altering the image’s aspect ratio.
4:3
Scales an image so that it is displayed in the center of the screen with a 4:3 aspect ratio. This is most suitable for 4:3 images like computer monitors, standard definition TV, and 4:3 aspect DVD movies, as it displays them without aspect alteration.
16:9
Scales an image so that it is displayed in the center of the screen with a 16:9 aspect ratio. This is most suitable for images which are already in a 16:9 aspect, like high definition TV.
|
| HDMI Settings
|
Range
Select a suitable color range according to the color range setting of the connected output device.
- Full: Sets the color range from 0~255.
- Limited: Sets the color range from 15~235.
- Auto: Sets the projector to detect the range of the input signal automatically.
|
| 3D Settings
|
Enables you to enjoy 3D movies, videos, and sporting events in a more realistic way by presenting the depth of the images while wearing 3D glasses.
3D Format
Adjust and choose from: Automatic, Off, Frame Sequential, Frame Packing, Top-Bottom, Side-by-Side.
3D Sync Invert
Allows for correction if the 3D image depth is inversed.
|
| harman/kardon
|
Adjust the audio settings.
|
| Light Source Level
|
Full
100% power consumption
Eco
70% power consumption
Extended Eco
55% power consumption
Battery Saving
30% power consumption
|
| Information
|
Shows Input Source, Resolution, and 3D Format.
|