VB-VIS-003 Using vDocCam+
Overview
1.Function Tabs
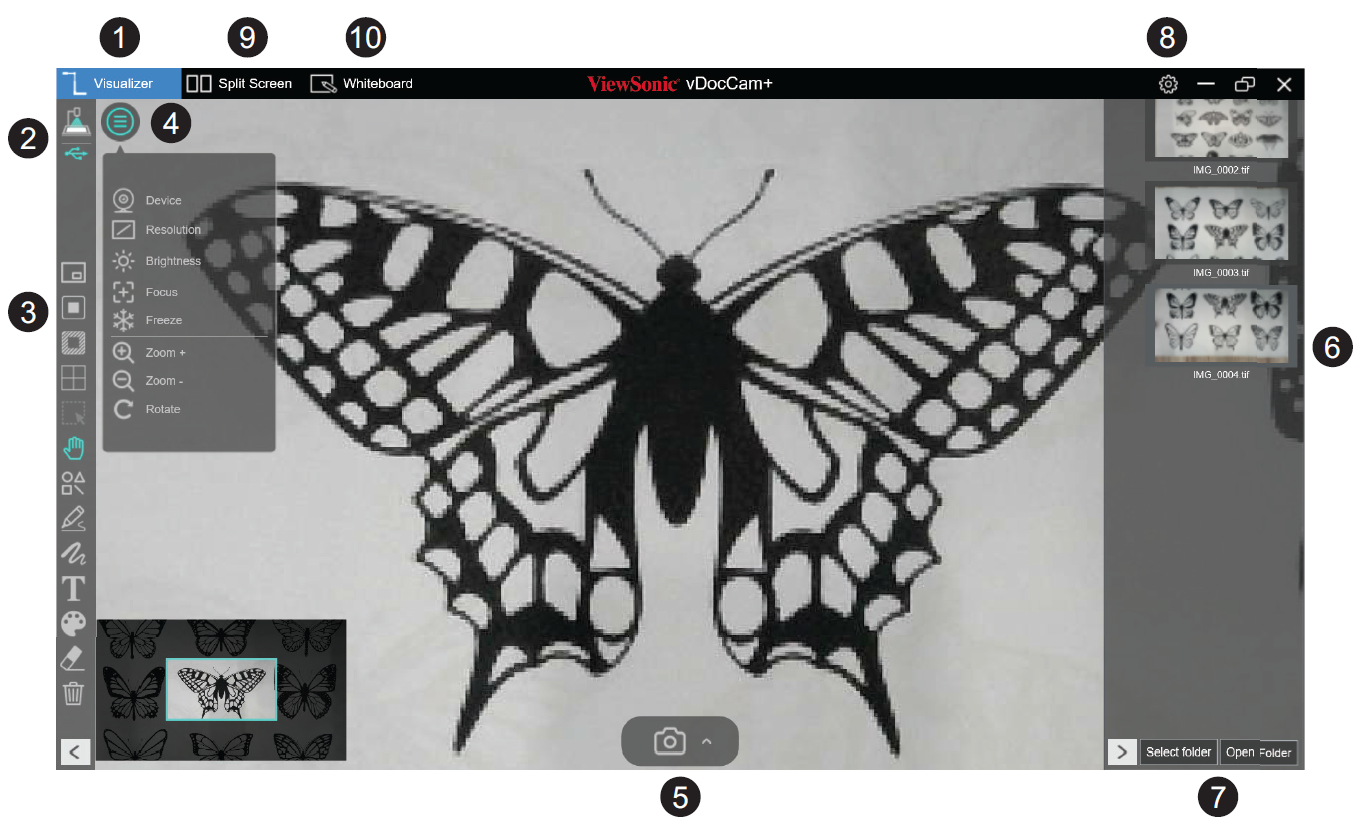
vDocCam+ integrates three (3) major functions. Click on the tab to switch function.
| Mode | Description |
|---|---|
| Visualizer | Live video from the Document Camera. |
| Split-Screen | Connect two (2) Document Cameras to a computer and present them in split-screen. |
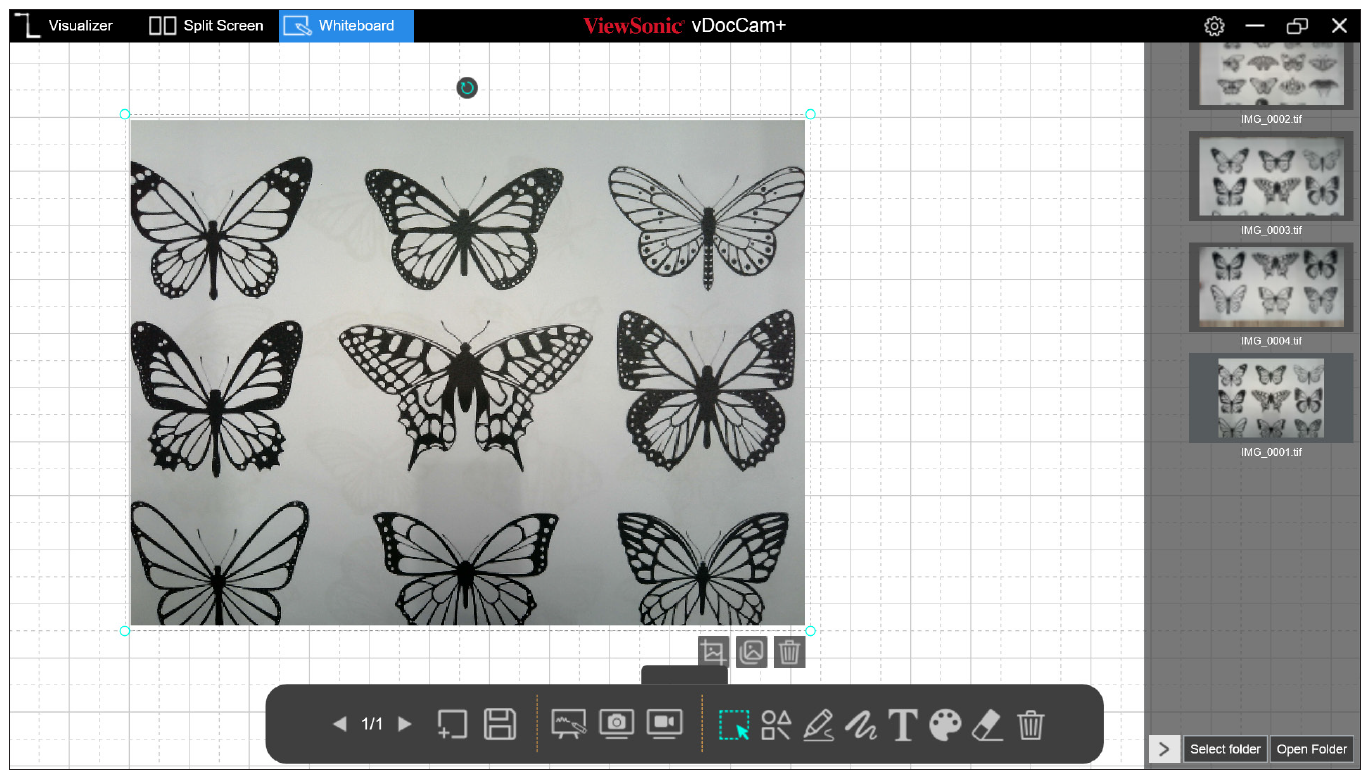
| Whiteboard | Draw and annotate on an interactive whiteboard. |
2.Select Connection
Click the icon to change the connection method.
| Icon Status | Description | Note |
|---|---|---|
| USB mode connection. (Default) This mode allows you to connect the Document Camera by USB wired connection. |
||
| Direct Wi-Fi (AP Mode) connection. This mode allows you to connect the Document Camera directly without an internet connection.
|
Reserved function; not supported by VB-VIS-003 | |
| Wi-Fi STA (Client Mode) connection. This mode allows you to connect the Document Camera through a router.
|
Reserved function; not supported by VB-VIS-003 |
3.Left Toolbar
| Icon | Description | |
|---|---|---|
| PIP (Picture-in-Picture) Enable Picture-in-Picture mode. | ||
| Mask Enable the mask mode in solid or translucent style. | ||
| Spotlight Show a spotlight by using the rectangle or ellipse style. | ||
| Gridlines Show gridlines on screen. | ||
| Select Select an annotation or object on screen. | ||
| Move Move the screen. | ||
| Shapes Add various shapes. | ||
| Rectangle Tool Draw a rectangle. | ||
| Rectangle Tool (solid) Draw a rectangle in a solid style. | ||
| Triangle Tool Draw a triangle. | ||
| Triangle Tool (solid) Draw a triangle in a solid style. | ||
| Ellipse Tool Draw an ellipse. | ||
| Ellipse Tool (solid) Draw an ellipse in a solid style. | ||
| Line Draw a line. | ||
| Dotted line Draw a dotted line. | ||
| Single arrow Draw a single arrow. | ||
| Double arrow Draw a double arrow. | ||
| Choose from several pen options for drawing and writing. | ||
| Smooth Pen Draw and write by using the Smooth Pen. | ||
| Highlighter Pen Draw and write by using the Highlighter Pen. | ||
| Disappearing Pen Draw and write by using the Disappearing Pen. NOTE: Set the disappearing time to 3, 5, 10, 20 seconds. | ||
| Line Option Set the line thickness of the annotation. | ||
| Color Option Choose the color of the annotation, shape, and text tools. | ||
| Text Tool Add text. | ||
| Eraser Remove specific annotations. | ||
| Clear All Clear all annotations on screen. | ||
| Show/Hide Show and hide toolbar. | ||
4.Image Adjustment
Click the icon to expand the Image Adjustment menu and adjust the live video.
| Icon | Description |
|---|---|
| Device Select the device and switch the power frequency (50/60 Hz). | |
| Resolution Set the resolution. | |
| Brightness Adjust the brightness level. | |
| 1:1 Show a 1:1 image; fit to screen. | |
| Focus Adjust the focus for the best focal length. | |
| Freeze Freeze the inputted image. | |
| Zoom + Zoom in on the image. | |
| Zoom - Zoom out from the image. | |
| Rotate Rotate the image: 0°, 90°, 180°, 270°, Flip, or Mirror. |
5.Capture Button Settings
Click on the arrow icon to select the capture mode.
| Icon | Description |
|---|---|
| Take a snapshot. (Default selection) | |
| Stop-Motion function can edit captured single photo and export adjustable frame rate preview motion video. | |
| Record video. |
6.Thumbnail List (Side Toolbar)
Right click on a thumbnail on the right-side and the following options will be available:
| Option | Description |
|---|---|
| Open | Open the file. |
| Copy | Duplicate the file. |
| Rename | Rename the file. |
| Delete | Delete the file. |
| Properties | Show the file’s information. |
7.File Save Path Settings
Set the directory for saving files.
| Button | Description |
|---|---|
| Select Folder | Select the save file destination. |
| Open Folder | Open the file location. |
8.Settings Menu
Click the icon to open the Settings menu.
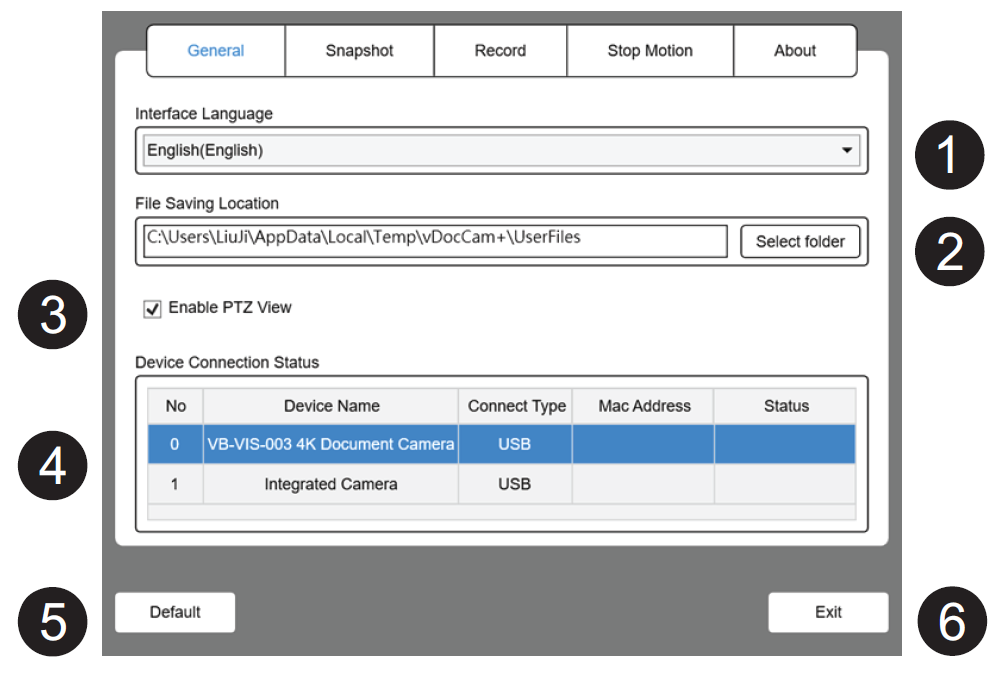
General
| Number | Description |
|---|---|
| 1 | Switch interface language. |
| 2 | Set the file saving location. |
| 3 | Enable PTZ (Point-Tilt-Zoom) view.
|
| 4 | Display current device connection status. |
| 5 | Restore the default settings. |
| 6 | Exit the Settings menu. |
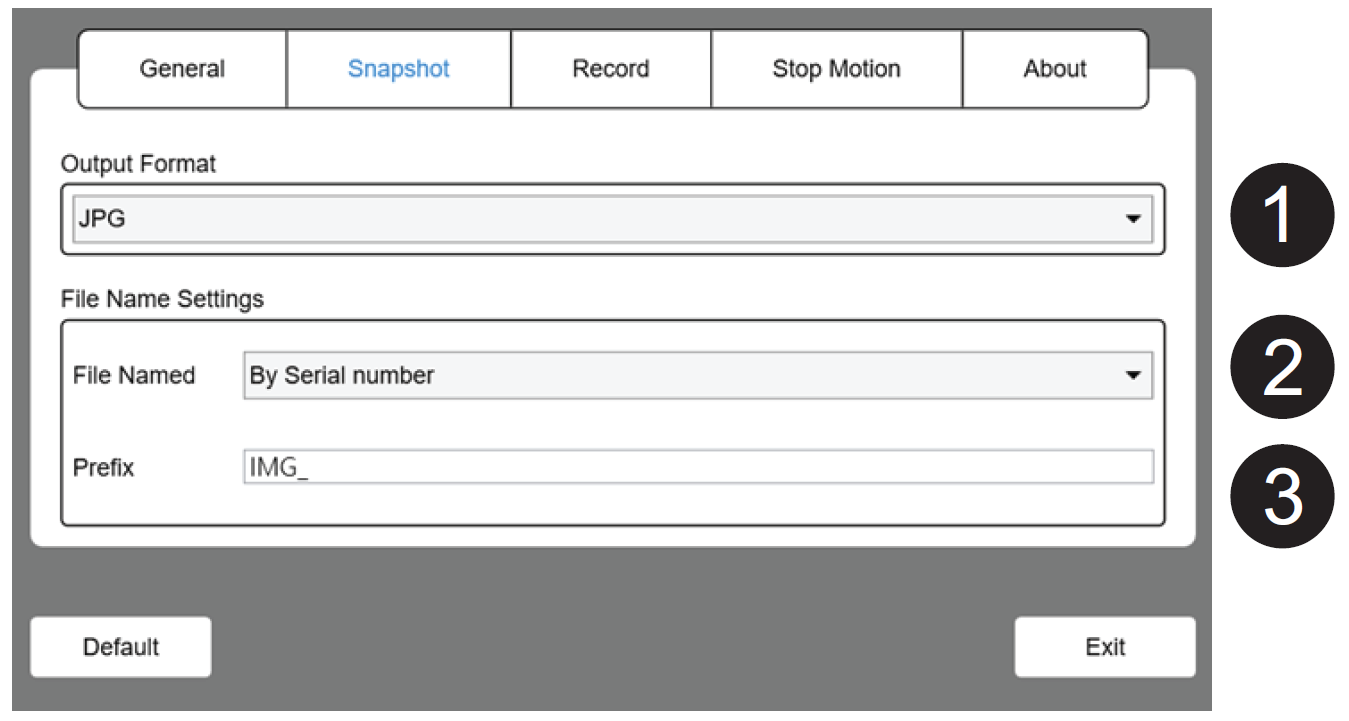
Snapshot
| Number | Description |
|---|---|
| 1 | Set the image file output format (JPG, BMP, PNG, TIF). |
| 2 | Set the file name format by serial number or by date and time. |
| 3 | Set the prefix file name. |
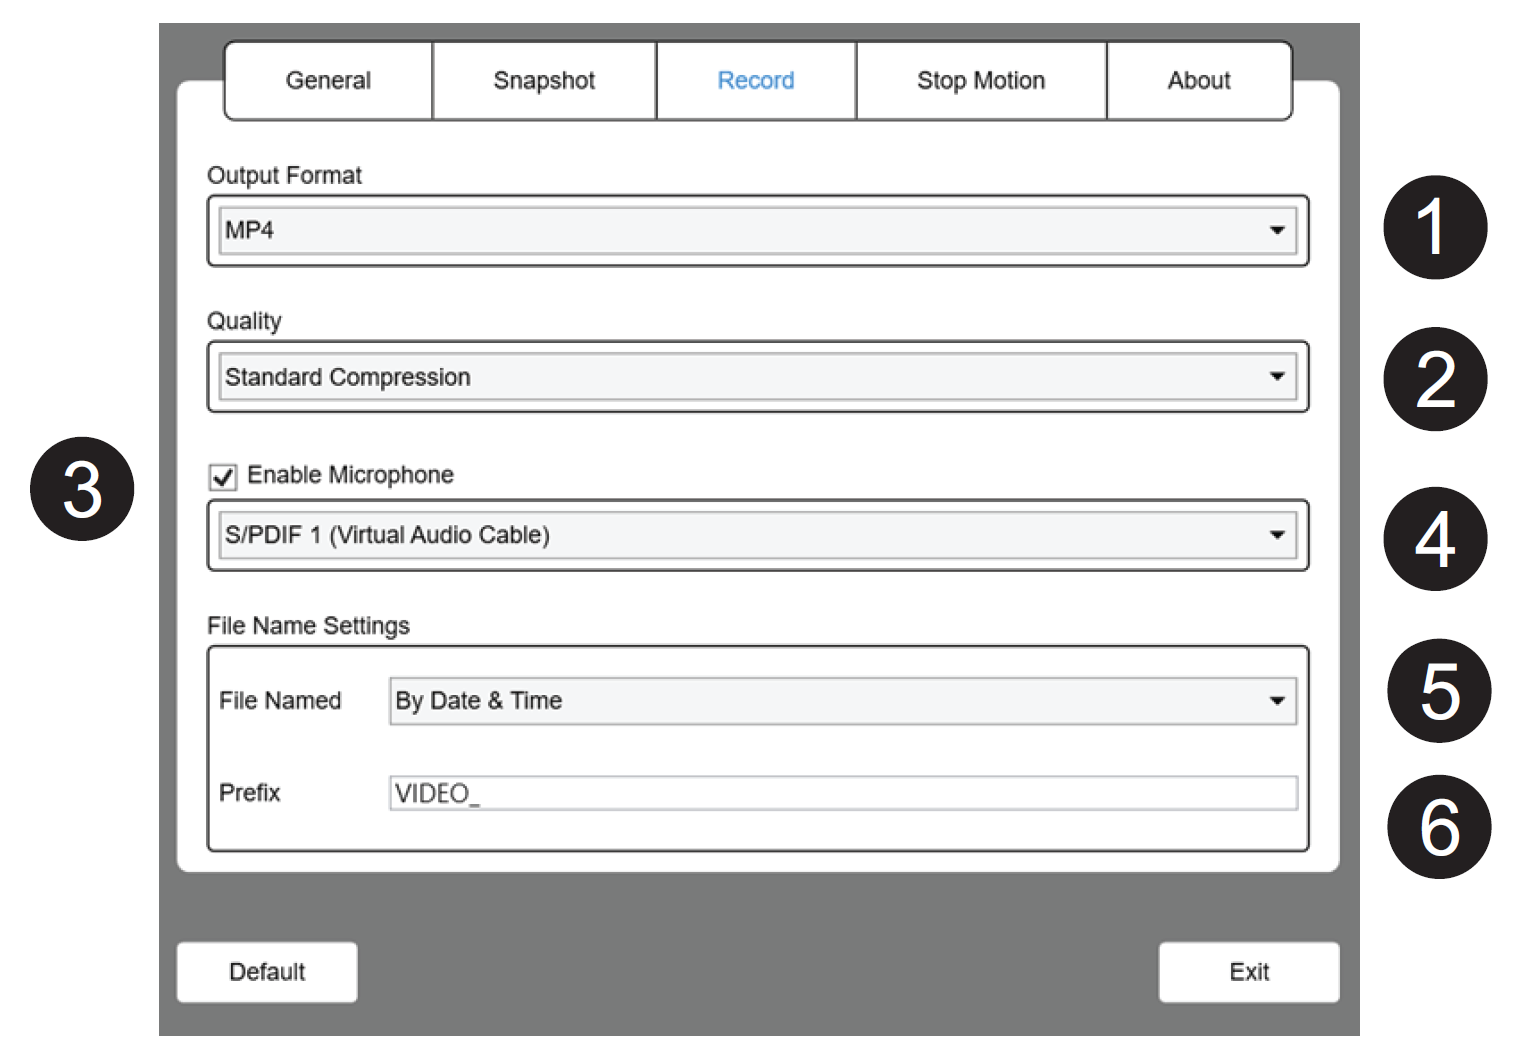
Record
| Number | Description |
|---|---|
| 1 | Set the video file output format (AVI, MP4, FLV). |
| 2 | Set the video compression quality:
|
| 3 | Enable the microphone. |
| 4 | Select the microphone. |
| 5 | Set the file name format by serial number or by date and time. |
| 6 | Set the prefix file name. |
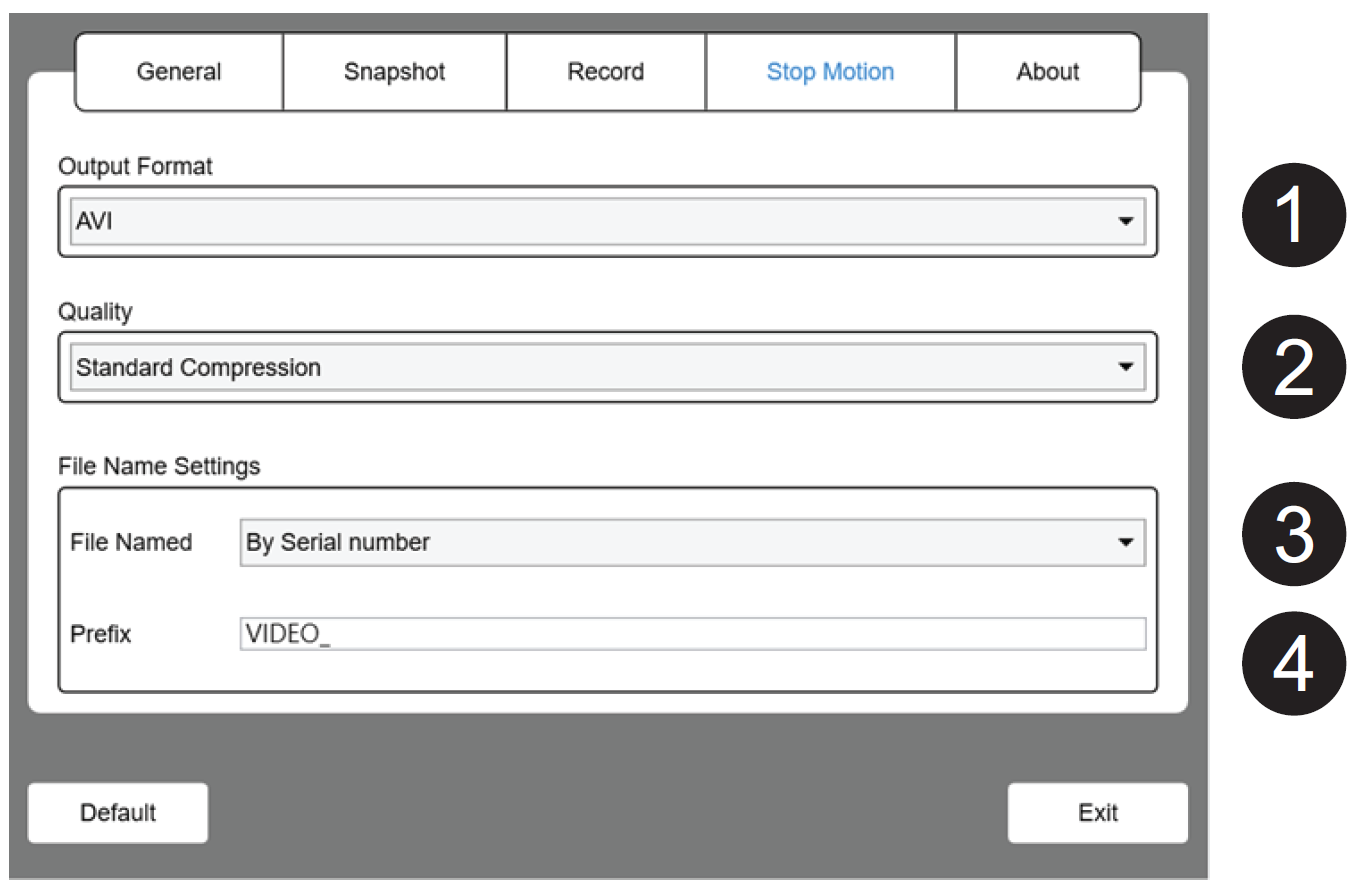
Stop Motion
| Number | Description |
|---|---|
| 1 | Set the video file output format (AVI, MP4, FLV). |
| 2 | Set the video compression quality:
|
| 3 | Set the file name format by serial number or by date and time. |
| 4 | Set the prefix file name. |
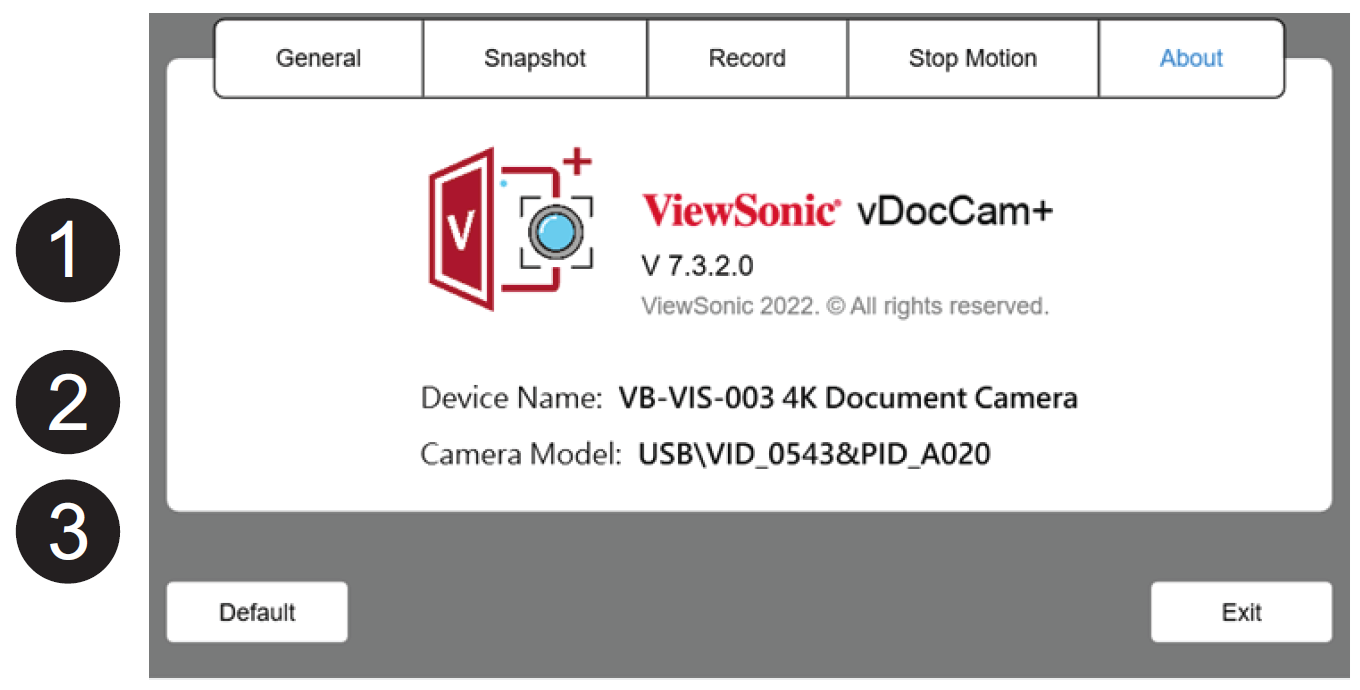
About
| Number | Description |
|---|---|
| 1 | Software version. |
| 2 | Current connected device name. |
| 3 | Current connected device’s VID/PID. |
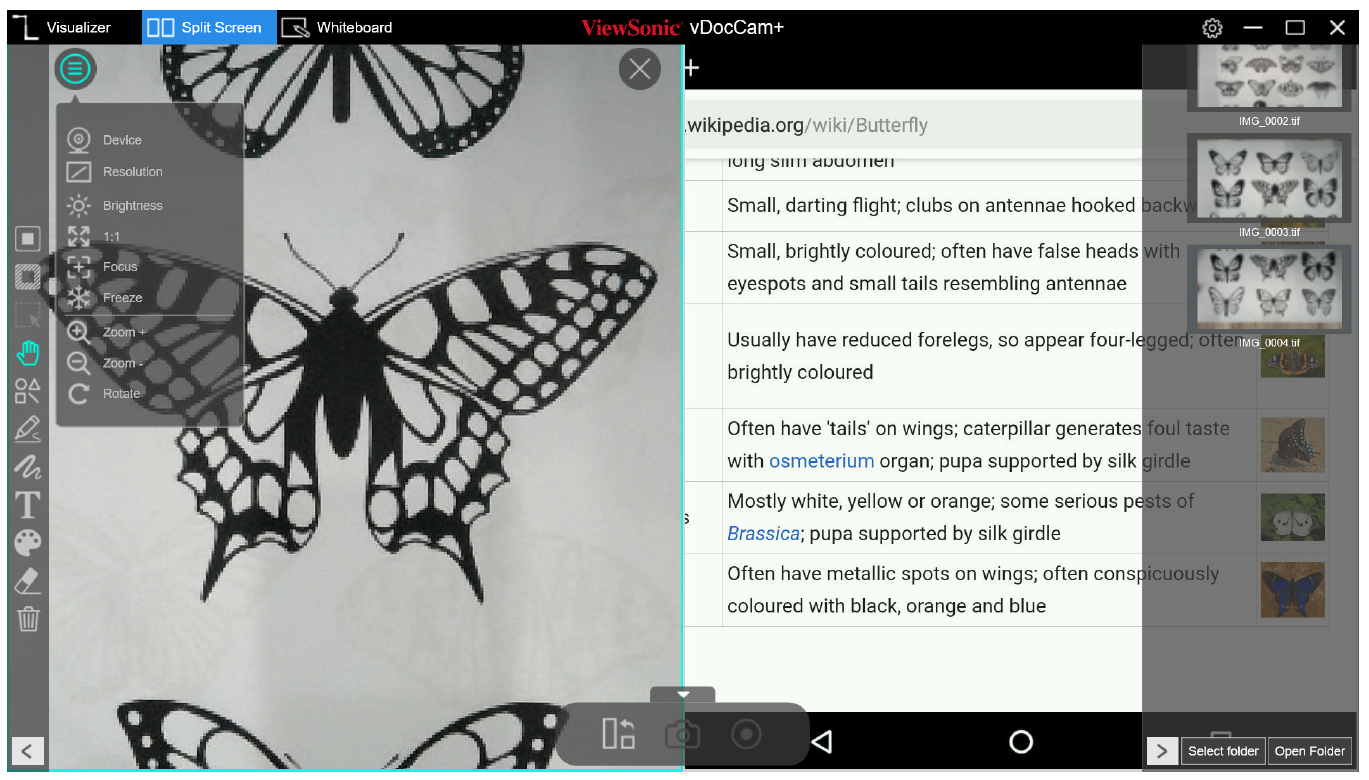
9.Split-Screen
With the Split-Screen function, you can connect two Document Cameras to your computer and present them by splitting two live screens and you can even compare still image with live video.
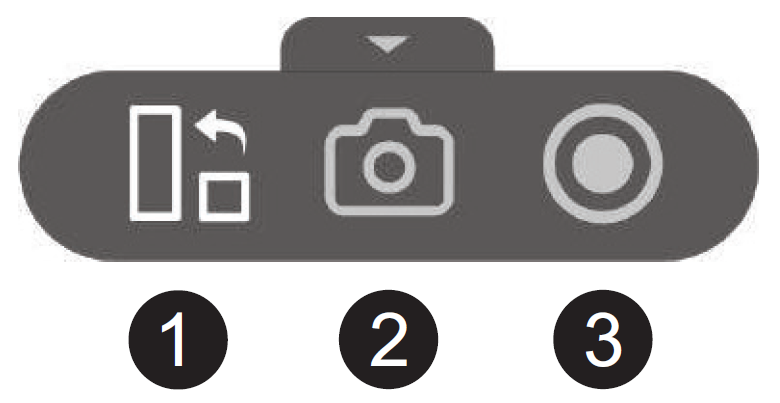
Split-Screen Action Buttons
| Number | Description |
|---|---|
| 1 | Shuffle Change the display layout. |
| 2 | Screen Capture Take a screenshot. |
| 3 | Screen Recording Take a screen recording. |
10.Whiteboard
The whiteboard mode allows you to draw and annotate anything on the interactive whiteboard, in this whiteboard function you can drag and drop selected images from the right-side file list to the whiteboard and add annotations.
Whiteboard Toolbar
| Icon | Description |
|---|---|
| Page Up and Down Switch between whiteboard pages. | |
| Add a Page Add a whiteboard page with a different color background. | |
| Save Save your current whiteboard pages in a PDF format. | |
| Switch the Background Switch between the whiteboard background, computer desktop, or mouse mode. | |
| Screenshot Take a screenshot of the whiteboard. | |
| Screen Recording Take a screen recording of the whiteboard. | |
| Select Select an annotation or object on the whiteboard. | |
| Shapes Add shapes. | |
| Freehand Tool Select a brush style and write on the whiteboard. | |
| Line Option Set the line thickness of the annotation. | |
| Text Tool Add text. | |
| Color Option Choose the color of the annotation, shape, and text tools. | |
| Eraser Remove specific annotations. | |
| Clear All Clear all annotations on screen. |

