LDM163-182 Remote Control
Remote Control Overview
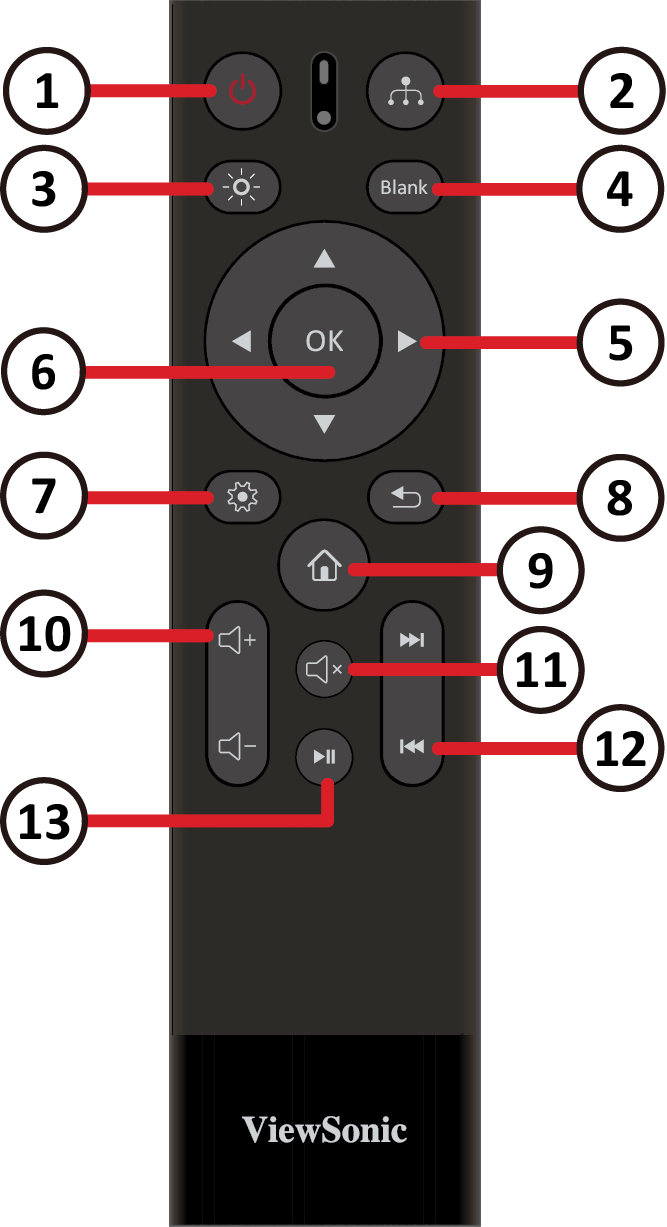
| Button | Description | |
|---|---|---|
| 1 | Power | Turn the display on or off. |
| 2 | Source | Select the input source. |
| 3 | Brightness | Adjust the screen's brightness level. |
| 4 | Blank | Change the current screen to a black screen. |
| 5 | Directional | Navigate menus and make adjustments. |
| 6 | OK | Confirm the selection. |
| 7 | Menu | Open the display settings or On-Screen Display (OSD) Menu. |
| 8 | Return | Return to the previous screen or exit a menu. |
| 9 | Home | Go to the Home screen. |
| 10 | Volume Control | Adjust the volume level. |
| 11 | Mute | Turn off the display's sound. |
| 12 | Forwards/Backwards | Move to next or previous content. |
| 13 | Play/Pause | Play or pause content. |
Bluetooth Remote Control Pairing
To pair the remote control:
- Make sure Bluetooth is enabled, go to: Settings > Network > Bluetooth > Enable.
- Press and hold the Menu
 and Return
 buttons for approximately three seconds until the indicator on the remote control flashes blue.
- If the pairing is successful, a pop-up message will appear on the screen.
- Note: If the pairing is unsuccessful after one minute, please try again by repeating Step 1 above.
Remote Control Receiver Range
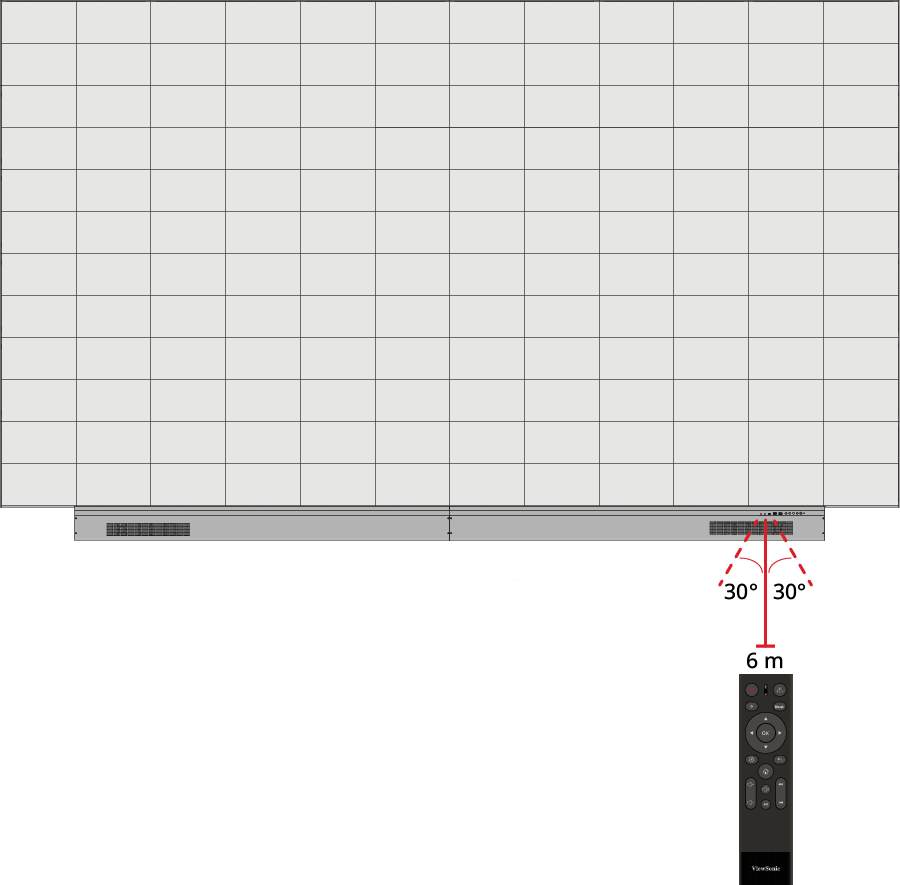
The operating range of the remote control is shown here. It has an effective range of 6 meters (20 feet), 30° degrees left and right. Please make sure there is nothing obstructing the remote control’s signal to the receiver.
IR Extension
- Note: The IR Extension port is accessed by removing the System Control Box Cover
If an additional IR Receiver is needed, an IR extension cable can be connected to the IR Extension port of the display.
Inserting Remote Control Batteries
The remote control is powered by two 1.5v "AAA" batteries.
To insert batteries into the remote control:
- Remove the cover on the rear of the remote control.
- Insert two “AAA” batteries, ensuring the (+) symbol on the battery matches the (+) on the battery post.
- Replace the cover by aligning it with the slot on the remote control and snapping the latch shut.
- WARNING: There is a risk of explosion if batteries are installed with incorrect polarity.
- Note:
- It is recommended that you do not mix battery types.
- Avoid exposure to heat or steam.
- Do not allow water or other liquids to splash on the remote control. If the remote control becomes wet, wipe it dry immediately.
- Always dispose of old batteries in an environmentally friendly way. Contact your local government for more information on how to dispose of batteries safely.


