From ViewSonic User Guide Database
Installing the VPC-A31-O1
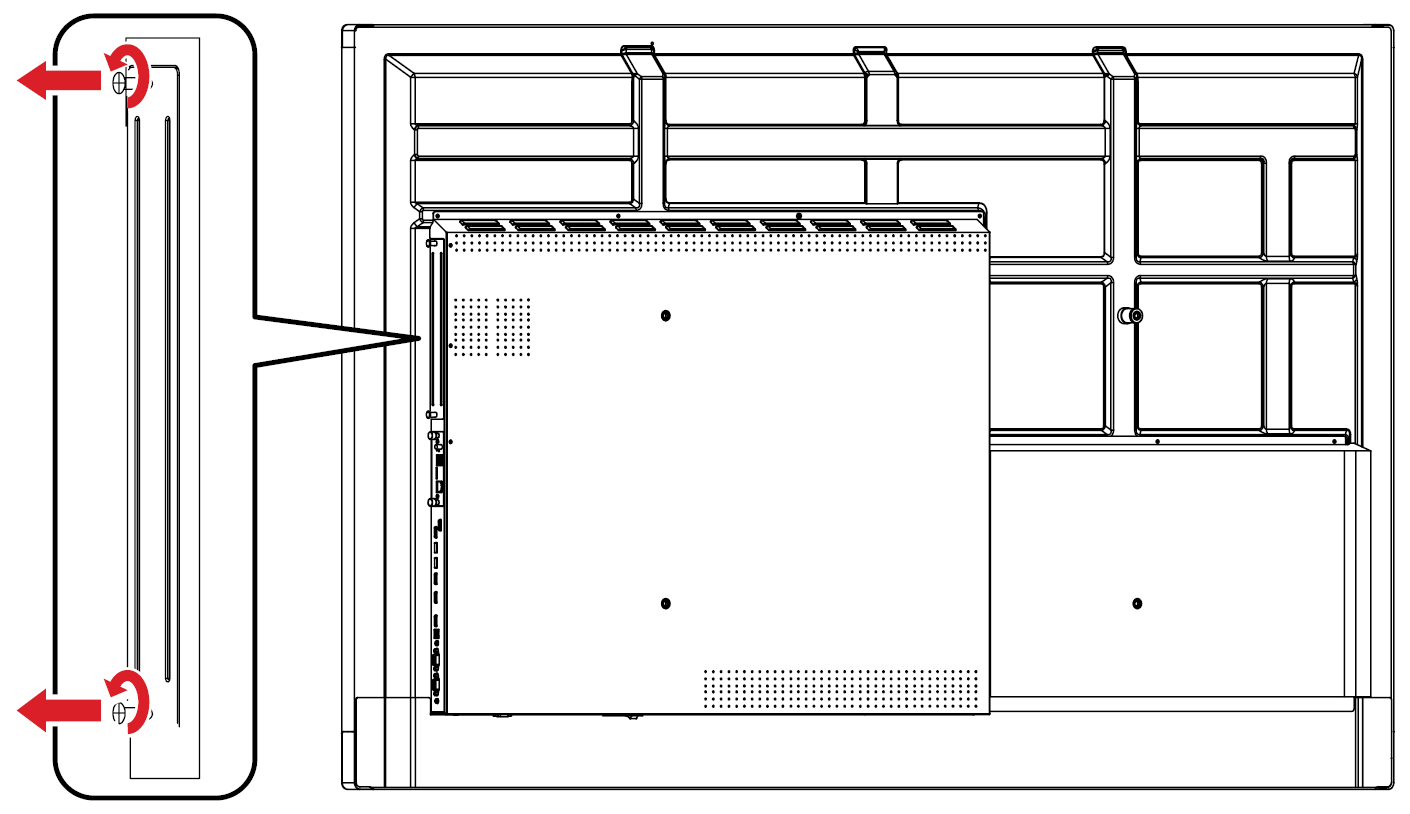
- Remove the slot-in PC cover of the display.
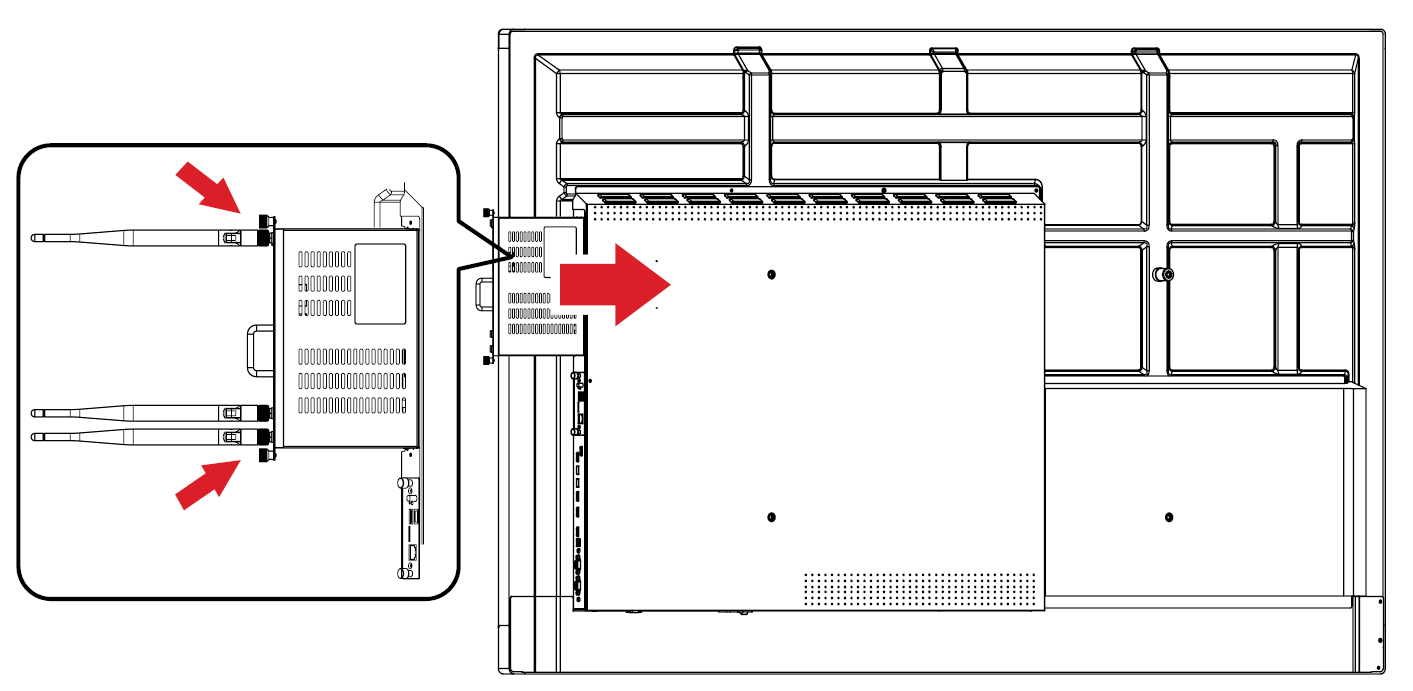
- Using the handle of the VPC-A31-O1, carefully insert it into the PC slot of the display.
- NOTE:
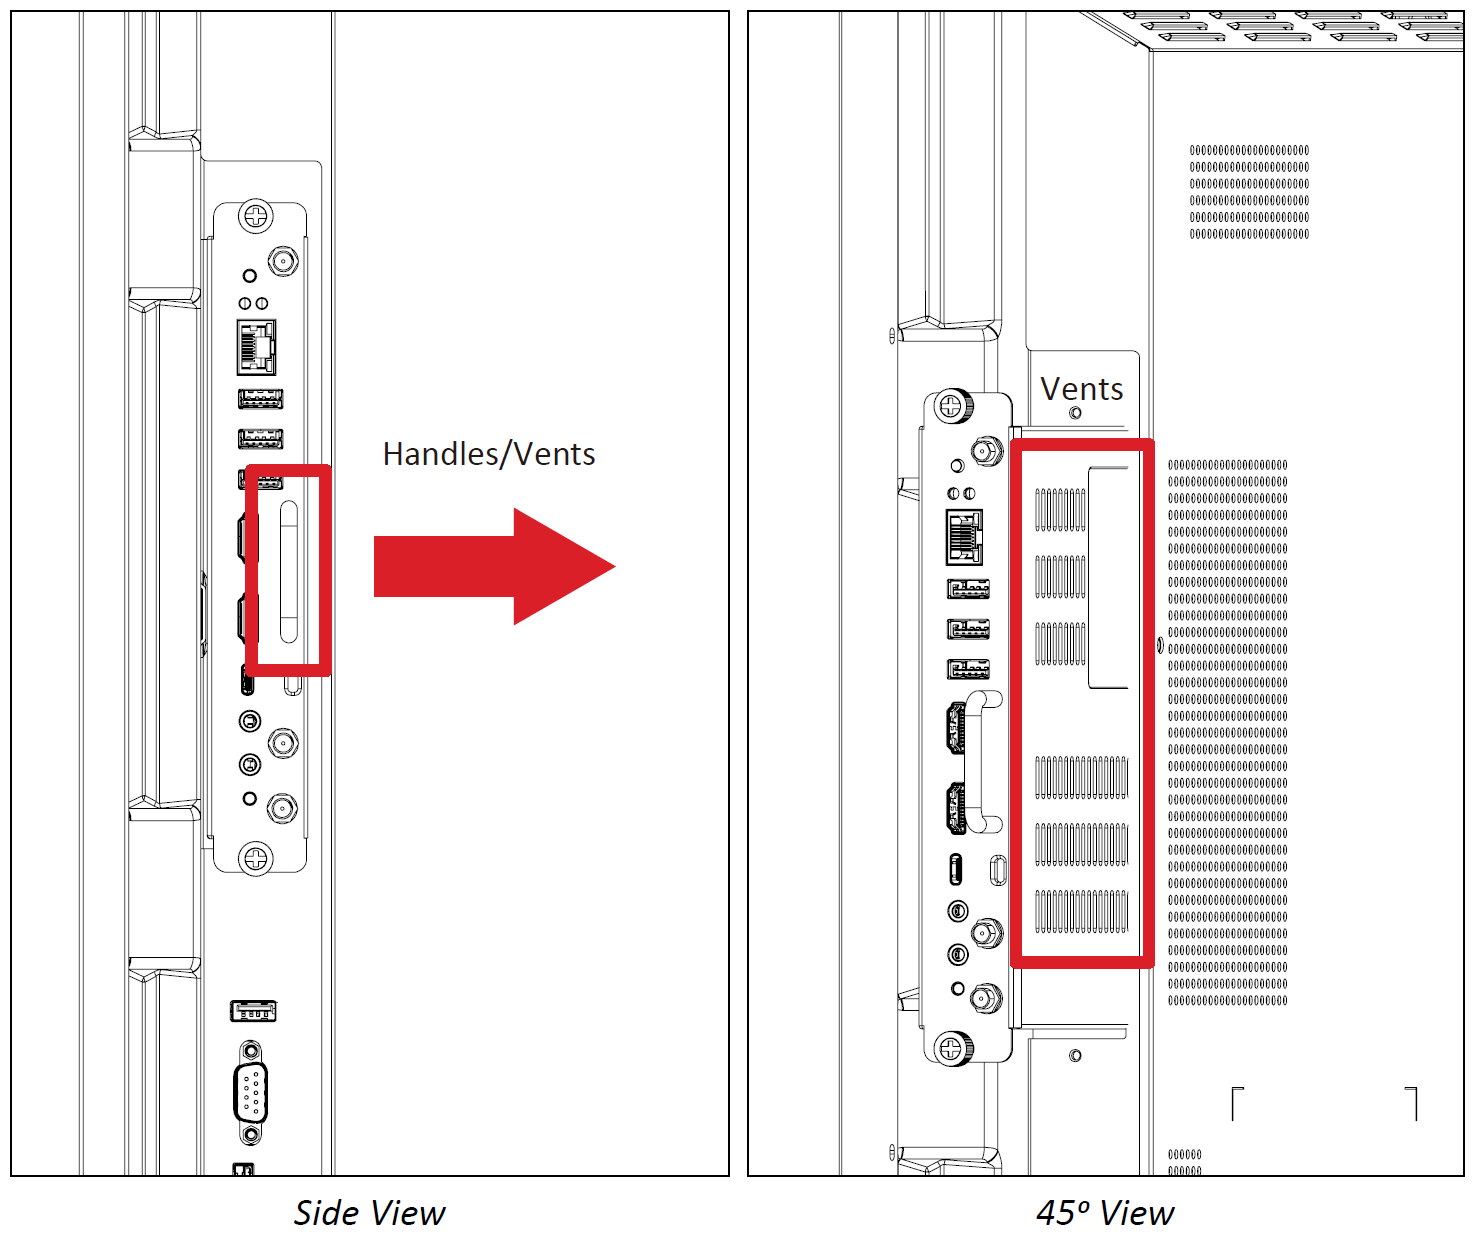
- Ensure the handle and vents of the VPC-A31-01 are facing outwards.
- The right installation direction is to avoid damage to the OPS terminal and maintain proper ventilation.
- Secure the VPC-A31-O1 to the display with the two (2) included screws.
- NOTE:
- Please note that the three (3) antennas must be installed on the VPCA31-O1.
- Please pay attention to the installation direction of the VPC-A31-O1, with the vents facing outwards to avoid damage.
- The VPC-A31-O1 does not support hot swapping. When removing the device, turn off the power supply for both the display and VPC-A31-O1 first.


