VBS200-A Using the Device
Powering ON/OFF the VBS200-A
- Ensure the VBS200-A is connected either via AC Adaper or PoE.
- Press the Power button to turn on the VBS200-A.
- To turn the VBS200-A off, press and hold the Power button.
Initial Launch Setup
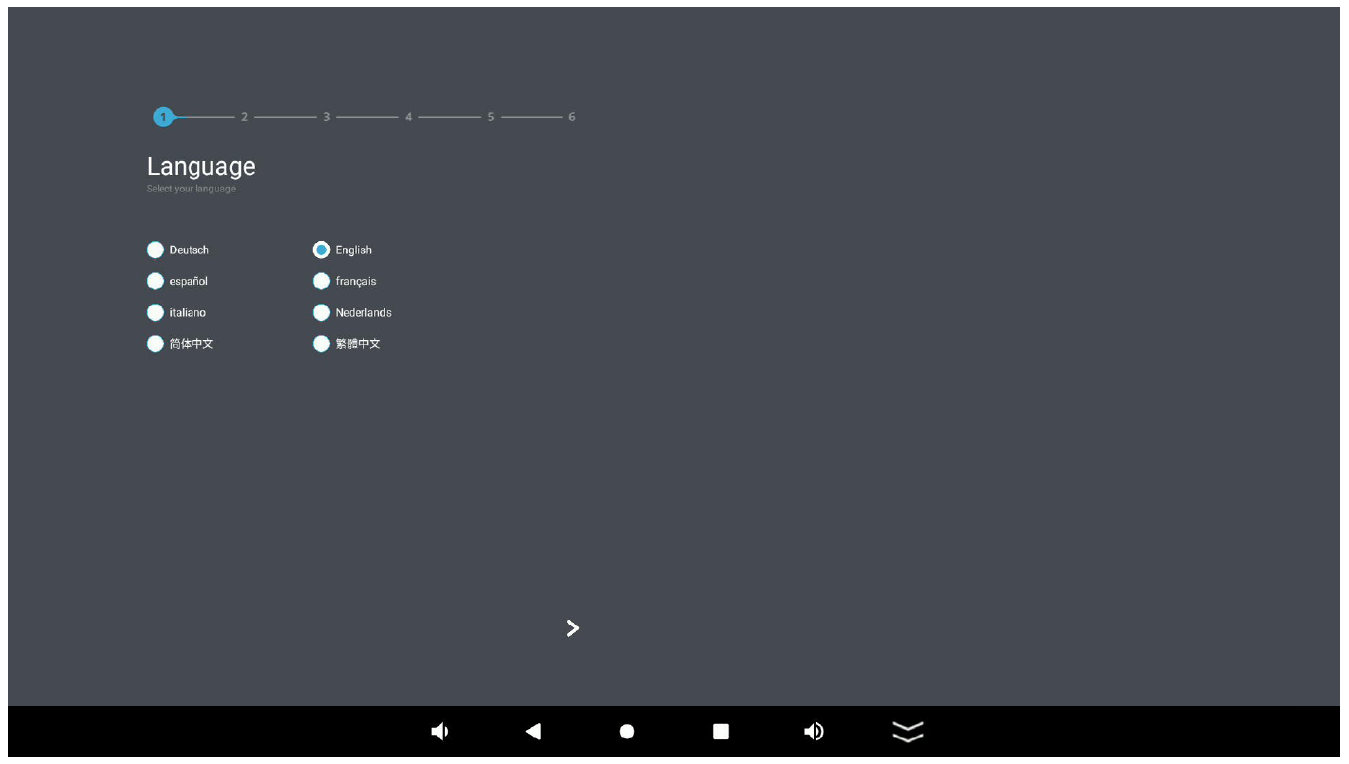
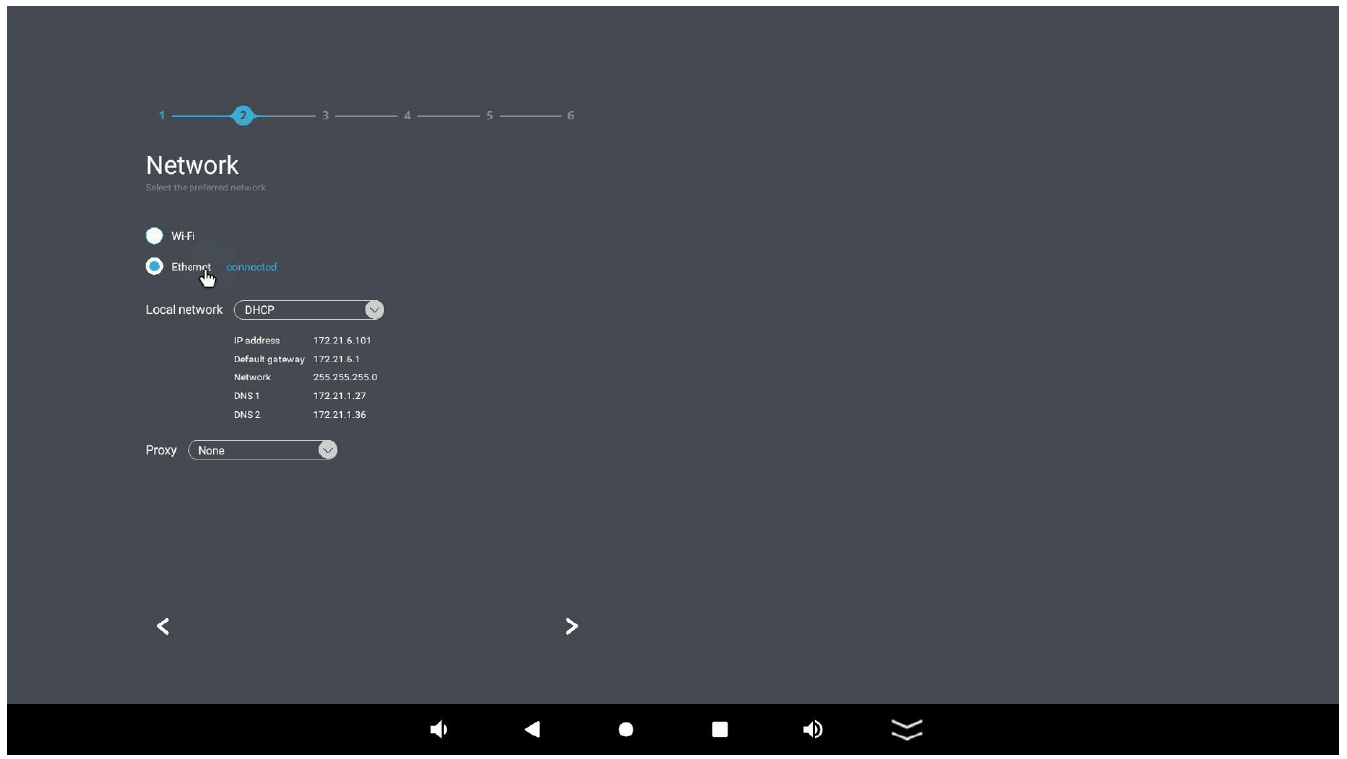
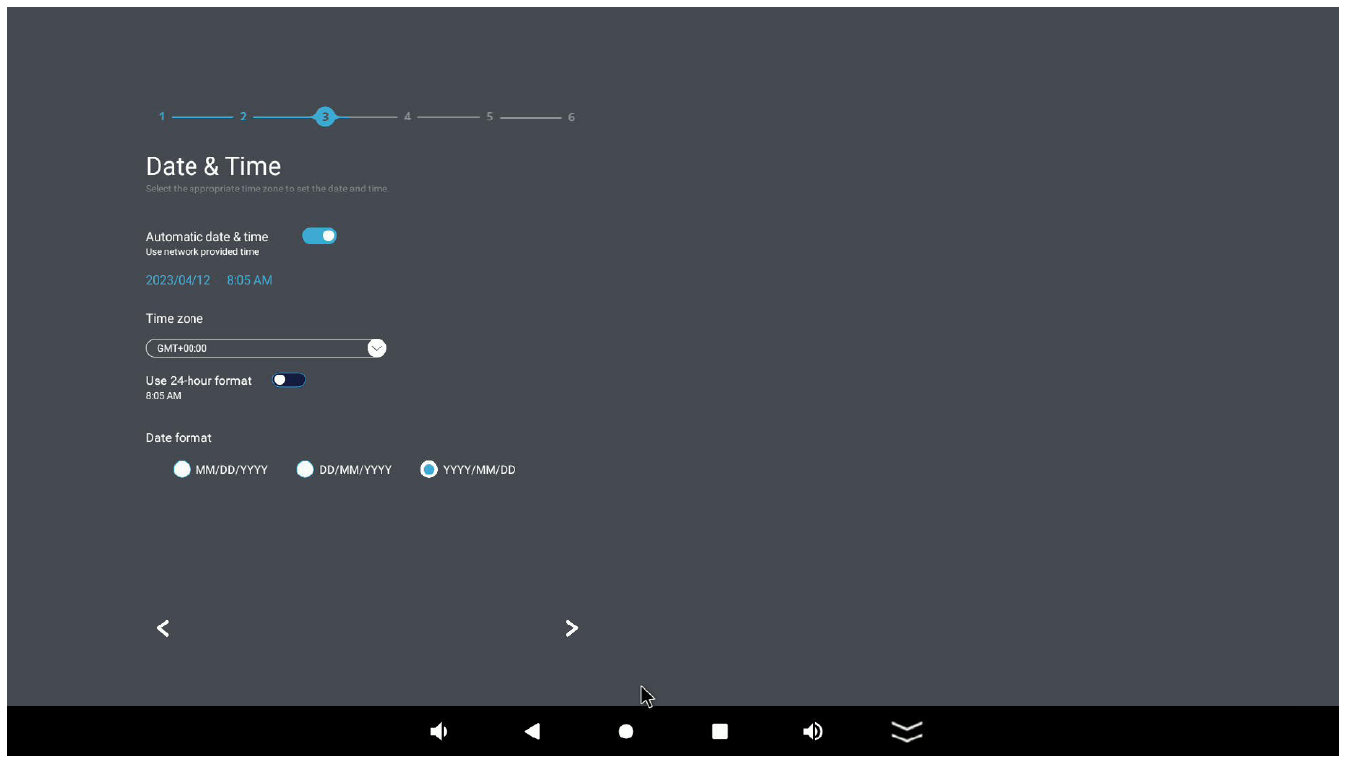
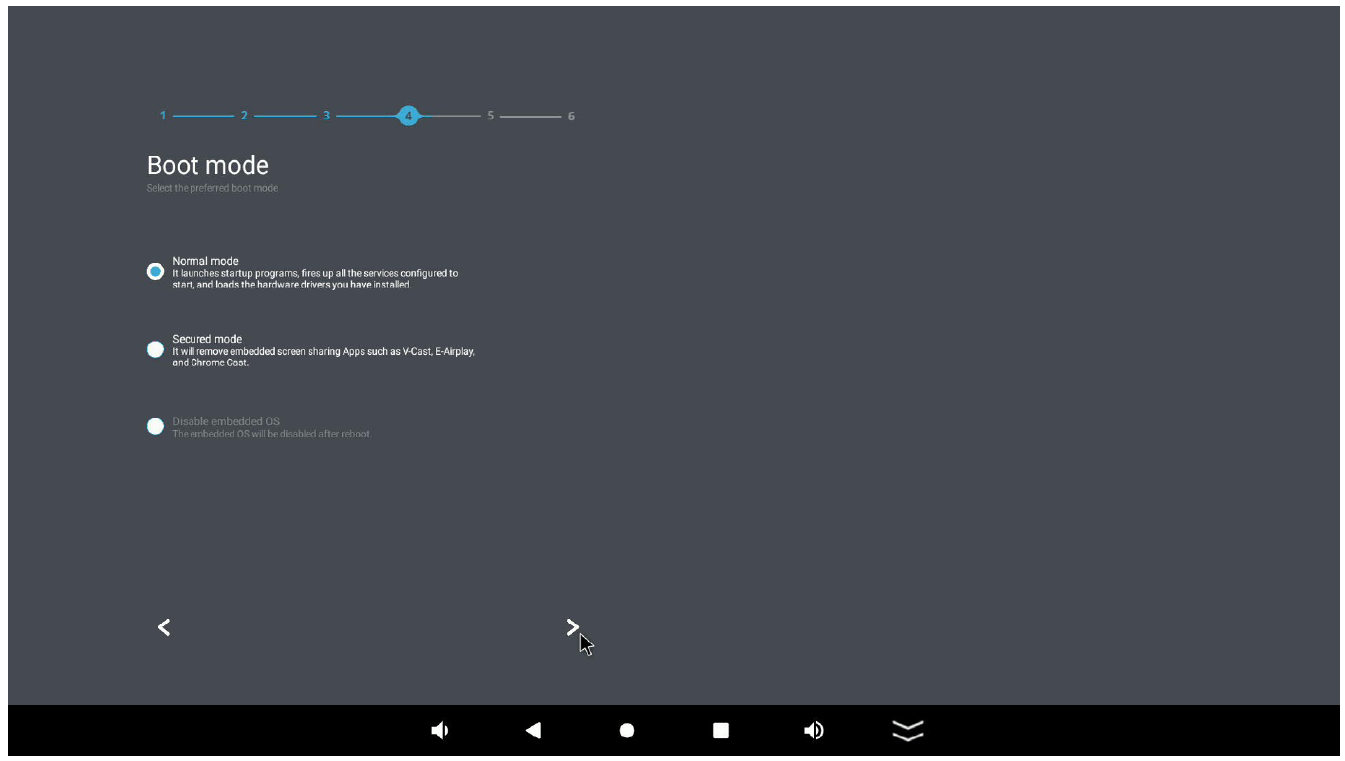
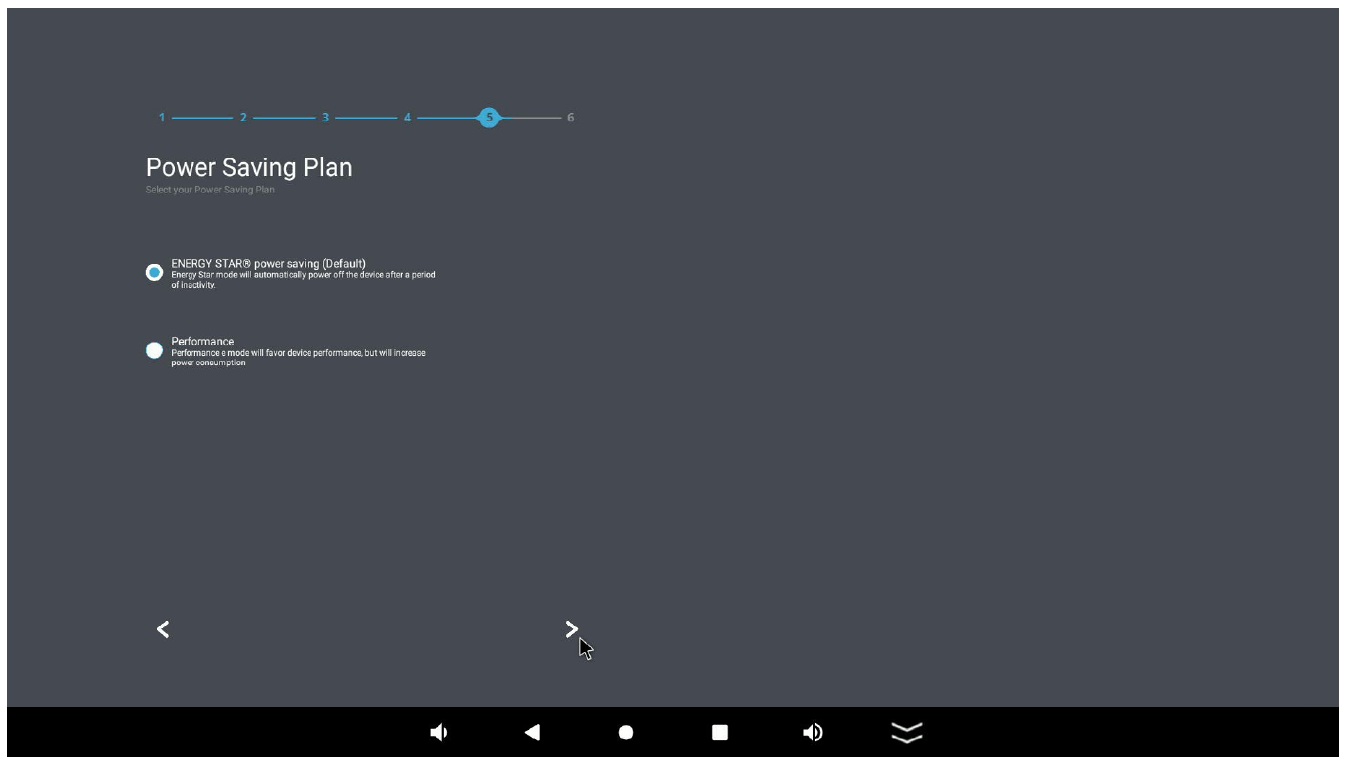
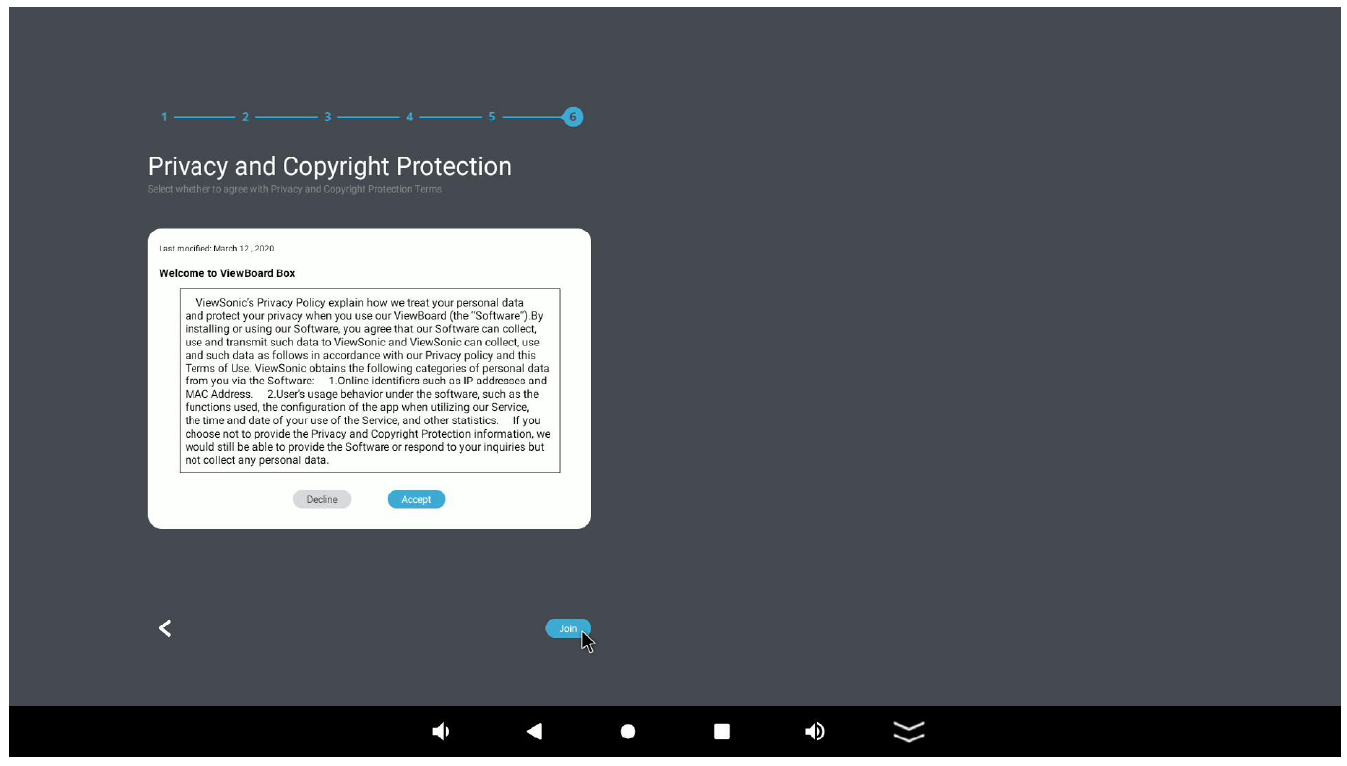
When you first turn on your VBS200-A, an initial setup wizard will launch. Please follow the on-screen instructions to set up the VBS200-A.
- Select your Language.
- Setup and verify your Network connection. Both Wi-Fi and Ethernet connections are supported.
- Set the Date & Time.
- Select your preferred System Mode. Choose between Normal and Secured Mode. In Secured Mode, preloaded applications with screen sharing capabilities will be hidden.
- Choose your Power Saving Plan. In the default setting, the VBS200-A will go into standby mode after an hour of inactivity.
- Review and Accept/Decline the Privacy and Copyright Protection terms.
vLauncher - Home Screen
Action Bar
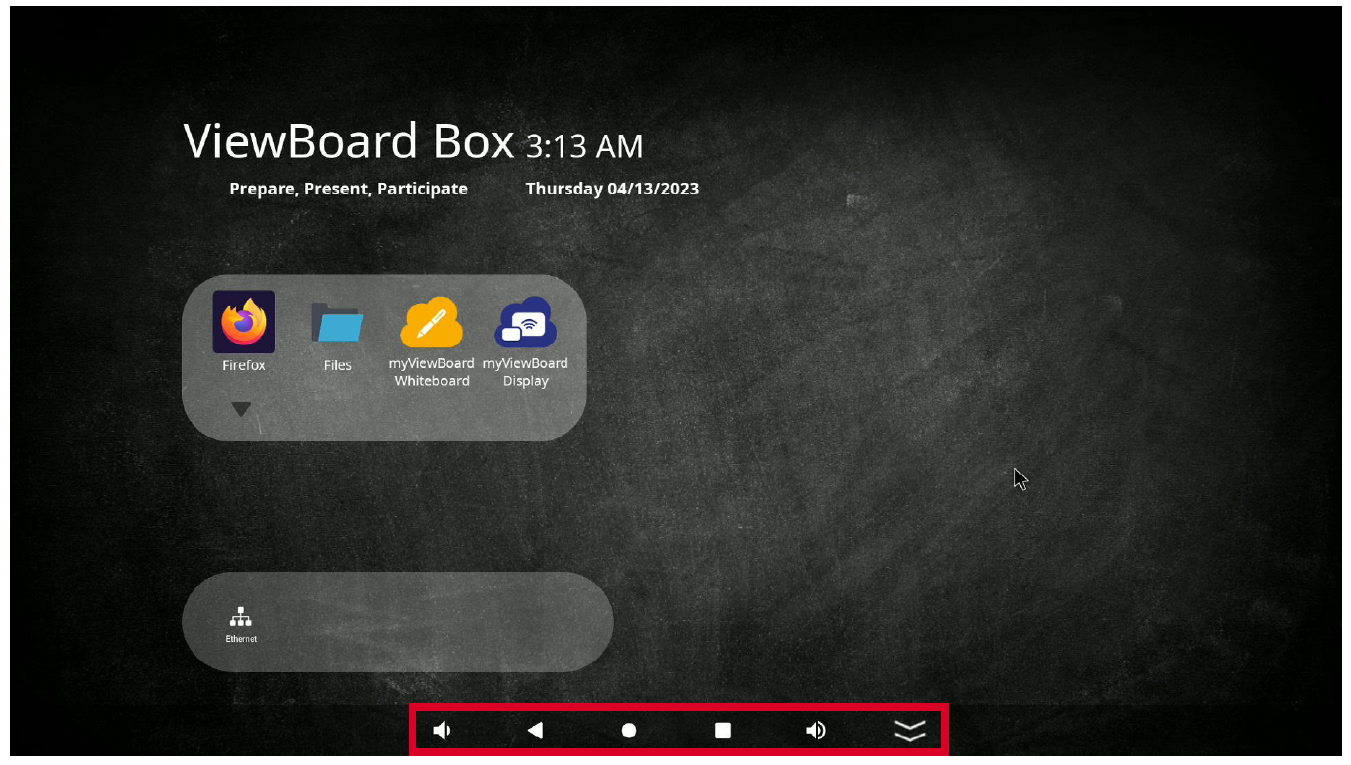
The Action Bar gives quick access to several controls.
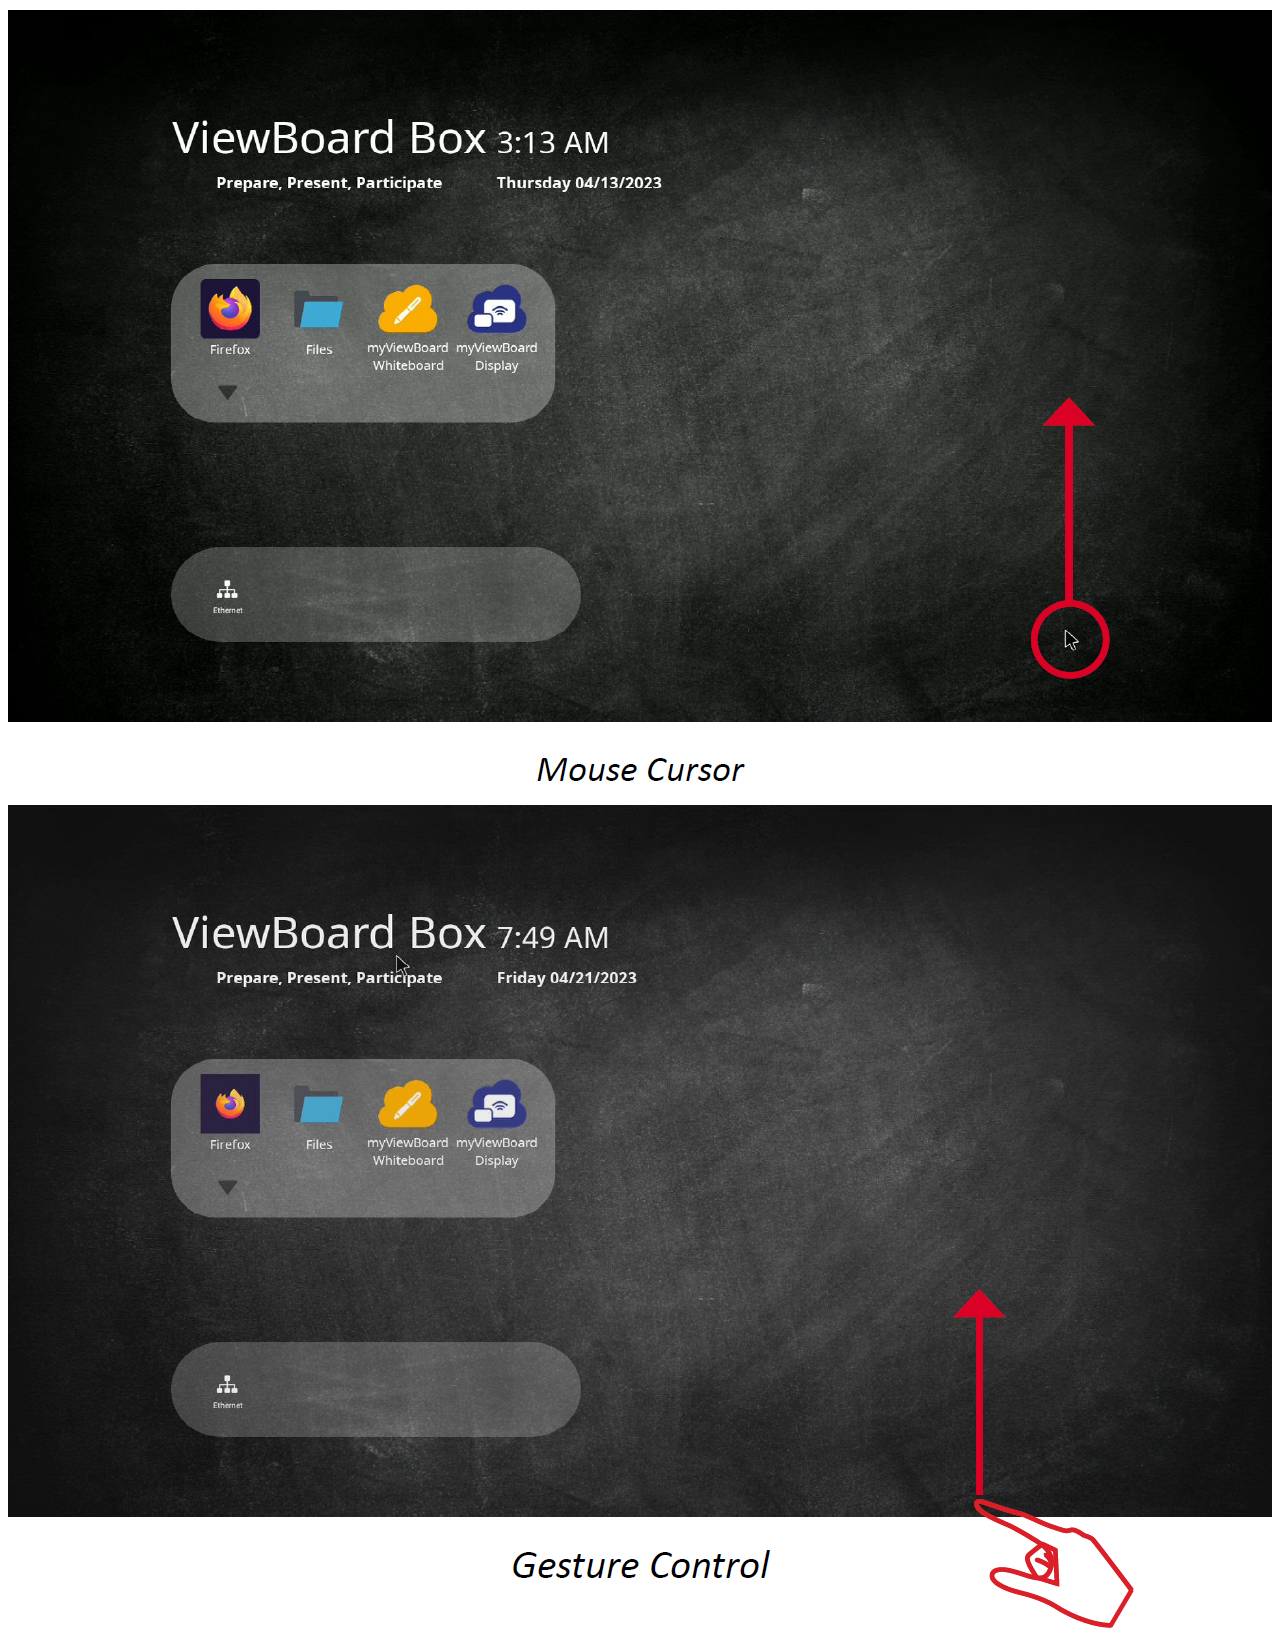
The Action Bar can be triggered by moving the mouse cursor or your finger (if your display device supports a touch back function) upwards from the bottom of the home screen.
Action Bar Icons
| Icon | Description | |
|---|---|---|
| Volume Down | Decrease the volume level. | |
| Return | Go back to the previous page. | |
| Home | Return to vLauncher (Home Screen). | |
| App Shortcut | Show the currently open applications. | |
| Volume Up | Increase the volume level. | |
| Hide | Hide the Action Bar. | |
vLauncher Message
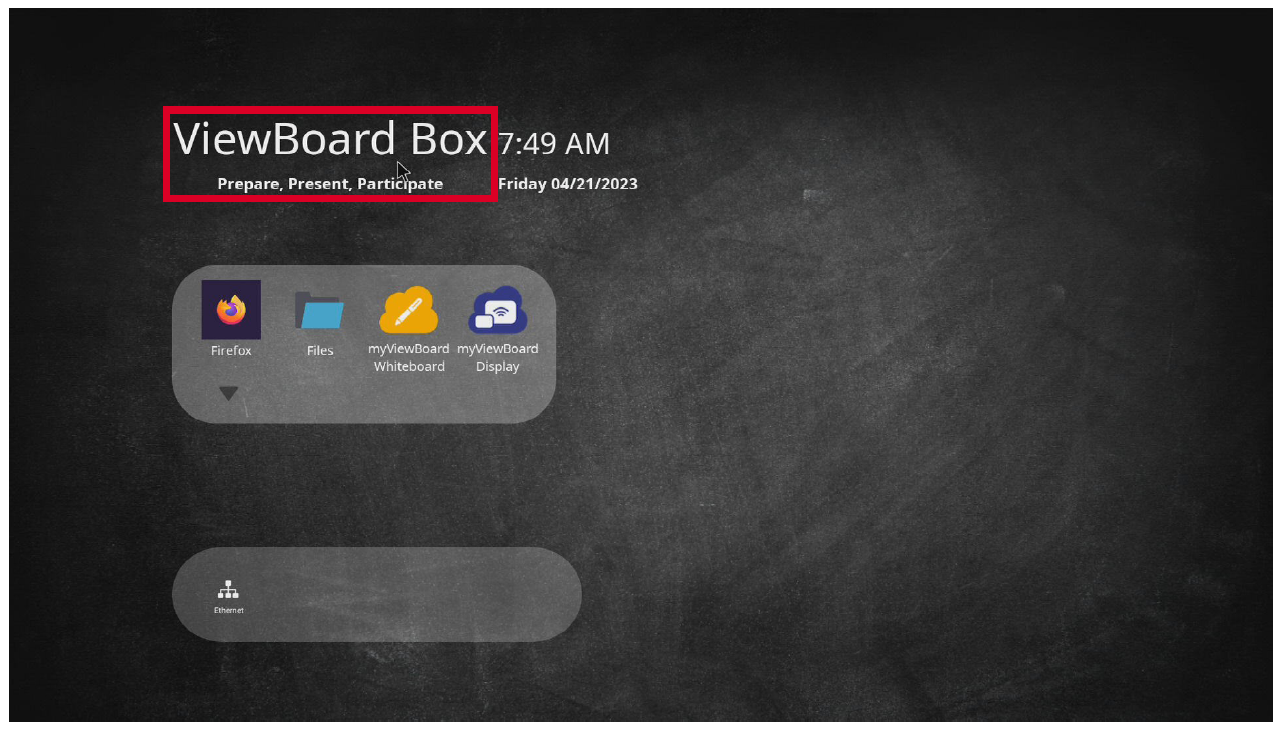
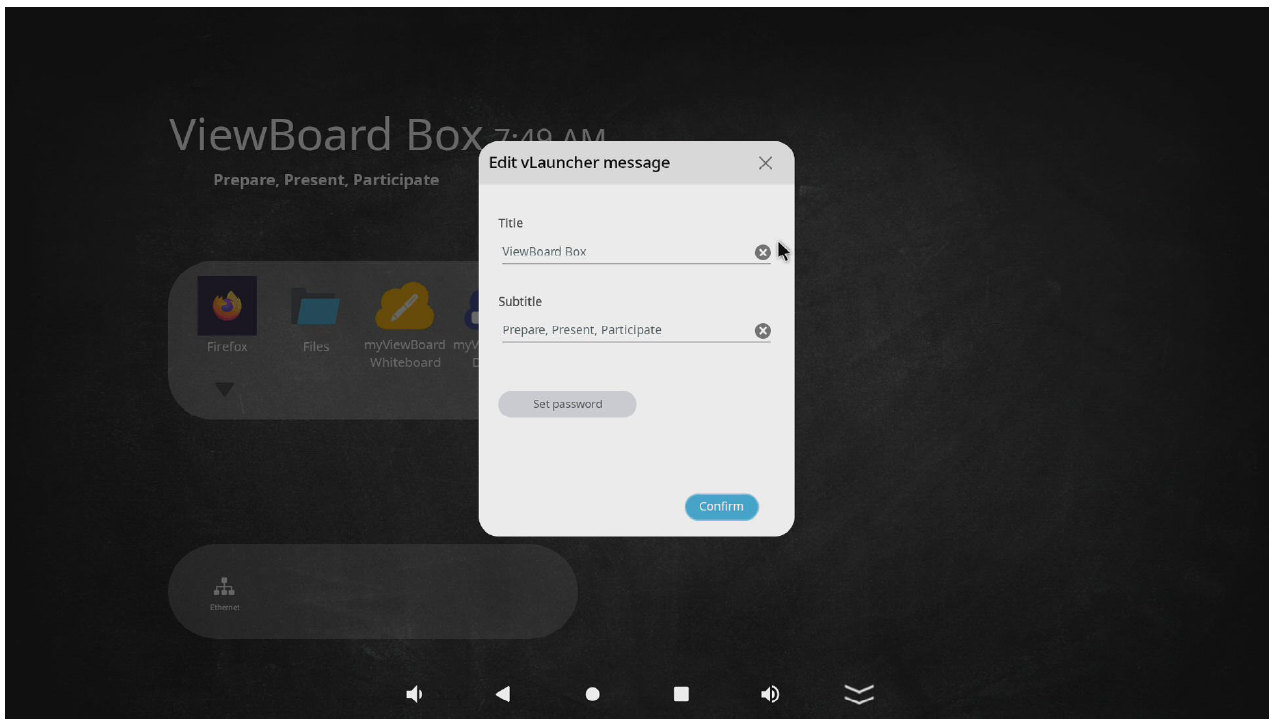
Both the vLauncher Title and Subtitle can be customized by selecting them.
Additionally, a password can be set by selecting Set Password.
Applications
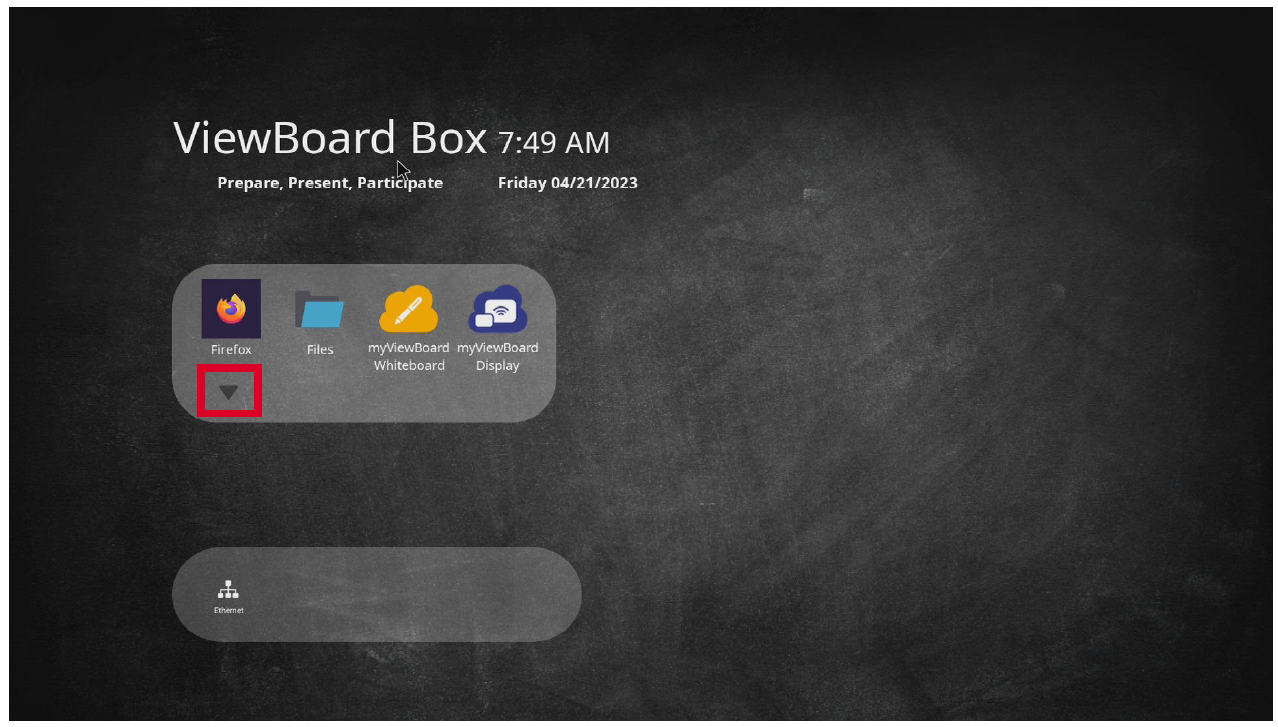
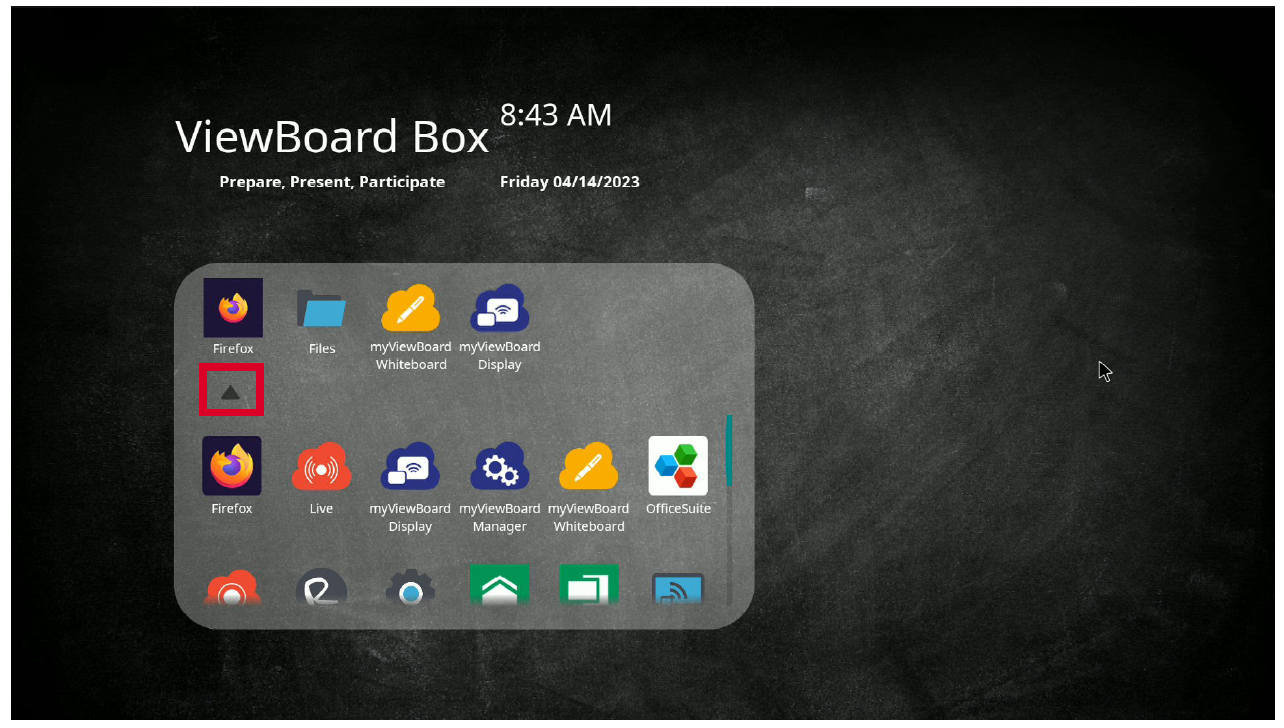
Installed applications can all be found on the welcome screen. To view all applications select the downwards arrow (▼).
To hide the application drawer, select the upwards arrow (▲).
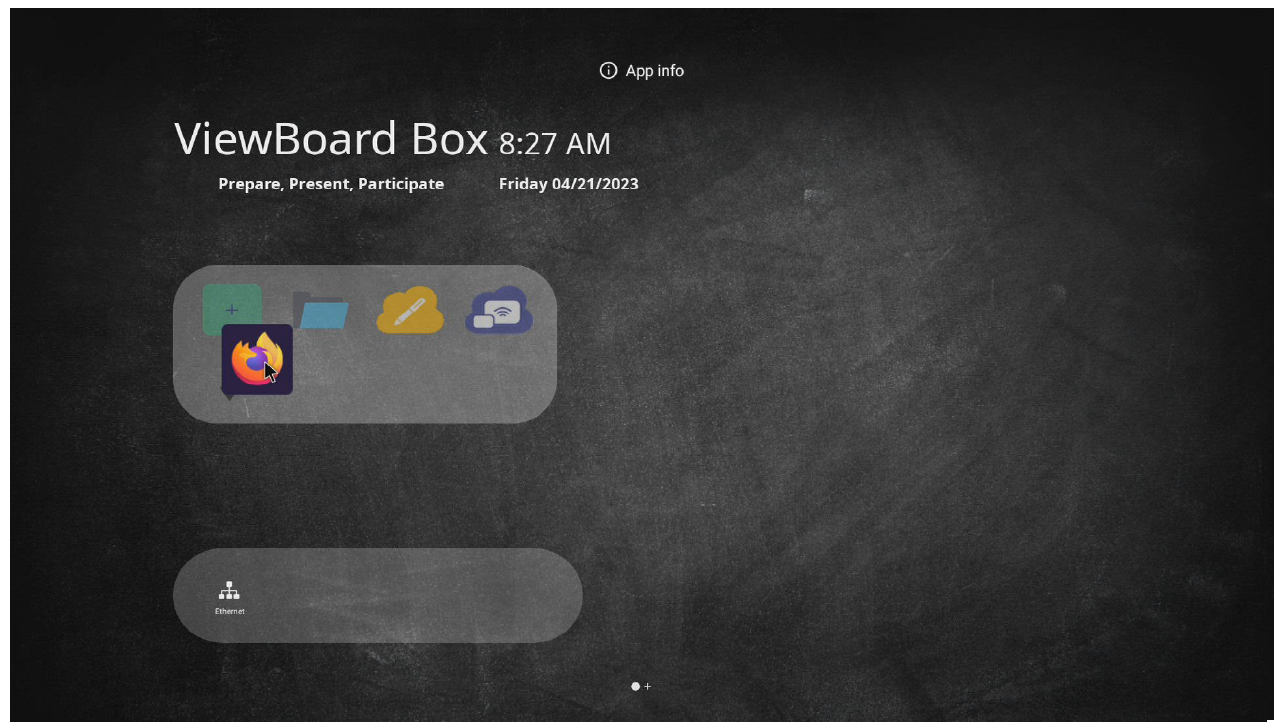
To add an application to the top applications list, select, hold, and drag the icon up.
- NOTE: Only four (4) application shortcuts can be added to the top applications list.
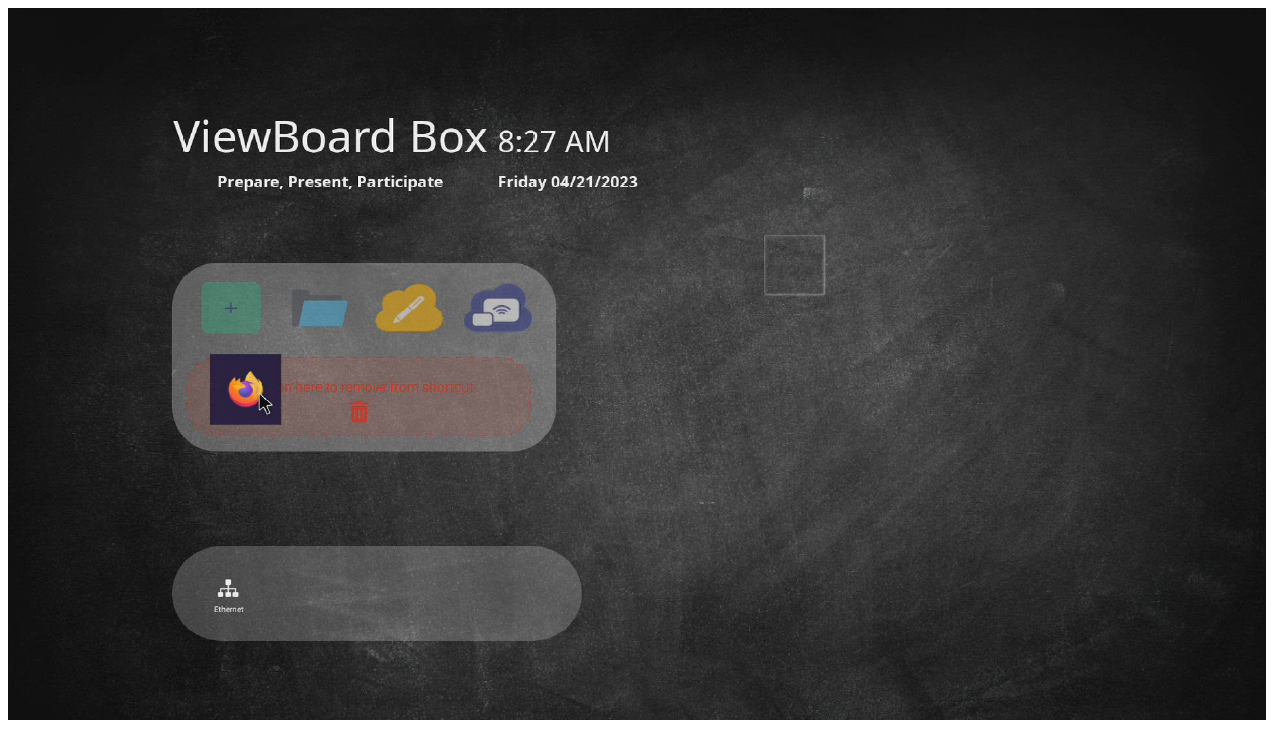
To remove an application from the top applications list, select, hold, and drag the icon down.
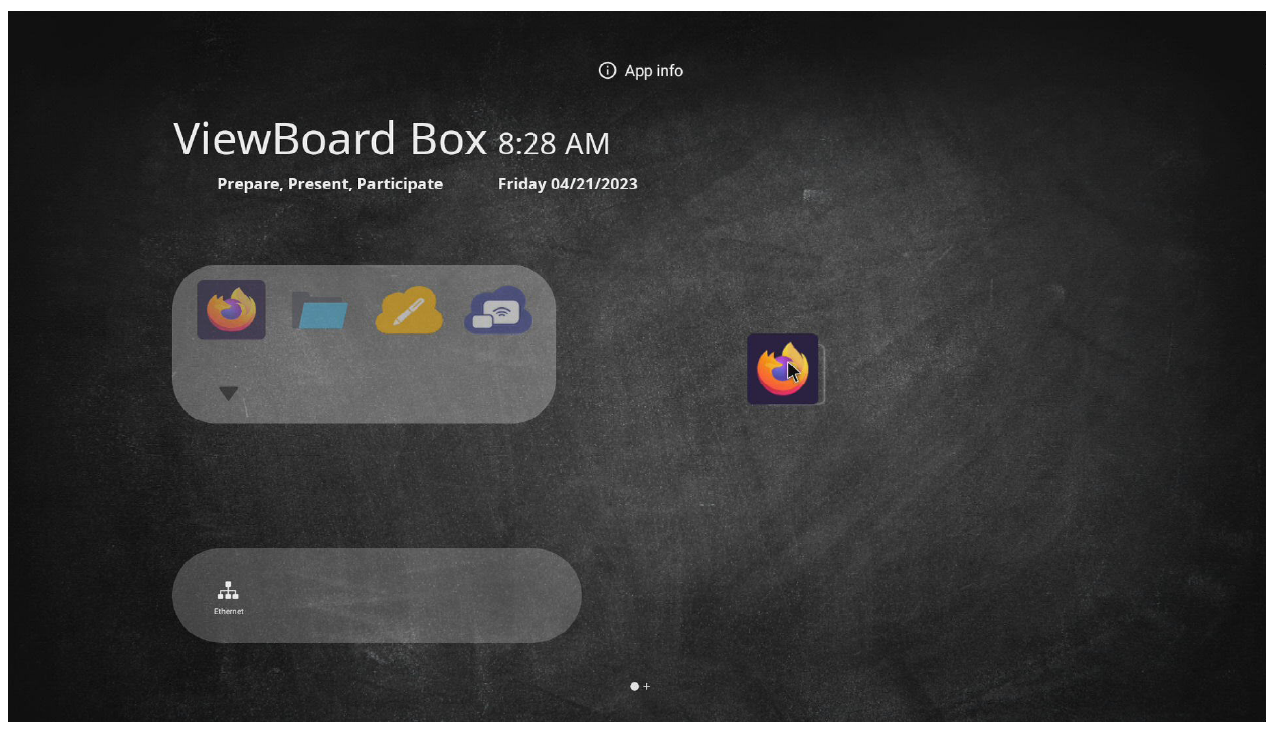
An application can also be added outside the application drawer. Simply select, hold, and drag the icon out.
Pre-installed Applications
| Icon | Description | |
|---|---|---|
 |
Files | Open, save, export, etc. files. |
| Firefox | Web browser for surfing the Internet. | |
| Live | Stream whiteboarding sessions. | |
| myViewBoard Display | Wirelessly mirror your screen to another display. | |
| myViewBoard Manager | IT management of installed ViewSonic hardware. | |
| myViewBoard Whiteboard | Digital whiteboarding software. | |
| Office Suite | Create, edit, and view Documents, Spreadsheets, Presentations, and PDFs. | |
| Record | Record, view, and save on-screen content. | |
| RevelDigital Player | Works with the RevelDigital management portal and provides the public-facing content for your own digital signage network. | |
| Settings | View and adjust system settings. | |
| Signage Launcher | Works with the ViewSonic Signage Manger portal and provides the public-facing content for your own digital signage network. | |
| Signage Player | Adjust what to allow the Signage application to access (Camera, Microphone, File and Media in your system). | |
| vCast | Wirelessly screen cast from your device. | |
| vSweeper | Clear unnecessary data and unwanted files. | |
On-Screen Display (OSD) Menu
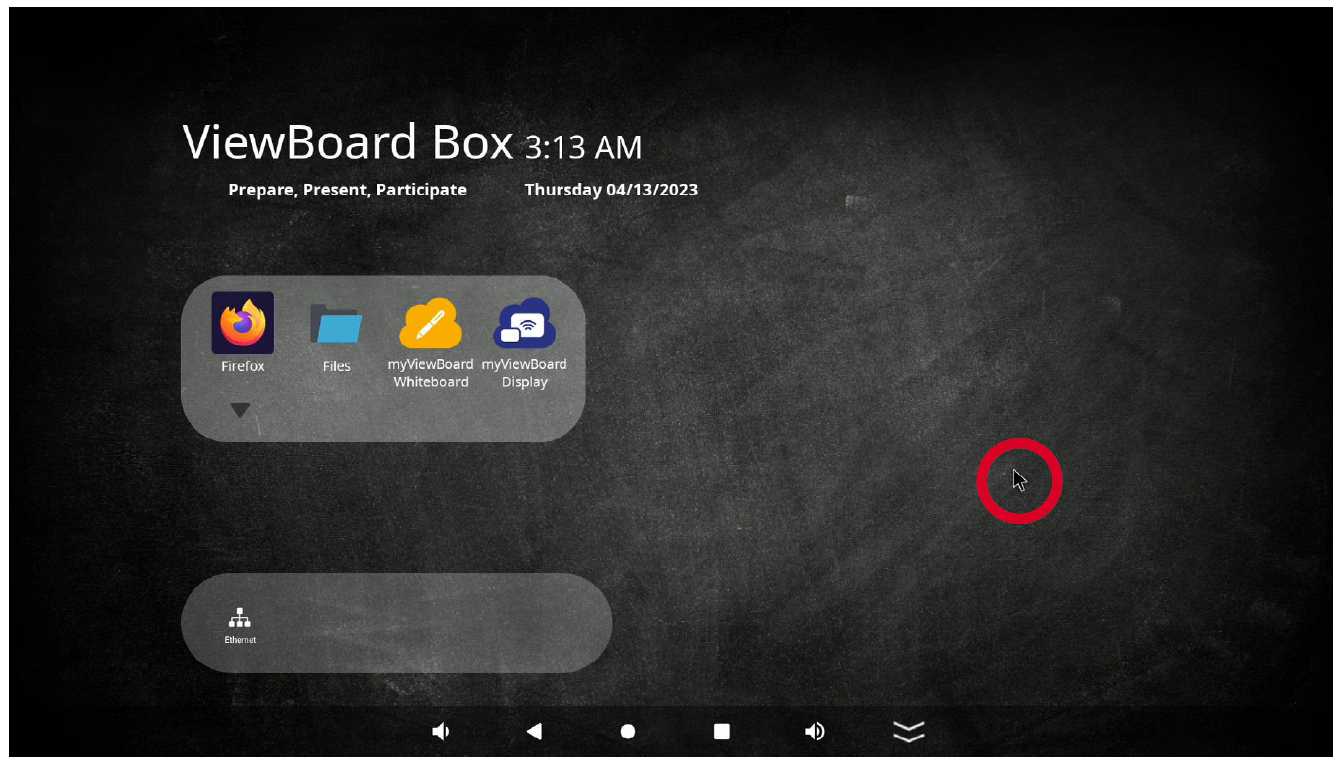
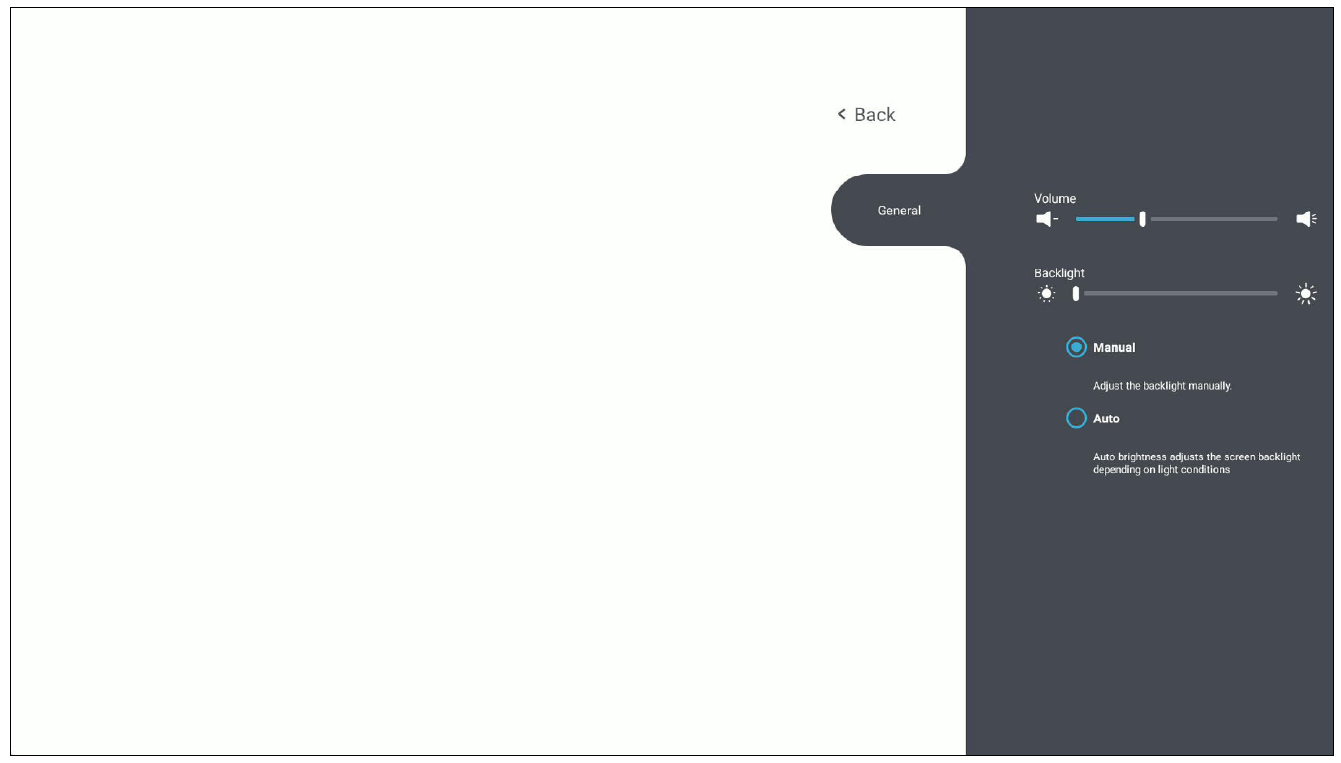
To access the General Settings, long press anywhere on the vLauncher (Home Screen) background.
General Settings
To adjust the Volume:
Drag the volume slider directly to increase or decrease the volume level.
- NOTE: The VBS200-A does not support backlight adjustment nor widgets like a standard ViewSonic IFP series display.
Settings - Embedded Player
To view and adjust the settings of the Embedded Player, select the Settings application from the application list on the vLauncher (Home Screen).
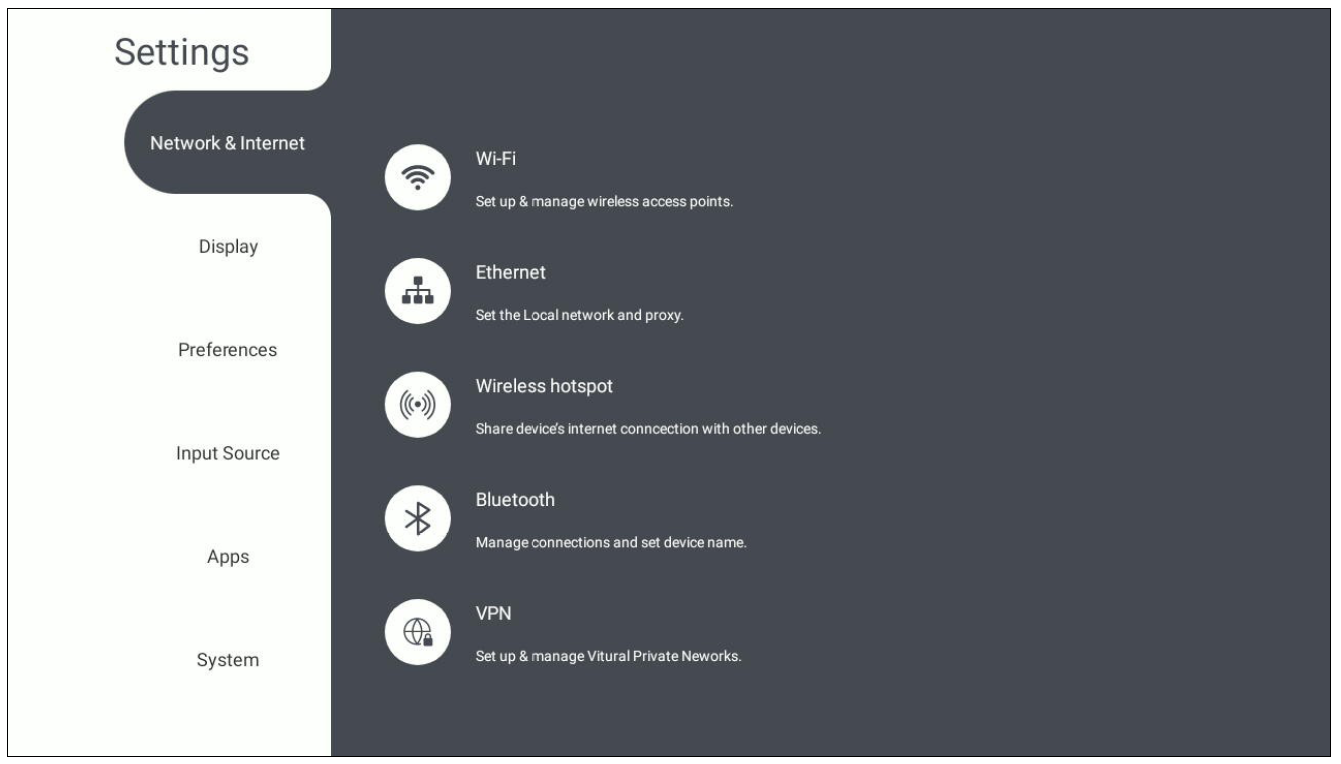
Network & Internet
Check current network connection status, set up and manage Wi-Fi, Ethernet, Bluetooth, and VPN, and establish a Wireless hotspot.
- NOTE: Both Wi-Fi and Ethernet can be used to connect to the Internet. However, Ethernet will take priority when both are connected and disable the Wi-Fi connection.
Wi-Fi
Setup and manage wireless access points.
- Select the toggle to turn Wi-Fi On or Off.
- Once On, you can: Add a Network, view Saved Networks, Refresh the network list, or view Advanced settings.
- In Advanced settings, you can toggle Network Notifications On or Off and view Network Card Info.
Ethernet
Set the local network and proxy.
- Select the drop-down list to connect/disconnect the Ethernet.
- You can adjust Local Network and Proxy settings as well.
Wireless Hotspot
Set and share my internet connection with other devices.
- Select the toggle to turn Wireless hotspot On or Off.
- Select Set up to set the Network name, Security, and Password.
Bluetooth
Manage connections, set the device name and discoverability.
- Select the toggle to turn Bluetooth On or Off. Once On, users can select a listed device to pair and connect to, rename their device, remove a device, or receive files.
- Select Received files to show all received files.
VPN
Setup and manage Virtual Private Networks (VPN). To create a VPN profile:
- Select Add VPN.
- Key in the Name.
- Select the VPN Type
- Choose to enable/disable PPP encryption (MPPE) and/or show Advanced options.
Display
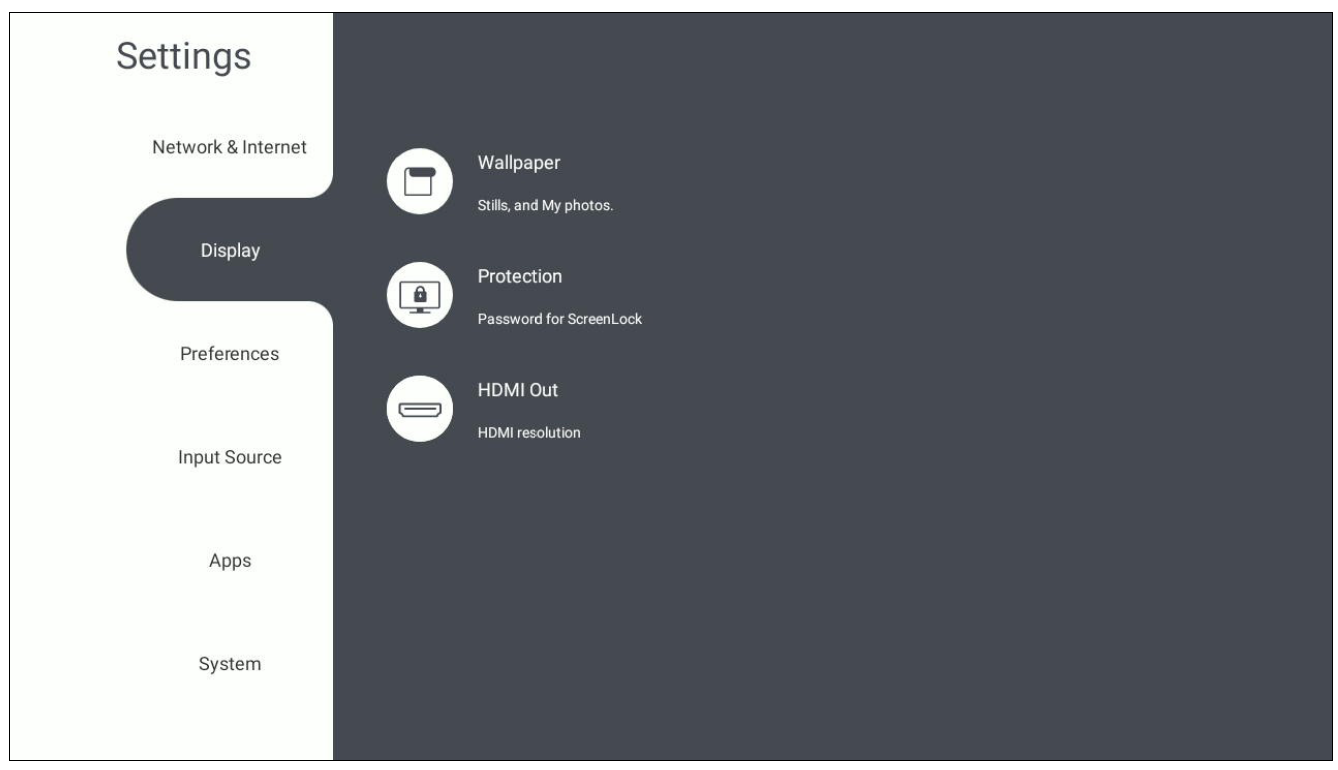
Adjust the Wallpaper, Protection, and HDMI Out settings.
Wallpaper
Users can change their wallpaper with default images, or use their own by tapping My Photos and selecting the image file.
Protection
Toggle HDCP & Copyright On or Off. HDCP is a secure protocol to protect audio and video signal transmission.
- NOTE: Grayed out content is not available for use.
HDMI Out
Adjust the HDMI Out Resolution setting when connected via HDMI Out.
- NOTE: For 4K resolution output, please plug in the HDMI cable first before plugging in the AC Adapter or Ethernet cable (PoE) for power.
Preferences
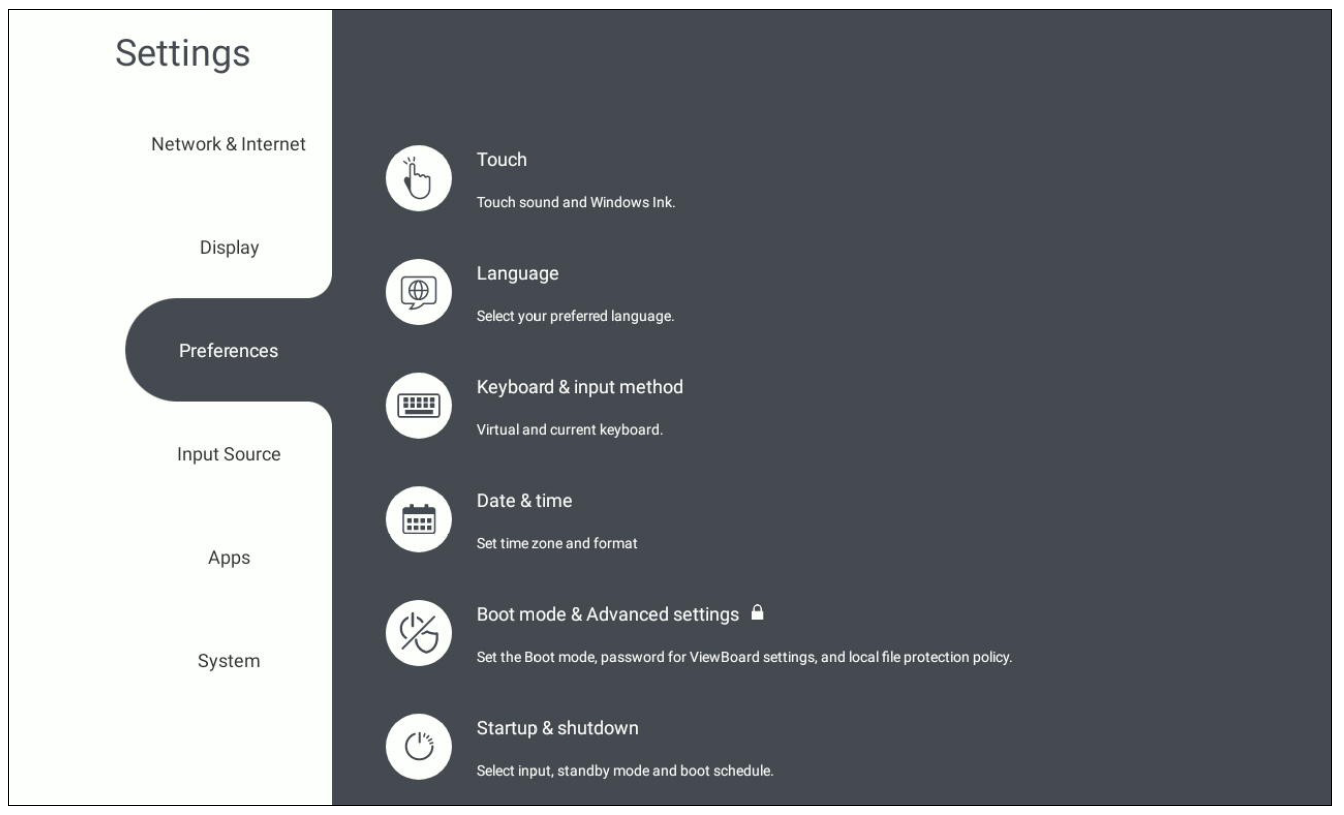
View and adjust Touch, Language, Keyboard & Input Method, Date & Time, Boot Mode & Advanced, and Startup & Shut down settings.
Touch
Toggle Touch Sounds On or Off.
Language
Choose the preferred language from the available languages.
Keyboard & Input Method
Enable/disable the visual keyboard and/or change the default input method.
Date & Time
Set the system time and format.
| Item | Description |
|---|---|
| Automatic Date & Time | When enabled, the VBS200-A will automatically synchronize the date and time via the Internet. |
| Time Zone | Select the relevant time zone. |
| Use 24-hour Format | Choose from 12-hour or 24-hour time format. Simply toggle the setting On or Off. |
| Date Format | Select the relevant date (month, day, and year) format. |
Boot Mode & Advanced Settings
Adjust the preferred boot up mode and set/reset a password.
| Item | Description |
|---|---|
| Normal Mode | Screen sharing applications will be loaded and run normally. |
| Secure Mode | Screen sharing applications will not be loaded. |
| Disable ViewBoard OS | This feature is not available on the VBS200-A. |
| Enable Password for ViewBoard Settings | Lock or unlock access to the ViewBoard Settings. |
| Boot Mode and Advanced Settings Password | Modify the Boot mode and ViewBoard Settings entry password. |
| Local File Protection Policy | Choose how long to keep locally stored files in the Files application. |
| Color Correction | Color correct the VBS200-A connected display. |
| Reset ViewBoard | Reset to the factory default settings. |
Startup & Shutdown
Adjust the preferred boot up mode and set/reset a password.
| Item | Description | ||||||
|---|---|---|---|---|---|---|---|
| Startup Input | Choose the startup input source. | ||||||
| Display Settings when NO SIGNAL | This feature is not available on the VBS200-A. | ||||||
| Standby Mode | Decide what happens when the EnergyStar Mode function is On.
| ||||||
| EnergyStar Mode | When On, the Standby Mode function will enact when the system is idle for one hour. When Off, Standby Mode will be disabled. | ||||||
| Black Screen After Startup | This feature is not available on the VBS200-A. | ||||||
| Time Switch | When enabled, the VBS200-A will turn off without any reminder after the scheduled off time is reached. | ||||||
| Schedule | Schedule a Boot and Shut Off time. |
Toolbar Settings
- NOTE: This feature is not currently available on the VBS200-A.
Input Source
Adjust the input source settings.
Label Input Source
- NOTE: This feature is not currently available on the VBS200-A.
Source
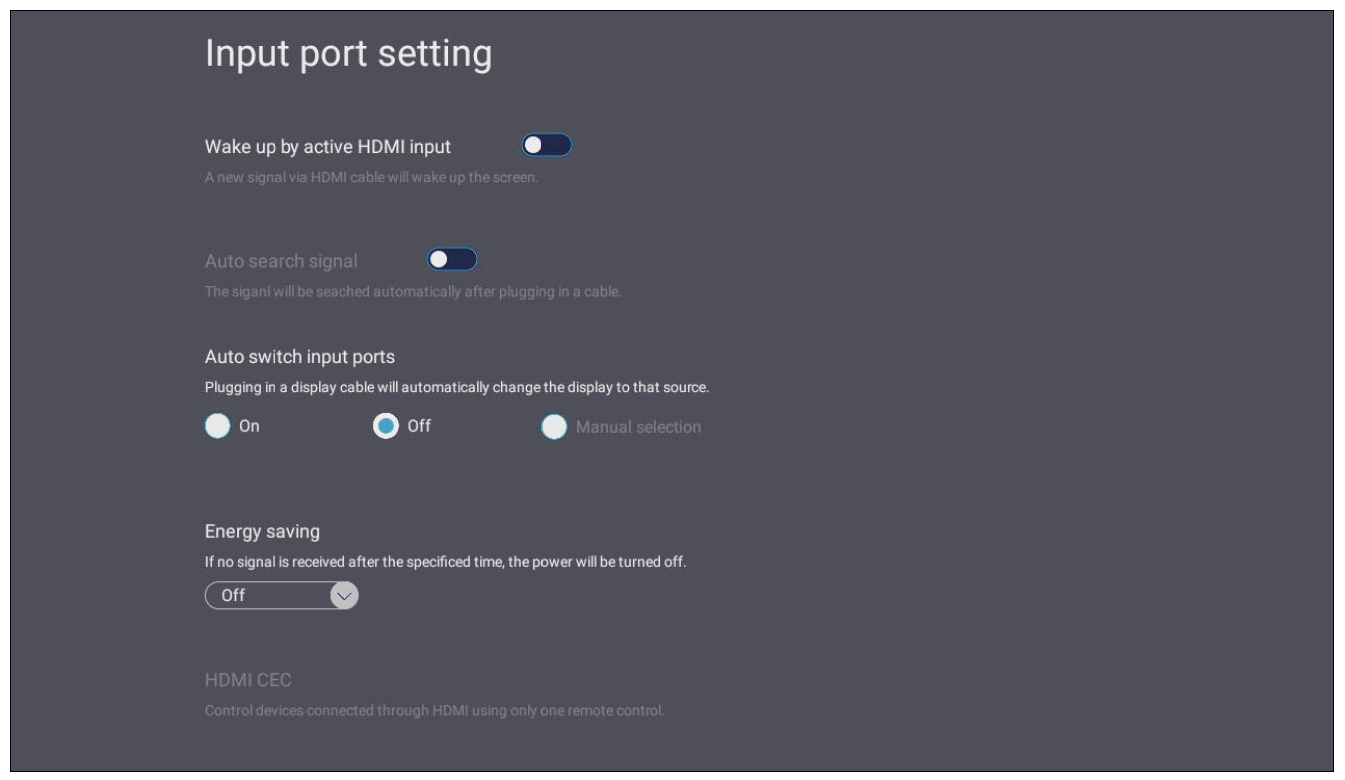
Toggle Wake up by active source, Signal auto switch, and Energy Saving plan.
| Item | Description |
|---|---|
| Wake Up by Active HDMI Input | The system will turn on automatically after plugging in an HDMI cable when the VBS200-A is in Sleep Mode. |
| Auto Search Signl | This feature is not available on the VBS200-A. |
| Auto Switch Input Ports | The input source will automatically change to the source of the display cable after it’s plugged in. |
| Energy Saving | Set a time period to power off if no input signal is detected. |
| HDMI CEC | This feature is not available on the VBS200-A. |
Apps
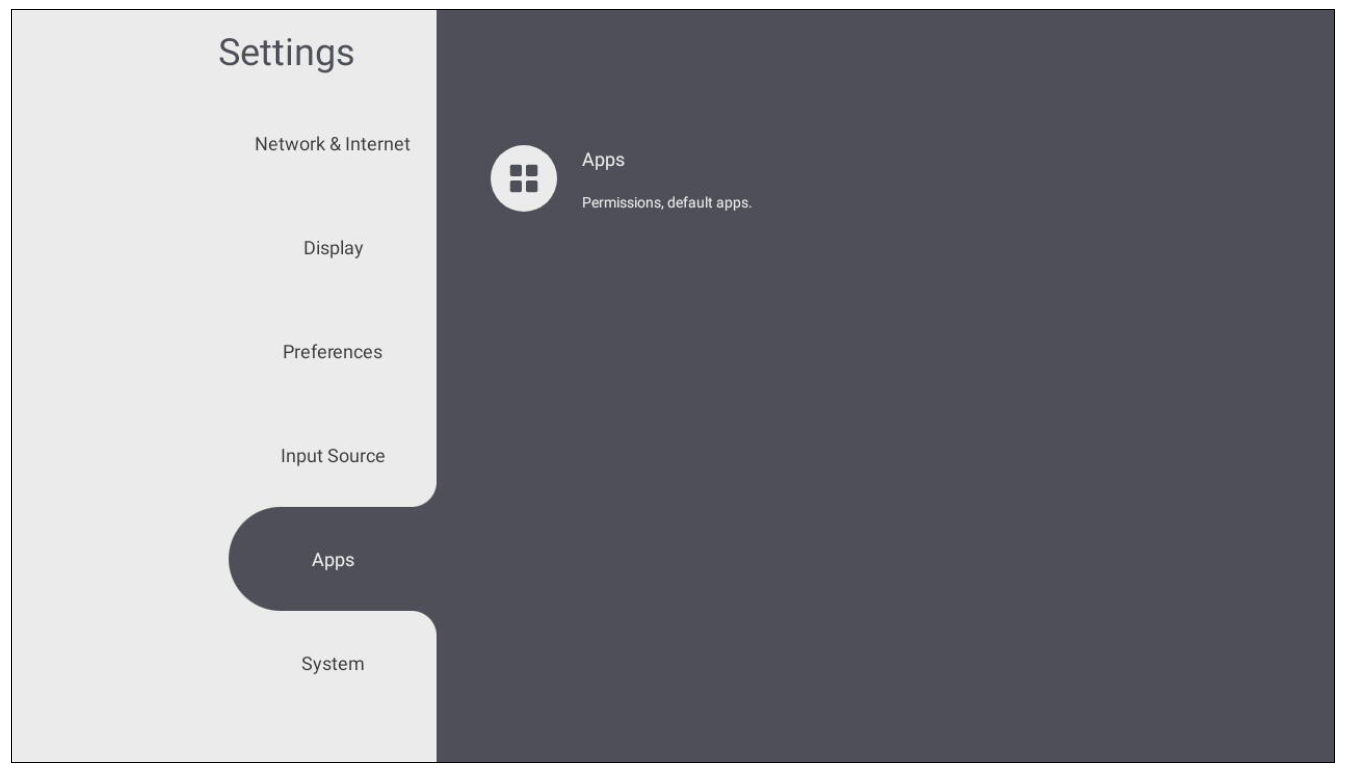
View application information and force stop, uninstall, move to USB storage, clear data, clear cache, and clear defaults.
- NOTE:
- Preloaded applications cannot be uninstalled.
- Not all applications support the Clear Data function.
System
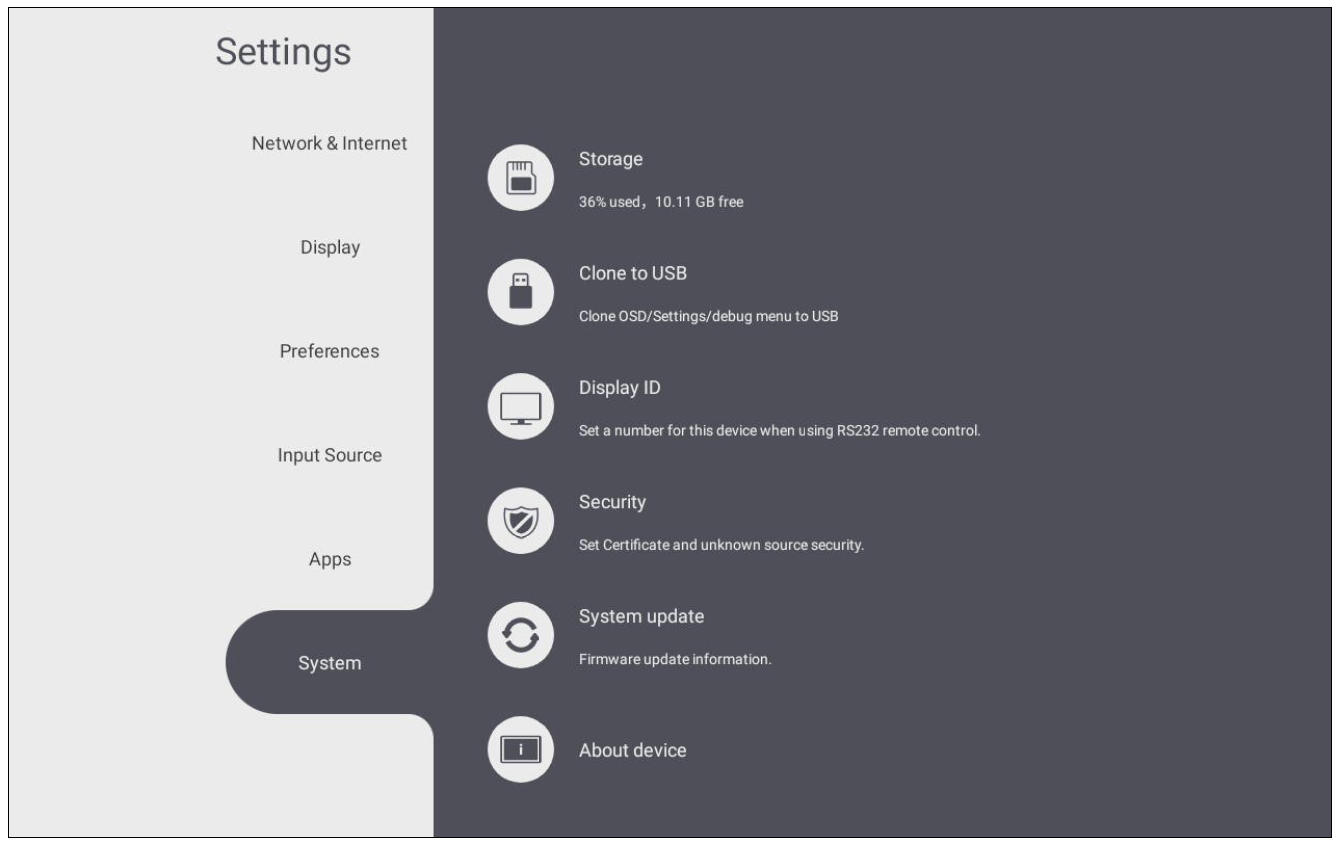
View and adjust Storage, Clone to USB, Display ID, Security, System Update, and About Device settings.
Storage
Check the remaining storage space and clear cached data for all applications.
Clone to USB
Copy settings to an external USB drive.
Display ID
Assign a number to remotely control the display by RS-232 or LAN. To assign or change the Display ID, select Edit ID and input a number.
- NOTE: The Display ID is for RS-232 users, and the range is 01~99.
Security
Review Certificates, Credentials, Unknown Source Security, and Privacy and Copyright Protection settings.
- Select Install Certificate from Storage to add additional certificates.
- Selecting Clear Credentials will remove all manually installed credentials.
- NOTE: Preloaded credentials cannot be cleared.
- Under Trusted Credentials view and edit all trusted and installed certificates. Selecting a credential will provide further detailed information.
- To allow the installation of applications from unknown sources, select the box under Unknown Source Security.
- NOTE: Applications from unknown sources may not be compatible or work properly
System Update
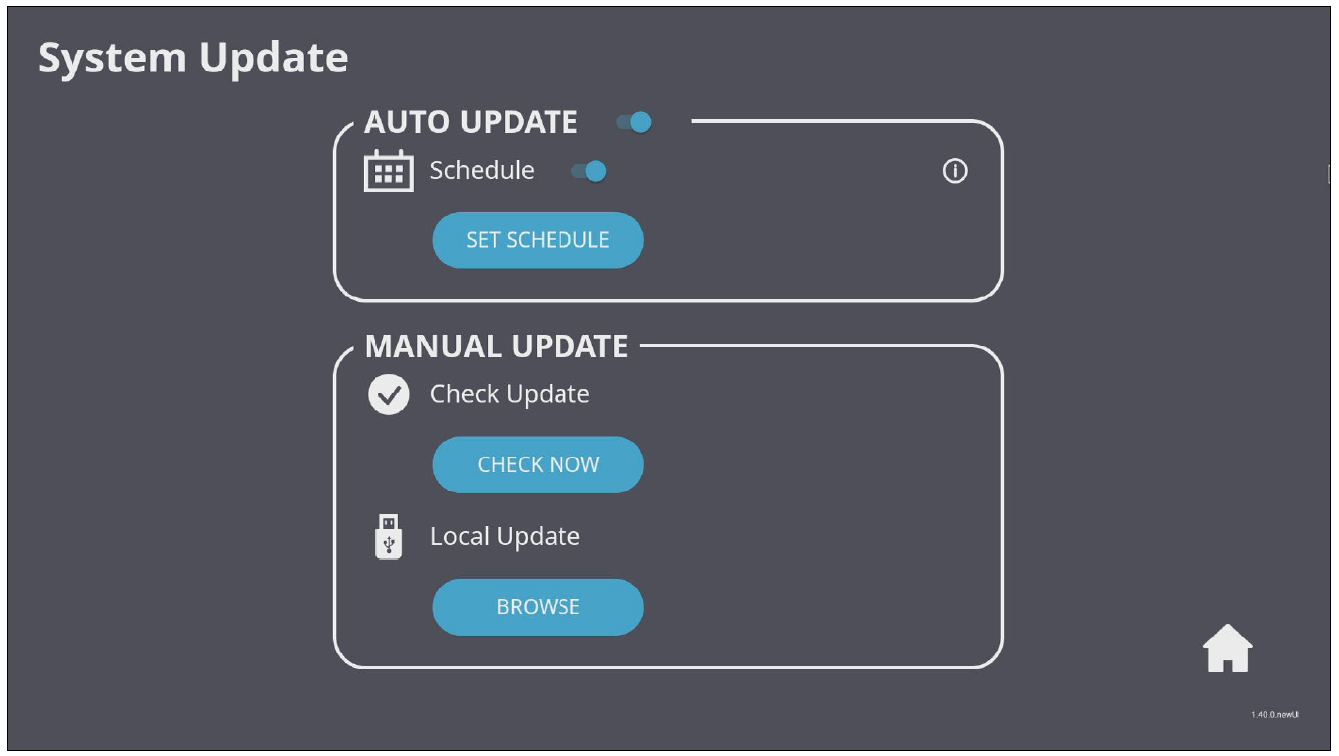
The VBS200-A automatically searches for software updates whenever connected to the Internet (OTA). With just one click, users can update their VBS200-A firmware version.
| Item | Description |
|---|---|
| Auto Update | The system will automatically check for a new version. If a new version is found, the system will automatically update. After the update is complete, the system will reboot. |
| Schedule | If ON, a specific update time can be set. |
| Manual Update | Update the firmware manually. |
About Device
Display Embedded Player information, Legal information, and Asset Tagging.
- The asset information can be adjusted by selecting Edit.
- Select Legal Information to check open source licenses. Also, by selecting the LGPL Source Code it will be downloaded to the Download folder of the system.


