VB-CAM-201 Network
Getting the Camera's IP Address
- NOTE: The Camera IP address, by default, is set as 'Fixed IP address'. Once you follow the below steps to connect to the camera, you can adjust the setting to 'Dynamic IP address' and let your Router/DHCP server assign the network setting to the camera automatically.
The camera’s factory default IP address is 192.168.100.88. To check this IP address, you can use the remote control to open the menu and find the intranet setting in the INFORMATION page.
Connect to a Computer
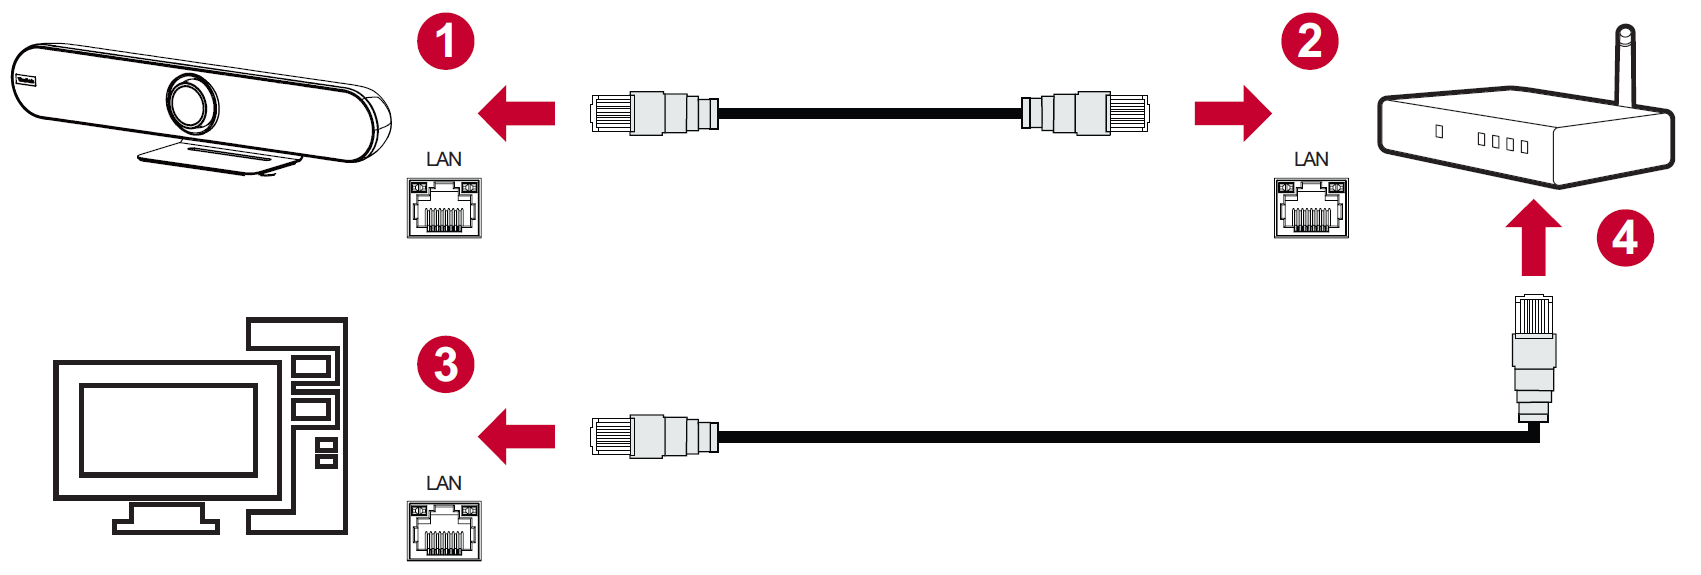
Connect the camera to a computer via a network cable directly.
- Connect one end of a CAT5/5e/6 network cable to the camera.
- Connect the other end of the network cable to the Ethernet interface of the computer (LAN port).
- Connect the camera to a power supply.
- Configure the computer network setting to the IP address 192.168.100.2 and subnet mask setting to 255.255.255.0.
Connect to a Router
Connect the camera and computer to the same router via a network cable.
- Connect one end of a CAT5/5e/6 network cable to the camera.
- Connect the other end of the network cable to the Ethernet interface of the router (LAN port).
- Connect the camera to a power supply.
- Connect the network cable to the Ethernet interface of the computer and router (LAN port).
- Configure the computer network setting to the IP address 192.168.100.2 and subnet mask setting to 255.255.255.0.
Setup Camera
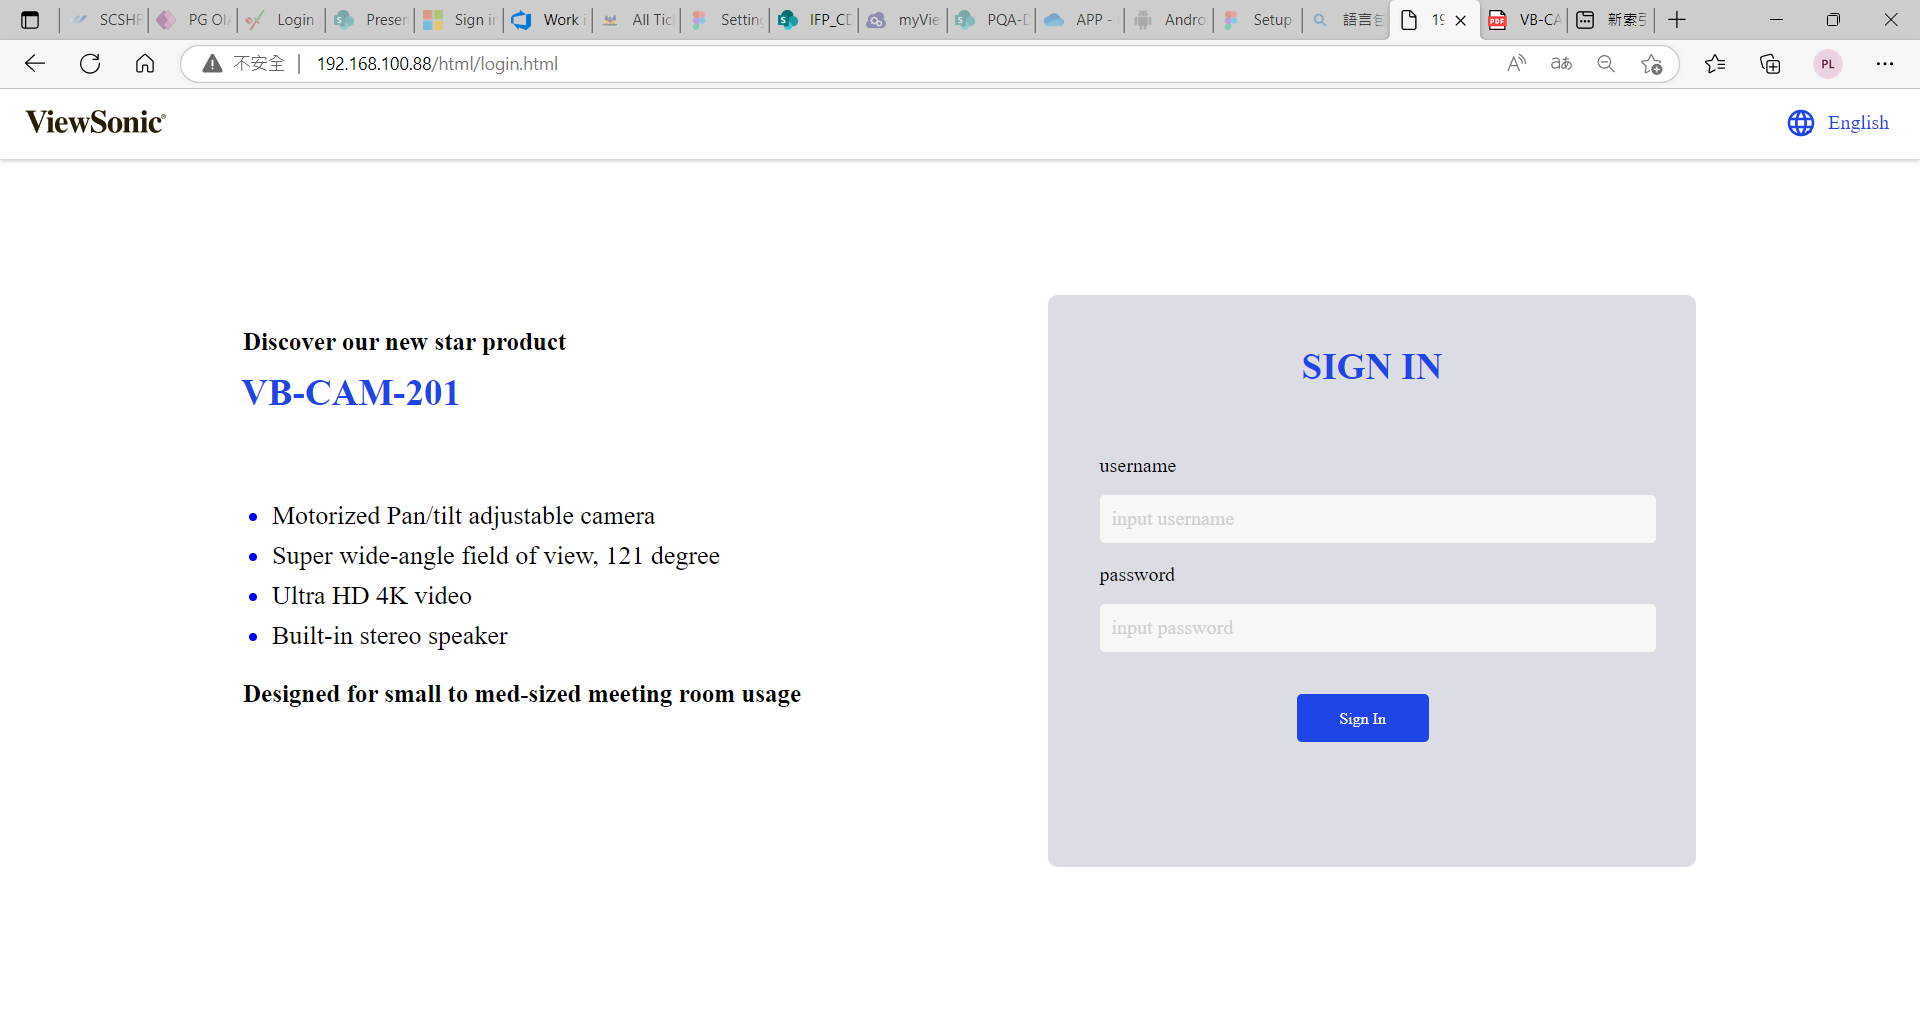
Open your web browser and enter: http://192.168.100.88 You will see the login web page as below if your cables are connected and network settings are correct.
There are two accounts built into the camera system:
- Administrator - The default username is admin, password is test. This account can access all functions on the web page.
- Guest – The default username is guest, password is test. This account only can access the basic functions on the web page.
- NOTE: The username and password can be changed in the SETTINGS menu.
Preview Menu
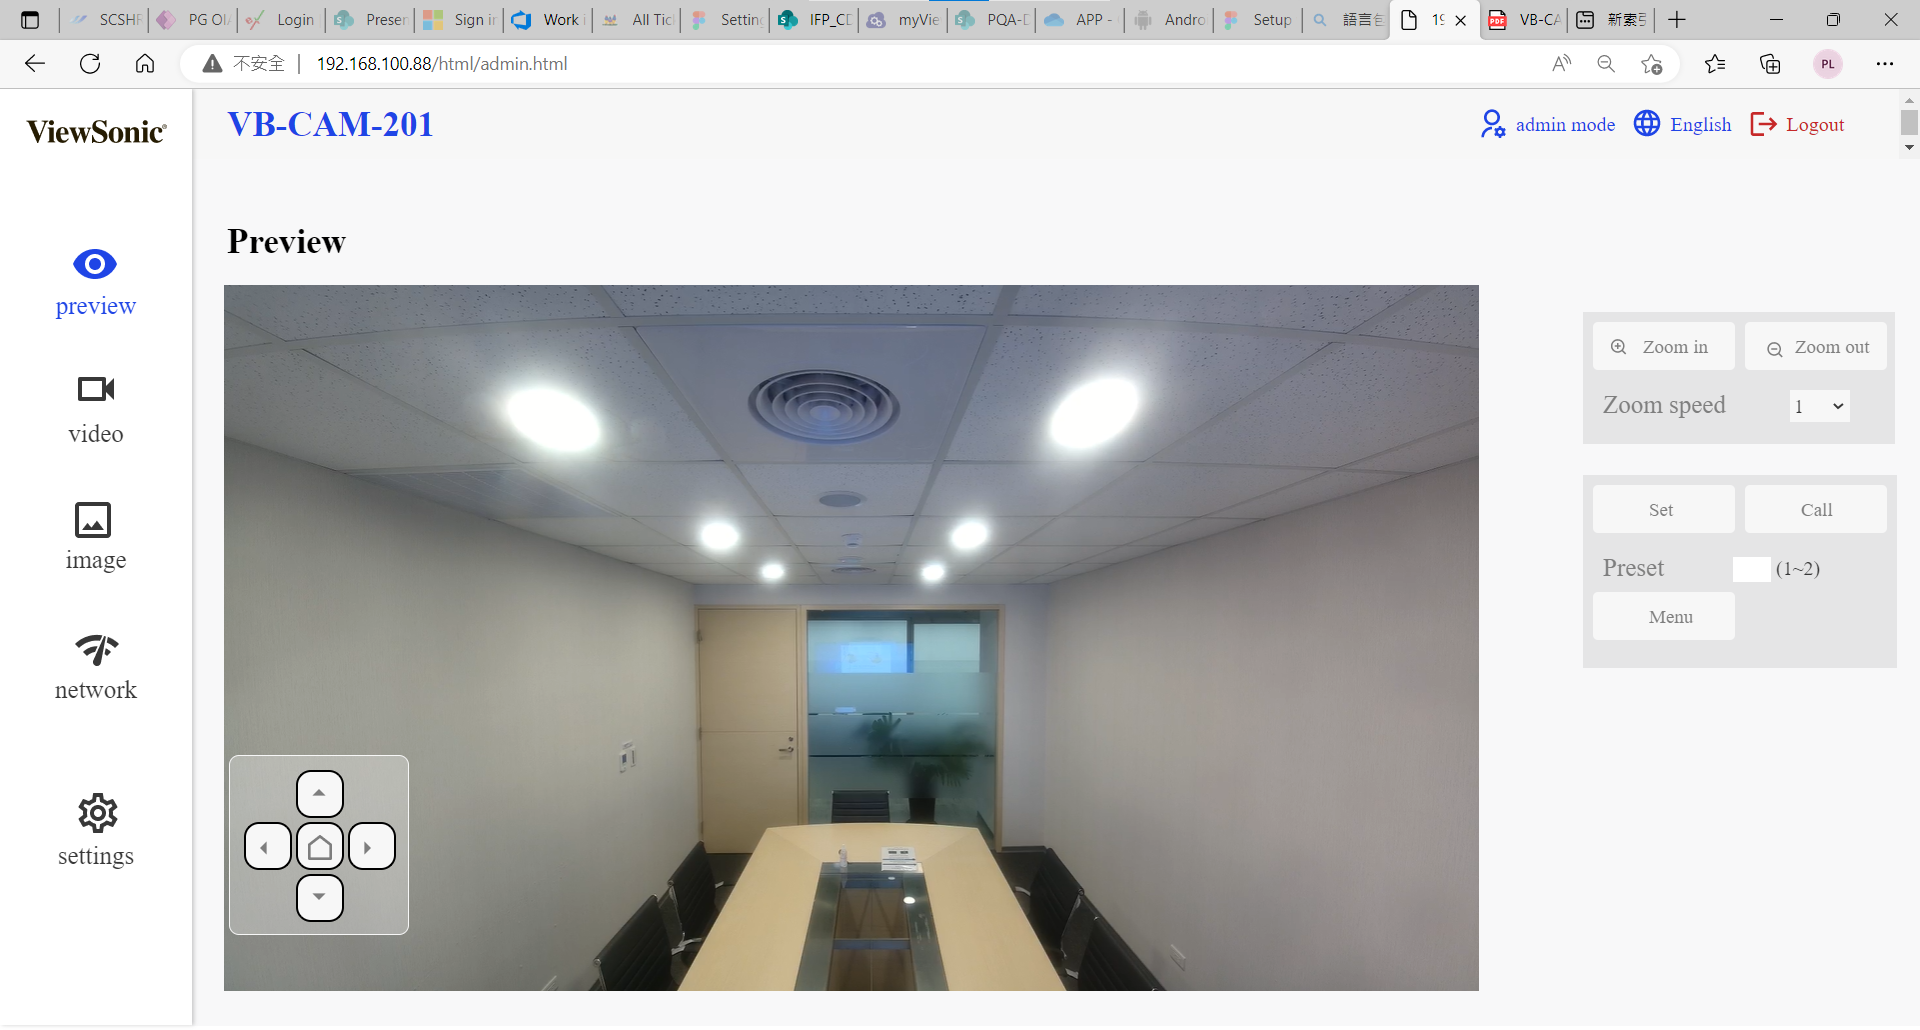
There are three main functions in this menu:
- Zoom adjust
- Set and call presets
- Pan, Tilt, and On-Screen Display (OSD) menu control
Zoom
Manually adjust the zoom of the camera.
- NOTE: The larger the number, the faster the in/out “zoom speed”.
Preset
Preset positions are the camera’s memorized Pan, Tilt, and Zoom position that can be recalled.
To set a preset position:
- Adjust the Pan, Tilt, and Zoom to your desired position.
- Key in the number you want to assign to this position.
- Click the Set button to save this position.
To recall a preset position:
- Input the preset number you want to call back.
- Click the Call button to recall the position.
- The camera will adjust the Pan, Tilt, and Zoom to the position automatically.
Up/Down/Left/Right/Home Button
These buttons can control the Pan and Tilt movement and the On-Screen Display (OSD) menu.
To adjust the OSD menu:
- If there is no OSD menu displayed on the screen, click the Menu button via mouse curser to open the OSD menu.
- Click the Up/Down/Left/Right/Home button to select and change the camera’s function.
To adjust Pan and Tilt:
- Make sure the OSD menu is closed. If it is not, click the Menu button to close the OSD menu.
- Use the Up/Down button to control the Pan angle; use the Left/Right button to control the Tilt angle.
Video Menu
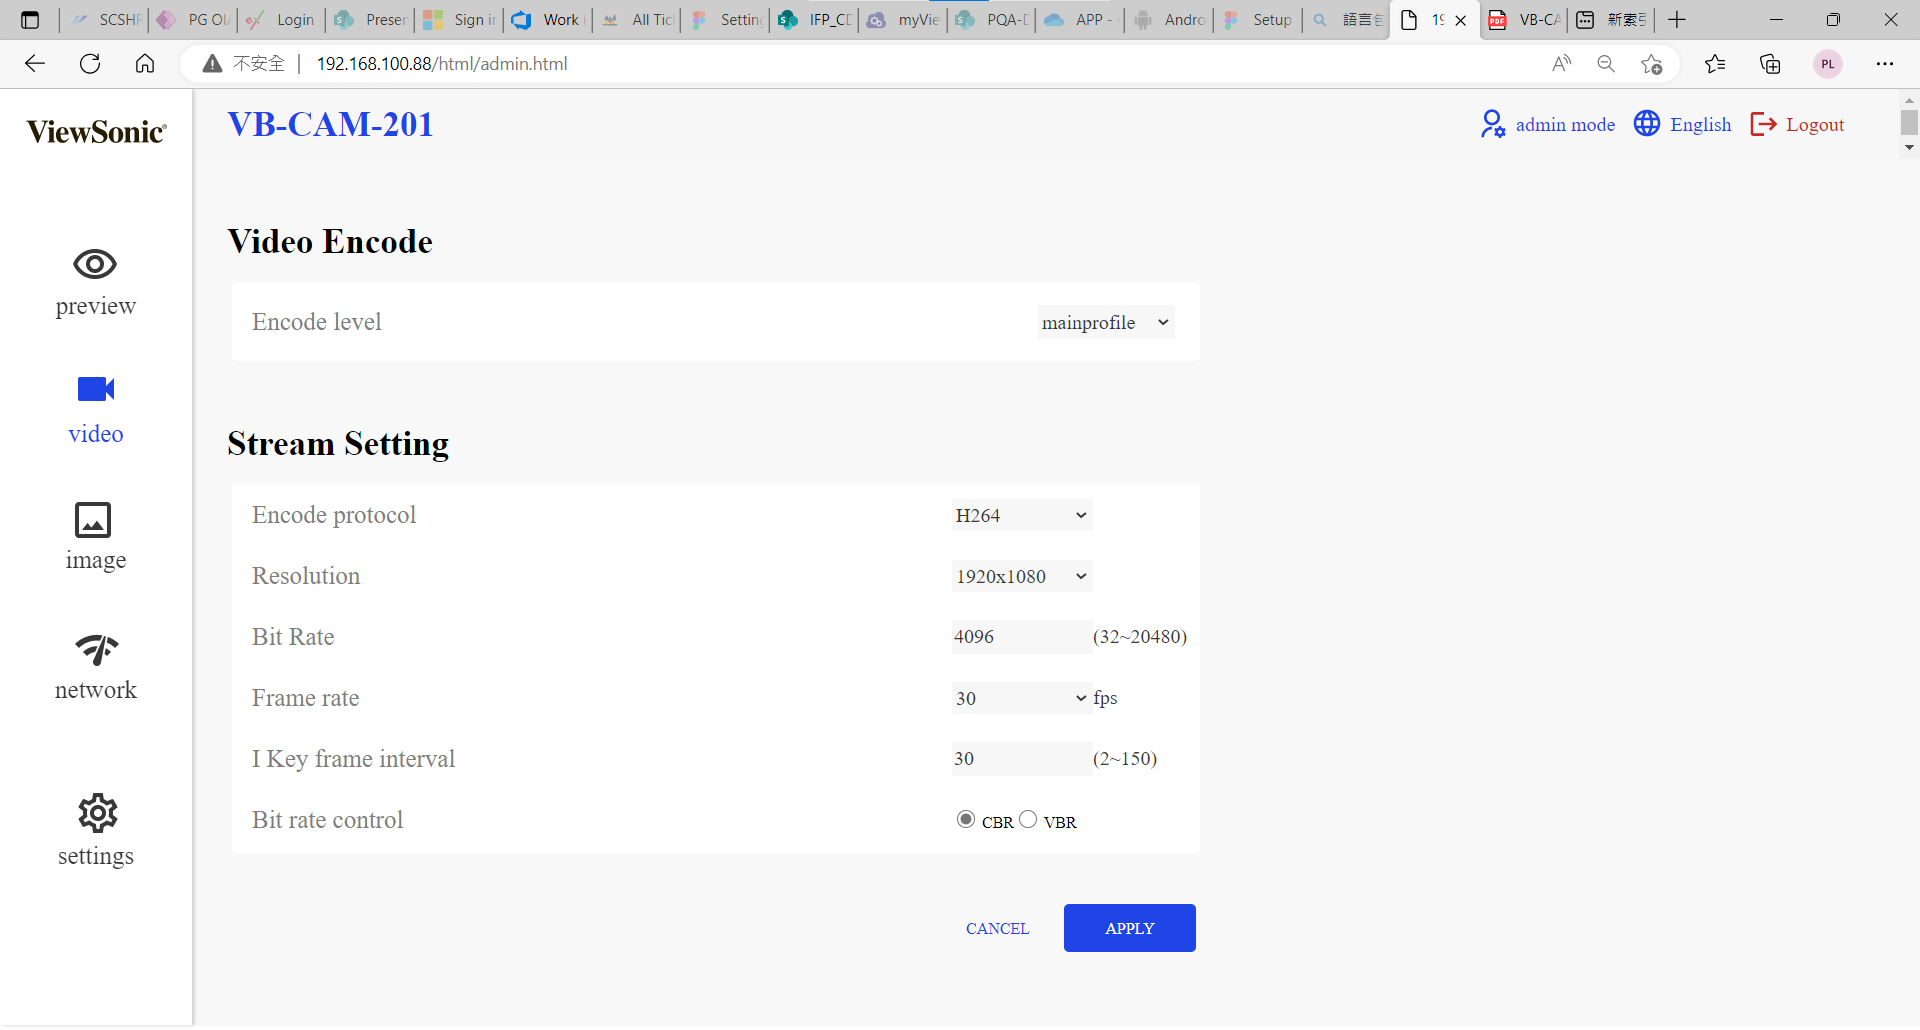
Video Encode
Encode level
- Default: Mainprofile
- Baseline: A simple profile with a low compression ratio.
- Main: An intermediate profile with a medium compression ratio.
- High: A complex profile with a high compression ratio.
First Stream
Encode protocol
- Default: H264
- Video stream compress format, this camera supports two types of format: H.264 and MJPEG.
- H264 format needs more performance to decode and encode, but less bandwidth requirement.
- MJPEG format is easier for backend editing.
Resolution
- Default: 1920 x 1080
- Choose the resolution for the video stream.
Bit Rate
- Default: 4096
- The bigger the value, the better the video quality; however, more bandwidth is required.
Frame rate
- Default: 30 FPS
- Select the number of images to be transmitted per second.
I Key frame interval
- Default: 30
- Select how often an I frame should be sent (H.264 only). The more often an I frame (full image) is sent, the better the video quality is; however, more bandwidth is required.
Bit rate control
- Default: CBR
- CBR: keeps the bit rate constant at the set value, regardless of the quality.
- VBR: keeps the video quality constant at the set value, regardless of the maximum bit rate.
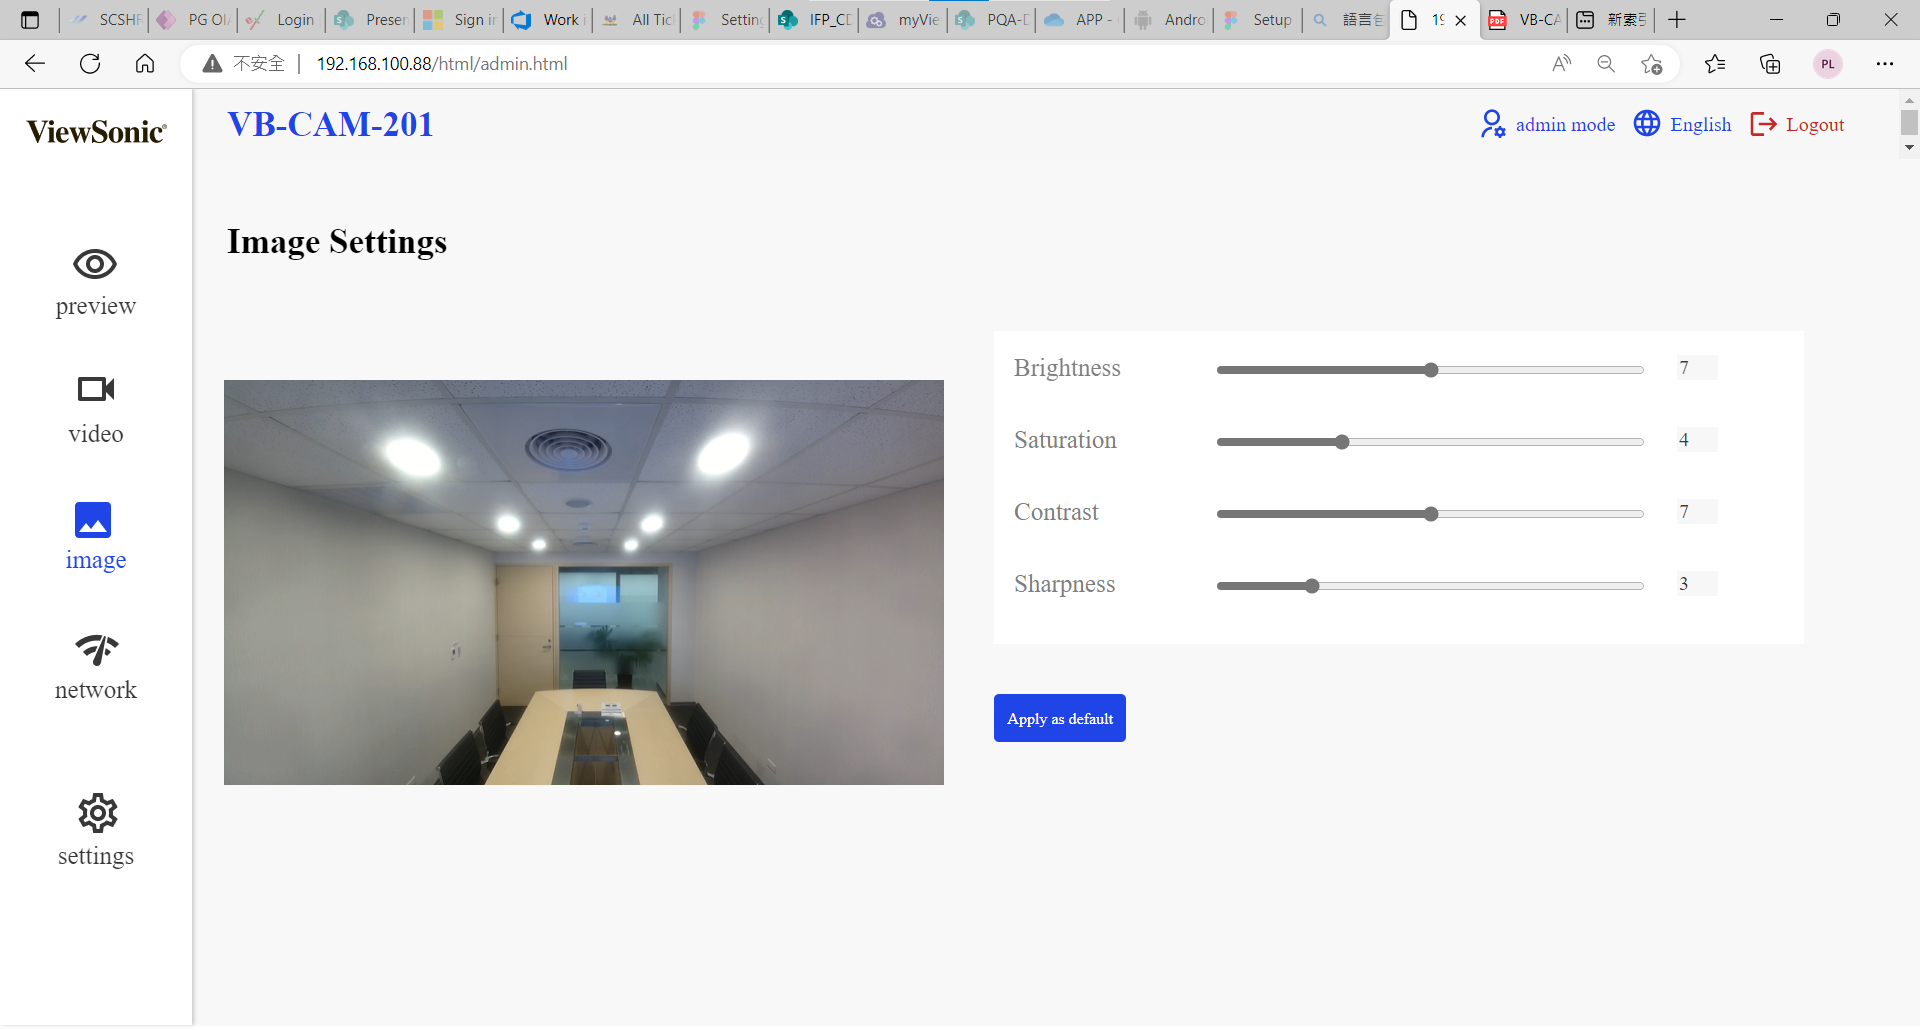
Image Menu
Brightness
Brightness of the video image. Adjust these values to suit the ambient conditions.
Saturation
Saturation of the video image. Adjust these values to suit the ambient conditions.
Contrast
Contrast of the video image. Adjust these values to suit the ambient conditions.
Sharpness
Adjust these values to increase/decrease the clarity of detail in the video image.
- NOTE: A higher sharpness value increases the noise in the video image.
Apply as default
Click this button to set the Brightness, Saturation, Contrast, and Sharpness back to the default value.
Network Menu
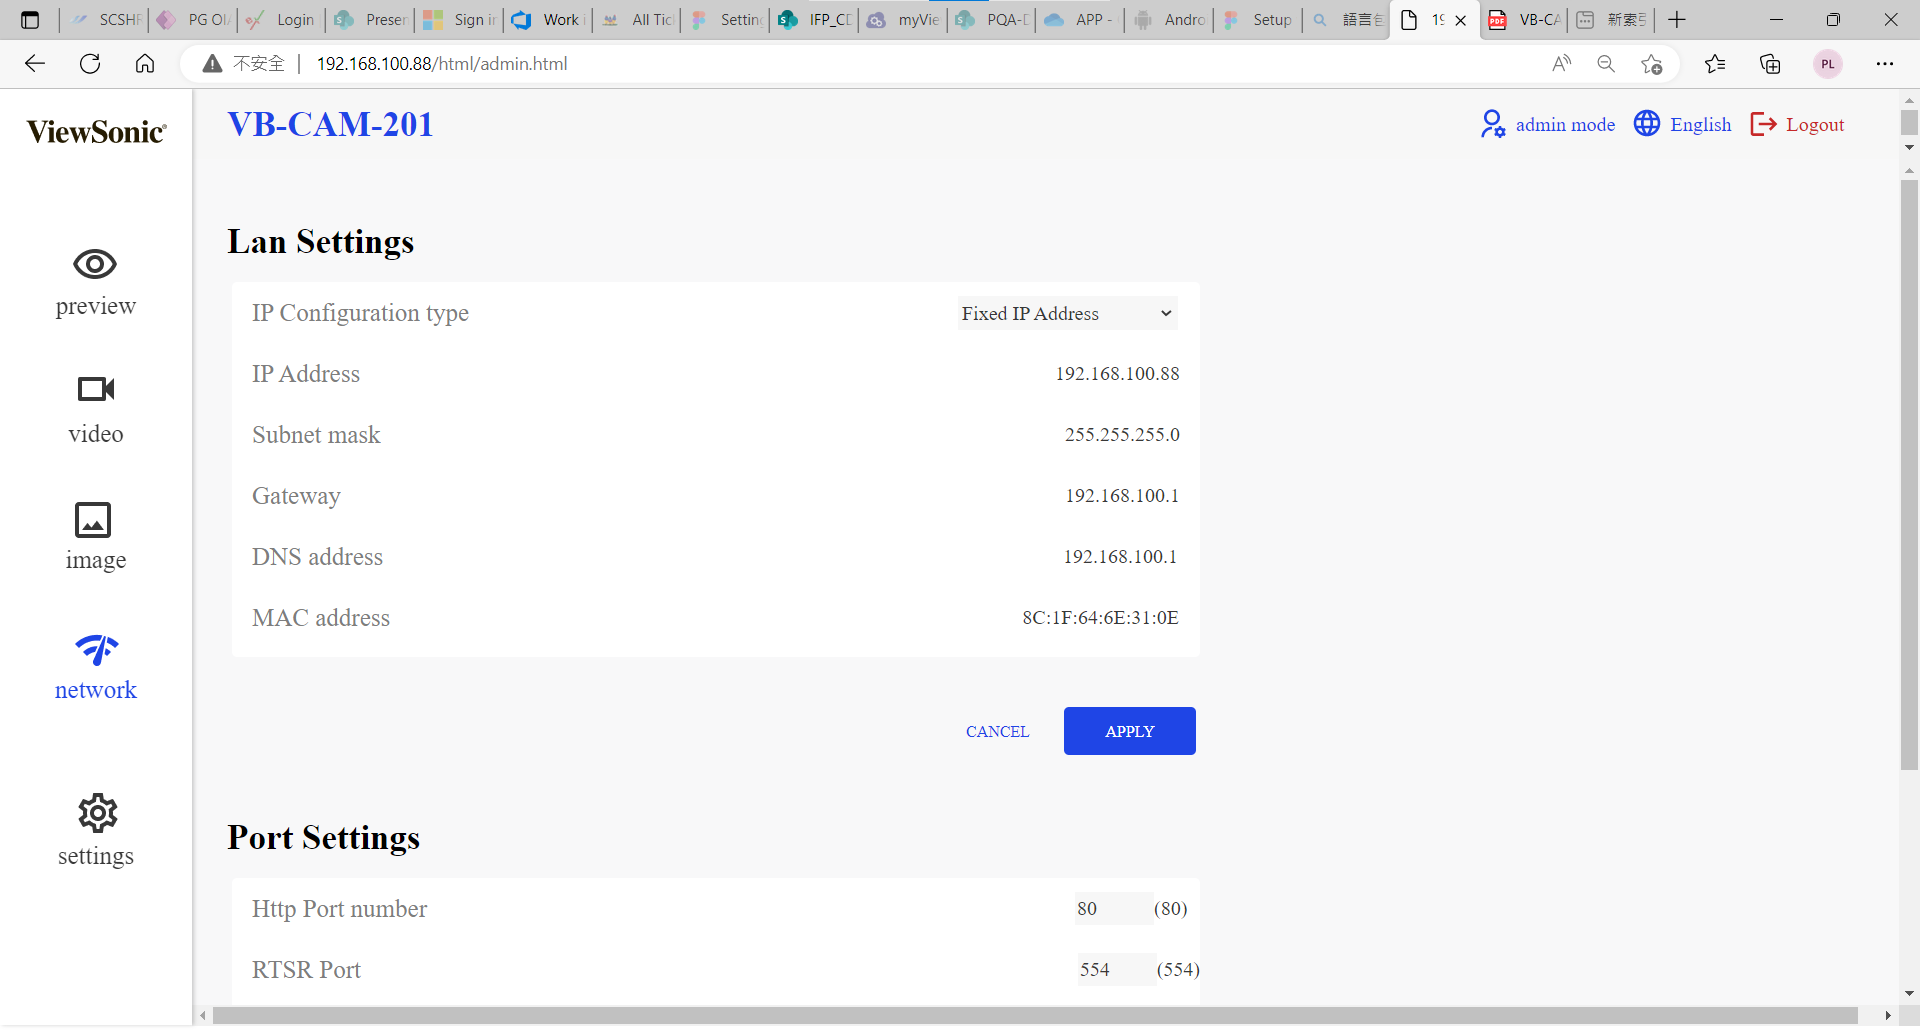
LAN Settings
IP Configuration type
- Dynamic IP address
- The IP address, subnet mask, and address for the default gateway are obtained automatically from a DHCP server.
- NOTE:
- An activated DHCP server must be present in the network.
- If a DHCP server is not enabled or does not exist in the network, then manually setting the network parameter is required (or just use the default setting).
- Fixed IP address
- Manually set the IP address, subnet mask, default gateway, and DNS server.
IP address
Manually insert the IP address, but make sure that IP address is not occupied by another device.
Subnet mask
Manually insert the subnet mask.
Gateway
Manually insert the gateway address (or known Router IP address).
DNS address
Manually insert the DNS server’s IP address.
MAC address
Display of the MAC address
Port Settings
Http Port number
The standard port for the HTTP protocol is 80. As an alternative, this port can be assigned a value between the number of 1025 ~ 65535. If several IP cameras are connected in the same sub network, then assign a different and unique number HTTP port for each camera.
RTSP Port
The standard port for the RTSP transmission is 554. As an alternative, this port can be assigned a value between the number of 1025 ~ 65535. If several IP cameras are connected in the same sub network, then assign a different and unique number RTSP port for each camera.
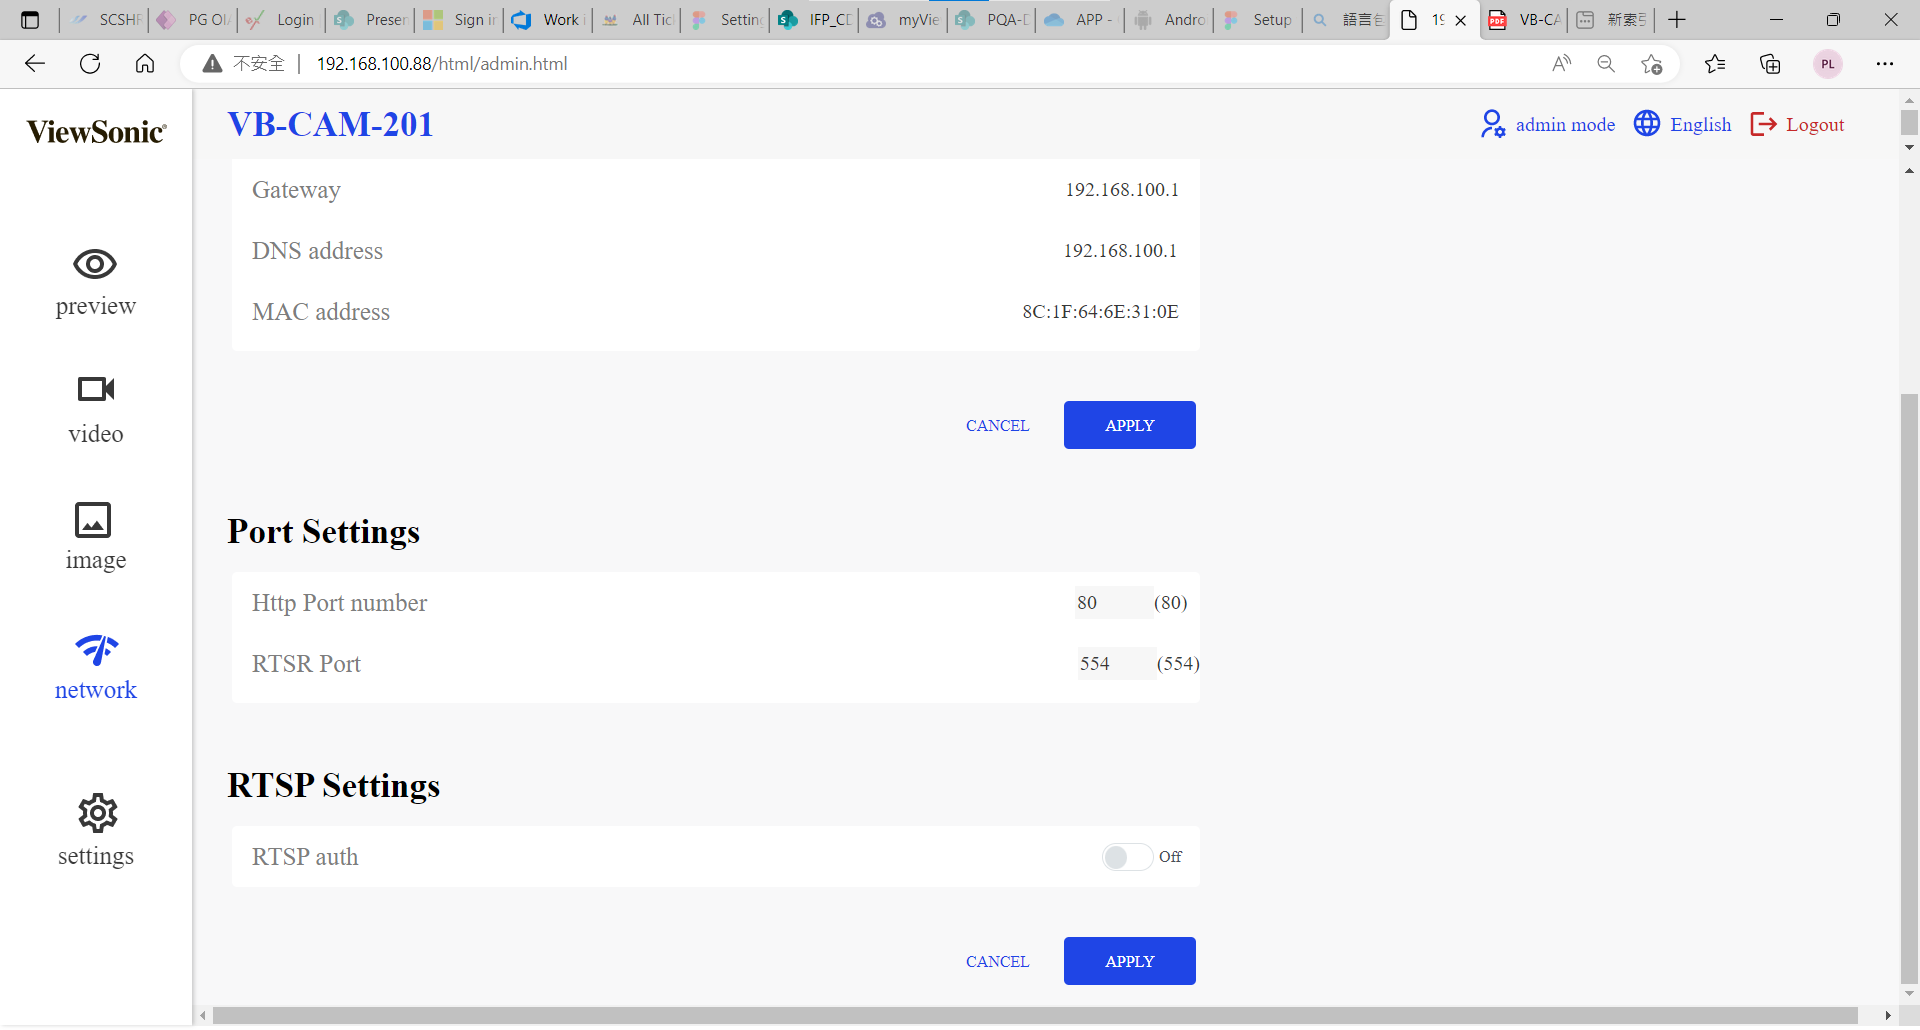
RTSP Settings
RTSP auth
- On: enables authentication.
- NOTE: Username and password are required for transmitting video data via RTSP.
- Off: disables authentication.
- NOTE: When changing the above network settings, don’t forget to click the Apply button to use the new setting(s), or click the Cancel button to abort the new setting(s) and use the current setting(s).
Settings Menu
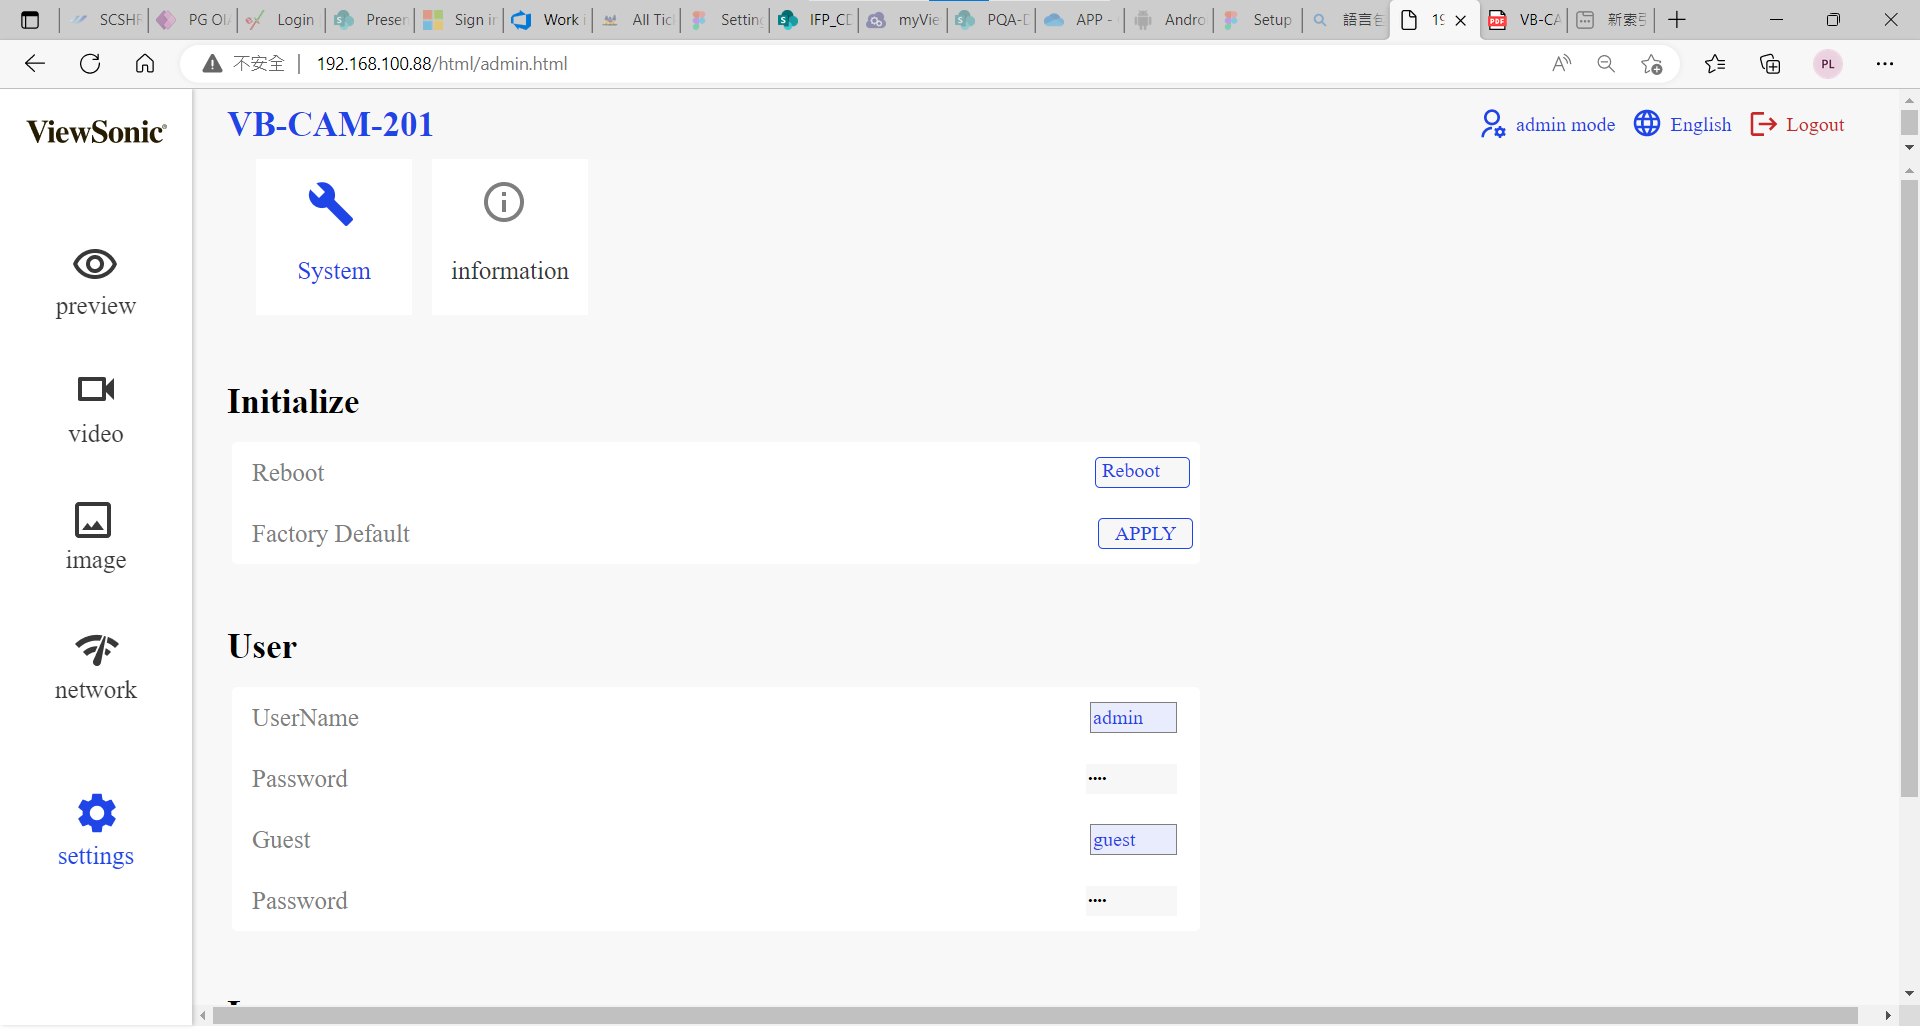
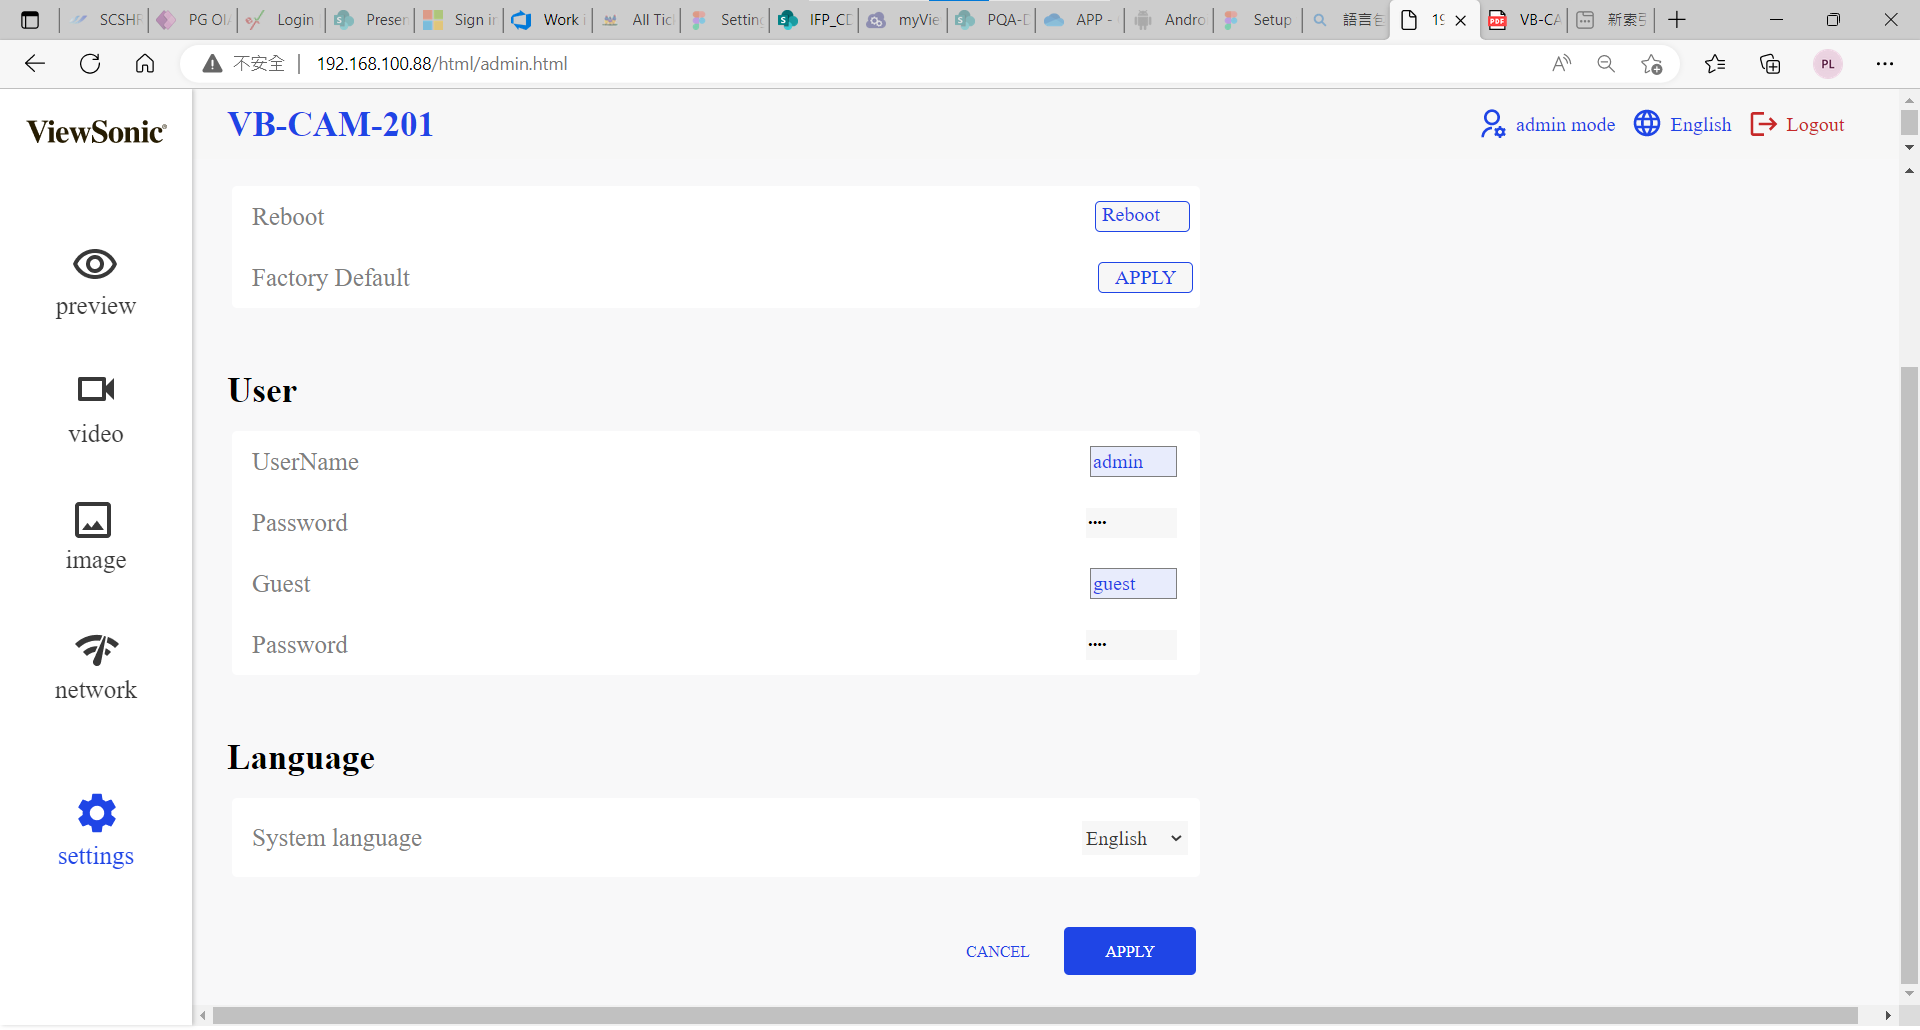
Initialize
Reboot
Click the Reboot button to restart the camera.
Factory Default
Click the Apply button to set all settings back to default.
User There are two accounts built into the camera system:
- Administrator - The default username is admin, password is test. This account can access all functions on the web page.
- Guest – The default username is guest, password is test. This account only can access the basic functions on the web page.
- NOTE:
- The username and password can be changed in the SETTINGS menu.
- If you forget the new username or password, the only recovery method is to press the Reset button on the rear of the camera to reset the camera to default and use the original admin or guest credentials to log in again.
Language
System Language
There are two selectable languages:
- English
- Simplified Chinese
- NOTE: When changing the above network settings, don’t forget to click the Apply button to use the new setting(s), or click the Cancel button to abort the new setting(s) and use the current setting(s).
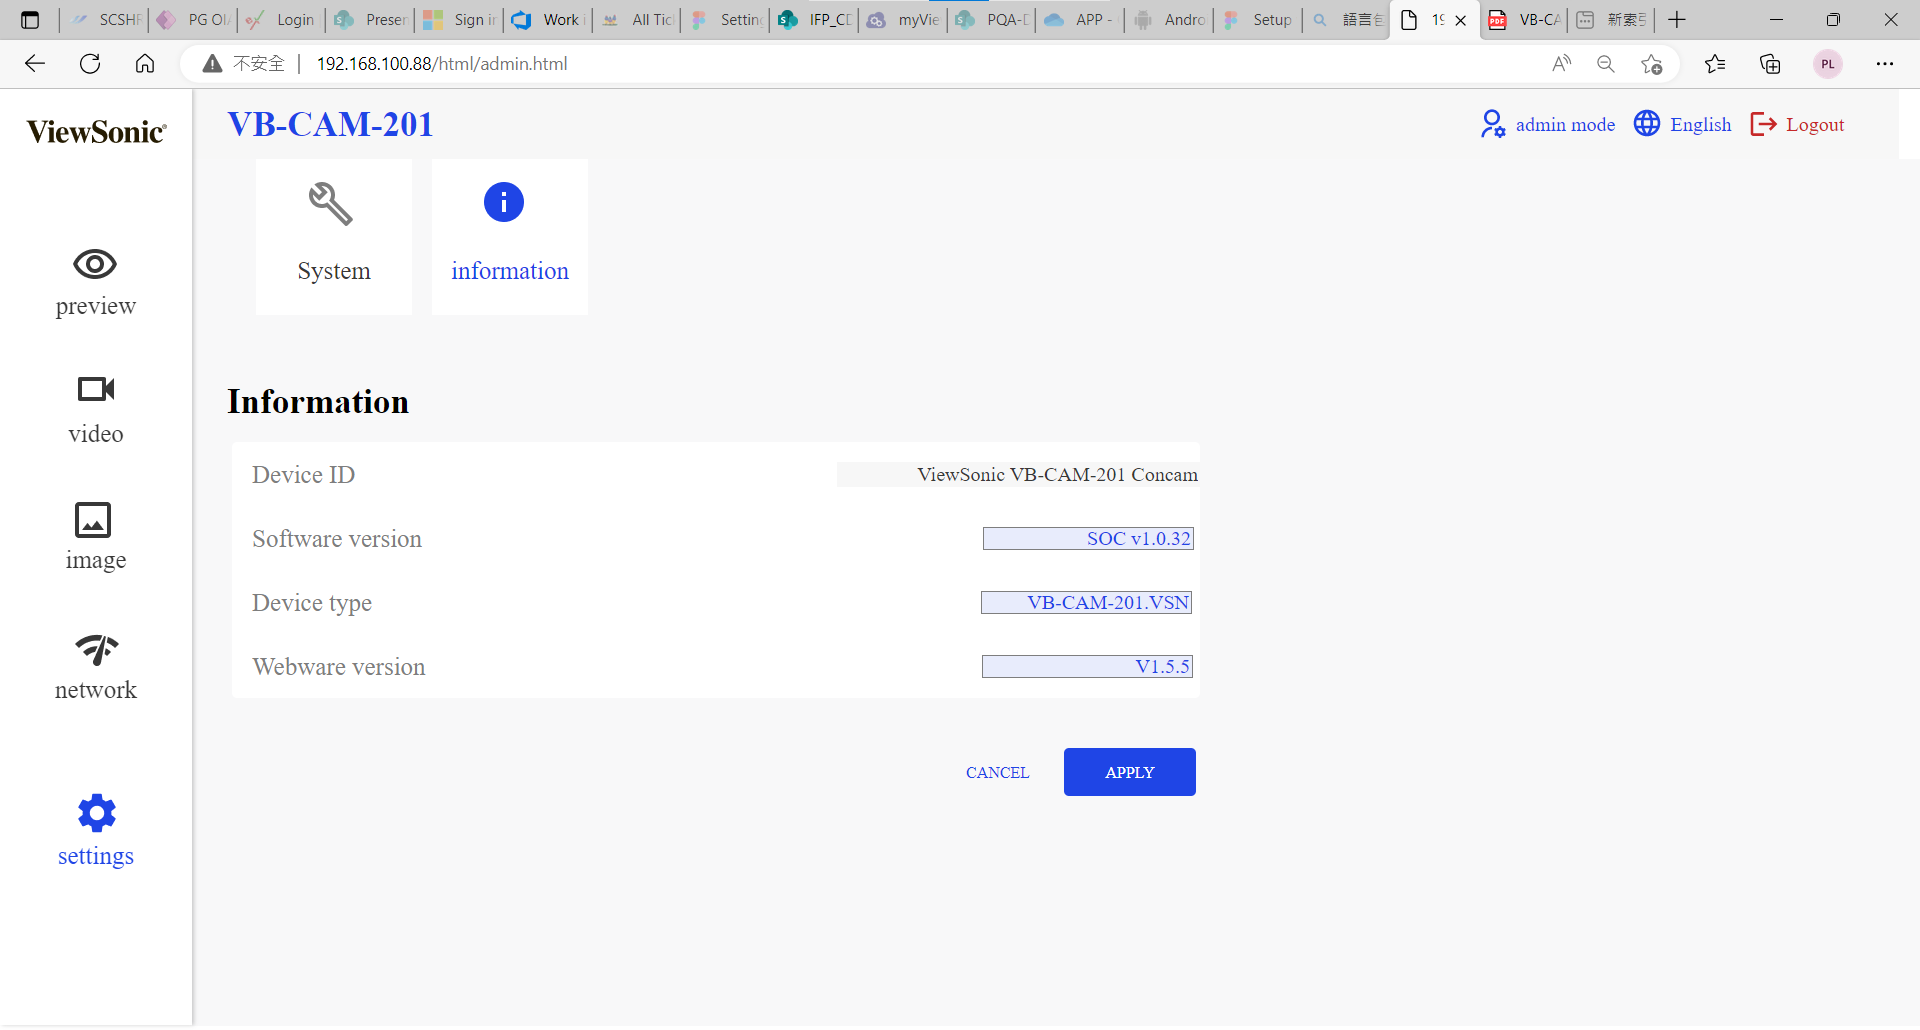
Information Page
This page shows the below information:
- Device ID
- Software version
- Device type
- Webware version


