From ViewSonic User Guide Database
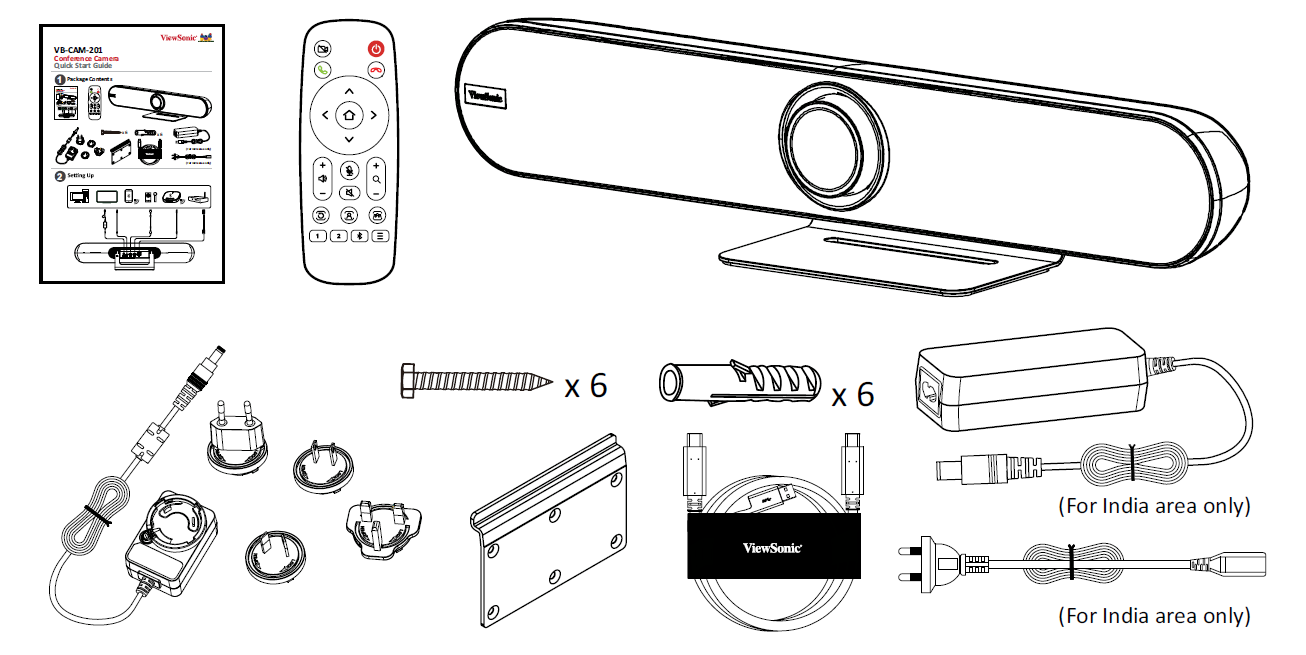
Package Contents
- VB-CAM-201
- Documentation
- Remote Control
- Power Adapter
- Bracket
- USB Cable
- Bracket Screw x 6
- Wall Anchor x 6
Product Overview
VB-CAM-201
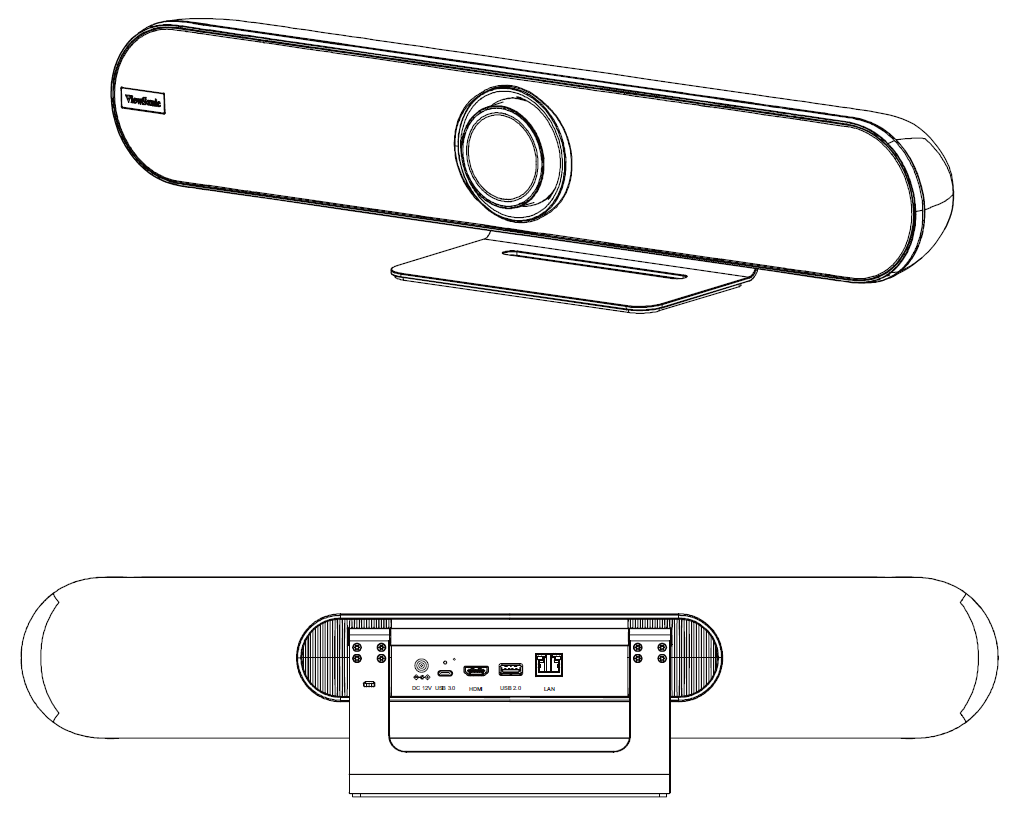
I/O Ports
| Number |
Item
|
| 1 |
DC IN
|
| 2 |
USB 3.0
|
| 3 |
Reset Button
|
| 4 |
HDMI
|
| 5 |
USB 2.0
|
| 6 |
RJ45
|
- NOTE:
- The HDMI port only supports video output.
- The RJ45 port only supports parameters management.
- The USB 2.0 port supports 2.0 output which is only designed for external USB microphone use.
Remote Control
| Number
|
Button
|
Description
|
| 1
|
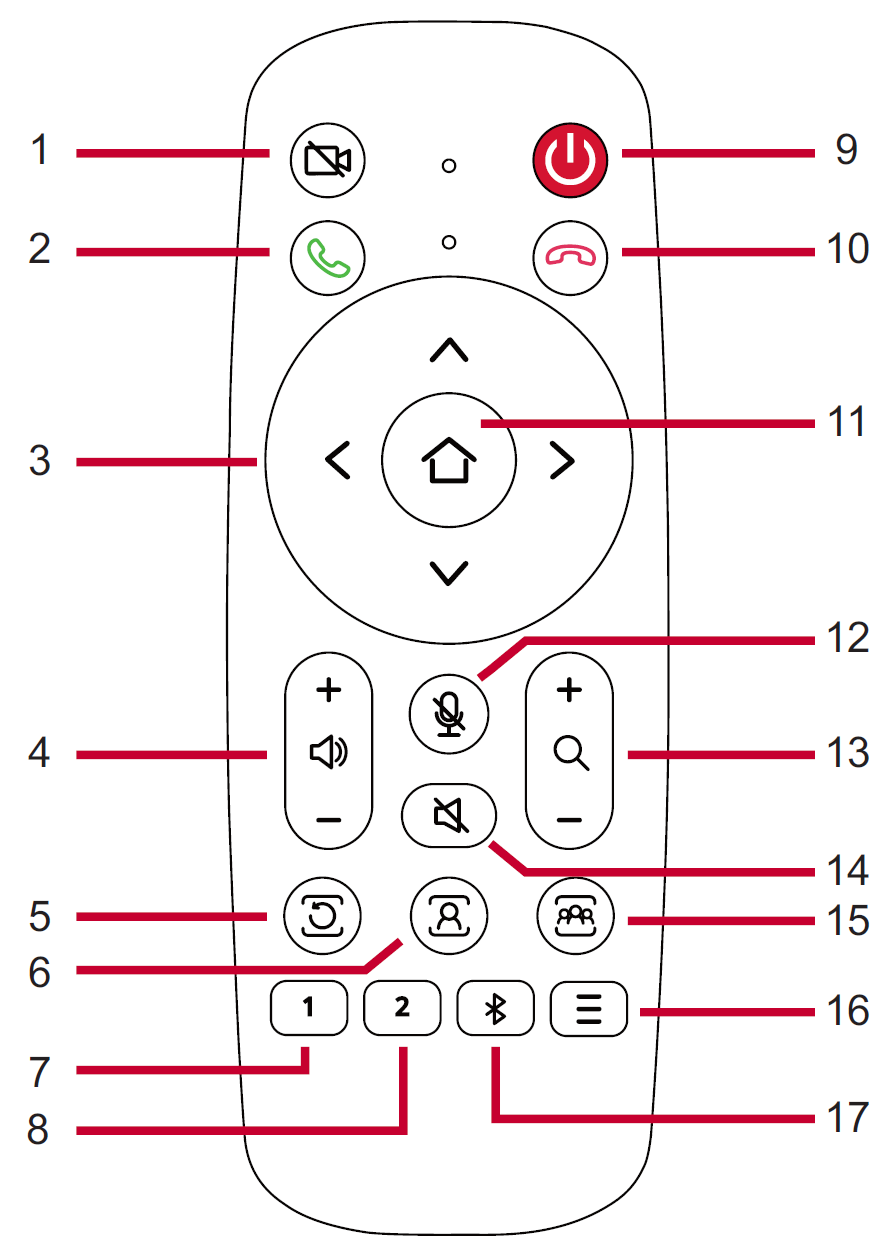
Camera Disable
|
Disable/Enable the video.
|
| 2
|
Call
|
Answer/Start call/Enter call interface[1].
|
| 3
|
Control Key
|
Menu Control/Camera moving direction.
|
| 4
|
Volume Up/Down
|
Audio volume control.
|
| 5
|
Exit Tracking
|
After pressing, the camera will exit the tracking mode.
|
| 6
|
Speaker Tracking
|
Press for voice tracking of the speaker.
|
| 7
|
Preset 1
|
Long press to set Preset 1; short press to call Preset 1.
|
| 8
|
Preset 2
|
Long press to set Preset 2; short press to call Preset 2.
|
| 9
|
Standby
|
Long press to enter Standby mode; short press to return to Normal mode.
|
| 10
|
Hang Up
|
Hang up the call/Reject to join the meeting[1].
|
| 11
|
OK (Confirm)
|
Confirm selection/Camera returns to home position.
|
| 12
|
Microphone Mute
|
Disable/Enable the microphone.
|
| 13
|
Zoom
|
Zoom In/Out.
|
| 14
|
Speaker Mute[2]
|
Disable/Enable the speaker.
|
| 15
|
Participant Tracking[3]
|
The camera will automatically track the participants.
|
| 16
|
Menu
|
Enter/Exit the OSD menu.
|
| 17
|
Bluetooth
|
Disable/Enable Bluetooth. Long press to switch Host and Client mode after Bluetooth is enabled.
|
- ↑ 1.0 1.1 For "Skype for Business" and "Microsoft Teams" only.
- ↑ Long press to disable the audio function completely. External devices will not detect the VB-CAM-201 as a speaker or microphone. If the function is disabled, a mute icon will be on screen.
- ↑ Long press to enter “Live Mosaic View” mode.
Replacing the Batteries of the Remote Control
- Remove the cover on the rear of the remote control.
- Insert two “AAA” batteries, ensuring the “+” symbol on the battery matches the “+” on the battery post.
- Replace the cover by aligning it with the slot on the remote control and snapping the latch shut.
NOTE:
- Avoid leaving the remote control or batteries in excessive heat or humidity.
- Always dispose of old batteries in an environmentally friendly way. Contact your local government for more information on how to dispose of batteries safely.
- Remove the batteries if the remote control will not be in use for an extended period of time.
- It is recommended that you do not mix battery types.


