VB-CAM-201 Making Connections
Connecting to Power
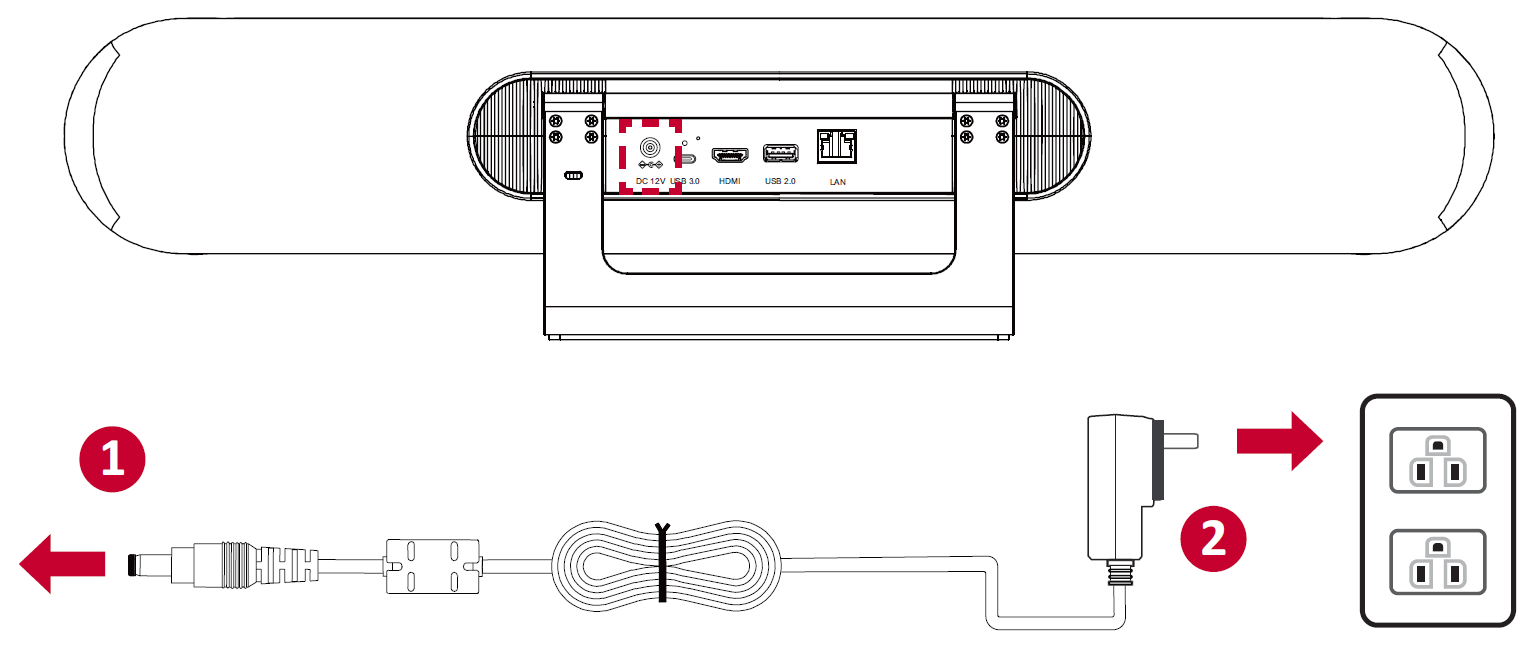
- Connect the power cord to the DC IN jack at the rear of the camera.
- Connect the power cord plug to a power outlet.
- NOTE: The power adapter includes four different plug faces.
Connecting External Devices
- NOTE: Ensure the camera (VB-CAM-201) is the default video and audio output device when being used.
HDMI Connection
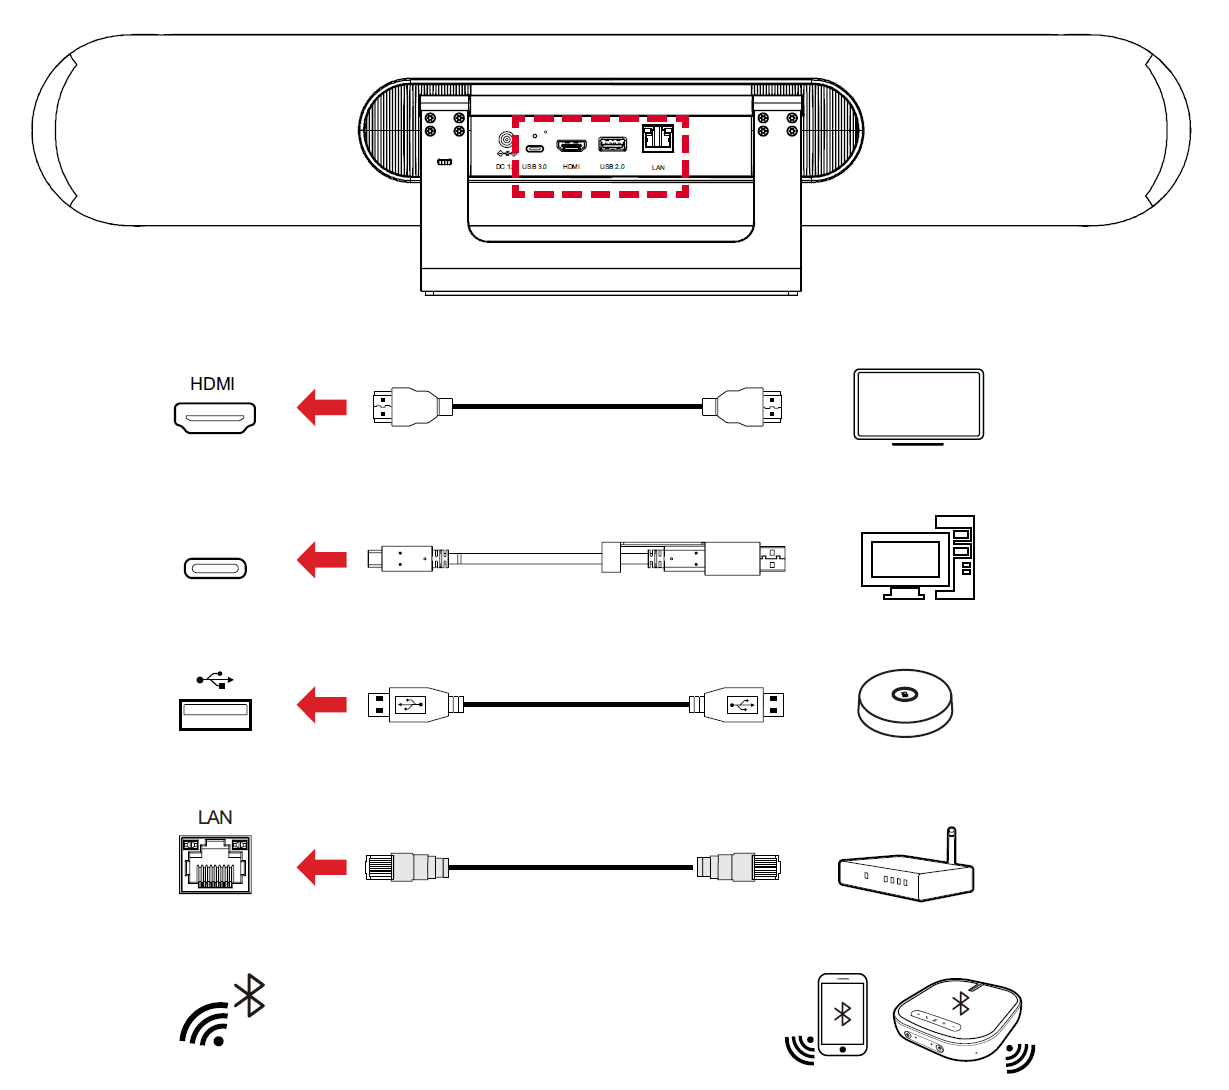
Connect one end of an HDMI cable to the HDMI port of the camera. Then connect the other end of the cable to the HDMI port of your monitor or IFP.
- NOTE: The HDMI port only supports video output.
USB Connection
Connect one end of a USB cable to a USB port of the camera. Then connect the other end of the cable to a USB port of your PC or IFP.
- NOTE:
- To output 4K video, a USB 3.0 cable is required.
- The USB cable supports USB 3.0 output.
- The USB female to male adapter only supports 2.0 output.
- The USB 2.0 port supports 2.0 output which is only designed for external USB microphone use.
USB External Microphone Connection (Optional Expansion)
- NOTE: This optional expansion requires the VB-MIC-201.
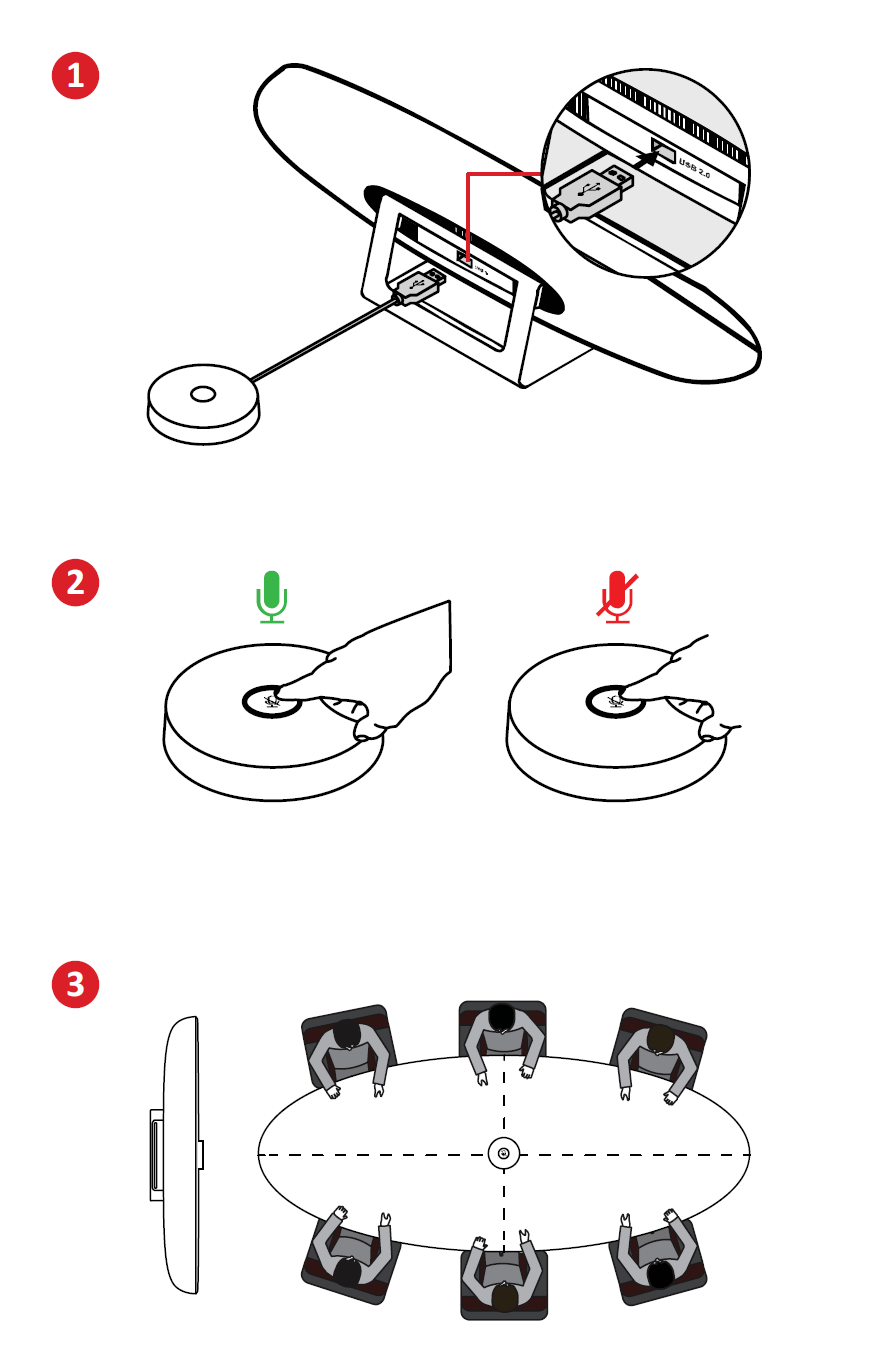
The VB-CAM-201 can support one external microphone.
- NOTE: The 10 meter microphone cable will be included in the package contents with the external microphone (VB-CAM-201) purchase.
Bluetooth Connection
Open the Bluetooth mode and search for the device as an external speaker. If the connection is successful, the LED light will be blue.
Host Mode
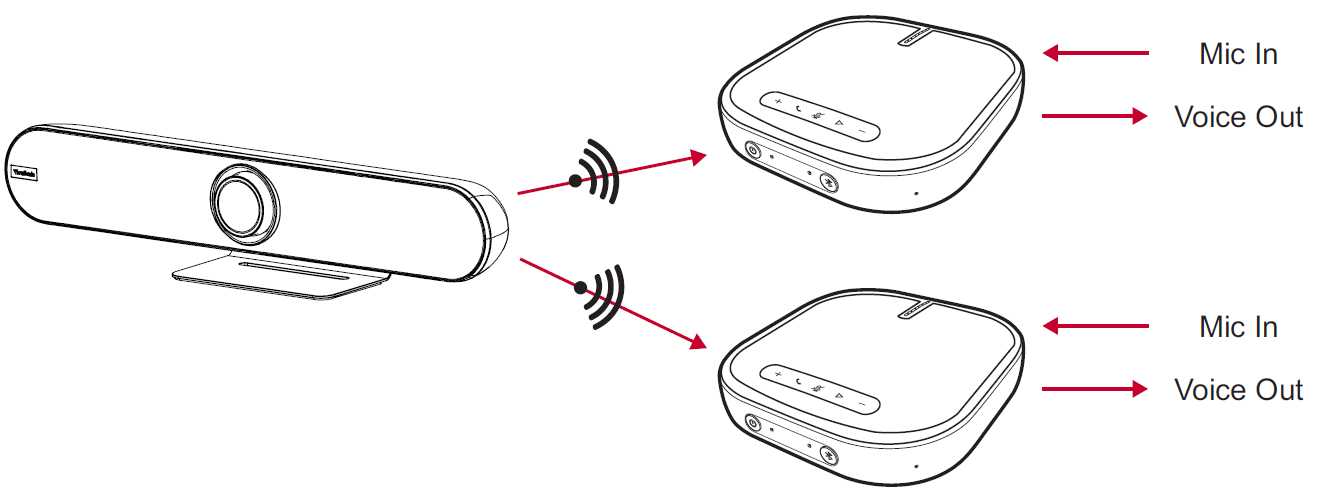
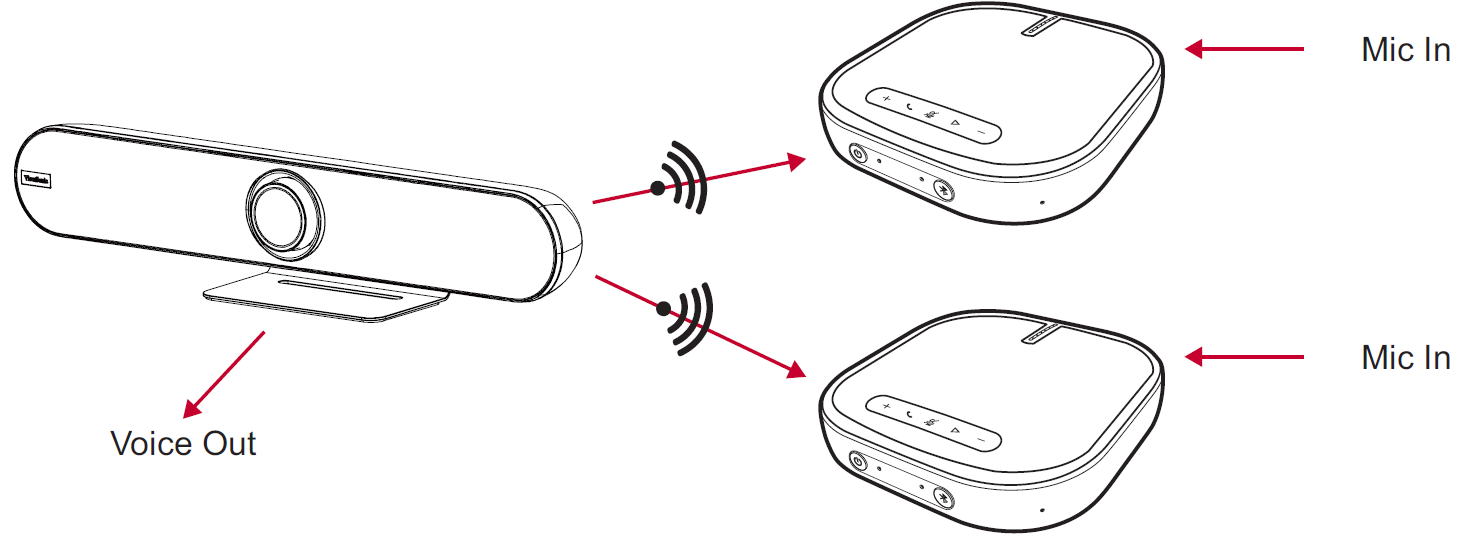
Under host mode, VB-CAM-201 can automatically connect to VB-AUD-201 and has a connection capacity of two. If the connection is not reaching maximum capacity, VB-CAM-201 will continuously search for VB-AUD-201 until reaching maximum capacity.
- NOTE: If the connection time goes over 60 seconds, push the Bluetooth pairing button again on VB-AUD-201.
Host mode provides two options, Host 1 and Host 2.
- NOTE: Refer to the VB-AUD-201 user guide to learn more about its light indicator.
Host 1
Under Host 1, the audio is only output from VB-AUD-201 and the speaker on VB-CAM-201 is mute. If the voice out volume is too low, adjust the volume on VB-AUD-201.
Host 2
Under Host 2, the audio will output from both VB-CAM-201 and VB-AUD-201 speakers. To avoid any negative influence from a stereo effect, the voice volume of the VB-AUD-201 is limited to a minimum level and cannot be adjusted.
- NOTE: The default setting of Host mode is Host 2. The user can switch the Host mode in BT Host Mode setting in the OSD Menu or via Remote Control.
Client Mode
Open the Bluetooth client mode and search for the device as an external speaker. If the connection is successful, the LED light will be blue.
Remote Control Pairing
- Connect the power supply to the camera and power it on.
- Clear the paired status of the remote control:
- Press the Menu Button and OK buttons at the same time, keep pressing until the remote control indicator shows a steady red light, release the buttons to successfully clear the paired remote control.
- Trigger the camera to enter the remote control pairing mode:
- Press the Reset button on the camera, and the camera’s LED light will switch to blue. This indicates it has entered pairing mode.
- NOTE: Each time you enter pairing mode, there is only 15 seconds of operation time. After which, the pairing mode will automatically end.
- Start Pairing:
- Using a cleared remote control, press and hold the Menu Button, and wait for the pairing to complete.
- When the normal pairing is successful, the camera’s LED light will be flashing blue.
- If the pairing fails, please repeat steps 2~4 until the pairing is successful.
- NOTE: The remote control has been paired with the VB-CAM-201 at the factory, and it can be used normally without any special operation.

