VB-CAM-201 Initial Setup
Installing the Camera
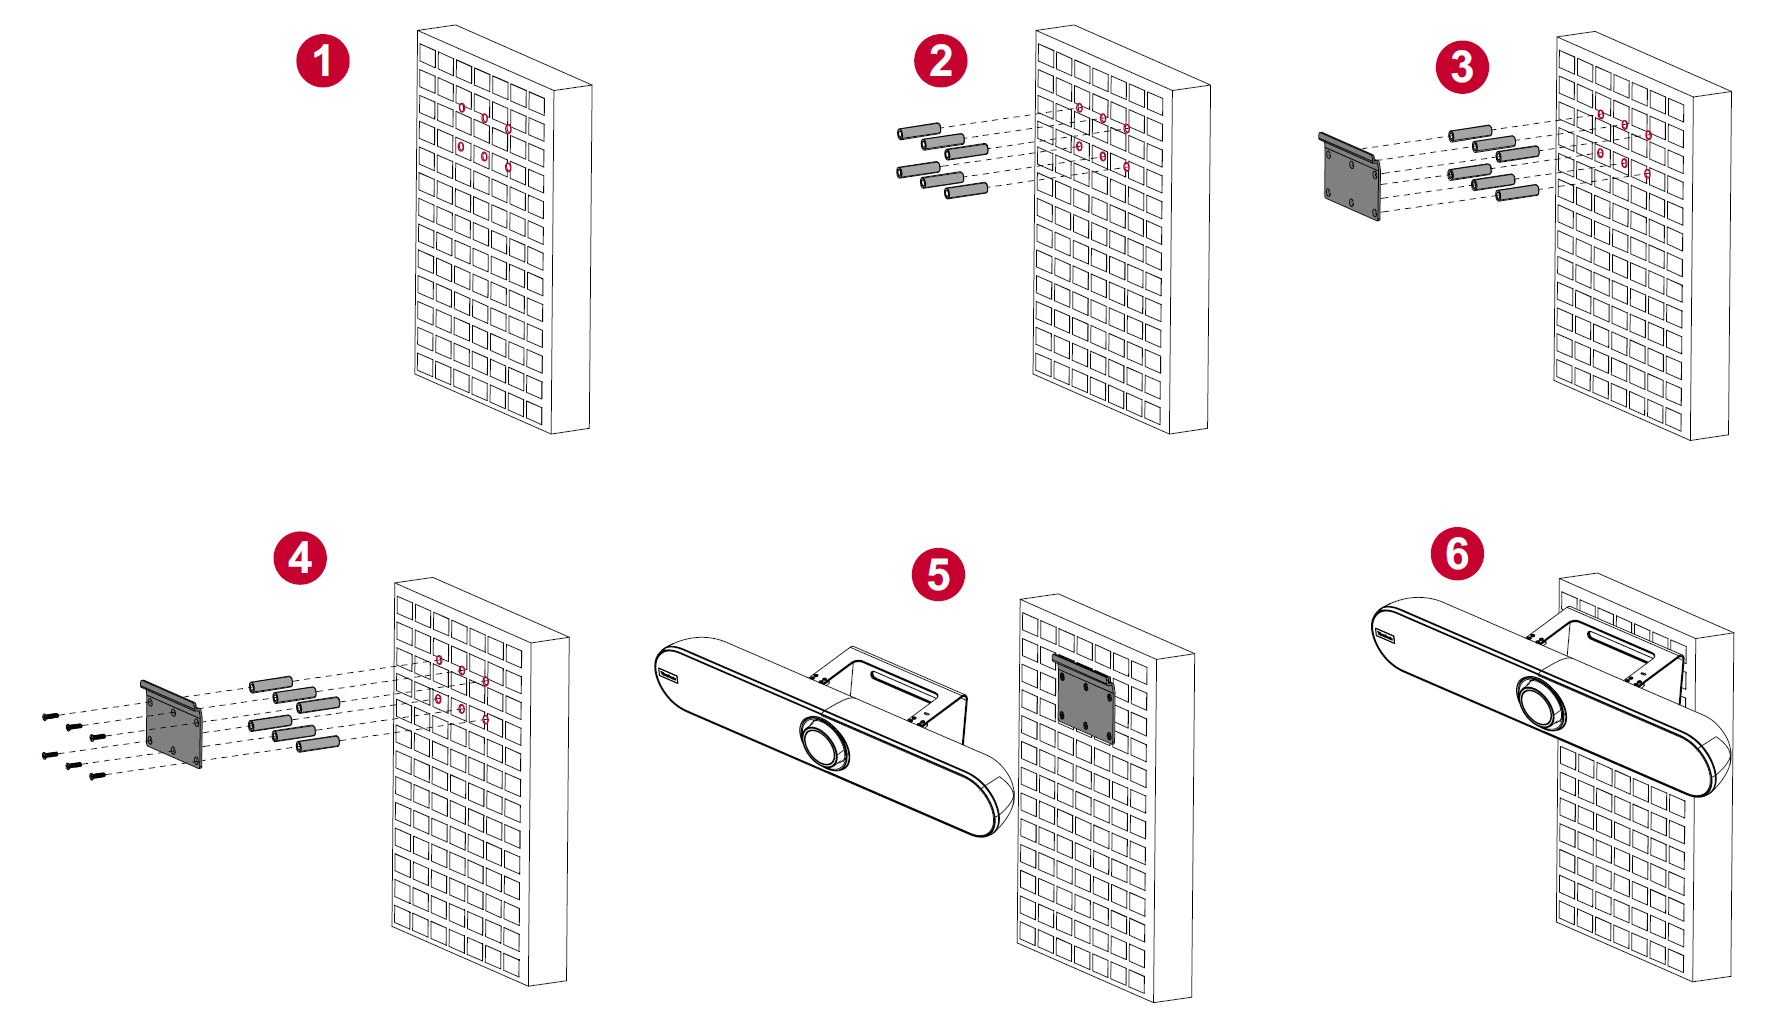
- Pre-drill six (6) holes into the wall.
- Install the six (6) wall anchors.
- Align the wall bracket with the six (6) anchors.
- Install the wall bracket with the six (6) bracket screws.
- Attach the camera to the wall bracket.
- The camera is now installed.
- NOTE: There is a 3% dimension tolerance when mounting the camera. It is recommended to physically measure the size and difference between users and the camera before permanently installing.

