M1 Pro Initial Setup
From ViewSonic Documentation
Choosing a Location - Projector Orientation
Personal preference and room layout will decide the installation location. Consider the following:
- Size and position of your screen.
- Location of a suitable power outlet.
- Location and distance between the projector and other equipment.
-
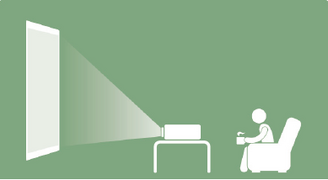 Front Table
 -
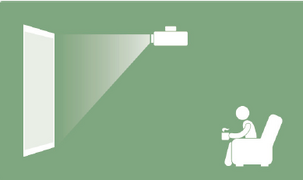 Front Ceiling
 -
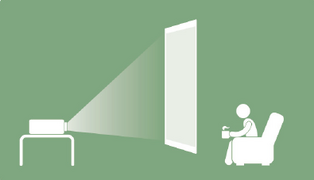 Rear Table
 -
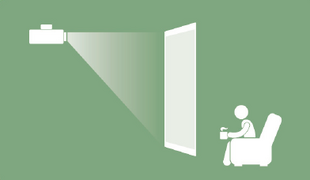 Rear Ceiling


| Location | Description |
|---|---|
| Front Table | The projector is placed near the floor in front of the screen. |
| Front Ceiling | The projector is suspended upside-down from the ceiling in front of the screen. |
| Rear Table[1] | The projector is placed near the floor behind the screen. |
| Rear Ceiling[1] | The projector is suspended upside-down from the ceiling behind the screen. |
Projection Dimensions

- NOTE: (e) = Screen | (f) = Center of Lens
16:9 Image on a 16:9 Screen
| (a) Screen Size | (b) Projection Distance | (c) Image Height | Image Width | ||||
|---|---|---|---|---|---|---|---|
| in. | mm | in. | mm | in. | mm | in. | mm |
| 40 | 1016 | 37.3 | 948 | 19.6 | 498 | 34.86 | 886 |
| 50 | 1270 | 46.6 | 1184 | 24.5 | 623 | 43.58 | 1107 |
| 60 | 1524 | 56 | 1421 | 29.4 | 747 | 52.29 | 1328 |
| 70 | 1778 | 65.3 | 1658 | 34.3 | 872 | 61.01 | 1550 |
| 80 | 2032 | 74.6 | 1895 | 39.2 | 996 | 69.73 | 1771 |
| 90 | 2286 | 83.9 | 2132 | 44.1 | 1121 | 78.44 | 1992 |
| 100 | 2540 | 93.3 | 2369 | 49 | 1245 | 87.16 | 2214 |
| 110 | 2794 | 102.6 | 2606 | 53.9 | 1370 | 95.87 | 2435 |
| 120 | 3048 | 111.9 | 2843 | 58.8 | 1494 | 104.59 | 2657 |
| 130 | 3302 | 121.2 | 3079 | 63.7 | 1619 | 113.3 | 2878 |
| 140 | 3556 | 130.6 | 3316 | 68.6 | 1743 | 122.02 | 3099 |
| 150 | 3810 | 139.9 | 3553 | 73.5 | 1868 | 130.74 | 3321 |
It is recommended that if you intend to permanently install the projector, please physically test the projection size and distance using the actual projector before you permanently install it.