VB-STND-007 Initial Setup
From ViewSonic Documentation
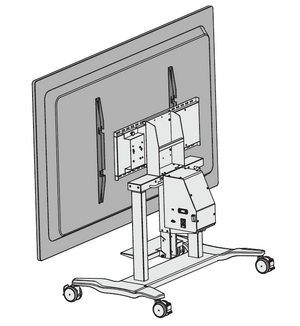
Assembling the Product
Step 1
- Prepare the following items:


- Align the three holes on the Trolley Base (M) to the bolts underneath the Trolley Body. Using the wrench (H), secure the Trolley Base to the Trolley Body with the nuts (B).

- Ensure all nuts are tightened properly on the assembled Trolley Cart.


Step 2
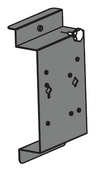
Attach the Mounting Brackets (N) to the IFP. Depending on the size of the IFP, use either M5 (C), M6 (D), or M8 (E) bolts. Refer to the IFP user guide to find the right bolt size.

Step 3
Attach the Keyboard Tray (Q) to the middle support.

Step 4
- Lift the IFP up and hook the Mounting Brackets onto the Trolley Cart.
- Note: It is recommended to perform this step with two or more people to avoid personal injury and/or damage to the IFP and Trolley Cart.

- Secure the Mounting Brackets to the Trolley Cart with two M6 x 14mm bolts (A).

Step 5
- Unscrew the M4 x 8mm bolts (F) and remove the Protective Cover from the Trolley Cart. Attach the Chrome Box onto the Trolley Cart.
- Note: This product does not include an Chrome Box.
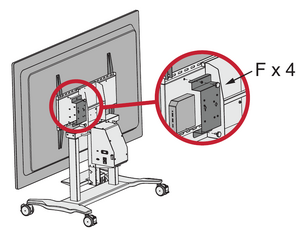


- Reattach the Protective Cover onto the Trolley Cart with the M4 x 8mm bolts, covering the Chrome Box.

- Ensure all parts are accurately and securely held together, as shown in the diagrams below.


Step 6
After moving the Trolley Cart to desired location, push down on the wheel brakes to lock the Trolley Cart in place.

Step 7
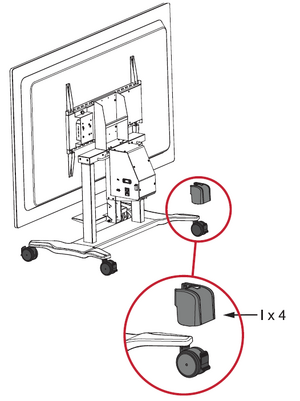
Install the Caster Covers (I) to further secure the Trolley Cart in place.
- Note: It is recommended to install the Caster Covers to avoid personal injury and/or damage to the IFP and Trolley Cart.
- Ensure the wheels are aligned with the Trolley Cart.

- Slide the Caster Covers over the wheels.
- Note: The Caster Covers automatically locks the wheel brakes.

Storing the Caster Covers
The Caster Covers are magnetic. Refer to the diagram below for the position of the magnet.

When moving the Trolley Cart, attach the Caster Covers to the left and right supports.
