M1 Connecting Power and Devices
From ViewSonic Documentation
Connecting to Power

Power Adapter
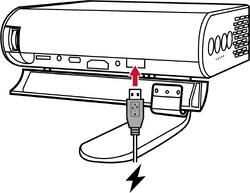
- Connect the power cord to the power adapter.
- Connect the DC power connector to your projector.
- Connect the AC power cord to a power source.
- NOTE: Charge the projector for 3 hours before using it in battery mode for the first time.
- Use only the bundled power adapter to charge the battery pack and supply power to your LED projector.
- Ensure that your LED projector is connected to the power adapter before turning it on for the first time. We strongly recommend that you use a grounded wall socket while using your LED projector on power adapter mode.
- The socket outlet must be easily accessible and near your LED projector.
- To disconnect your LED projector from its main power supply, unplug your LED projector from the power socket.
Battery Power
The battery level icon will show at the top right of the Home Screen. As the battery’s power level runs low, the screen will show a “low battery message”.
Battery Usage Time Information
| Charging | About 3 hours |
| Usage Hours | Up to 6 hours (with Battery Saving mode and without USB power supply) |
| Battery Level Indicator (Charging) | During Charging: Red LED light is On
Full Charge: White LED light is On |
- NOTE: There will be a very low power consumption during Standby mode, it is suggested to fully charge the battery before usage every time.
- The battery used in this device may present a risk of fire or chemical burn if removed or disassembled.
- Follow the warning labels for your personal safety.
- Risk of explosion if battery is replaced by an incorrect type.
- Do not dispose of in fire.
- Never attempt to short-circuit your LED projector’s battery.
- Never attempt to dissemble and reassemble the battery.
- Discontinue usage if leakage is found.
- The battery and its components must be recycled or disposed of properly.
- Keep the battery and other small components away from children.
Connecting to External Devices

1. Micro SD
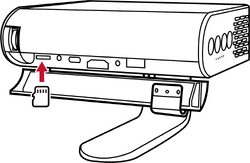
- NOTE:
- SDHC (up to 32 GB).
- FAT32/NTFS.

2. USB-C
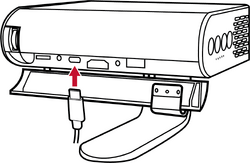
- NOTE:
- Please use the supplied USB-C cable to make sure the compatibility.
- Please make sure your USB-C device can support video transmission.

3. HDMI
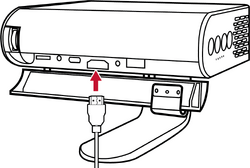
- NOTE: iPhone/iPad users need to buy an additional adapter. To avoid compatibility issues, please use Apple authorized accessories.

4. USB Reader
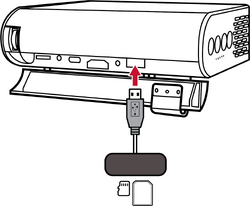
- NOTE:
- FAT32/NTFS.
- Hard disk support up to 1 TB.

5. USB Power Supply
- NOTE: 5V/1A.
