
VP2786a-4K Initial Setup
From ViewSonic Documentation
Installing the Stand
- Place the monitor on a flat, stable surface with the screen facing down.
- Align and slide the upper hooks of the monitor stand into the stand mounting slots.
- Lift the monitor into its upright position on a flat, stable surface.


Note: For safety and to ensure optimal performance, please position the monitor on a flat, stable surface. Failure to do so may lead to the monitor falling, causing damage to the monitor itself and/or posing a risk of personal injury.
Removing the Stand and Mounting the Monitor
Refer to the table below for the standard dimensions for mounting kits.
Note: For use only with a UL certified mount kit/bracket. To obtain a mounting kit or height adjustment base, contact ViewSonic® or your local dealer.
| Maximum
Loading |
Hole Pattern
(W x H) |
Interface Pad
(W x H x D) |
Pad Hole | Screw
Specification |
Screw
Quantity |
|---|---|---|---|---|---|
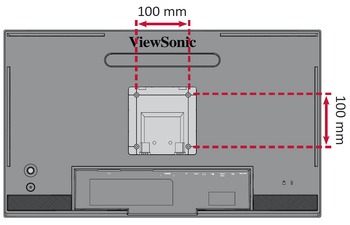
| 14 kg | 100 x 100 mm | N/A | N/A | M4 x 10 mm | 4 |
- Turn off the device and disconnect all cables.
- Place the device on a flat, stable surface with the screen facing down.
-
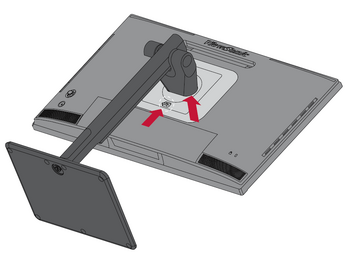
Pull and hold the quick release tab and carefully lift the stand.
-
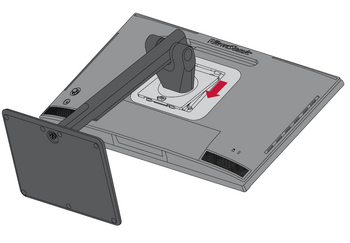
Pull down slightly to disengage the hooks and remove the stand.
-
Attach the mounting bracket to the VESA mounting holes at the rear of the monitor. Then secure it with four screws (M4 x 10 mm).
- Follow the instructions that come with the mounting kit to mount the monitor.


Using the Security Slot
Installing the Shade Hood
Note: The Shade Hood is an optional accessory.
- Place the monitor upright on a flat, stable surface. Make sure the monitor is rotated to the landscape mode.
- Prepare the shade hood by folding the side panels down.
- Attach the shade hood to the top of the monitor by aligning the shape bar inside the hood with the one on top of the monitor. Repeat for the left and right sides.
- Press down on the shade hood to fix it firmly in place.


