From ViewSonic User Guide Database
VP2786a-4K On-Screen Display Menu Options
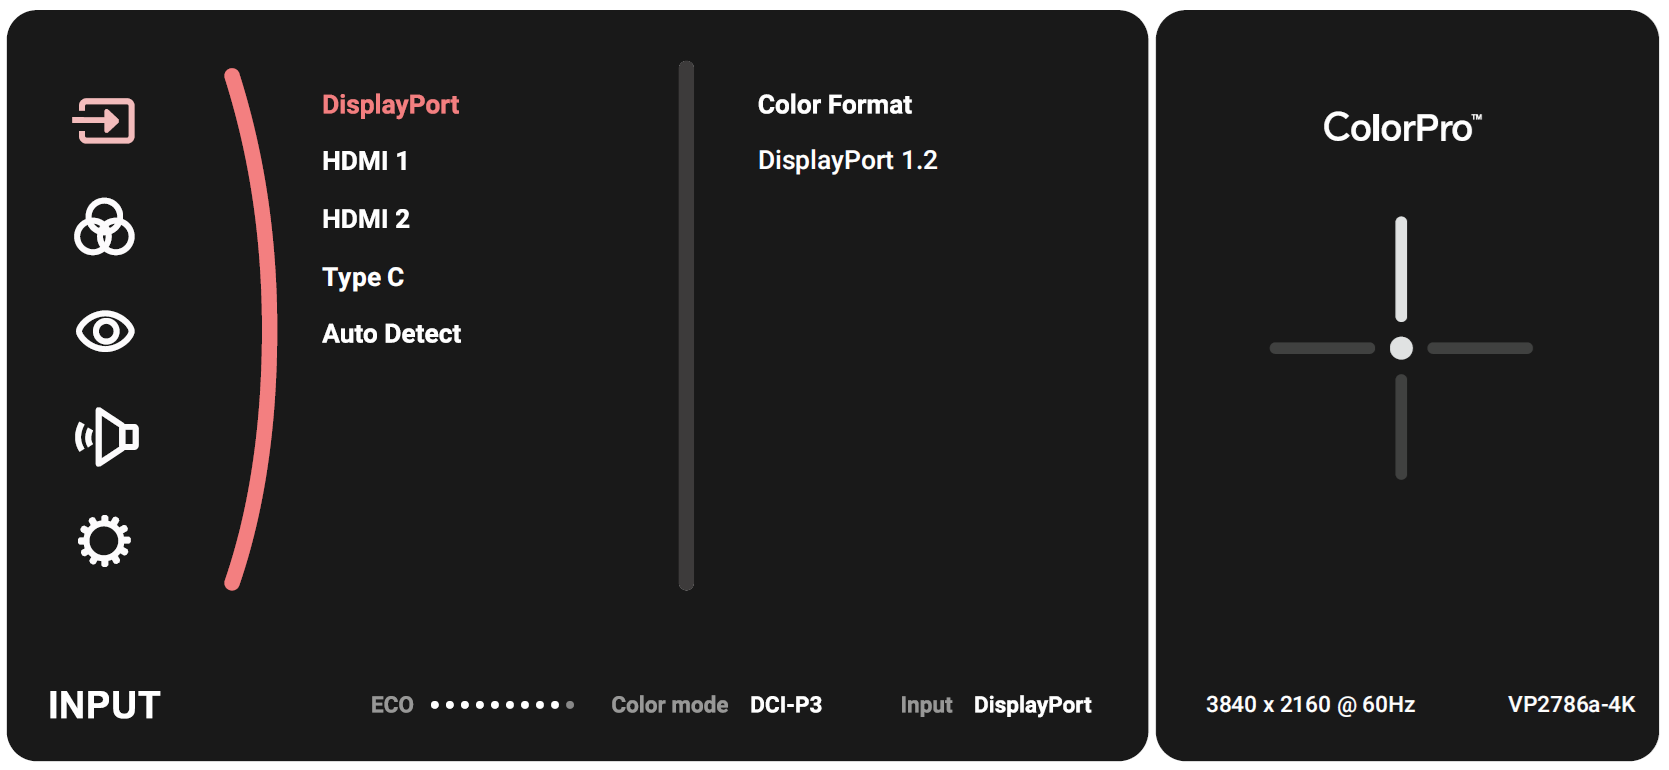
Input
- Move the Joy Key (
 ) to display the Startup Menu. Then navigate to Main Menu and press the Joy Key (
  ) to display the OSD Menu.
- Move the Joy Key (
 ) or (
  ) to select Input. Then press the Joy Key (
  ) to enter the Input menu.
- Move the Joy Key (
 ) or (
  ) to select the desired input source. Then press the Joy Key (
  ) to confirm the selection.
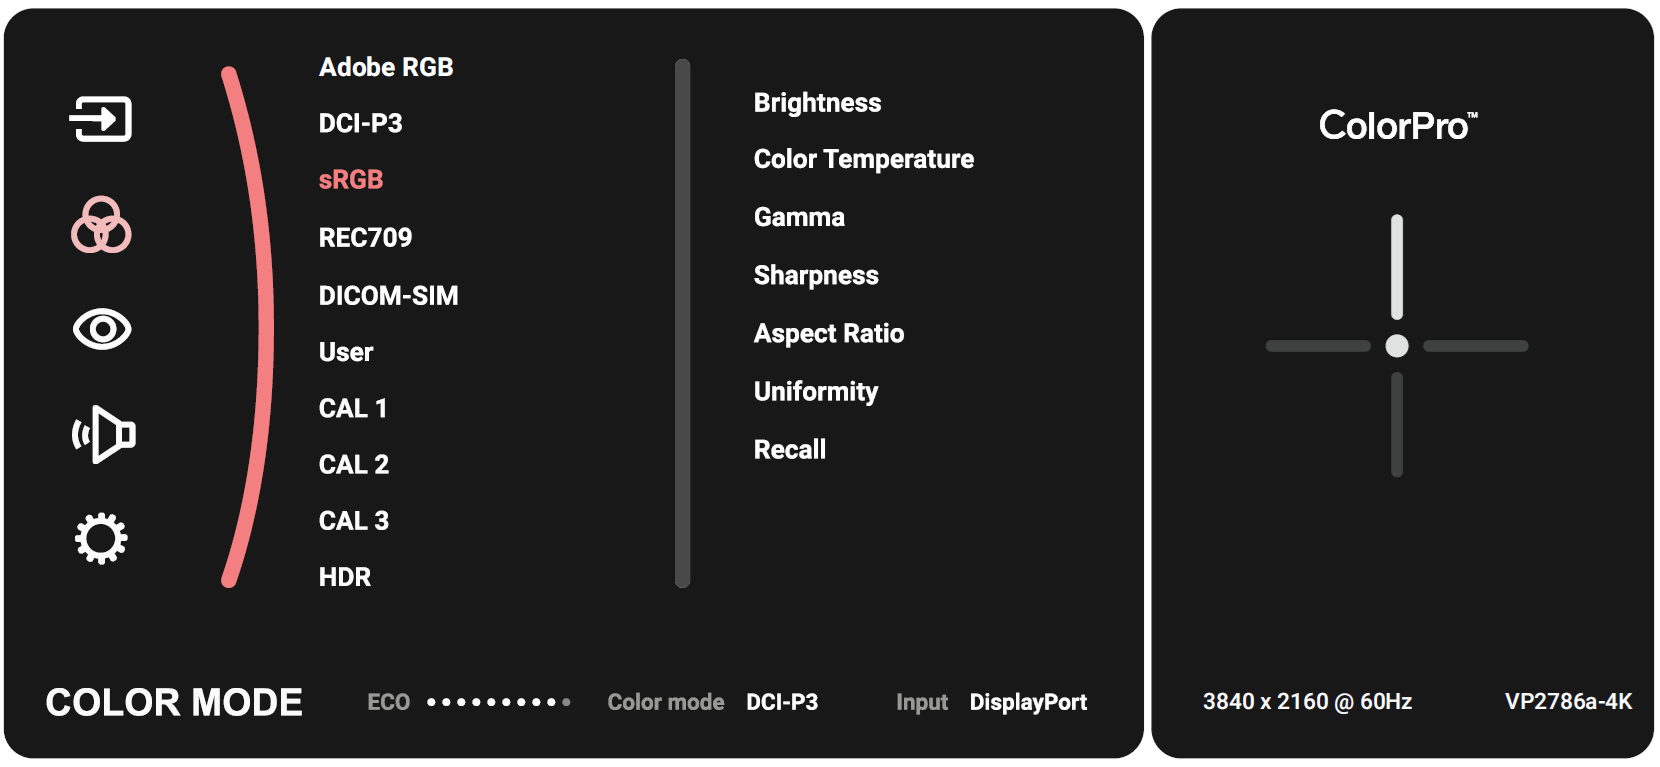
Color Mode
- Move the Joy Key (
 ) to display the Startup Menu. Then navigate to Main Menu and press the Joy Key (
  to display the OSD Menu.
- Move the Joy Key (
 ) or (
  ) to select Color Mode. Then press the Joy Key (
  ) to enter the Color Mode menu.
- Move the Joy Key (
 ) or (
  ) to select the desired option. Then press the Joy Key (
  ) to enter its sub-menu.
- Move the Joy Key (
 ) or (
  ) to adjust/select the setting, and press the Joy Key (
  ) to confirm the selection (if applicable).
| Menu Option
|
Description
|
| Adobe RGB
|
Precise color gamut and gamma of Adobe RGB standard.
|
| DCI-P3
|
Precise color gamut and gamma of DCI-P3 standard.
|
| sRGB
|
Precise color gamut and gamma of sRGB standard.
|
| REC709
|
Precise color gamut and gamma of ITU-R Rec. 709 standard.
|
| DICOM-SIM
|
Gamma curves are set to a DICOM simulation.
|
| User
|
Custom, user-defined settings.
|
| CAL1/CAL2/CAL3
|
Display with the 1st/2nd/3rd user calibration mode.
|
| HDR
|
Reduce the overall contrast of a given scene so that detail in the highlights and shadows can be seen.
|
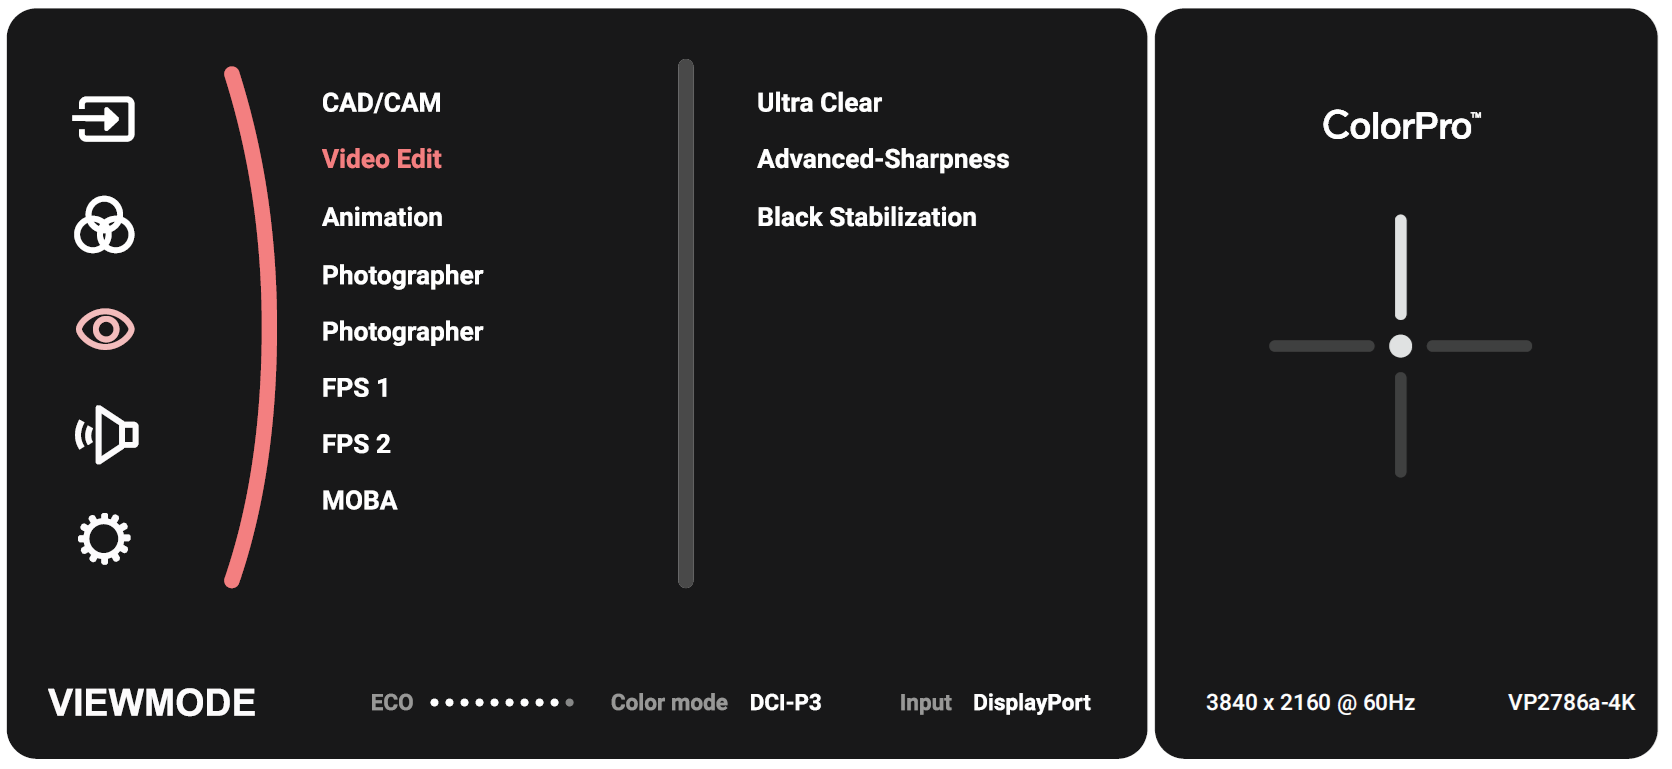
ViewMode
- Move the Joy Key (
 ) to display the Startup Menu. Then navigate to Main Menu and press the Joy Key (
  ) to display the OSD Menu.
- Move the Joy Key (
 ) or (
  ) to select ViewMode. Then press the Joy Key (
  ) to enter the ViewMode menu.
- Move the Joy Key (
 ) or (
  ) to select the desired option. Then press the Joy Key (
  ) to enter its sub-menu.
| Menu Option
|
Description
|
| CAD/CAM
|
Select this option for viewing graphic design files.
|
| Video Edit
|
Select this option for video editing.
|
| Animation
|
Select this option for animation.
|
| Photographer
|
Select this option for viewing photo files.
|
| FPS 1
|
Ideal for First-Person Shooter games.
|
| FPS 2
|
Ideal for First-Person Shooter games.
|
| RTS
|
Ideal for Real-Time Strategy games.
|
| MOBA
|
Select this option for Multiplayer Online Battle Arena games.
|
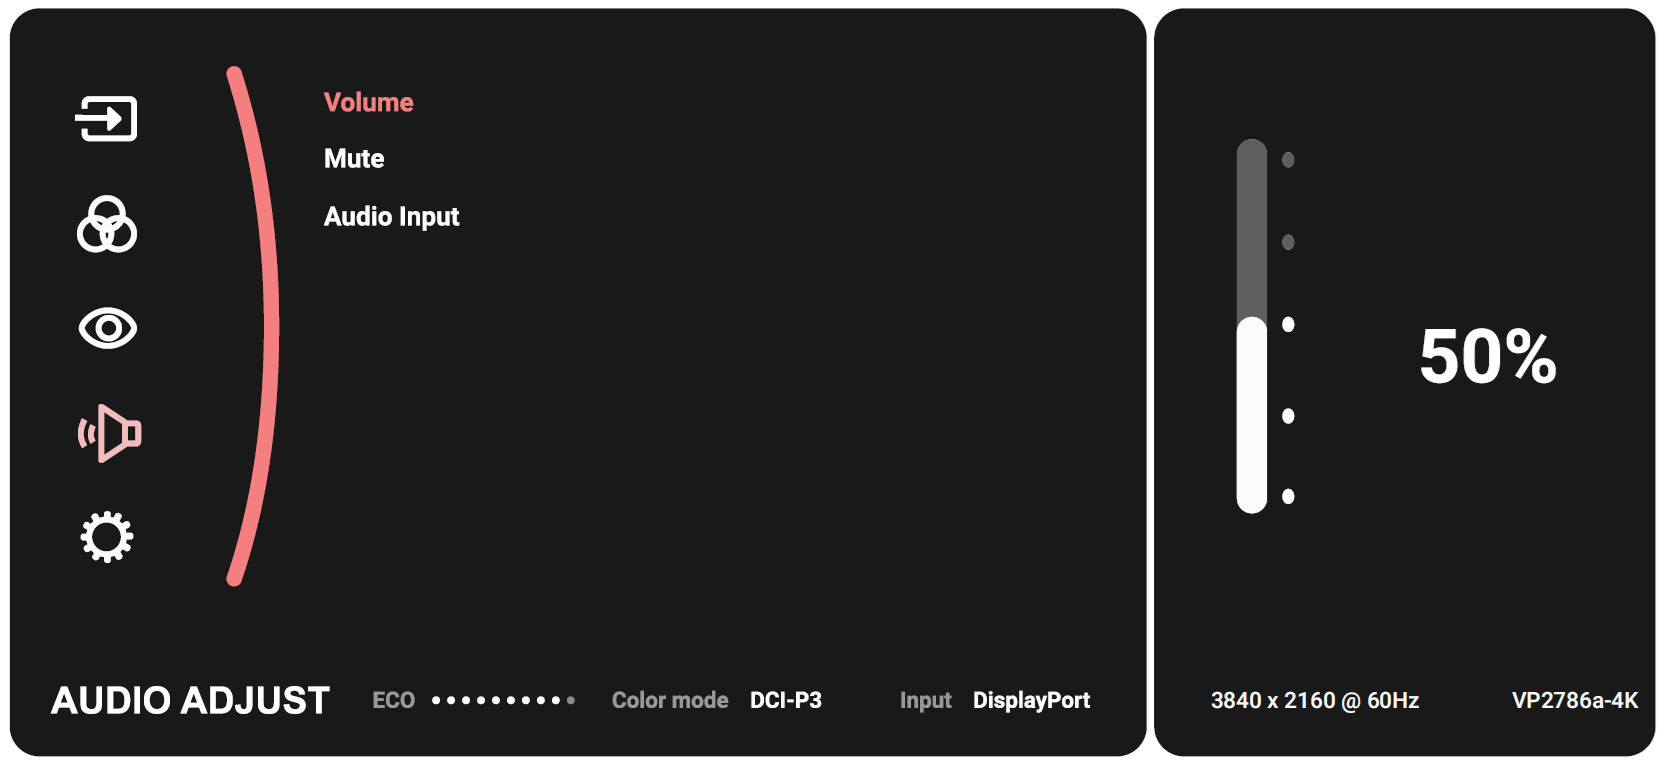
Audio Adjust
- Move the Joy Key (
 ) to display the Startup Menu. Then navigate to Main Menu and press the Joy Key (
  ) to display the OSD Menu.
- Move the Joy Key (
 ) or (
  ) to select Audio Adjust. Then press the Joy Key (
  ) to enter the Audio Adjust menu.
- Move the Joy Key (
 ) or (
  ) to select the desired option. Then press the Joy Key (
  ) to enter its sub-menu.
- Move the Joy Key (
 ) or (
  ) to adjust/select the setting, and press the Joy Key (
  ) to confirm the selection (if applicable).
| Menu Option
|
Description
|
| Volume
|
Adjust the monitor’s sound level.
|
| Mute
|
Turn off the monitor's sound.
|
| Audio Input
|
Select the audio input source.
|
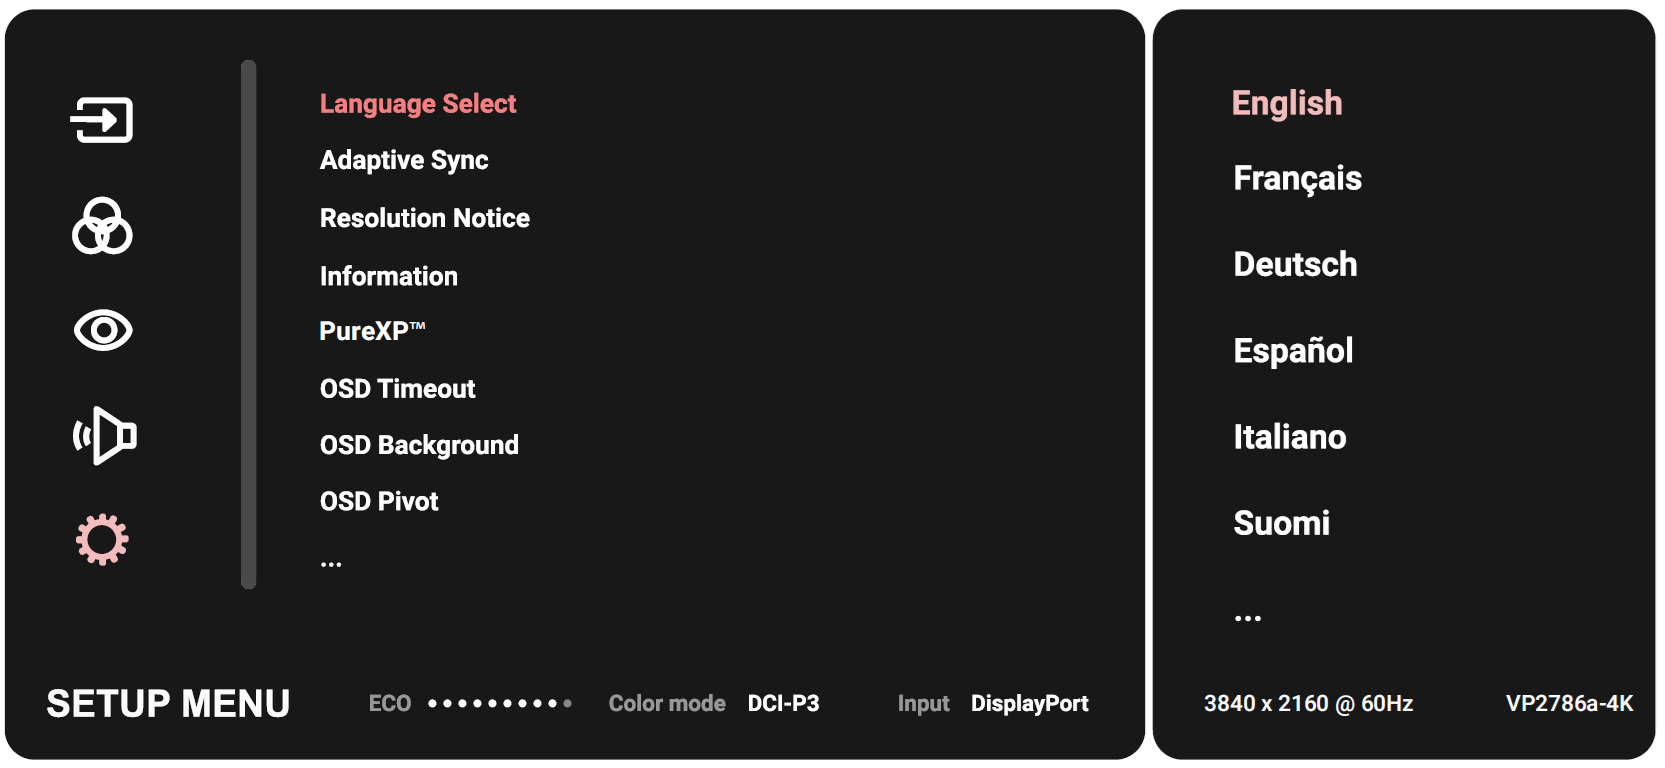
- Move the Joy Key (
 ) to display the Startup Menu. Then navigate to Main Menu and press the Joy Key (
  ) to display the OSD Menu.
- Move the Joy Key (
 ) or (
  ) to select Setup Menu. Then press the Joy Key (
  ) to enter the Setup Menu menu.
- Move the Joy Key (
 ) or (
  ) to select the desired option. Then press the Joy Key (
  ) to enter its sub-menu.
- Move the Joy Key (
 ) or (
  ) to adjust/select the setting, and press the Joy Key (
  ) to confirm the selection (if applicable).
| Menu Option
|
Description
|
| Language Select
|
Select an available language for the OSD Menu.
|
| Adaptive Sync
|
Eliminates stuttering and tearing during gameplay.
|
| Resolution Notice
|
Enable this option to allow the system to inform users that the current viewing resolution is not the correct native resolution.
|
| PureXP™
|
Short for “Pure Experience”, this feature can enhance the visual quality of moving objects, making them less vague with a clearer view.
|
| Information
|
Display the monitor information.
|
| OSD Timeout
|
Set the length of time the OSD Menu remains on screen.
|
| OSD Background
|
Show/Hide the OSD background when the OSD Menu appears on the screen.
|
| OSD Pivot
|
Set the OSD Menu orientation.
- Auto: With the built-in G sensor, the OSD Menu can automatically pivot when the monitor is positioned vertically.
-
- 0°: Sets the OSD Menu without a pivot.
-
- +90°: Sets the OSD Menu with a +90° pivot.
-
- 90°: Sets the OSD Menu with a -90° pivot.
-
- 180°: Sets the OSD Menu with a 180° pivot.
-
|
| Power Indicator
|
Set the Power Indicator On or Off. If the setting is set to On, the power indicator lights blue when the device is turned on.
|
| Auto Power Off
|
Enable this option to allow the monitor to automatically turn off after a certain amount of time.
|
| Sleep
|
Set the amount of idle time before the monitor enters Sleep mode.
|
| Multi-Picture
|
Off
- Disable this function.
PBP Left-Right
- Display two windows, a 1x1 split screen, side-by-side on the left and right of the screen. User can specify the input source for each screen.
PIP
- Split the screen into two parts, a main window and an inset window. User can specify the input source for each screen.
Dual Color
- Display two different color settings in PIP or PBP mode.
|
| ECO Mode
|
Choose between various modes, based on power consumption.
|
| Overscan
|
Enable this option to automatically enlarge the original picture horizontally and vertically to an equal aspect ratio that fills the screen.
|
| Response Time
|
Adjust the response time, creating smooth images without streaking, blurring or ghosting. A low response time is perfect for the most graphic-intense gaming, and provides amazing visual quality while watching sports or action movies.
|
| USB Charging
|
Enable/disable usb charging.
|
| Backstage Lighting
|
Adjust the LED lighting.
|
| Burn-in Eraser
|
Reduce image burn-in.
|
| DDC/CI
|
Enable this option to allow the monitor control via the graphics card.
|
| Rename
|
Rename the personalized custom profile.
|
| All Recall
|
Resets all settings to their default values.
|
) to display the Startup Menu. Then navigate to Main Menu and press the Joy Key (
) to display the OSD Menu.
) or (
) to select Input. Then press the Joy Key (
) to enter the Input menu.
) or (
) to select the desired input source. Then press the Joy Key (
) to confirm the selection.
) to display the Startup Menu. Then navigate to Main Menu and press the Joy Key (
to display the OSD Menu.
) or (
) to select Color Mode. Then press the Joy Key (
) to enter the Color Mode menu.
) or (
) to select the desired option. Then press the Joy Key (
) to enter its sub-menu.
) or (
) to adjust/select the setting, and press the Joy Key (
) to confirm the selection (if applicable).
) to display the Startup Menu. Then navigate to Main Menu and press the Joy Key (
) to display the OSD Menu.
) or (
) to select ViewMode. Then press the Joy Key (
) to enter the ViewMode menu.
) or (
) to select the desired option. Then press the Joy Key (
) to enter its sub-menu.
) to display the Startup Menu. Then navigate to Main Menu and press the Joy Key (
) to display the OSD Menu.
) or (
) to select Audio Adjust. Then press the Joy Key (
) to enter the Audio Adjust menu.
) or (
) to select the desired option. Then press the Joy Key (
) to enter its sub-menu.
) or (
) to adjust/select the setting, and press the Joy Key (
) to confirm the selection (if applicable).
) to display the Startup Menu. Then navigate to Main Menu and press the Joy Key (
) to display the OSD Menu.
) or (
) to select Setup Menu. Then press the Joy Key (
) to enter the Setup Menu menu.
) or (
) to select the desired option. Then press the Joy Key (
) to enter its sub-menu.
) or (
) to adjust/select the setting, and press the Joy Key (
) to confirm the selection (if applicable).

