
UMB202 Initial Setup: Difference between revisions
From ViewSonic Documentation
// via Wikitext Extension for VSCode |
// via Wikitext Extension for VSCode |
||
| Line 10: | Line 10: | ||
</noinclude> | </noinclude> | ||
=Wall Mounting= | =Wall Mounting= | ||
<div class="res-img">[[File:UMB202_Wall_Mount.png|600px]]</div> | <div class="res-img">[[File:UMB202_Wall_Mount.png|600px|alt=Mounting the camera to the wall]]</div> | ||
#Pre-drill three holes into the wall and install the three wall anchors. | #Pre-drill three holes into the wall and install the three wall anchors. | ||
#Align the wall bracket with the three anchors and secure the wall bracket with the three bracket screws. | #Align the wall bracket with the three anchors and secure the wall bracket with the three bracket screws. | ||
| Line 26: | Line 26: | ||
{{Note|Some parts are optional accessories included in other ViewSonic products. Please refer to our website for more information}} | {{Note|Some parts are optional accessories included in other ViewSonic products. Please refer to our website for more information}} | ||
==Mounting the Camera onto VB-WMK-002== | ==Mounting the Camera onto VB-WMK-002== | ||
<div class="res-img">[[File:VB-WMK-002_Mount.png|600px]]</div> | <div class="res-img">[[File:VB-WMK-002_Mount.png|600px|alt=Mounting the camera to the ViewSonic's TV Mount]]</div> | ||
#Line up the mounting plate with the VB-WMK-002. | #Line up the mounting plate with the VB-WMK-002. | ||
Revision as of 09:33, 2 September 2024
Wall Mounting

- Pre-drill three holes into the wall and install the three wall anchors.
- Align the wall bracket with the three anchors and secure the wall bracket with the three bracket screws.
- Secure the camera to the mounting plate.
- Attach the mounting plate to the wall bracket to complete the installation.
Note: When installing the camera, please note that there is a dimensional tolerance of 3%. It’s advisable to manually measure the size and the distance between the users and the camera prior to final installation.
VB-WMK-002 Mounting
What You Need
-
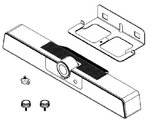 UMB202
 -
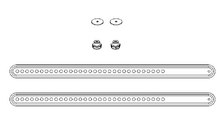 VB-WMK-002


Note: Some parts are optional accessories included in other ViewSonic products. Please refer to our website for more information
Mounting the Camera onto VB-WMK-002

- Line up the mounting plate with the VB-WMK-002.
- Attach the mounting plate to the VB-WMK-002 with the screws.
- Secure the camera to the mounting plate.
Note: When installing the camera, please note that there is a dimensional tolerance of 3%. It’s advisable to manually measure the size and the distance between the users and the camera prior to final installation.
Mounting UMB202 and VB-WMK-002 onto an IFP
After installing the UMB202 onto the VB-WMK-002, it can be set on the top or bottom of an ViewBoard.
-
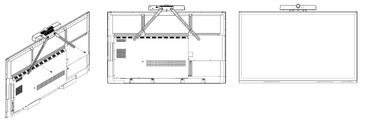 On the Top
 -
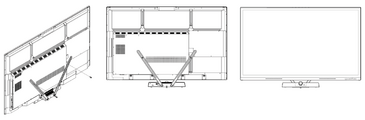 On the Bottom


Note: Please refer to the Compatibility List on page 18 or contact our local service provider for more information.