From ViewSonic User Guide Database
Package Contents
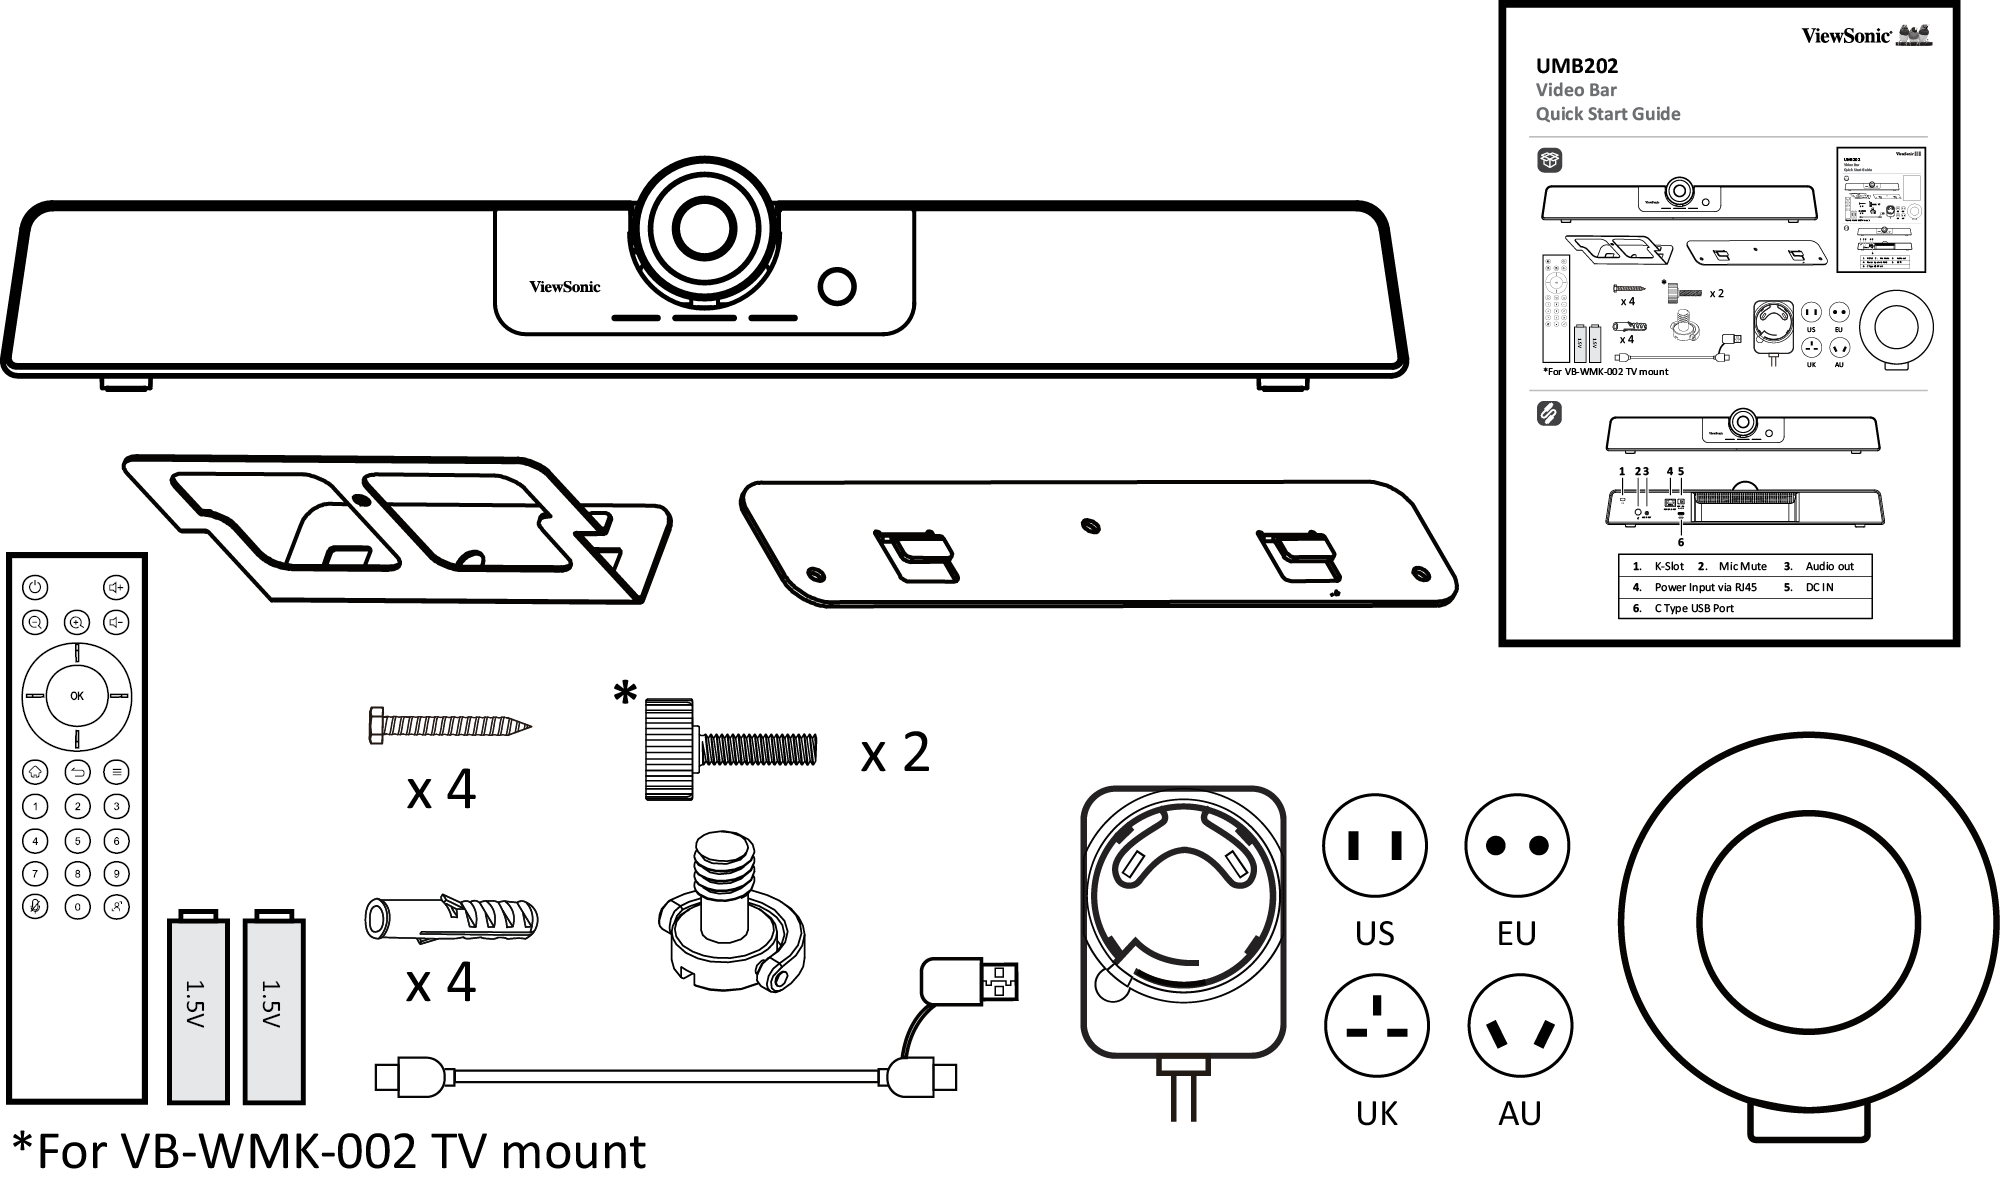
- UMB202
- Remote Control.
- AAA Batteries x 2
- Wall Mounting Kit with Anchors and Screws
- TV Mount Screws
- USB Type C Cable with USB Type A Adapter
- Power Adapter with US/EU/UK/AU plug adapters
- Lens Cover
- Quick Start Guide
Product Overview
| Number
|
Description
|
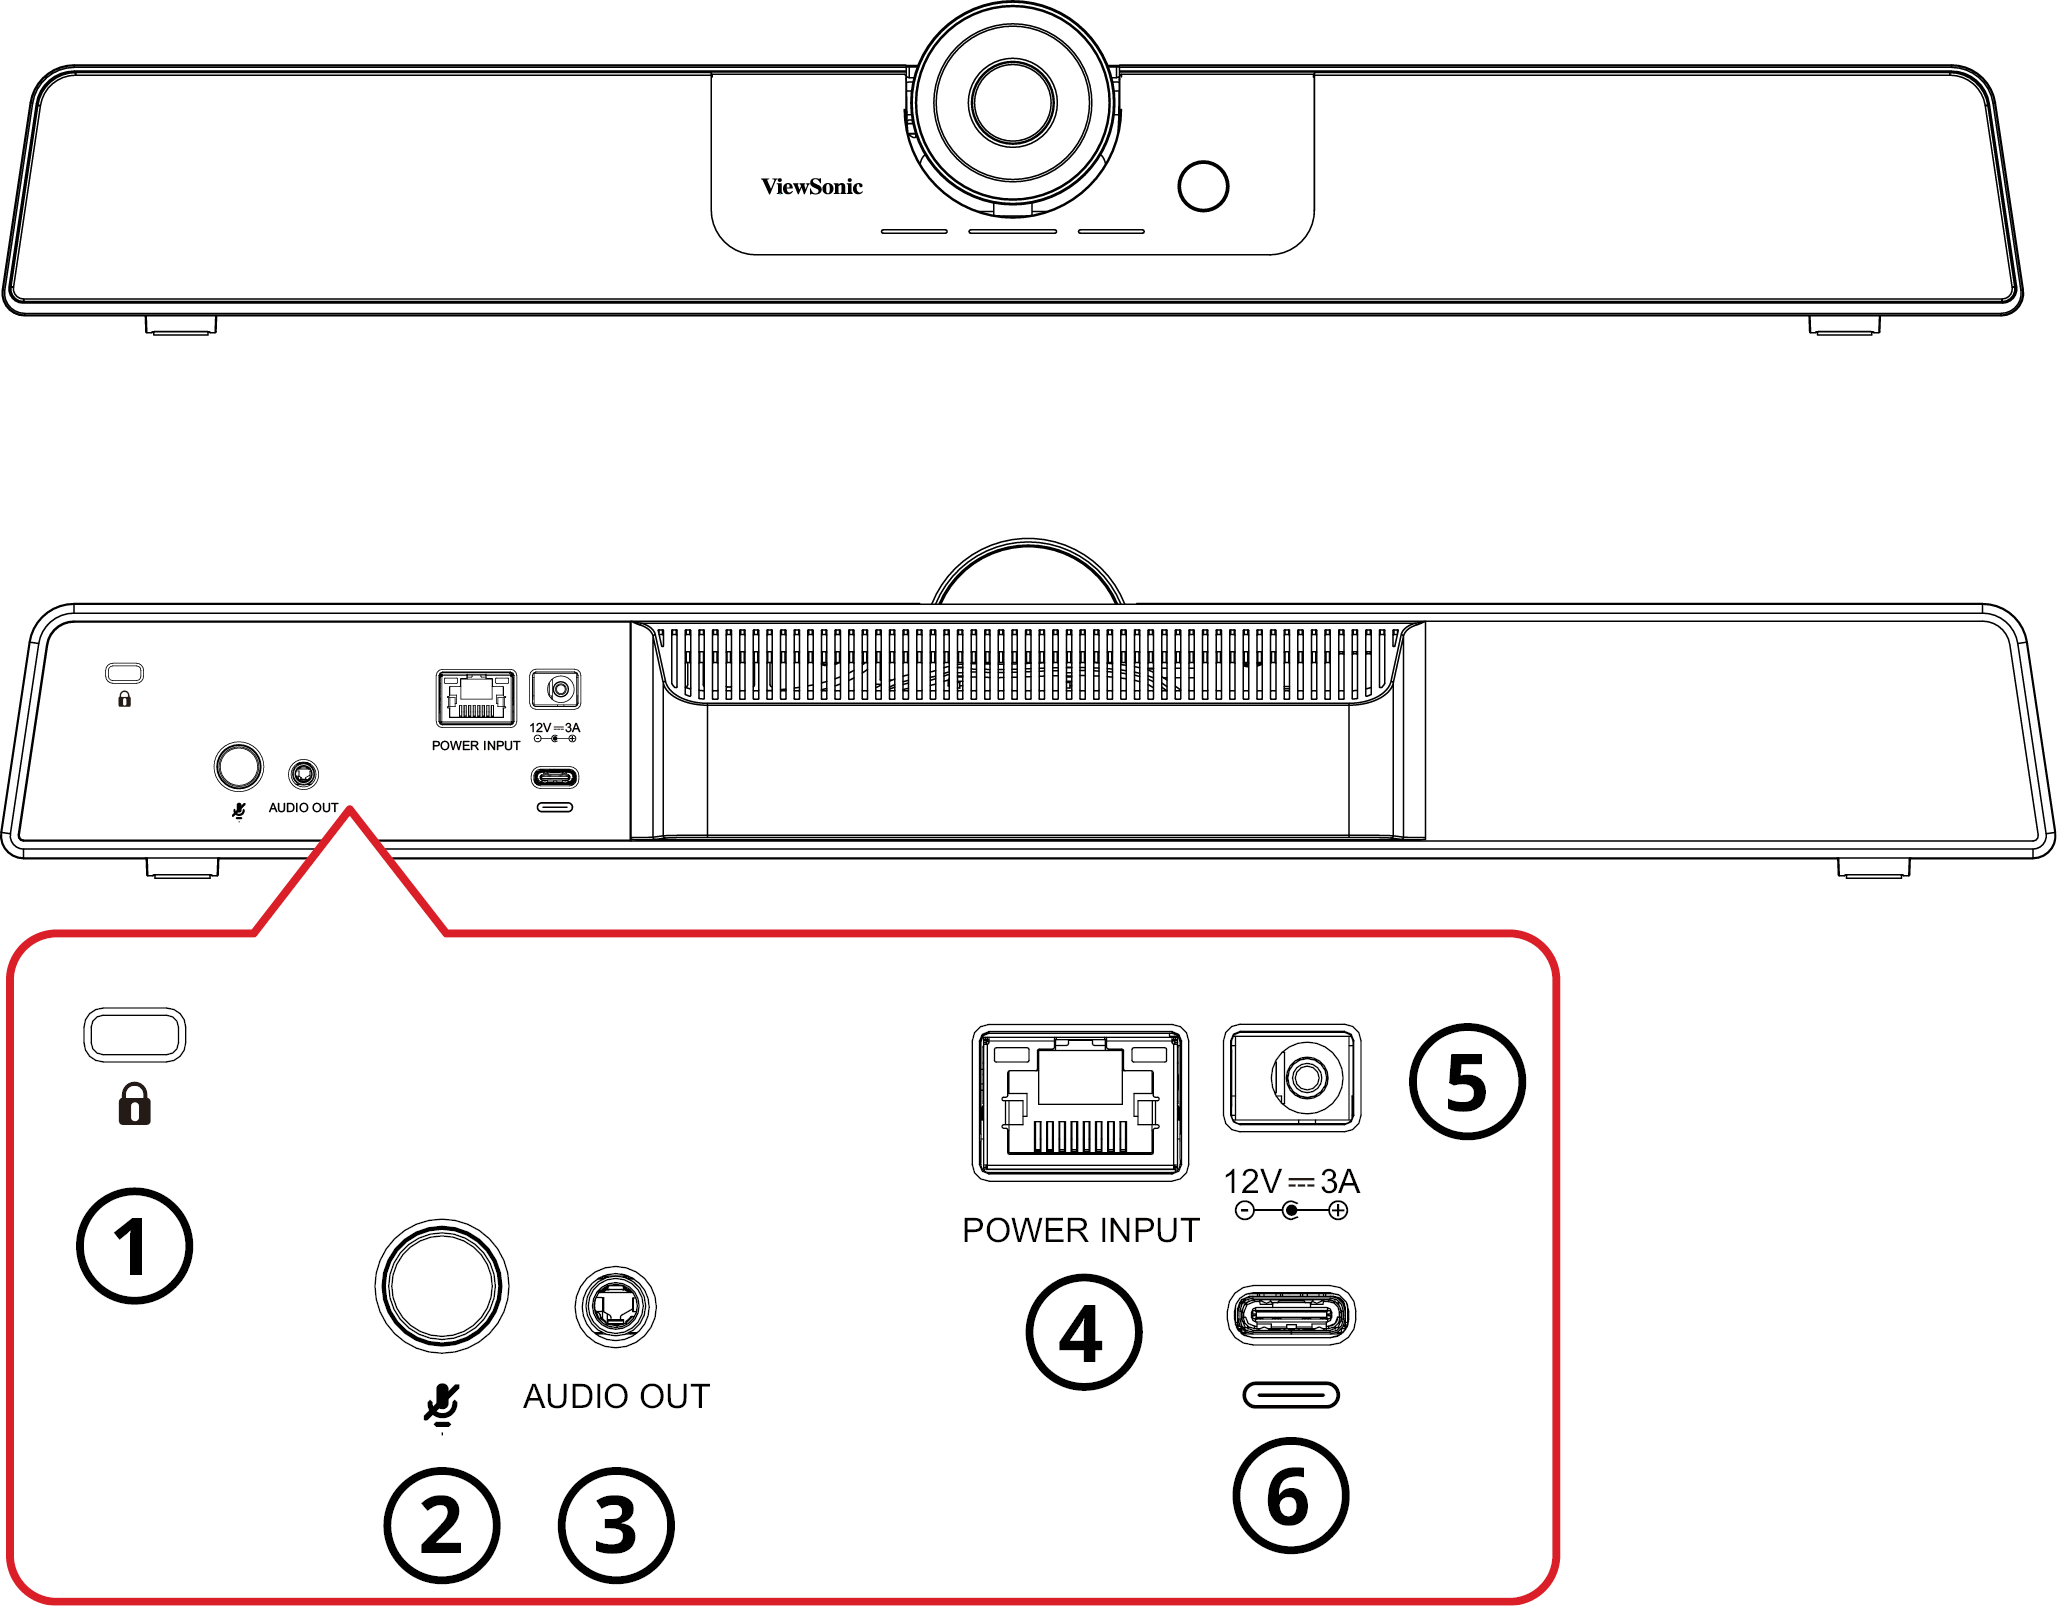
| 1
|
Security lock
|
| 2
|
Mic Mute
|
| 3
|
Audio Out
|
| 4
|
Power Input (RJ45)[1]
|
| 5
|
DC IN
|
| 6
|
USB Type C
|
Notes
- ↑ The RJ45 port only supports Power over Ethernet.
Remote Control
| Number
|
Button
|
Description
|
| 1
|
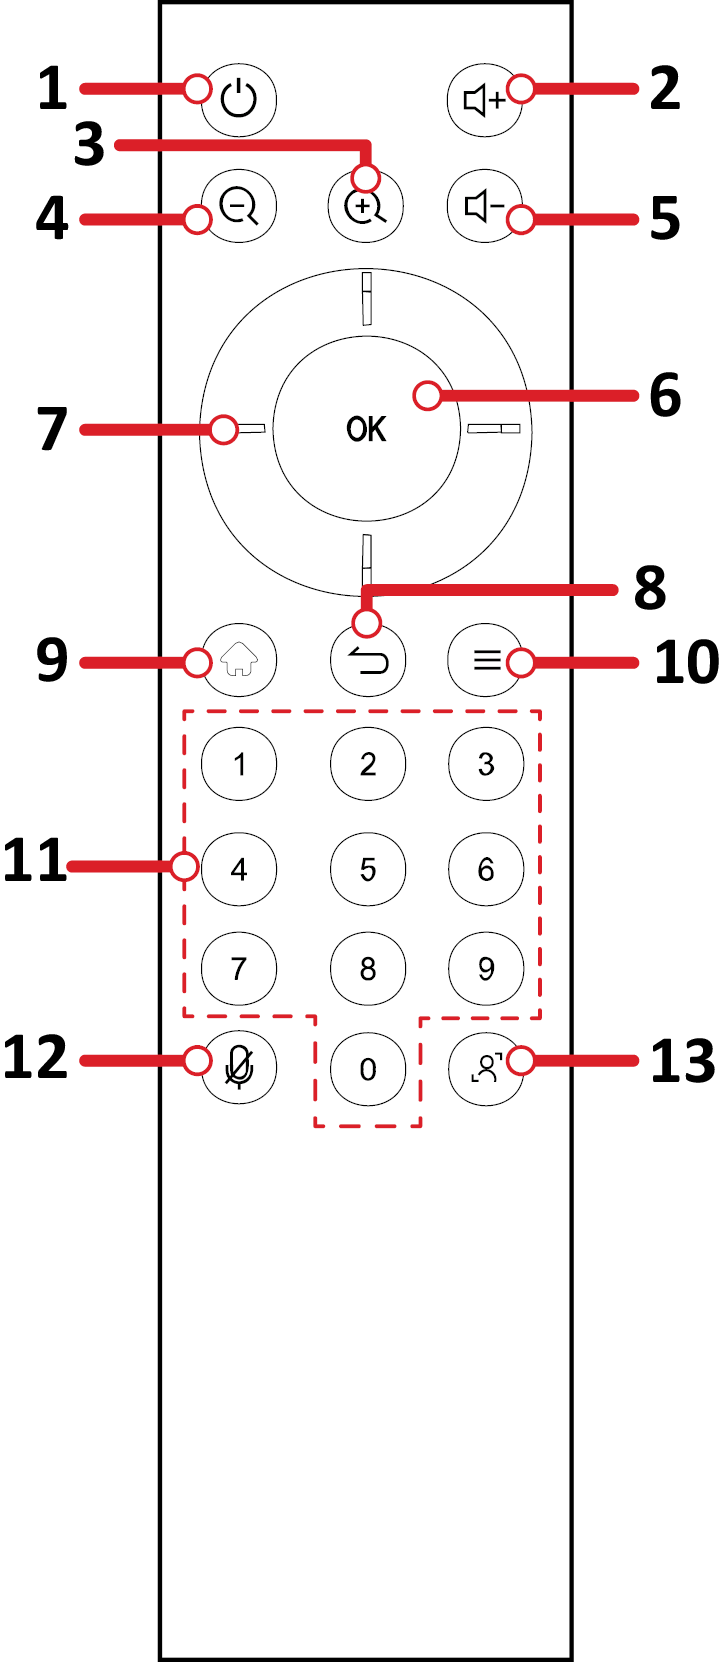
Power On/Standby
|
Turn on the UMB202, or put into standby.
|
| 2
|
Volume Up
|
Increase the volume level.
|
| 3
|
Digital Zoom In
|
Increase the zoom level.
|
| 4
|
Digital Zoom Out
|
Decrease the zoom level.
|
| 5
|
Volume Down
|
Decrease the volume level.
|
| 6
|
OK (Confirm)
|
Confirm selection.
|
| 7
|
Directional
|
Adjust settings.
|
| 8
|
No function
|
| 9
|
No function
|
| 10
|
No function
|
| 11
|
Number Pad
|
Press and hold a number for three seconds to save the image position to the pressed number.
|
| 12
|
Microphone Mute
|
Disable the microphone.
|
| 13
|
Framing Mode Adjust
|
Change the Framing Mode (Manual/Auto Framing and Voice Tracking/Voice Tracking Only)
|
Replacing the Batteries of the Remote Control
- Remove the cover on the rear of the remote control.
- Insert two “AAA” batteries, ensuring the “+” symbol on the battery matches the “+” on the battery post.
- Replace the cover by aligning it with the slot on the remote control and snapping the latch shut.
Note:
- Avoid leaving the remote control or batteries in excessive heat or humidity.
- Always dispose of old batteries in an environmentally friendly way. Contact your local government for more information on how to dispose of batteries safely.
- Remove the batteries if the remote control will not be in use for an extended period of time.
- It is recommended that you do not mix battery types.


