
IFP62 Using the ViewBoard: Difference between revisions
From ViewSonic Documentation
| Line 44: | Line 44: | ||
{| class="wikitable" width=45% | {| class="wikitable" width=45% | ||
|- | |- | ||
! style="font-weight:bold; text-align:center; background-color:#c41230; color:#ffffff;"|Icon | ! style="font-weight:bold; text-align:center; background-color:#c41230; color:#ffffff;"| Icon | ||
! style="font-weight:bold; text-align:center; background-color:#c41230; color:#ffffff;"|Description | ! style="font-weight:bold; text-align:center; background-color:#c41230; color:#ffffff;"| Description | ||
|- | |- | ||
| <div class="res-img">[[File: | | rowspan="8" | <div class="res-img">[[File:IFP70_Icon_Pen.png|200px]]</div> | ||
| <div class="res-img">[[File: | | Access the Pen, Highlighter, Clear, and Save options<br /> | ||
| < | <div class="res-img">[[File:IFP70_Icon_Pen_Tools.png|400px]]</div> | ||
|- | |||
| 1. <u>Digital Pen</u><br />Annotate the overlay of any input source with red, black, blue, or green ink.<br /> | |||
:<small>'''NOTE:''' The default digital pen setting supports up to 10-point writing.</small> | |||
|- | |- | ||
| < | | 2. <u>Digital Highlighter</u><br />Mark and highlight with four colors: yellow, orange, blue, and green.<br /> | ||
:<small>'''NOTE:''' The default digital highlighter setting supports up to 10-point marking.</small> | |||
| < | |- | ||
| < | | 3. <u>Brush</u><br />Clears all the digital ink on the screen. | ||
|- | |||
| 4. <u>Save As</u><br />Save the on-screen image onto the internal storage. | |||
|- | |- | ||
| | | 5. <u>Writing Mode</u><br />Transparent mode: Screen won't be frozen, the screen resolution won't be reduced to 1080p. | ||
|- | |- | ||
| < | | 6. <u>Picture Save Setting</u><br /> | ||
:'''Speed Priority:''' Save the on-screen image as 1920 x 1080; fast save speed.<br /> | |||
:'''Quality Priority:''' Save the on-screen image as 3840 x 2160; save time will take up to 10 seconds.<br /> | |||
::<small>'''NOTE:''' In opaque mode, the user cannot select the picture save setting.</small> | |||
|- | |||
| 7. <u>Close</u><br />Close the digital pen icon. | |||
|- | |||
| | |||
|- | |- | ||
| < | | rowspan="5" | <div class="res-img">[[File:IFP70_Icon_Freeze.png|200px]]</div> | ||
| Convert the currently displayed content into a still image; then you can zoom in or zoom out | |||
<div class="res-img">[[File:IFP70_Icon_Freeze_Tools.png|180px]]</div> | |||
|- | |- | ||
| <u> | | 1. <u>Zoom In</u><br />Enlarge the captured image. | ||
:<small>'''NOTE:''' The screen resolution will be reduced after zooming in.</small> | |||
|- | |- | ||
| <u> | | 2. <u>Zoom Out</u><br />Shrink the captured image. | ||
|- | |- | ||
| | | 3. <u>Back to Full Screen</u><br />Reset the Zoom In/Zoom Out effects to the original full screen. | ||
|- | |- | ||
| <u> | | 4. <u>Close</u><br />Close the icon. | ||
|- | |- | ||
| < | | rowspan="6" | <div class="res-img">[[File:IFP70_Icon_Tools.png|200px]]</div> | ||
| View more applications within the ViewBoard tool bar | |||
<div class="res-img">[[File:IFP70_Icon_Tools_Tools.png|220px]]</div> | |||
|- | |- | ||
| <u> | | 1. <u>Spotlight</u><br />Highlight the focus content zone. Tap the Setting icon to adjust the spotlight size and alpha blending effect.<br /> | ||
:<div class="res-img">[[File:IFP70_Spotlight.png|180px]]</div> | |||
|- | |- | ||
| <u> | | 2. <u>Countdown</u><br /> | ||
*Access the countdown timer with an optional alarm setting. Touch and swipe to adjust the numeric values, then click '''Start'''. | |||
*At any time, the countdown timer can be paused, resumed, or reset. | |||
*The timer will reduce in size and move to the lower-center of the screen automatically when the user touches another area. Touching the timer again will return it to its normal size and original location. | |||
|- | |- | ||
| <u> | | 3. <u>Stopwatch</u><br /> | ||
*Tapping '''Start''' will initiate the stopwatch. | |||
*At any time, the stopwatch can be paused, resumed, split, or reset. | |||
*The stopwatch will reduce in size and move to the lower-center of the screen automatically when the user touches another area. Touching the stopwatch again will return it to its normal size and original location. | |||
|- | |- | ||
| <u> | | 4. <u>Air Class</u><br />Interactive teaching tool for classroom usage. | ||
|- | |- | ||
| <u> | | 5. <u>Folder</u><br />Access the Folder function and retrieve documents. | ||
|} | |} | ||
{{#seo: | {{#seo: | ||
Revision as of 09:11, 9 May 2022
Power On/Off your ViewBoard
- Ensure the power cord is connected, plugged into a power outlet, and the power switch is in the “On” position.
- Press the Power button to turn on the ViewBoard.
- To turn the ViewBoard off, press and hold the Power button.

Initial Launch Setup
When you first turn on your ViewBoard, an initial setup wizard will launch.
-
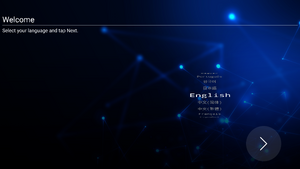 Language Select
 -
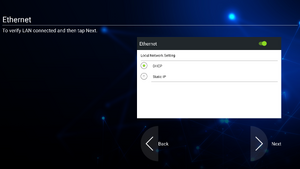 Network Connection
 -
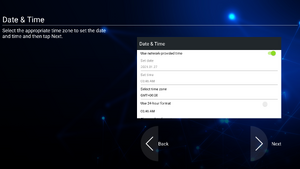 Date and Time


- Select your Language.
- Setup and verify your LAN connection.
- Select your Time Zone to set the Date and Time.
Toolbar
Toolbar trigger icons are on the edge of the ViewBoard launcher providing access to your tools.

To launch a tool:
- Tap a Toolbar trigger icon.
- Tap on your desired tool icon.

Toolbar Icons
| Icon | Description |
|---|---|
 |
Access the Pen, Highlighter, Clear, and Save options |
| 1. Digital Pen Annotate the overlay of any input source with red, black, blue, or green ink.
| |
| 2. Digital Highlighter Mark and highlight with four colors: yellow, orange, blue, and green.
| |
| 3. Brush Clears all the digital ink on the screen. | |
| 4. Save As Save the on-screen image onto the internal storage. | |
| 5. Writing Mode Transparent mode: Screen won't be frozen, the screen resolution won't be reduced to 1080p. | |
6. Picture Save Setting
| |
| 7. Close Close the digital pen icon. | |
 |
Convert the currently displayed content into a still image; then you can zoom in or zoom out
 |
| 1. Zoom In Enlarge the captured image.
| |
| 2. Zoom Out Shrink the captured image. | |
| 3. Back to Full Screen Reset the Zoom In/Zoom Out effects to the original full screen. | |
| 4. Close Close the icon. | |
 |
View more applications within the ViewBoard tool bar
 |
| 1. Spotlight Highlight the focus content zone. Tap the Setting icon to adjust the spotlight size and alpha blending effect. | |
2. Countdown
| |
3. Stopwatch
| |
| 4. Air Class Interactive teaching tool for classroom usage. | |
| 5. Folder Access the Folder function and retrieve documents. |
