IFP6533 Using the ViewBoard
From ViewSonic Documentation
Powering ON/OFF your ViewBoard
- Ensure the power cord is connected, plugged into a power outlet, and the power switch is in the “ON” position.
- Press the Power button to turn on the ViewBoard.
- To turn the ViewBoard OFF, press and hold the Power button.

Initial Launch Setup
When you first turn on your ViewBoard, an initial setup wizard will launch.
-
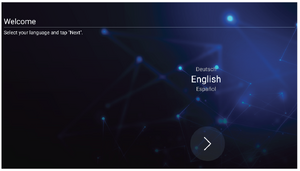 Language Select
 -
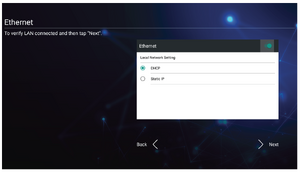 Network Connection
 -
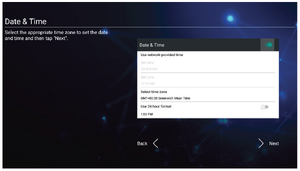 Date and Time
 -
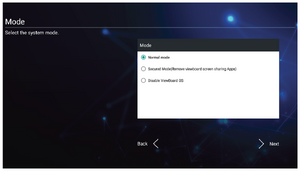 System Mode
 -
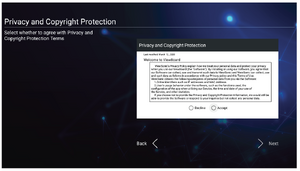 Privacy and Copyright Protection


- Select your Language.
- Setup and verify your LAN connection.
- Select your Time Zone to set the Date and Time.
- Select your preferred System Mode.
- Accept or Decline the Privacy and Copyright Protection Terms.
Toolbar
The Toolbar is where your applications and tools can be found. Trigger icons are on the edge of the launcher for quick access.

To launch an application or tool:
- Tap a Toolbar trigger icon.
- Tap on your desired application or tool icon.

Toolbar Icons
| Icon | Description |
|---|---|
| Return to the previous operation screen. | |
| Return to the Home Screen of the Embedded Player. | |
| Display all embedded applications that are currently open. | |
| View all installed applications.
| |
| Browser Web browser for surfing the Internet. | |
| Chromium Web browser for surfing the Internet. | |
| Cloud Drive Store and retrieve files from your cloud storage service. | |
| myViewBoard Display Wirelessly mirror screens to a larger display. | |
| Finder Manage files and folders. | |
| Live Stream whiteboarding sessions. | |
| Miracast Miracast wirelessly streams content from Windows and Android devices to a ViewBoard. | |
| myViewBoard Manager Remotely manage multiple installations of ViewSonic devices. | |
| myViewBoard Whiteboard A digital whiteboarding application. | |
| Palette Select a color and adjust the saturation levels. | |
| PIP Picture-in-Picture. Split the screen into two parts, a main window and an inset window. Users can specify the input source for each screen. | |
| Record Record, view, and save on-screen content. | |
| Settings Access the System Settings. | |
| Split-Screen Split the screen to display two different applications on the display. | |
| vCastReceiver Working with ViewBoard Cast software, receive vCastSender laptop screens (Windows/Mac/Chrome) and mobile (iOS/Android) users’ screens, photos, videos, annotations, and camera(s). | |
| Access the General Settings. | |
Annotate the overlay of any input source with a pen or brush. | |
Take a screenshot of the current screen and resize. | |
| View more applications within the toolbar.
| |
| Timer A countdown timer with an optional alarm setting. Touch and swipe to adjust the numeric values, then click Start. At any time, the countdown timer can be paused, resumed, or reset.  | |
| Spotlight Highlight the focus content zone. Tap the setting icon to adjust the spotlight size and alpha blending effect. | |
| Record Record, view, and save on-screen content. | |
| Freeze Convert the currently displayed content into a still image; then you can zoom in, zoom out, go back to full screen, and exit.  | |
| Split-Screen Split the screen to display two different applications on the display.  | |
| Screen Lock Lock the display’s screen for added security. | |
| Calculator Use for mathematical calculations. |
Control Bar
Frequently used settings and tools can be accessed quickly through the Control Bar.

| Item | Description | |
|---|---|---|
| 1 | Input Source | Select the input source.
 |
| 2 | Brightness | Adjust the brightness level of the display.
 |
| 3 | Sound | Adjust the volume level of the display.
 |
| 4 | USB | If a USB storage device is connected, the USB icon will be visible. Clicking the icon will open the USB storage device’s folder.
 |
| 5 | Hotspot | Shortcut to Wireless Hotspot settings. Enable or disable the hotspot function.
 |
| 6 | Ethernet | Shortcut to Wireless & Network LAN settings. Enable or disable LAN connection.
 |
| 7 | Wireless | Shortcut to Wireless & Network Wi-Fi settings. Enable or disable Wi-Fi and connect to a wireless network.
 |
| 8 | Date & Time | Shortcut to Date & Time settings. Set the date and time of the display.
 |