GD1330 Pen Input Area Mapping: Difference between revisions
From ViewSonic Documentation
Created page with "<noinclude> {{Sticky_Menu_Pen_Display_GD1330 |1=GD1330_Introduction |2=GD1330_Making_Connections |3=GD1330_Drive_Installation_Use_and_Removal |4=GD1330_Setting_the_Display_Area |5=GD1330_Pen_Input_Area_Mapping |6=GD1330_Device_Features |7=GD1330_Specifications |8=GD1330_Regulatory_and_Service_Information }} </noinclude> =Pen Input Area= To set the proper pen input area, <ol> <li>Open '''Pen Display Manager''' either from the Start menu, by going to: '''Start''' > '''Pen..." |
|||
| Line 11: | Line 11: | ||
}} | }} | ||
</noinclude> | </noinclude> | ||
=Pen Input | =Pen Input Settings= | ||
To | To adjust the pen input settings: | ||
<ol> | <ol><li>Open ViewSonic Pen Manager either by going to: '''Start''' > '''ViewSonic Pen Manager''' or selecting the ViewSonic Pen Manager icon from the System Tray.</li> | ||
<li>Open | <div class="res-img">[[File:GD1330_Pen_Input_Start.png|500px]]</div> | ||
<div class="res-img">[[File: | <li>Adjustments to the pen can be made by selecting the '''Pen''' tab.</li> | ||
<li> | |||
:<div class="res-img">[[File:Pen_Display_Manager_Mapping.png|400px]]</div> | :<div class="res-img">[[File:Pen_Display_Manager_Mapping.png|400px]]</div> | ||
<li>Select the | <li>Select the '''Mapping''' tab to adjust screen orientation and display.</li> | ||
:<div class="res-img">[[File:Pen_Display_Manager_Mapping_Orientation.png|400px]]</div> | :<div class="res-img">[[File:Pen_Display_Manager_Mapping_Orientation.png|400px]]</div> | ||
<li>Select the ''' | <li>Select the '''Express Keys''' tab to customize the six (6) express keys on the pen display.</li> | ||
:<div class="res-img">[[File:Pen_Display_Manager_Pen.png|400px]]</div></ol> | :<div class="res-img">[[File:Pen_Display_Manager_Pen.png|400px]]</div></ol> | ||
Revision as of 10:26, 18 April 2023
Pen Input Settings
To adjust the pen input settings:
- Open ViewSonic Pen Manager either by going to: Start > ViewSonic Pen Manager or selecting the ViewSonic Pen Manager icon from the System Tray.
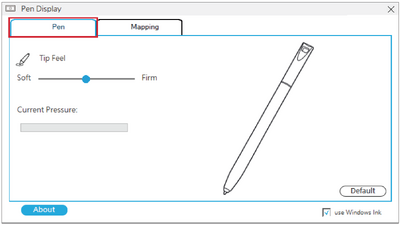
- Adjustments to the pen can be made by selecting the Pen tab.
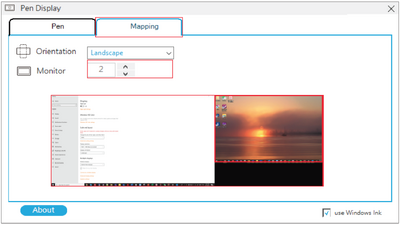
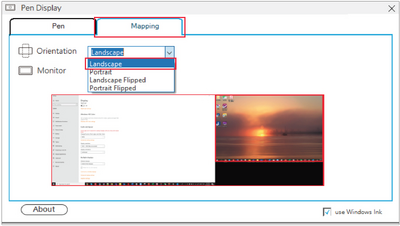
- Select the Mapping tab to adjust screen orientation and display.
- Select the Express Keys tab to customize the six (6) express keys on the pen display.