MPC310-W31-TU Using the Device: Difference between revisions
// via Wikitext Extension for VSCode |
No edit summary |
||
| (16 intermediate revisions by one other user not shown) | |||
| Line 1: | Line 1: | ||
<noinclude> | <noinclude> | ||
<div class="noprint"> | <div class="noprint"> | ||
<div style="top:1px;width:auto;" class="nomobile"> | <div style="top:1px;width:auto;" class="nomobile"> | ||
| Line 11: | Line 11: | ||
<div class="grid-item">[[MPC310-W31-TU_Appendix|Appendix]]</div> | <div class="grid-item">[[MPC310-W31-TU_Appendix|Appendix]]</div> | ||
<div class="grid-item">[[MPC310-W31-TU_Regulatory_and_Service_Information|Regulatory and Service Information]]</div> | <div class="grid-item">[[MPC310-W31-TU_Regulatory_and_Service_Information|Regulatory and Service Information]]</div> | ||
<div class="grid-item">[[MPC310-W31-TU_Troubleshooting|Troubleshooting]]</div> | |||
</div> | </div> | ||
</div> | </div> | ||
| Line 26: | Line 27: | ||
<li> | <li> | ||
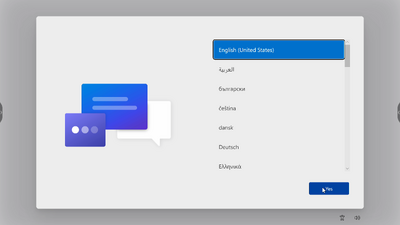
<p>Select language.</p> | <p>Select language.</p> | ||
<div class="res-img">[[File:MPC310-W31-TU MTR Setup-1.png| | <div class="res-img">[[File:MPC310-W31-TU MTR Setup-1.png|400px|alt=Languages]]</div> | ||
</li> | </li> | ||
<li> | <li> | ||
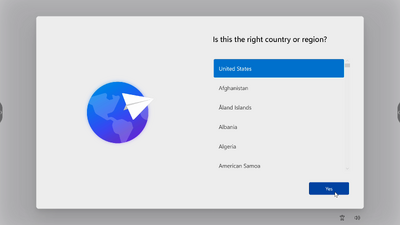
<p>Select country or region.</p> | <p>Select country or region.</p> | ||
<div class="res-img">[[File:MPC310-W31-TU MTR Setup-2.png| | <div class="res-img">[[File:MPC310-W31-TU MTR Setup-2.png|400px|alt= Countries or regions]]</div> | ||
</li> | </li> | ||
<li> | <li> | ||
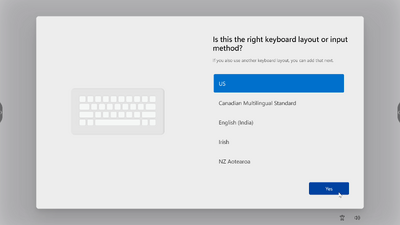
<p>Select keyboard layout.</p> | <p>Select keyboard layout.</p> | ||
<div class="res-img">[[File:MPC310-W31-TU MTR Setup-3.png| | <div class="res-img">[[File:MPC310-W31-TU MTR Setup-3.png|400px|alt=keyboard layouts]]</div> | ||
</li> | </li> | ||
<li> | <li> | ||
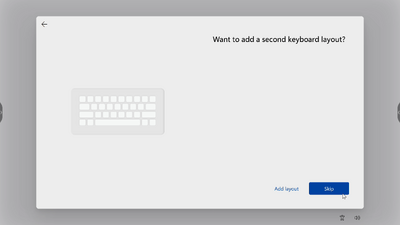
<p>Add a second keyboard layout.</p> | <p>Add a second keyboard layout.</p> | ||
<div class="res-img">[[File:MPC310-W31-TU MTR Setup-4.png| | <div class="res-img">[[File:MPC310-W31-TU MTR Setup-4.png|400px|alt=second keyboard layouts]]</div> | ||
</li> | </li> | ||
<li> | <li> | ||
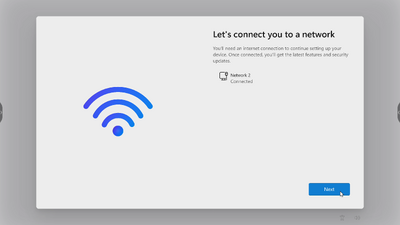
<p>Connect to a network.</p> | <p>Connect to a network.</p> | ||
<div class="res-img">[[File:MPC310-W31-TU MTR Setup-5.png| | <div class="res-img">[[File:MPC310-W31-TU MTR Setup-5.png|400px|alt=networks]]</div> | ||
</li> | </li> | ||
| Line 52: | Line 53: | ||
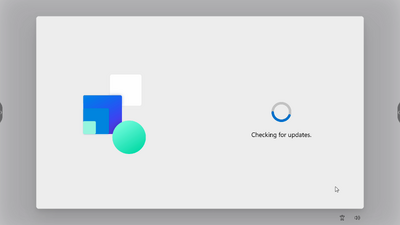
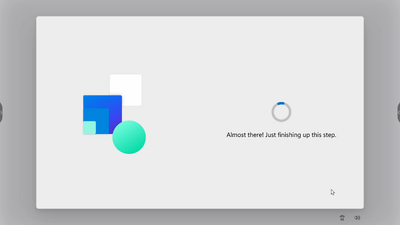
<p>Check for any updates and finish setting up.</p> | <p>Check for any updates and finish setting up.</p> | ||
<div class="res-img"> | <div class="res-img"> | ||
<p>[[File:MPC310-W31-TU MTR Setup-6-1.png| | <p>[[File:MPC310-W31-TU MTR Setup-6-1.png|400px|alt=checking for updates]]</p> | ||
<p>[[File:MPC310-W31-TU MTR Setup-6-2.png| | <p>[[File:MPC310-W31-TU MTR Setup-6-2.png|400px|alt=finish setting up]]</p> | ||
<p>[[File:MPC310-W31-TU MTR Setup-6-3.png| | <p>[[File:MPC310-W31-TU MTR Setup-6-3.png|400px|alt=Teams Rooms screen]]</p> | ||
</div> | </div> | ||
</li> | </li> | ||
| Line 63: | Line 64: | ||
<li> | <li> | ||
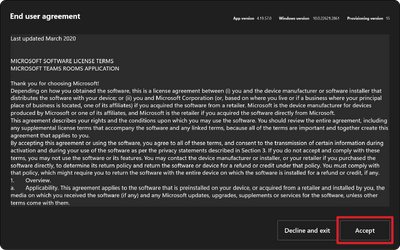
<p>To setup a Microsoft Teams Rooms account, review the End user agreement and select '''Accept'''.</p> | <p>To setup a Microsoft Teams Rooms account, review the End user agreement and select '''Accept'''.</p> | ||
<div class="res-img">[[File:MPC310-W31-TU MTR Account-1.png| | <div class="res-img">[[File:MPC310-W31-TU MTR Account-1.png|400px|alt=User agreement]]</div> | ||
</li> | </li> | ||
<li> | <li> | ||
<p>Select '''Manual setup'''.</p> | <p>Select '''Manual setup'''.</p> | ||
<div class="res-img">[[File:MPC310-W31-TU MTR Account-2.png| | <div class="res-img">[[File:MPC310-W31-TU MTR Account-2.png|400px|alt=Manual setup]]</div> | ||
</li> | </li> | ||
<li> | <li> | ||
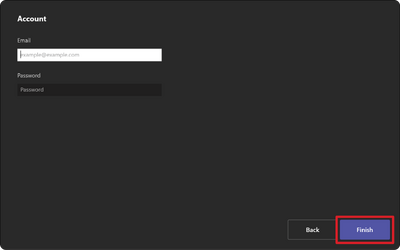
<p>Enter the account email and password, then select '''Finish'''.</p> | <p>Enter the account email and password, then select '''Finish'''.</p> | ||
<div class="res-img">[[File:MPC310-W31-TU MTR Account-3.png| | <div class="res-img">[[File:MPC310-W31-TU MTR Account-3.png|400px|alt=finish setting up]]</div> | ||
</li> | </li> | ||
</ol> | </ol> | ||
| Line 79: | Line 80: | ||
=Touch Console= | =Touch Console= | ||
==Home Screen== | ==Home Screen== | ||
<div class="res-img">[[File:MPC310-W31-TU Touch Console.png| | <div class="res-img">[[File:MPC310-W31-TU Touch Console.png|400px|alt=Touch Console's Home Screen]]</div> | ||
{| class="wikitable" style="text-align:center; width:60%; background-color:#ffffff;" | {| class="wikitable" style="text-align:center; width:60%; background-color:#ffffff;" | ||
|- | |- | ||
| Line 138: | Line 139: | ||
<li> | <li> | ||
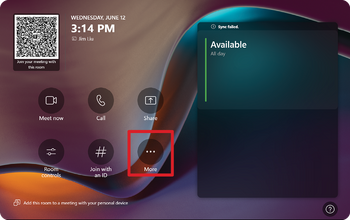
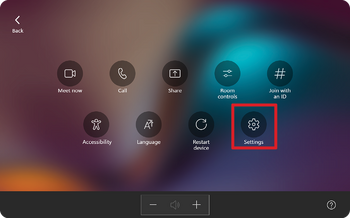
<p>On the Touch Console, select '''More''' and then '''Settings'''.</p> | <p>On the Touch Console, select '''More''' and then '''Settings'''.</p> | ||
< | <div class="res-img"> | ||
MRC1010-TN PIR Sensor Setup-1-1.png | | <p>[[File:MRC1010-TN PIR Sensor Setup-1-1.png |350px|alt=More button]] [[File:MRC1010-TN PIR Sensor Setup-1-2.png |350px|alt=More and Settings buttons]]</p> | ||
MRC1010-TN PIR Sensor Setup-1-2.png | | </div> | ||
</ | |||
</li> | </li> | ||
<li> | <li> | ||
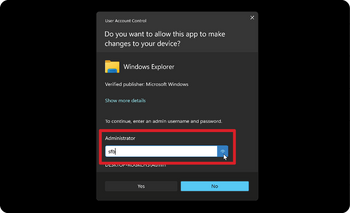
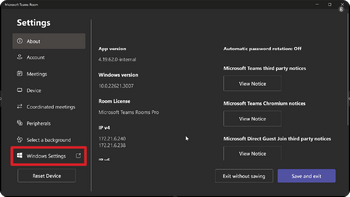
<p></p> | <p>Enter the Administrator password “sfb” and select '''Windows Settings''' and '''Go to Admin Sign-in'''.</p> | ||
<div class="res-img">[[File: | <div class="res-img"> | ||
<p>[[File:MRC1010-TN PIR Sensor Setup-2-1.png |350px|alt=More button]] [[File:MRC1010-TN PIR Sensor Setup-2-2.png |350px|alt=Windows Settings and Go to Admin Sign-in buttons]]</p> | |||
</div> | |||
</li> | </li> | ||
<li> | <li> | ||
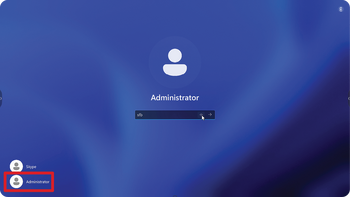
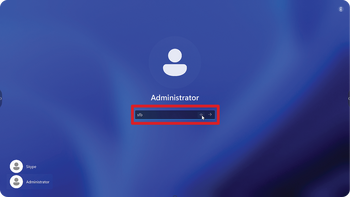
<p></p> | <p>The MTR computer will log out of MTR and the Windows 11 login screen will be presented. Select the Administrator account and enter the password “sfb”.</p> | ||
<div class="res-img">[[File: | <div class="res-img"> | ||
<p>[[File:MRC1010-TN PIR Sensor Setup-3-1.png |350px|alt=Selecting the Administrator account]] [[File:MRC1010-TN PIR Sensor Setup-3-2.png |350px|alt=Entering the password]]</p> | |||
</div> | |||
</li> | </li> | ||
<li> | <li> | ||
<p></p | <p>In the Search Box on the Windows Task Bar, search for and open Device Manager.</p> | ||
</li> | </li> | ||
<li> | <li> | ||
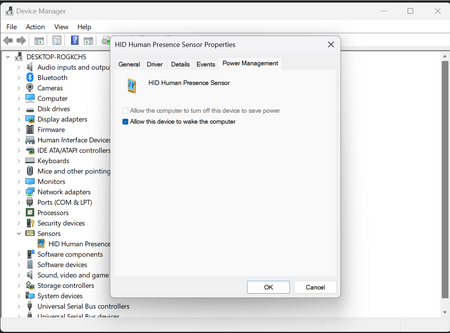
<p></p> | <p>In Device Manager, select: '''Sensors''' > '''HID Human Presence Sensor Properties''' > '''Power Management'''.</p> | ||
<div class="res-img">[[File: | <div class="res-img">[[File:MRC1010-TN PIR Sensor Setup-5.png|450px|alt=Setting up Device Manager]]</div> | ||
</li> | </li> | ||
<li> | <li> | ||
<p> | <p>Select the checkbox next to '''Allow this device to wake the computer'''.</p> | ||
</li> | |||
</li> | |||
</ol> | </ol> | ||
="Wake on Active IFP Display" Settings= | ="Wake on Active IFP Display" Settings= | ||
<div class="res-img">[[File:MPC310-W31-TU Wake On Active IFP.png|400px|alt=Connect ViewBoards]]</div> | |||
Please follow the guidelines below to wake up the IFP display from standby mode to active mode when the MTR PIR sensor makes a detection: | |||
*Before adjusting the IFP display settings, make sure the [[#PIR Sensor Setup|PIR Sensor Setup]] is complete as this allows the device to wake the computer. | |||
*Refer to the following examples of Startup & Shutdown/Power Save settings of the IFP /CDE series. | |||
==IFP33 Series - IFP62 Series - IFP105== | |||
<div class="res-img">[[File:MPC310-W31-TU IFP.png|400px|alt=Setup and Shutdown screen]]</div> | |||
==CDE30 Series== | |||
<div class="res-img">[[File:MPC310-W31-TU CDE30.png|400px|alt=Power save pop-up]]</div> | |||
==IFPG1 Series== | |||
<p>Power Save: Mode3 TCP on, WOL off, wake up by video signal resume.</p> | |||
<div class="res-img">[[File:MPC310-W31-TU IFPG1.png|400px|alt=Power save screen]]</div> | |||
{{Note|MTR sleep mode time settings.<p>[[File:MPC310-W31-TU IFPG1 Sleep Mode Time Settings.png|center|300px|alt=the Power save function]]</p>}} | |||
==Calibrate the Display for Pen or Touch== | |||
<div class="res-img">[[File:MPC310-W31-TU Calibrate.png|400px|alt=Connect ViewSonic's Pen Display or Touch Display]]</div> | |||
{{Note|Before starting, make sure a keyboard is connected to the Conference PC.}} | |||
<ol> | <ol> | ||
<li> | <li> | ||
<p>On the Touch Console, select '''More''' and then '''Settings'''.</p> | <p>On the Touch Console, select '''More''' and then '''Settings'''.</p> | ||
<div class="res-img"> | |||
<p>[[File:MRC1010-TN PIR Sensor Setup-1-1.png |350px|alt=More button]] [[File:MRC1010-TN PIR Sensor Setup-1-2.png |350px|alt=More and Settings buttons]]</p> | |||
</div> | |||
</li> | |||
<li> | |||
<p>Enter the Administrator password “sfb” and select '''Windows Settings''' and '''Go to Admin Sign-in'''.</p> | |||
<div class="res-img"> | |||
<p>[[File:MPC310-W31-TU Calibrate-2-1.png|350px|alt=Selecting the Administrator account]] [[File:MPC310-W31-TU Calibrate-2-1.png|350px|alt=Entering the password]]</p> | |||
</div> | |||
</li> | </li> | ||
<li> | <li> | ||
<p></p> | <p>The MTR computer will log out of MTR and the Windows 11 login screen will be presented. Select the Administrator account and enter the password “sfb".</p> | ||
<div class="res-img">[[File: | <div class="res-img"> | ||
<p>[[File:MRC1010-TN PIR Sensor Setup-3-1.png |350px|alt=Selecting the Administrator account]] [[File:MRC1010-TN PIR Sensor Setup-3-2.png |350px|alt=Entering the password]]</p> | |||
</div> | |||
</li> | </li> | ||
<li> | <li> | ||
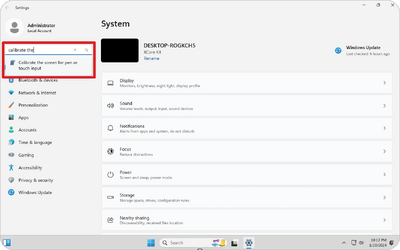
<p></p> | <p>In the Search Box on the Windows Task Bar, search for and open “Calibrate the screen for pen or touch input”.</p> | ||
<div class="res-img">[[File:MPC310-W31-TU | <div class="res-img">[[File:MPC310-W31-TU Calibrate-4.png |400px|alt=open the function]]</div> | ||
</li> | </li> | ||
<li> | <li> | ||
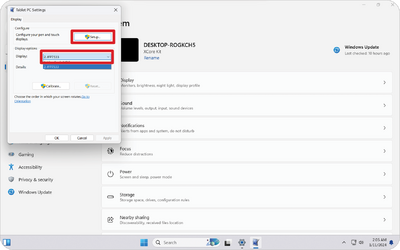
<p></p> | <p>In Tablet PC Settings under Display Options select the connected display. Then, under Configure, click Setup and select Touch Input in the pop-up window.</p> | ||
<div class="res-img">[[File:MPC310-W31-TU | <div class="res-img">[[File:MPC310-W31-TU Calibrate-5.png|400px|alt=selecting Touch Input]]</div> | ||
</li> | </li> | ||
<li> | <li> | ||
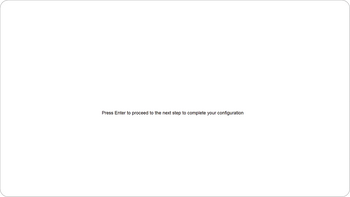
<p></p> | <p>A message will appear on each display’s screen (e.g., IFP display and MRC1010-TN) one at a time instructing you to tap the screen with a single finger to identify it as the touchscreen. Tap the screen displaying this message with your finger as instructed, and press Enter on the connected keyboard to proceed.</p> | ||
<div class="res-img">[[File:MPC310-W31-TU | {{Note|This step will first set up the IFP display side and then set up the MRC1010-TN side, refer to the same setting screen as below}} | ||
<div class="res-img"> | |||
<p>[[File:MPC310-W31-TU Calibrate-6-1.png|350px|alt=Tapping the screen]] [[File:MPC310-W31-TU Calibrate-6-2.png|350px|alt=Enter the password]]</p> | |||
</div> | |||
</li> | </li> | ||
<li> | <li> | ||
<p></p> | <p>Repeat this for all interactive displays, including the IFP display and the MRC1010-TN Touch console.</p> | ||
{{Note| If any non-interactive displays are being used, press '''Enter''' on the connected keyboard to skip.}} | |||
</li> | </li> | ||
</ol> | </ol> | ||
Latest revision as of 03:09, 27 September 2024
Prerequisites
Required License for Microsoft Teams Rooms (MTR)
You will need a Microsoft Teams Rooms license to set up your MTR Room System. To learn more about the required licenses, refer to the Microsoft Teams documentation: "Microsoft Teams Rooms licenses"
Required Resource Account for Microsoft Teams Rooms
To set up your Microsoft Teams Rooms system, you will also need a Microsoft Teams Rooms account. For information on setting up this account, refer to the Microsoft Teams documentation: "Create and configure resource accounts for rooms and shared Teams device"
MTR Setup Wizard
-
Select language.
-
Select country or region.
-
Select keyboard layout.
-
Add a second keyboard layout.
-
Connect to a network.
-
Check for any updates and finish setting up.


MTR Account Setup
-
To setup a Microsoft Teams Rooms account, review the End user agreement and select Accept.
-
Select Manual setup.

-
Enter the account email and password, then select Finish.


Touch Console
Home Screen

| Icon | Function | Description |
|---|---|---|
| Meet Now | Start a new meeting. | |
| Call | Make a phone call. | |
| Share | Project your laptop by plugging in the cable connected to the console. Depending on the room settings, it may be projected to the room automatically, or you may have to select Share on the Touch Console. You can also cast content onto the room display from your desktop or mobile device. | |
| Join with an ID | Join a meeting that is not on the calendar. | |
| More | View more options like adding a room, setting adjustment, etc. | |
| Accessibility | See accessibility options. | |
| Restart Device | Restart the Touch Console. | |
| Settings | Change the Touch Console settings. | |
| Room Controls | Switch to an OEM-provided application for in-room media or room lighting and/or blind controls. This option is available when configured by your administration. |
- NOTE:For more information on features see Microsoft Teams Rooms (Windows) and Get Started with Chat in Microsoft Teams.
PIR Sensor Setup
-
On the Touch Console, select More and then Settings.
-
Enter the Administrator password “sfb” and select Windows Settings and Go to Admin Sign-in.
-
The MTR computer will log out of MTR and the Windows 11 login screen will be presented. Select the Administrator account and enter the password “sfb”.
-
In the Search Box on the Windows Task Bar, search for and open Device Manager.
-
In Device Manager, select: Sensors > HID Human Presence Sensor Properties > Power Management.
-
Select the checkbox next to Allow this device to wake the computer.


"Wake on Active IFP Display" Settings

Please follow the guidelines below to wake up the IFP display from standby mode to active mode when the MTR PIR sensor makes a detection:
- Before adjusting the IFP display settings, make sure the PIR Sensor Setup is complete as this allows the device to wake the computer.
- Refer to the following examples of Startup & Shutdown/Power Save settings of the IFP /CDE series.
IFP33 Series - IFP62 Series - IFP105

CDE30 Series

IFPG1 Series
Power Save: Mode3 TCP on, WOL off, wake up by video signal resume.


Calibrate the Display for Pen or Touch

-
On the Touch Console, select More and then Settings.
-
Enter the Administrator password “sfb” and select Windows Settings and Go to Admin Sign-in.

-
The MTR computer will log out of MTR and the Windows 11 login screen will be presented. Select the Administrator account and enter the password “sfb".
-
In the Search Box on the Windows Task Bar, search for and open “Calibrate the screen for pen or touch input”.
-
In Tablet PC Settings under Display Options select the connected display. Then, under Configure, click Setup and select Touch Input in the pop-up window.
-
A message will appear on each display’s screen (e.g., IFP display and MRC1010-TN) one at a time instructing you to tap the screen with a single finger to identify it as the touchscreen. Tap the screen displaying this message with your finger as instructed, and press Enter on the connected keyboard to proceed.
Note: This step will first set up the IFP display side and then set up the MRC1010-TN side, refer to the same setting screen as below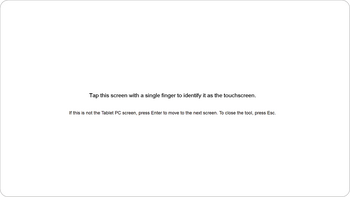
-
Repeat this for all interactive displays, including the IFP display and the MRC1010-TN Touch console.
Note: If any non-interactive displays are being used, press Enter on the connected keyboard to skip.


