XG320Q Advanced Features and Settings
Adaptive Sync
Enabling Adaptive Sync will put an end to choppy gameplay and broken games with fluid, artifact-free performance at virtually any frame rate.
To enable the Adaptive Sync function:
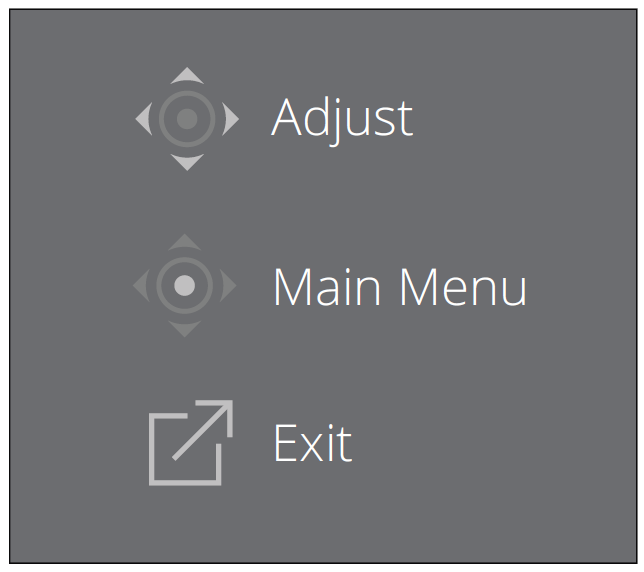
- Press the [●] key or move the joy key [◄] or [▲] or [▼] to display the On-Screen Display (OSD) Menu.
- Move the joy key [◄] or [►] to select Display. Then move the joy key [▼] to enter the Display menu.
- Move the joy key [▲] or [▼] to select Adaptive Sync. Then move the joy key [►] to confirm the selection.
- Move the joy key [▲] or [▼] to select On or Off. Then press the [●] key to confirm the selection.
- NOTE: To use the G-Sync function, a DisplayPort connection must be used. Additionally, please note:
- Your computer must be equipped with a GeForce GTX 10-Series or GeForce RTX 20-Series graphics card.
- The latest GeForce Driver should be installed.
- For more information on how to enable G-Sync on an Adaptive Sync monitor, please visit: https://www.nvidia.com/en-us/geforce/news/geforce-rtx-2060-g-sync-compatible-game-ready-driver/ .
PureXP™
Short for “Pure Experience”, this feature can enhance the visual quality of moving objects, making them less vague with a clearer view. XP is also a play on the life bar in some games. XP is a common & cool way for naming, just like video industry, video effect as VFX. It also adds a more gaming & technological touch.
This is ViewSonic’s exclusive technology to optimize the moving picture response time (MPRT) for better performance during gaming.
- NOTE: Only available for refresh rates above 100Hz.
To enable the PureXP™ function:
- Press the [●] key or move the joy key [◄] or [▲] or [▼] to display the On-Screen Display (OSD) Menu.
- Move the joy key [◄] or [►] to select Display. Then move the joy key [▼] to enter the Display menu.
- Move the joy key [▲] or [▼] to select PureXP™. Then move the joy key [►] to confirm the selection.
- Move the joy key [▲] or [▼] to select your preferred experience. Then press the [●] key to confirm the selection.
Hertz Limiter
A monitor hertz controller allows users to control how many frames the monitor can output. The monitor will put a cap on the maximum amount of frames that can be rendered from the monitor to save power and loading from the monitor’s side.
To adjust the Hertz Limiter:
- Press the [●] key or move the joy key [◄] or [▲] or [▼] to display the On-Screen Display (OSD) Menu.
- Move the joy key [◄] or [►] to select Display. Then move the joy key [▼] to enter the Display menu.
- Move the joy key [▲] or [▼] to select Hertz Limiter. Then move the joy key [►] to confirm the selection.
- Move the joy key [▲] or [▼] to select your preferred frame output. Then press the [●] key to confirm the selection.
| Menu Option |
|---|
| Native |
| 60Hz |
| 100Hz |
| 144Hz |
| 165Hz |
NOTE:
- If Adaptive Sync is “On”, Hertz Limiter will be disabled.
- ViewScale may not support all Hz levels.
Response Time OD
Adjusting the Response Time OD setting will allow the user to fine-tune their desired response time. With five (5) settings to choose from, users can precisely select the best fit for each use scenario.
Each setting will increase response time speed, allowing users the ability to match their PC and game type, creating a “best fit” scenario.
To enable the Response Time OD function:
- Press the [●] key or move the joy key [◄] or [▲] or [▼] to display the On-Screen Display (OSD) Menu.
- Move the joy key [◄] or [►] to select Display. Then move the joy key [▼] to enter the Display menu.
- Move the joy key [▲] or [▼] to select Response Time OD. Then move the joy key [►] to confirm the selection.
- Move the joy key [▲] or [▼] to select your preferred response time. Then press the [●] key to confirm the selection.
Blue Light Filter and Eye Health
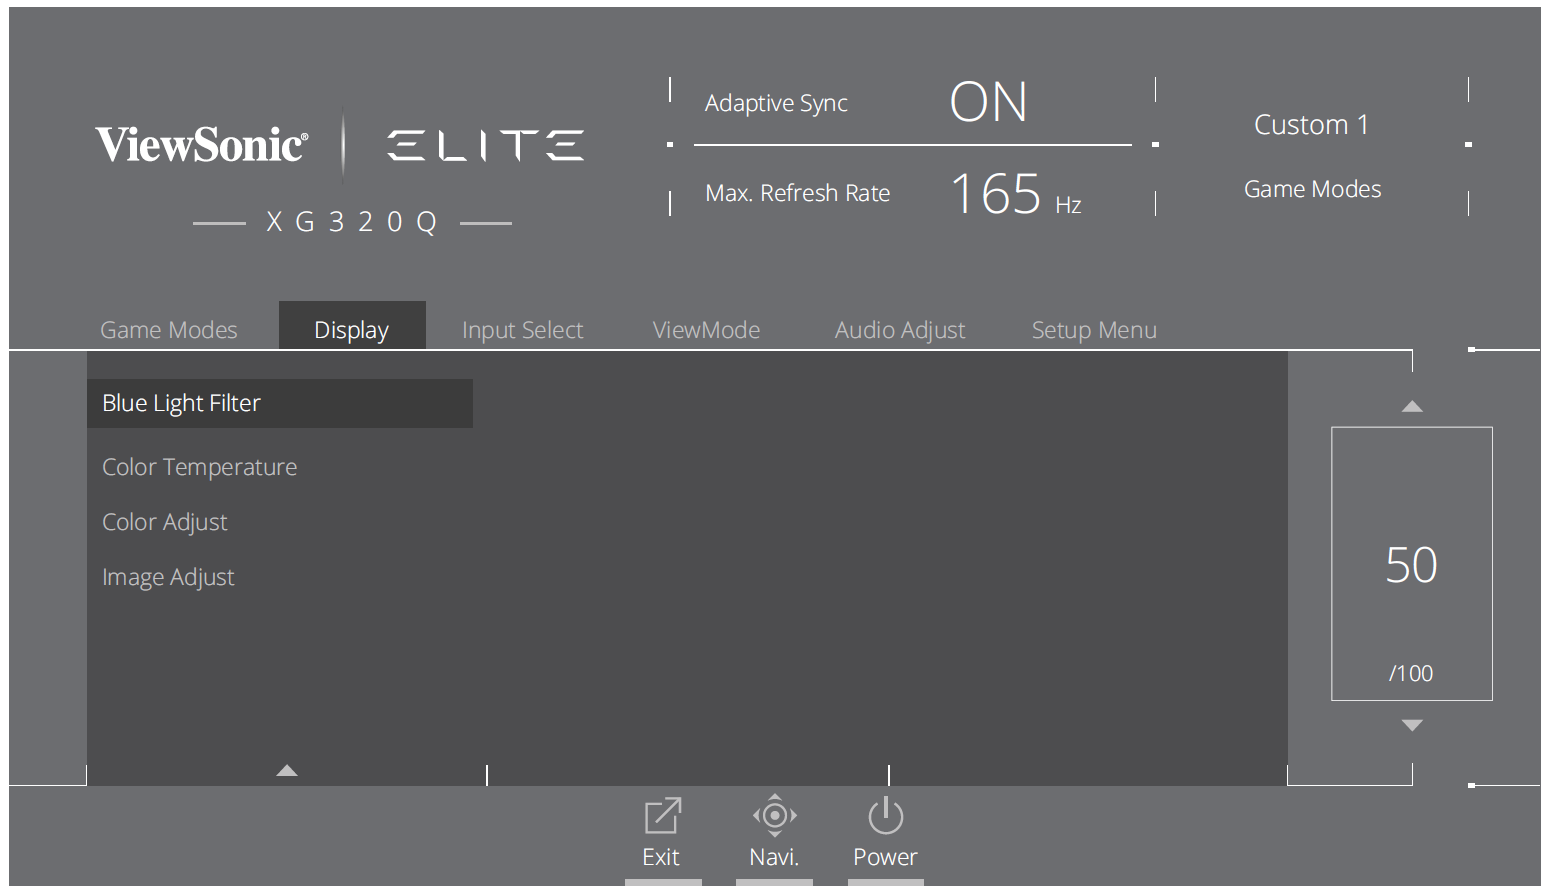
The Blue Light Filter blocks high-energy blue light for a more comfortable viewing experience.
Quick Access Blue Light Filter Setup
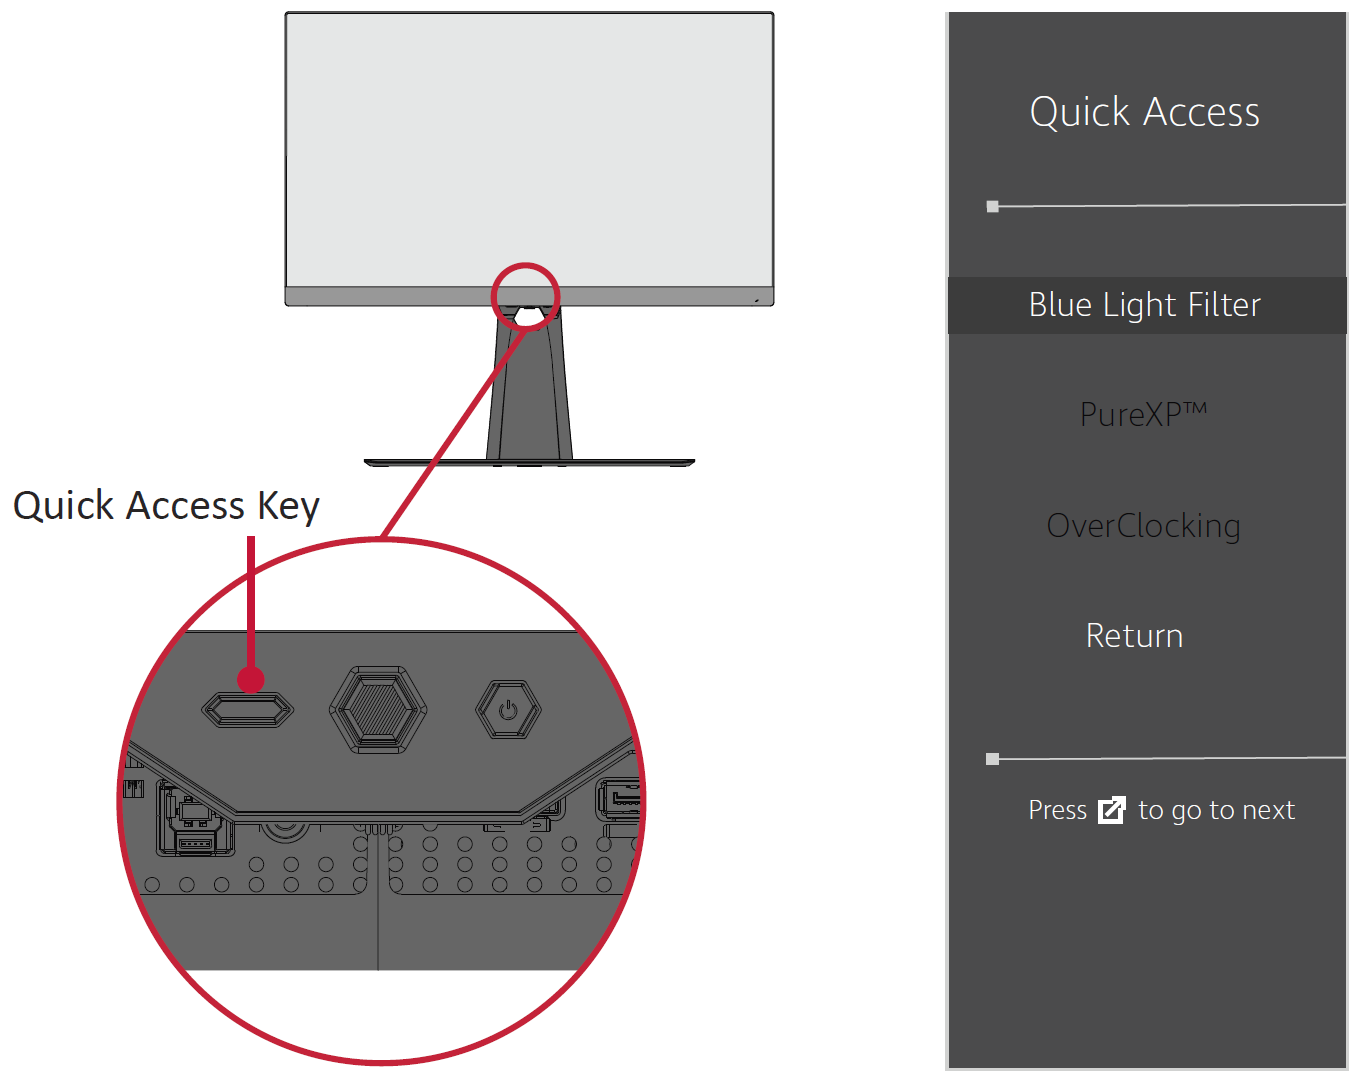
Enabling and disabling the Blue Light Filter can be done on the fly via the Quick Access Key.
- NOTE: When enabling the Blue Light Filter (BLF) via the Quick Access Key, the BLF value will be 100 which is certified by TÜV. However, the BLF value will be 0 if the user chooses another function via the Quick Access Key.
While using and enjoying your monitor please keep the following in mind:
- Viewing computer screens for extended periods of time may cause eye irritation and discomfort. To reduce these effects, it is recommended to take periodic breaks from viewing to allow the eyes to relax.
- Users can customize the Blue Light Filter value through the Game Modes Menu.
- The monitor also supports Flicker-Free, which reduces or eliminates screen flicker, thus easing potential eye strain.
Calculating Breaks
When viewing the monitor for extended periods, it is recommended to take periodic breaks from viewing. Short breaks of at least five (5) minutes are recommended after one (1) to two (2) hours of continuous viewing. Taking shorter, more frequent breaks are generally more beneficial than longer, less frequent breaks.
Looking at Distant Objects
While taking breaks, users can further reduce eye strain and dryness by focusing on objects that are further away from them.
Eye and Neck Exercises
Eye Exercises
Eye exercises can help minimize eye strain. Slowly roll your eyes to the left, right, up, and down. Repeat as many times as needed.
Neck Exercises
Neck exercises can also help minimize eye strain. Relax your arms and let them hang at your sides, bend forward slightly to stretch the neck, turn your head to the right and to the left. Repeat as many times as needed.
ViewScale
Under ViewScale, users can adjust their current aspect ratio to fit their specific usage scenario. Below are the listed aspect ratios.
- NOTE: If users choose a ViewScale aspect mode that is not native, it may impact the user’s experience.
To enable ViewScale:
- Press the [●] key or move the joy key [◄] or [▲] or [▼] to display the On-Screen Display (OSD) Menu.
- Move the joy key [◄] or [►] to select Display. Then move the joy key [▼] to enter the Display menu.
- Move the joy key [▲] or [▼] to select Image Adjust. Then move the joy key [►] to enter its sub-menu.
- Move the joy key [▲] or [▼] to select ViewScale. Then move the joy key [►] to enter its sub-menu.
- Move the joy key [▲] or [▼] to select your preferred aspect ratio. Then press the [●] key to confirm the selection.
| Aspect Ratio | Description |
|---|---|
| Full | Scales the inputted image to fill the screen, this is the default input choice and is ideal for 16:9 images. |
| Aspect | The inputted image is allowed to fill the screen as large as it can go without image distortion. |
| 1:1 | The image is directly displayed without scaling. |
| 19" (4:3) | Simulates the inputted image in a 4:3 aspect ratio and 19” display size. |
| 19"W (16:10) | Simulates the inputted image in a 16:10 aspect ratio and 19”W display size. |
| 21.5" (16:9) | Simulates the inputted image in a 16:9 aspect ratio and 21.5” display size. |
| 22”W (16:10) | Simulates the inputted image in a 16:10 aspect ratio and 22”W display size. |
| 23.6”W (16:9) | Simulates the inputted image in a 16:9 aspect ratio and 23.6”W display size. |
| 24”W (16:9) | Simulates the inputted image in a 16:9 aspect ratio and 24”W display size. |
Quick Access
Quickly initiate some functions and modes through the Quick Access key and menu. Users can also define which functions or modes they prefer in the Quick Access Menu via the Setup Menu in OSD. The function/mode will be enabled as soon as the light-bar moves on the item, and will disable after removing the light-bar.
In the Quick Access Menu, “Return” means users can “automatically” go back to the mode they chose before entering the Quick Access Menu.
For example, if users chose “Console Speed” mode before entering the Quick Access Menu and there is an existing FPS option in the Quick Access Menu, according to the Quick Access definition, users will enable FPS mode when the light-bar moves on the item. Then, when moving the light-bar to “Return,” the mode will be changed into “Console Speed” automatically which is same as the mode before user entering the Quick Access Menu.
To activate the Quick Access Menu:
- Press the Quick Access Key to display the Quick Access Menu.
- Press the Quick Access Key to select your preference.
- NOTE:
- To change the Quick Access Menu’s default functions (Blue Light Filter, PureXP™, and OverClocking), remove one or more default functions via the OSD Setup Menu first.
- The Quick Access Menu will disappear after three (3) seconds automatically.
- NOTE:
To change the Quick Access Menu options:
- Press the [●] key or move the joy key [◄] or [▲] or [▼] to display the On-Screen Display (OSD) Menu.
- Move the joy key [◄] or [►] to select Setup Menu. Then move the joy key [▼] to enter the Setup Menu menu.
- Move the joy key [▲] or [▼] to select Quick Access. Then move the joy key [►] to enter its sub-menu.
- Move the joy key [▲] or [▼] to select your preference. Then press the [●] key to confirm the selection.
- NOTE: Some sub-menu options may have another sub-menu. To enter the respective sub-menu, move the joy key [►].
Elite RGB Lighting
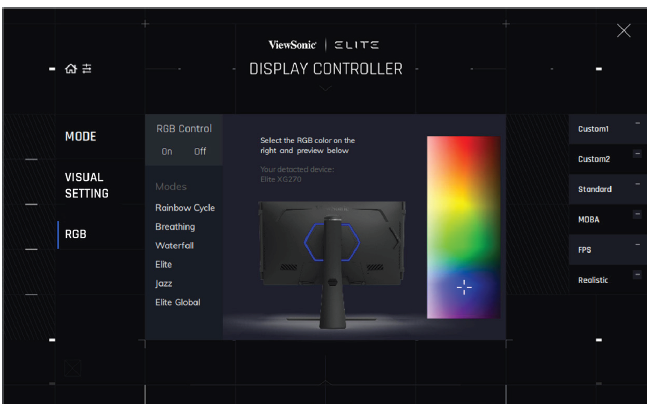
This setting controls the RGB lighting on the back of the monitor and beneath the bezel. When “On”, or after being reset, the default ‘Breathing’ mode will be active.
To enter the Elite RGB menu:
- Press the [●] key or move the joy key [◄] or [▲] or [▼] to display the On-Screen Display (OSD) Menu.
- Move the joy key [◄] or [►] to select Setup Menu. Then move the joy key [▼] to enter the Setup Menu menu.
- Move the joy key [▲] or [▼] to select Elite RGB. Then move the joy key [►] to enter its sub-menu.
- Move the joy key [▲] or [▼] to select your preference. Then press the [●] key to confirm the selection.
- NOTE: Some sub-menu options may have another sub-menu. To enter the respective sub-menu, move the joy key [►].
In addition, the RGB backlights are also synced with several key partners. Downloading their software will give you the power to adjust your RGB capabilities further.
To setup up partner RGB software:
- Visit: https://www.viewsonic.com/elite/rgb/
- Select a partner RGB software, and download it.
- Connect one end of the USB Type B cable to the monitor and the other end to your computer.
- Run and install the partner software.
- Start customizing the monitor’s RGB lighting.
Crosshair
Select from different crosshair styles and colors to overlay on your screen.
To enable the Crosshair function:
- Press the [●] key or move the joy key [◄] or [▲] or [▼] to display the On-Screen Display (OSD) Menu.
- Move the joy key [◄] or [►] to select Setup Menu. Then move the joy key [▼] to enter the Setup Menu menu.
- Move the joy key [▲] or [▼] to select Crosshair. Then move the joy key [►] to confirm the selection.
- Move the joy key [▲] or [▼] to select your preferred crosshair style and color. Then press the [●] key to confirm the selection.
- NOTE: A preview image of the crosshair (type and color) will be displayed on the right side of the OSD Menu before confirming.
| Crosshair | Description |
|---|---|
| Type A | 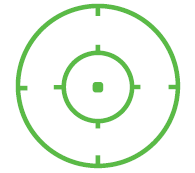
|
| Type B | 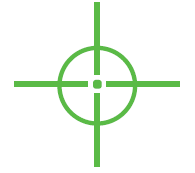
|
| Type C | 
|
| NOTE: This message box will appear with the crosshair, and disappear after three (3) seconds automatically. |
Firmware Update
For the best display performance and to resolve any known issues, it is best to keep your monitor updated with the latest firmware version. With the USB cable and firmware update tool, you can easily update your monitor firmware any time.
You can visit: https://www.viewsonic.com/elite/display-controller/ to check and download the latest firmware version with the update tool.
To update the firmware:
- Check and download the Firmware Update Tool with latest firmware version for your monitor from: http://www.viewsonic.com/elite/display-controller/.
- Connect the USB Type B male cable (square with 2 cut corners) to the USB Type B port of your monitor. Then connect the other end of the cable to the USB port of the computer.
- Unzip the downloaded Firmware Update Tool and double-click on the .exe file or .pkg file. Then follow the on-screen instructions to complete the application installation.
- Launch the Firmware Update Tool. The application will automatically detect and verify your monitor model and current firmware version.
- Click Update to upgrade your monitor firmware.
- Wait until the upgrade process is complete.
- NOTE:
- Any interruptions during the firmware upgrade process may permanently damage your monitor. Do not disconnect the USB cable or turn off your PC and monitor.
- By using the Elite Display Controller, users can receive an auto-notification when new firmware is available.
- NOTE:

