XG270QG Advanced Features and Settings
Advanced Features
Blue Light Filter and Eye Health
The Blue Light Filter blocks high-energy blue light for a more comfortable viewing experience.
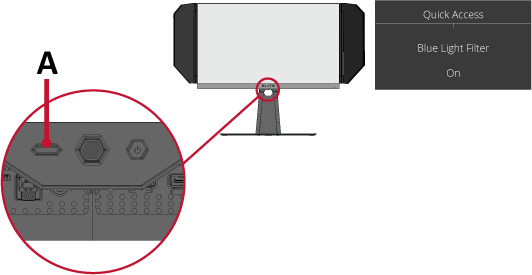
Quick Access Blue Light Filter Setup
Enabling and disabling the Blue Light Filter can be done on the fly via the Quick Access Key.
| Letter | Item |
|---|---|
| A | Quick Access Key |
- NOTE: When enabling the Blue Light Filter (BLF) via the Quick Access Key, the BLF value will be 100 which is certified by TÜV. However, the BLF value will be 0 if the user chooses another function via the Quick Access Key.
While using and enjoying your monitor please keep the following in mind:
- Viewing computer screens for extended periods of time may cause eye irritation and discomfort. To reduce these effects, it is recommended to take periodic breaks from viewing to allow the eyes to relax.
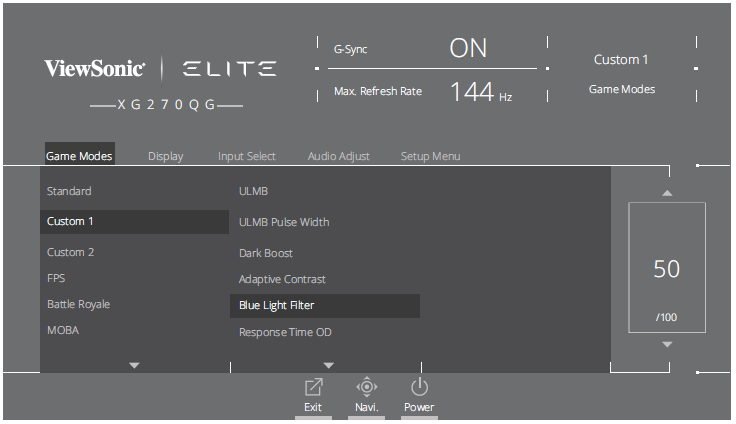
- Users can customize the Blue Light Filter value through the Game Modes Menu.
- The monitor also supports Flicker-Free, which reduces or eliminates screen flicker, thus easing potential eye strain.
Calculating Breaks
When viewing the monitor for extended periods, it is recommended to take periodic breaks from viewing. Short breaks of at least five (5) minutes are recommended after one (1) to two (2) hours of continuous viewing. Taking shorter, more frequent breaks are generally more beneficial than longer, less frequent breaks.
Looking at Distant Objects
While taking breaks, users can further reduce eye strain and dryness by focusing on objects that are further away from them.
Eye and Neck Exercises
Eye Exercises
Eye exercises can help minimize eye strain. Slowly roll your eyes to the left, right, up, and down. Repeat as many times as needed.
Neck Exercises
Neck exercises can also help minimize eye strain. Relax your arms and let them hang at your sides, bend forward slightly to stretch the neck, turn your head to the right and to the left. Repeat as many times as needed.
Elite RGB Lighting
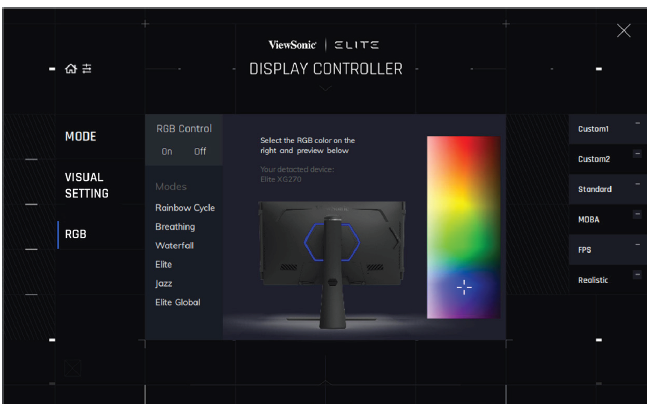
This setting controls the RGB lighting on the back of the monitor and beneath the bezel. When “On”, or after being reset, the default ‘Breathing’ mode will be active.
To enter the Elite RGB menu:
- Press the [●] key or move the joy key [◄] or [▲] or [▼] to display the On-Screen Display (OSD) Menu.
- Move the joy key [◄] or [►] to select Setup Menu. Then move the joy key [▼] to enter the Setup Menu menu.
- Move the joy key [▲] or [▼] to select Elite RGB. Then move the joy key [►] to enter its sub-menu.
- Move the joy key [▲] or [▼] to select your preference. Then press the [●] key to confirm the selection.
- NOTE: Some sub-menu options may have another sub-menu. To enter the respective sub-menu, move the joy key [►].
In addition, the RGB backlights are also synced with several key partners. Downloading their software will give you the power to adjust your RGB capabilities further.
To setup up partner RGB software:
- Visit: https://www.viewsonic.com/elite/rgb/
- Select a partner RGB software, and download it.
- Connect one end of the USB Type B cable to the monitor and the other end to your computer.
- Run and install the partner software.
- Start customizing the monitor’s RGB lighting.
Crosshair
Select from different crosshair styles and colors to overlay on your screen.
To enable the Crosshair function:
- Press the [●] key or move the joy key [◄] or [▲] or [▼] to display the On-Screen Display (OSD) Menu.
- Move the joy key [◄] or [►] to select Setup Menu. Then move the joy key [▼] to enter the Setup Menu menu.
- Move the joy key [▲] or [▼] to select Crosshair. Then move the joy key [►] to confirm the selection.
- Move the joy key [▲] or [▼] to select your preferred crosshair style and color. Then press the [●] key to confirm the selection.
- NOTE: A preview image of the crosshair (type and color) will be displayed on the right side of the OSD Menu before confirming.
| Crosshair | Description |
|---|---|
| Type A | 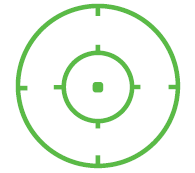
|
| Type B | 
|
| Type C | 
|

