VG2457V Connecting Power and Devices
Connecting to Power
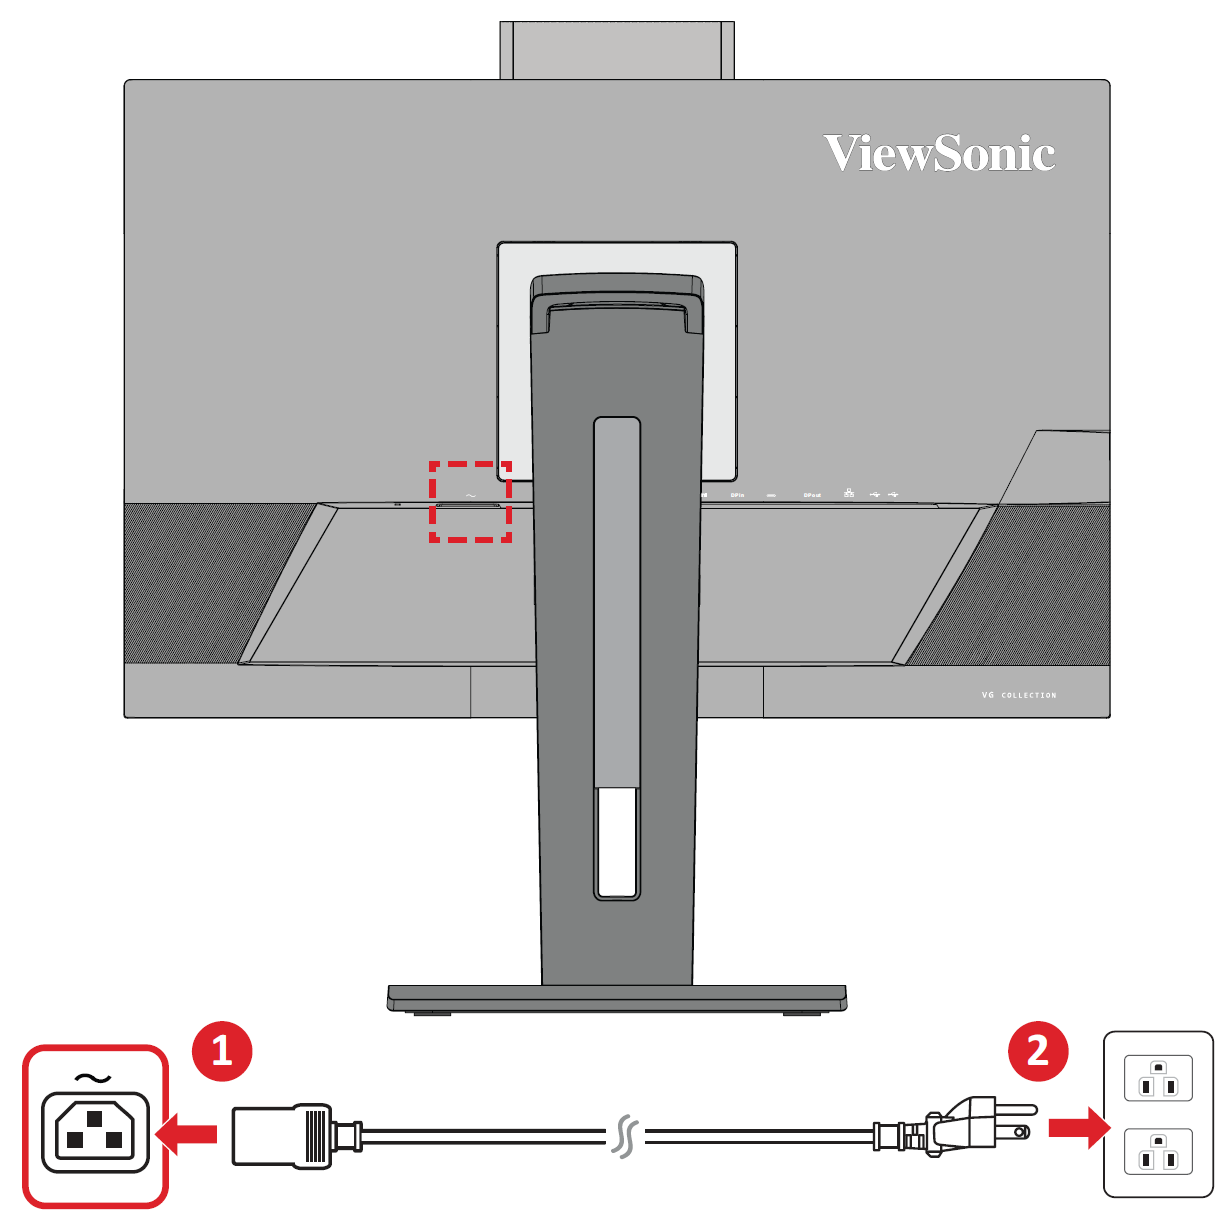
- Connect the power cord to the AC IN jack at the rear of the device.
- Plug the power cord plug into a power outlet.
Connecting to Video
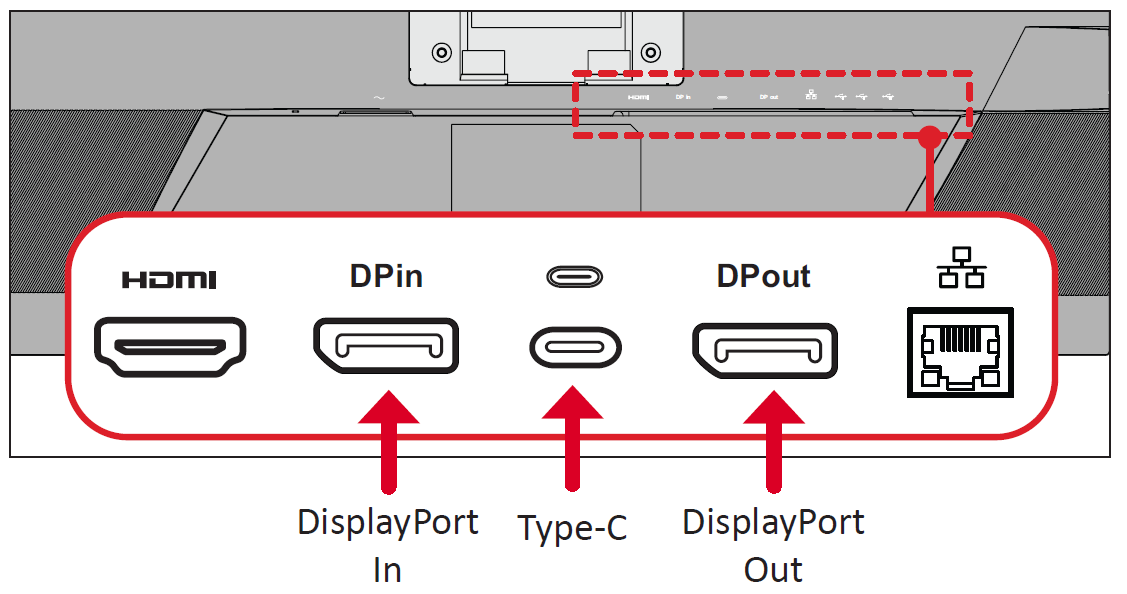
HDMI
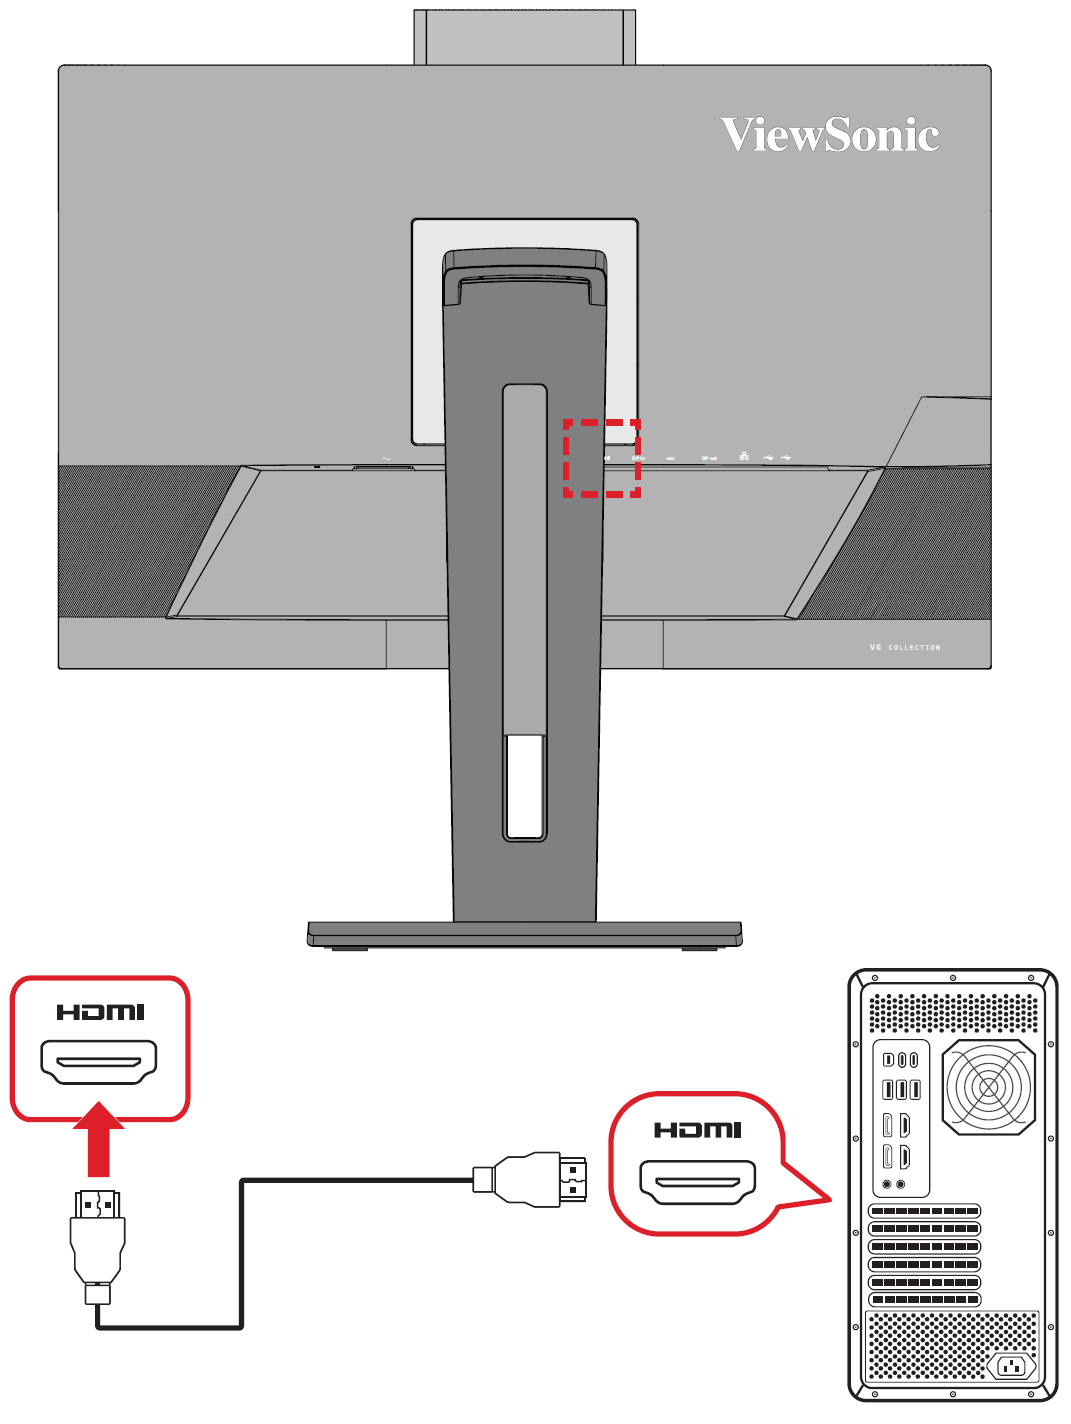
- Connect one end of an HDMI cable to an HDMI port of the monitor.
- Plug the other end of the cable into the HDMI port of your computer.
DisplayPort
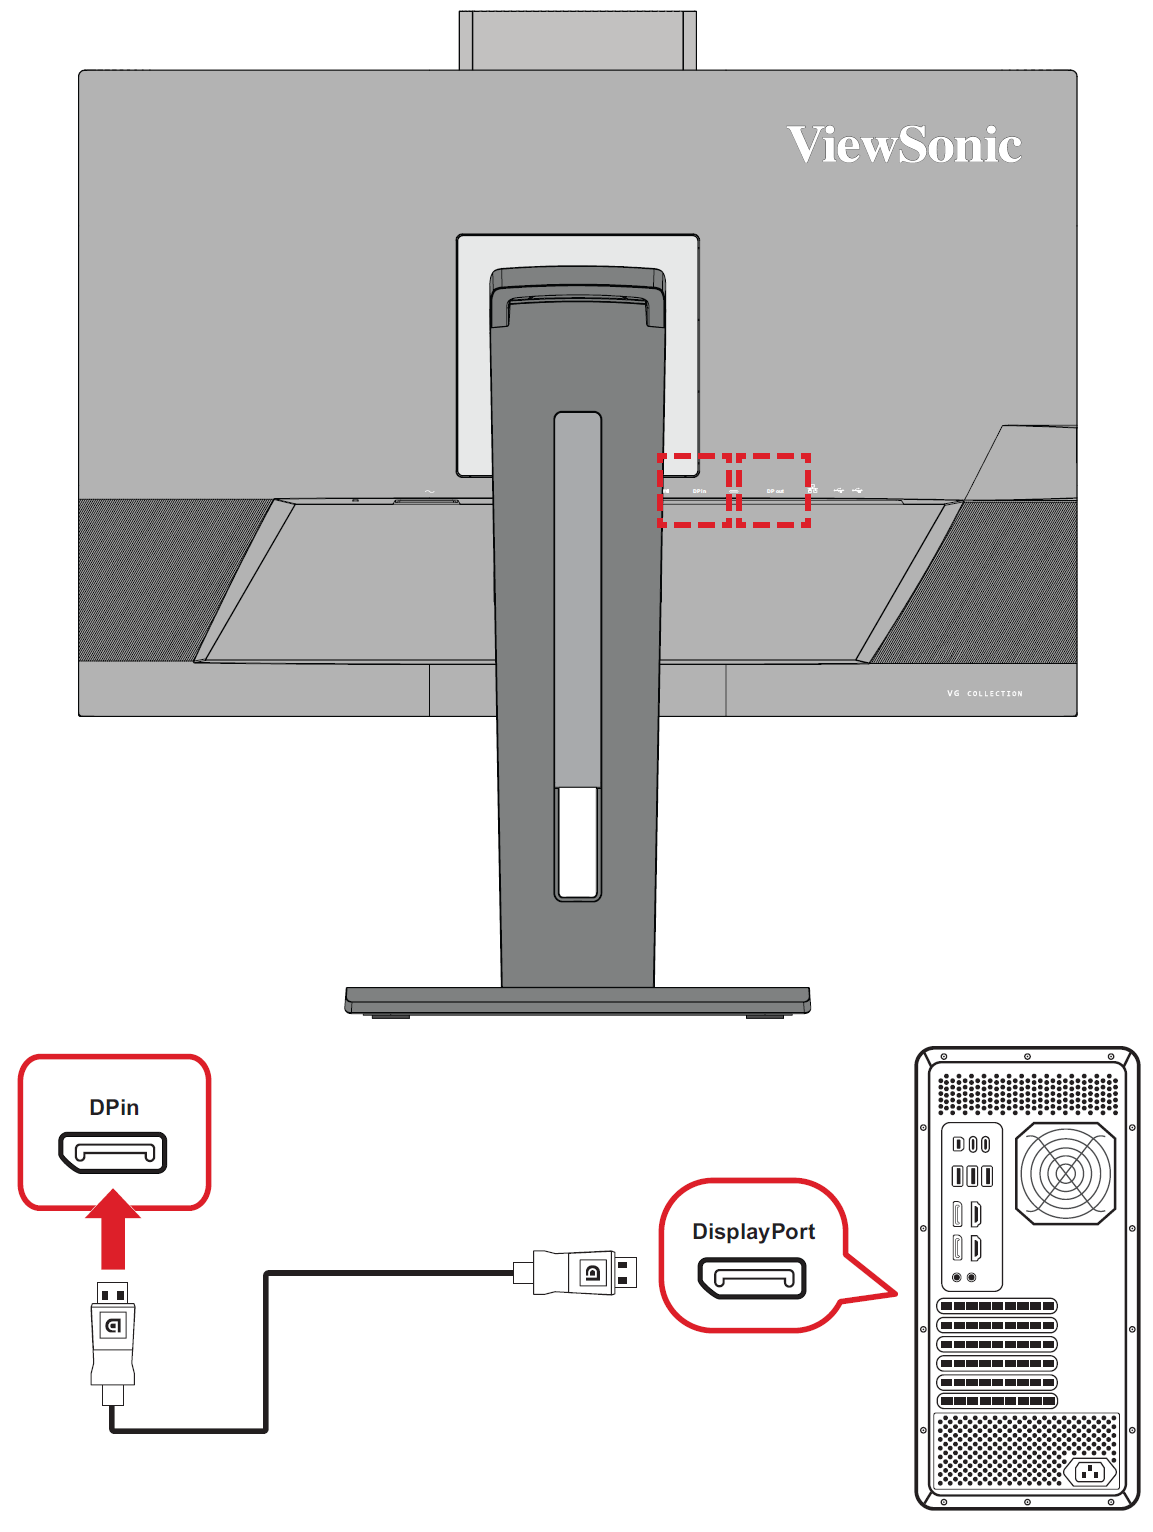
- Connect one end of a DisplayPort cable to the DisplayPort port of the monitor.
- Plug the other end of the cable into the DisplayPort or Mini DisplayPort port of your computer.
- Note: To connect the monitor to the Thunderbolt port (v. 1 & 2) on your Mac, connect the Mini DisplayPort end of a “Mini DisplayPort to DisplayPort cable” to the Thunderbolt output port of your Mac. Then connect the other end of the cable to the DisplayPort port of the monitor.
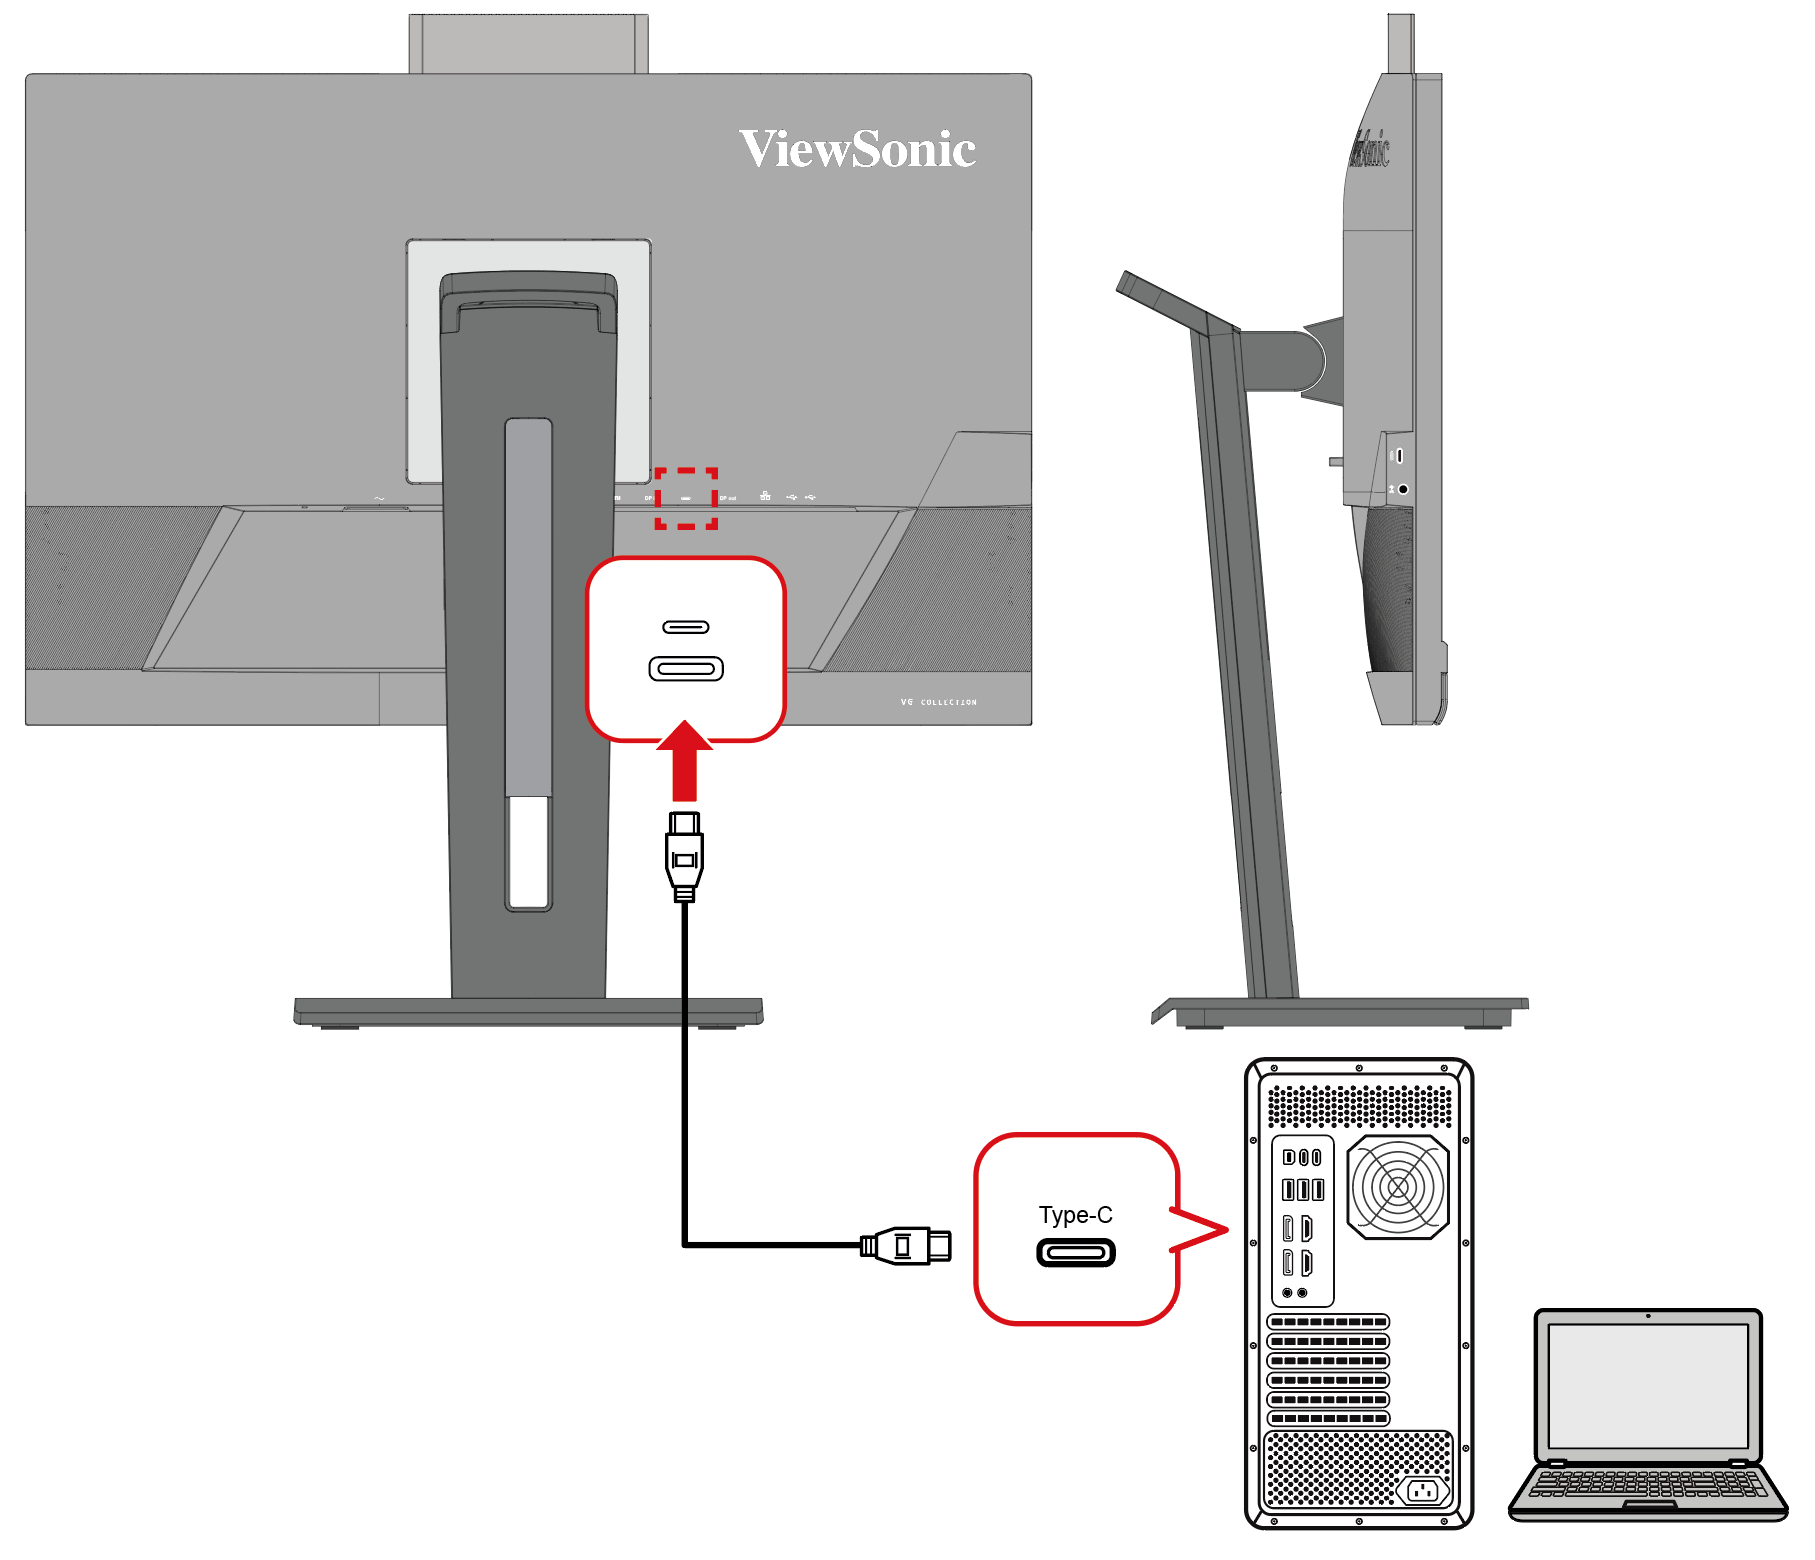
Type C
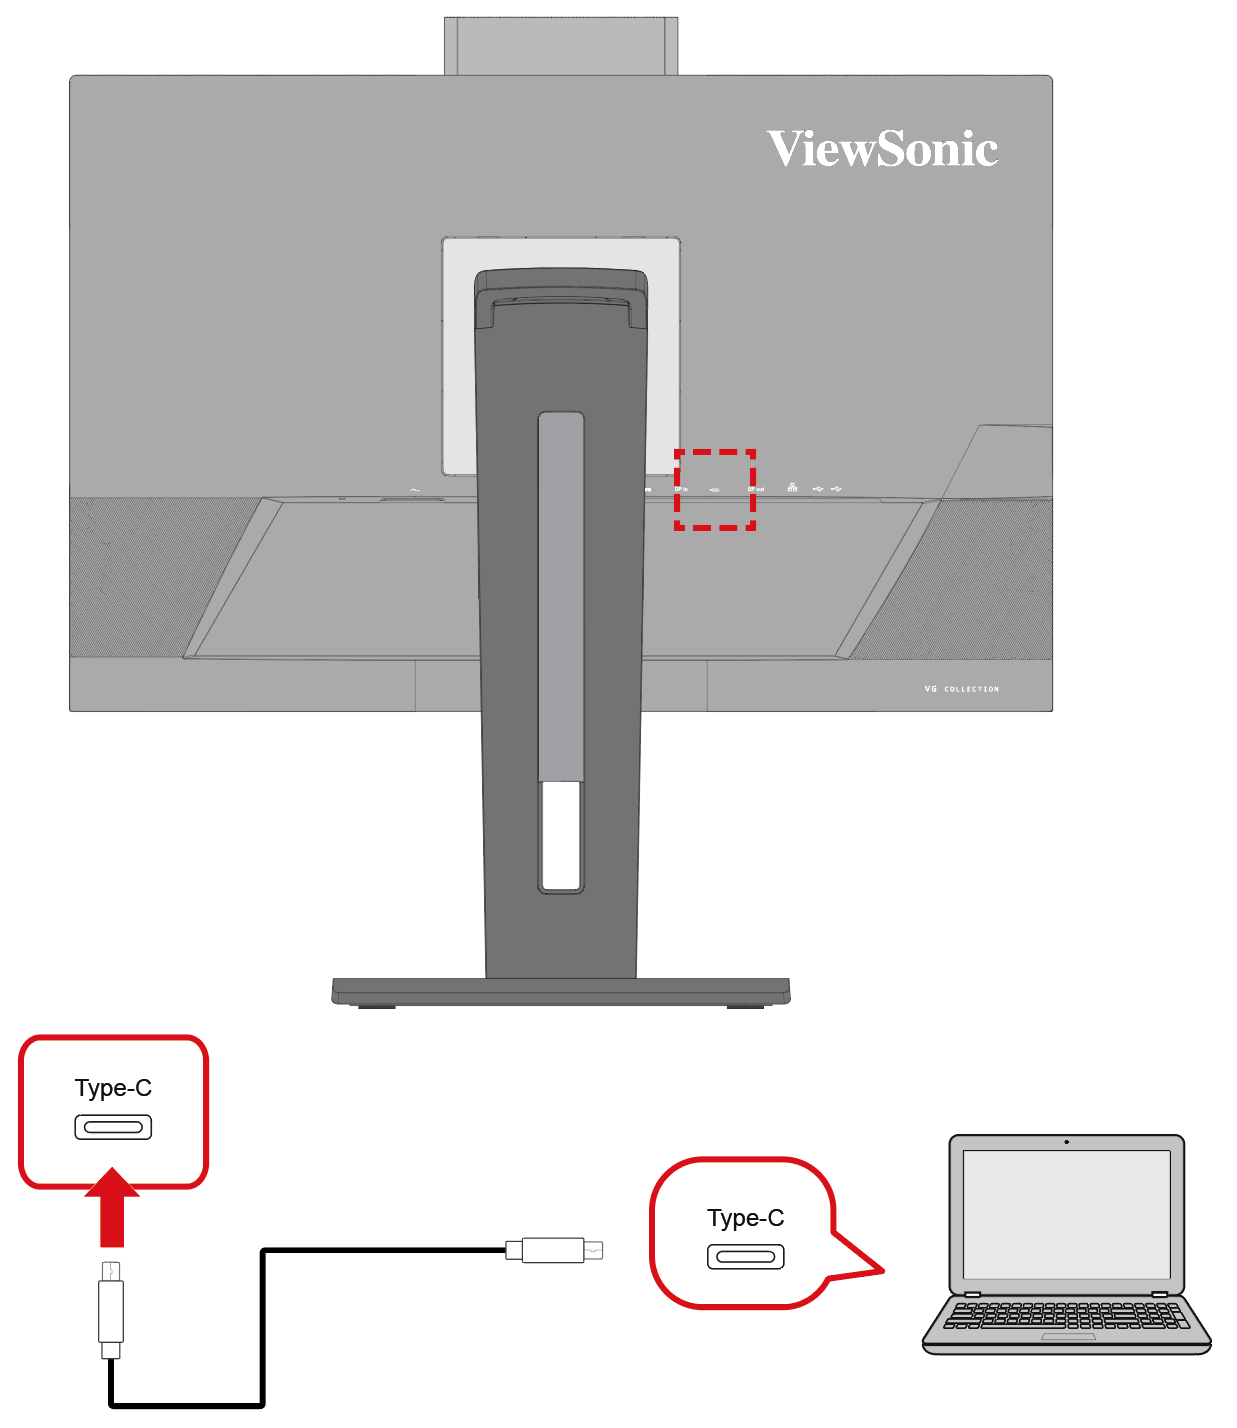
- Connect one end of a USB Type C cable to the USB Type C port of the monitor.
- Plug the other end of the cable into the full-featured USB port of your computer.
- NOTE:
- For video output use, make sure your USB Type C output device (e.g., laptop) and cable are full-featured and support video signal transmission.
- When you use Type C as the video signal input source, it is recommended to unplug the DisplayPort and HDMI signals to avoid audio output confusion.
DisplayPort/USB Type-C MST Daisy Chain Connection
With DisplayPort/USB Type-C Multi-Stream Transport (MST) support, you can daisy chain up to four monitors.
- Connect one end of a DisplayPort/USB Type-C cable to the DisplayPort/USB Type-C Out port of your computer. Then connect the other end of the cable to the DisplayPort In/USB Type-C port of the monitor.
- Use another DisplayPort cable to connect to the DisplayPort Out port of the first monitor. Then connect the other end of the cable to the DisplayPort In port of the second monitor.
- Repeat Step 2 as needed with up to four monitors.
- Note: Your graphics card compatibility and monitor resolution will determine the number of monitors.
- NOTE:
- DisplayPort 1.2 MST must be turned on in the Setup Menu in the OSD Menu to enable daisy chaining.
- If High Data Speed is selected, it will prioritize high speed data transfer and Ethernet. MST will only support 2560 x 1440 @30Hz (maximum).
- If High Resolution is selected, MST can support 2560 x 1440 @60Hz, but data transfer and Ethernet speed will be limited to USB 2.0 standards due to bandwidth limitation.
- If the input source changes to HDMI, DisplayPort 1.2 MST will turn off automatically.
USB Connection
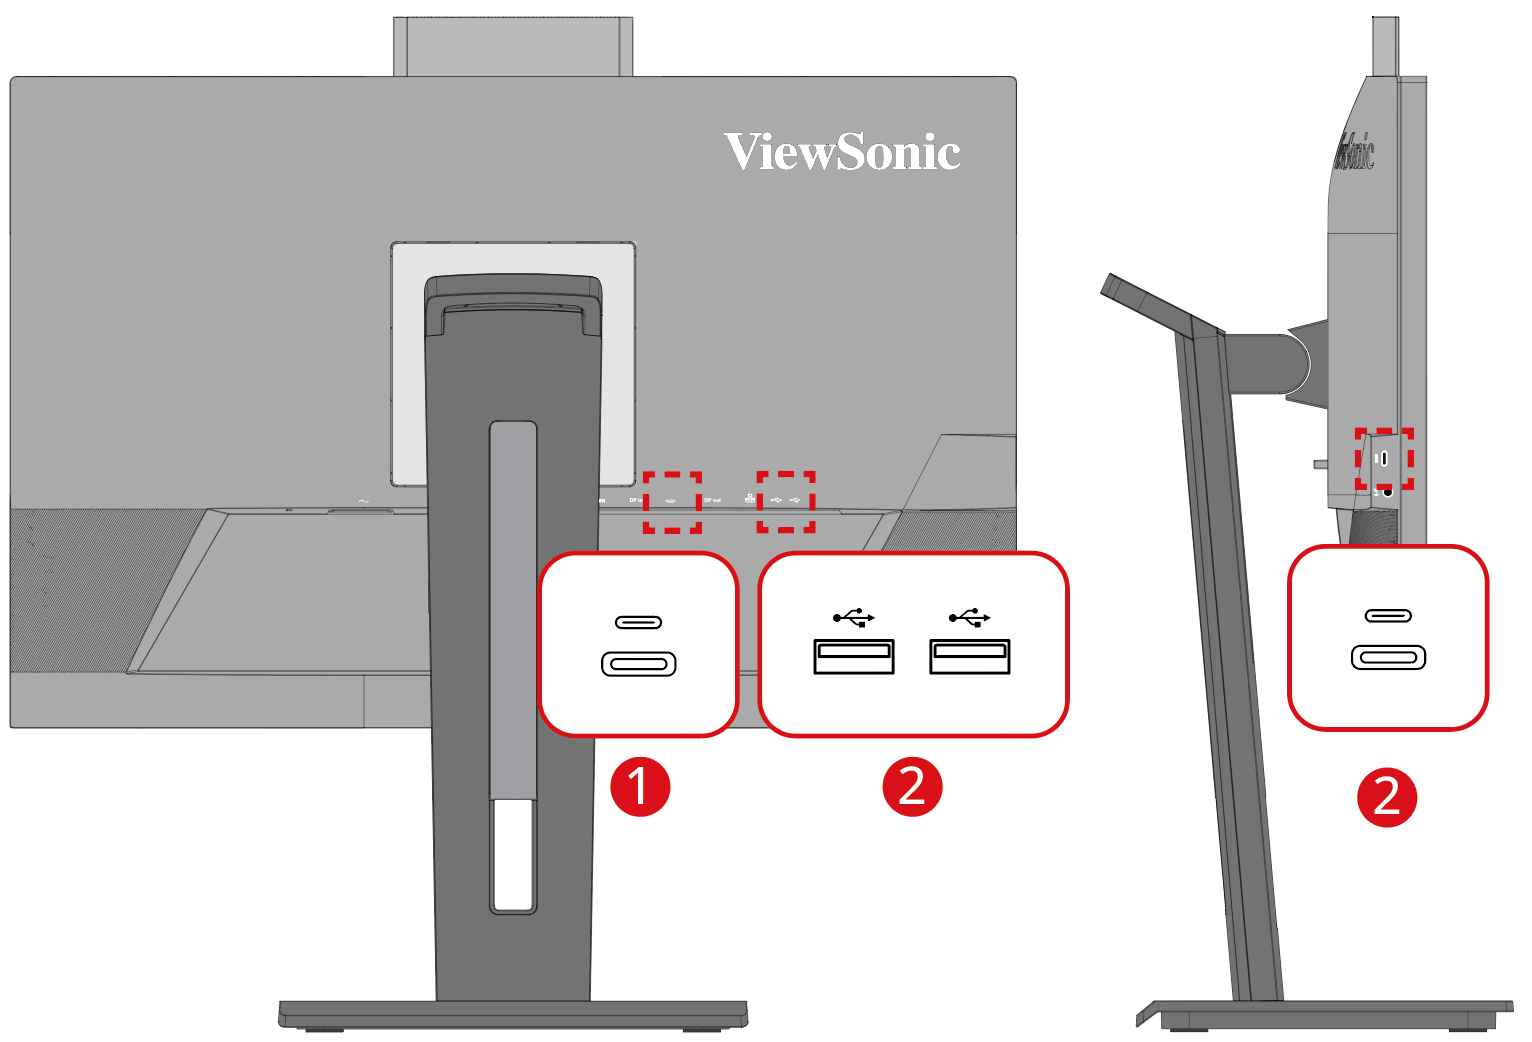
The monitor supports two types of USB ports, upstream and downstream. When making connection(s), observe the following guidelines.
| USB Type | Connection Type | Description | |
|---|---|---|---|
| Upstream | Type C | Full-featured port: transfers data, audio, video, and power. | |
| Supports: 5V/3A, 9V/3A, 12V/3A, 15V/3A, 20V/4.9A (LPS) charging. | |||
| Downstream | Type A | For peripheral device(s) (e.g., storage device, keyboard, mouse, etc.). | |
| Type C | Transfers data between the computer and the USB devices connected to the monitor. | ||
Using the USB Ports
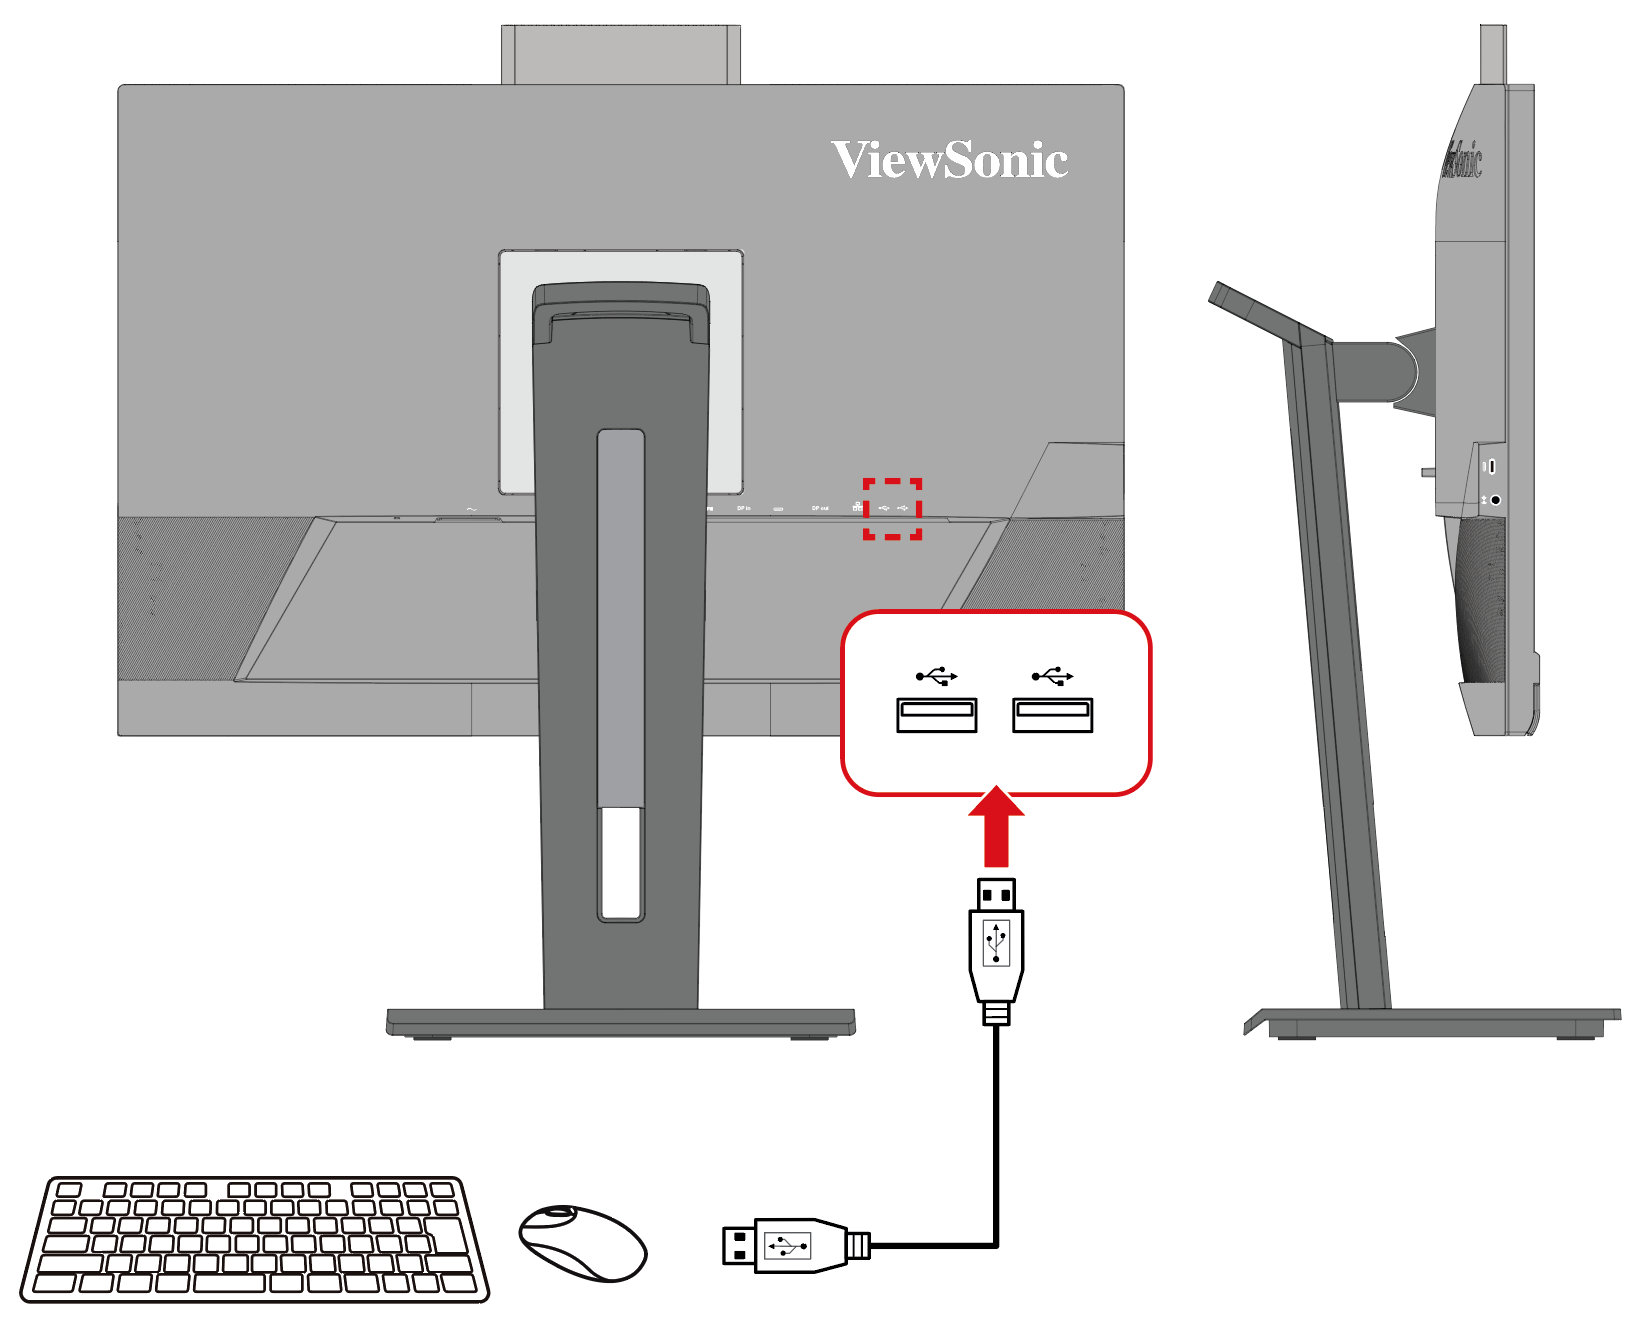
- To use the USB downstream ports, connect one end of a USB cable to a USB upstream port (Type C or Type B) of the monitor. Plug the other end of the cable into a USB port of your computer.
- Connect your peripheral device to a USB downstream port of the monitor.
- Note: If you are required to connect through either HDMI or DisplayPort, please also use a USB cable to connect to the monitor's USB upstream port to enable data transfer.
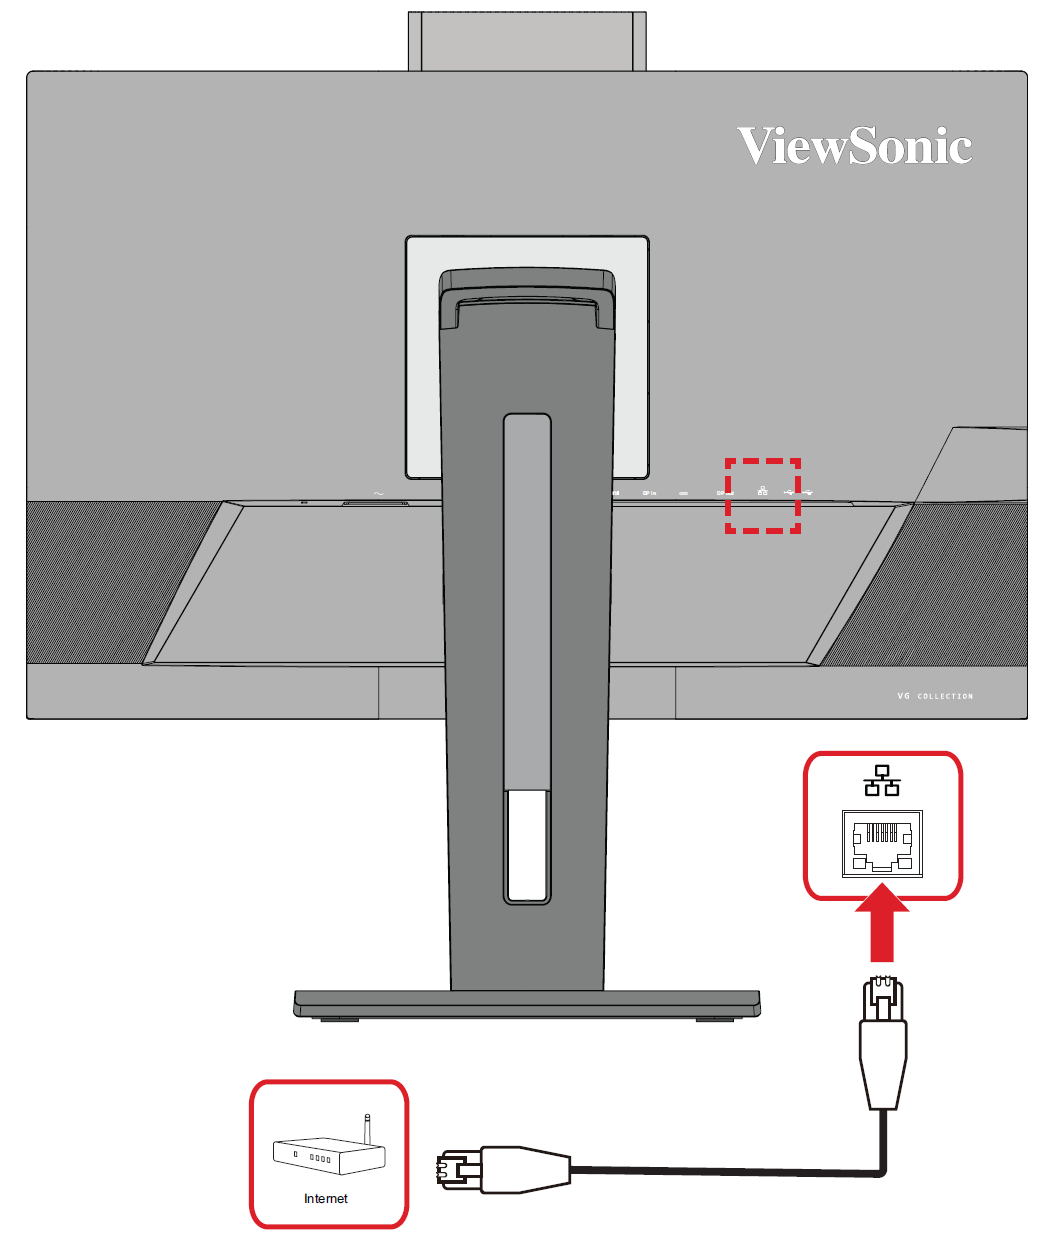
Ethernet Connection
- Connect one end of your LAN (RJ45) cable to the LAN (RJ45) port of the monitor.
- Plug the other end into your network modem or port.
- Ensure your computer is also connected to the monitor by a rear USB upstream port (Type C or Type B) of the monitor.
Ethernet Connection When Using USB Type C for Video Input
No further steps are required.
Ethernet Connection When Using DisplayPort or HDMI for Video Input
In addition to the DisplayPort or HDMI connection, please also connect your computer to a USB upstream port of the monitor to enable data transfer.
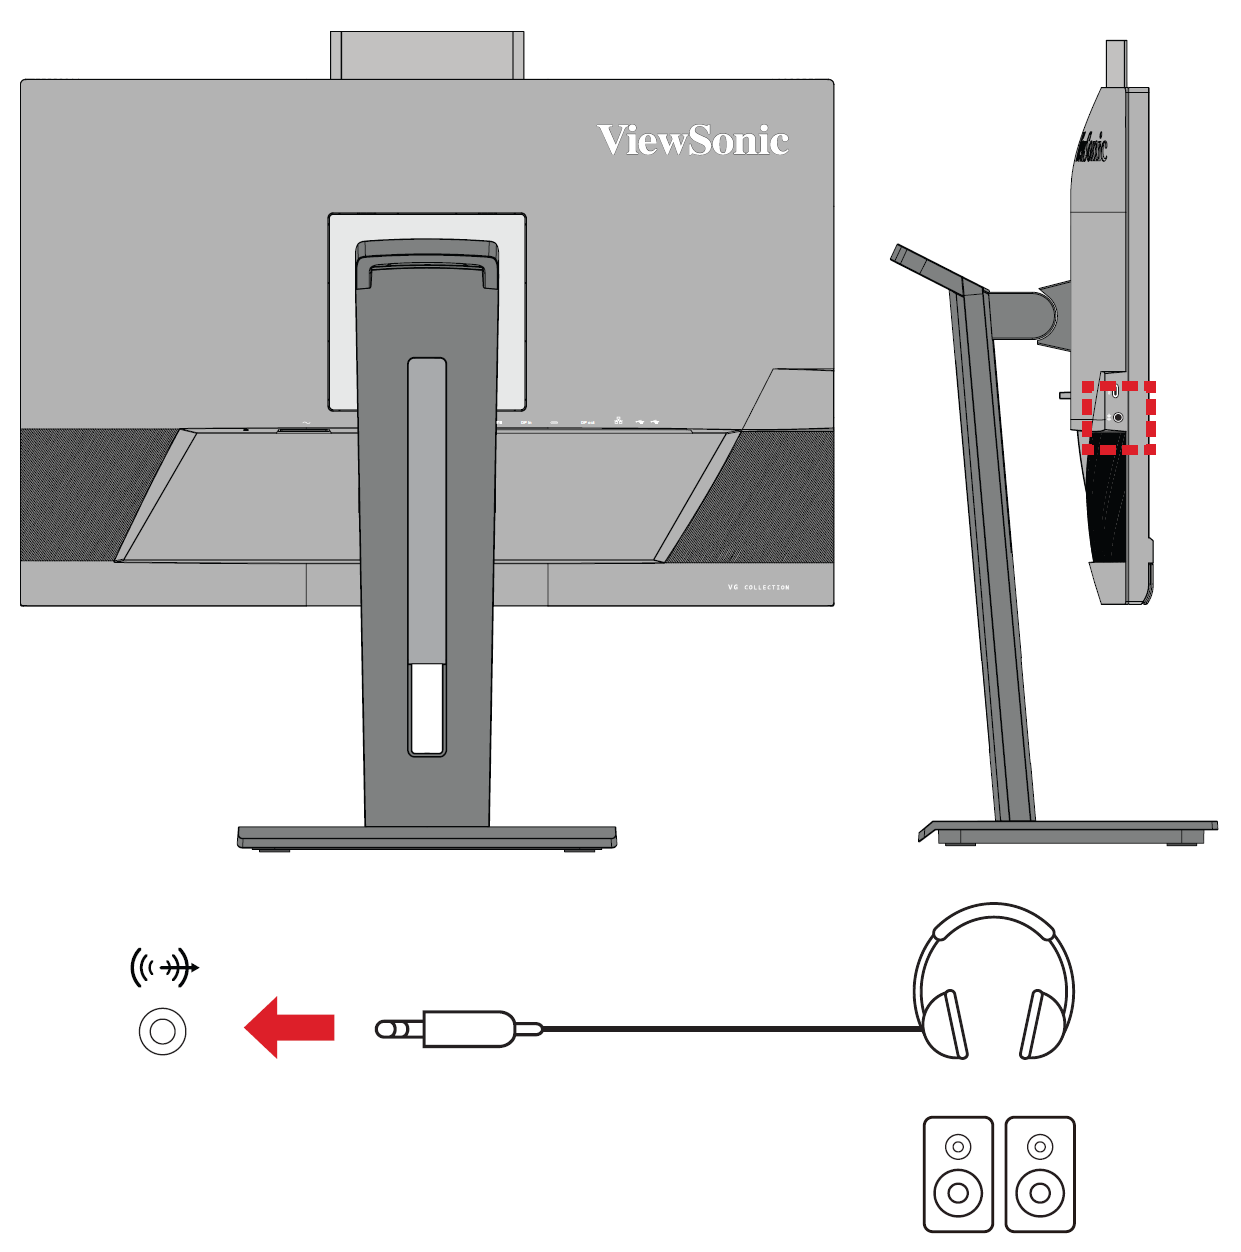
Audio Connection
Plug the audio jack of the ear-/headphones into the Audio Out port of the monitor. Additionally, you can connect the monitor to a sound bar using an audio cable.
- Note: The monitor is also equipped with dual speakers.
- Note: There are two audio output sources when connected to USB upstream. Users can choose according to their preference.
| Audio Output Source | Description |
|---|---|
| Echo Cancelling Speakerphone (Windows OS) | Monitor and operating system volume controls can be synchronized. |
| USB (macOS) | |
| HD Audio Driver for Display Audio (Windows OS) | The volume of the monitor and operating system are controlled independently. |
| HDMI or DisplayPort (macOS) |

