LD135-151 Introduction
From ViewSonic Documentation
Package Contents
| Item | Quantity | Note | |
|---|---|---|---|
| Cabinet Sections |  |
5 sections total | One (1) left, three (3) Middle, and one (1) Right. |
| System Control Box (Left and Right sides) |
 |
2 sides | |
| Quick Start Guide | 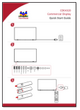 |
1 | |
| LED Modules |  |
100 modules | The quantity of spare LED modules will vary by country. |
| Remote Control | 1 | ||
| Screws |  |
16 x M6x10mm (1) 32 x M6x50mm Expansion (2) 32 x TA6x30mm (3) 20 x M6x16mm (4) 12 x KM3x6mm (5) | |
| Hex Tool | 1 | ||
| System Control Box Covers (Left, Middle, and Right sides) |
 |
3 | |
| Wall Mounting Brackets | 4 | ||
| Vacuum Suction Tool |  |
1 | |
| Anti-Static Glove |  |
2 pairs | |
| USB-A to USB-B Cable (5m) | 1 | ||
- NOTE:
- This product is packed in an air transport box.
- Due to the size and weight, it is recommended that two or more people handle it.
- The base stand is an optional accessory and will be sold separately.
Product Overview
Front Panel

Rear Panel

I/O Control Panel

| Number | Port | Description |
|---|---|---|
| 1 | RS-232 | Serial control port. |
| 2 | Ambient Light Sensor | Detects ambient light and adjusts brightness levels automatically. |
| 3 | USB 2.0 | USB Reader (5V/0.5A) |
| 4 | USB 3.0 | USB Reader (5V/1A) |
| 5 | HDMI Out | Extend content out to another display device. |
| 6 | HDMI In | High definition input; connect to PC with HDMI output, set-top box, or other video device. |
| 7 | Audio Out | Audio output to an external speaker. |
| 8 | USB-B | Maintenance port for external PC connection. |
| 9 | IR Receiver | Receiver for the Remote Control. |
| 10 | LAN | Standard RJ45 (10M/100M/1000M) Internet connection interface. |
| 11 | Stand-by | Press to enter Stand-by mode. |
| 12 | Input Select | Press to cycle through available input sources. |
| 13 | Brightness | Press to cycle through brightness levels. |
- Locking the Control Panel
- When the administrator does not want others to use the control panel, it can be locked by pressing 1168+OK on the remote control.