
PD0511 Pen Input Area Mapping: Difference between revisions
From ViewSonic Documentation
No edit summary |
No edit summary |
||
| Line 23: | Line 23: | ||
:<div class="res-img">[[File:Pen_Display_Manager_Pen.png|400px]]</div></ol> | :<div class="res-img">[[File:Pen_Display_Manager_Pen.png|400px]]</div></ol> | ||
:<small>'''NOTE:''' ''Tip Feel'' alters how much actual pressure it takes to achieve maximum pressure. | :<small>'''NOTE:''' ''Tip Feel'' alters how much actual pressure it takes to achieve maximum pressure. | ||
::* Soft - requires less actual pressure to see a difference in pen pressure levels. | ::* Soft - requires less actual pressure to see a difference in pen pressure levels. | ||
::* Firm - more force is needed to see changes in pen pressure. | ::* Firm - more force is needed to see changes in pen pressure.</small> | ||
{{#seo: | {{#seo: | ||
Revision as of 09:25, 2 November 2021
Pen Input Area
To set the proper pen input area,
- Open Pen Display Manager either by going to: Start > Pen Display Manager or selecting the Pen Display Manager icon from the System Tray.
Additionally, the driver can also be accessed from ViewSign Console - either the widget or by right-clicking the ViewSign Console icon in the system tray and selecting Pen Display Driver. 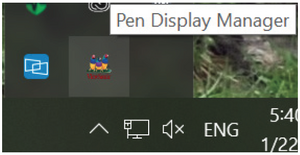
- Select the Mapping tab.
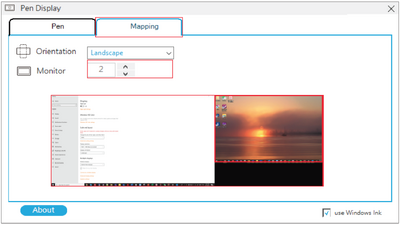
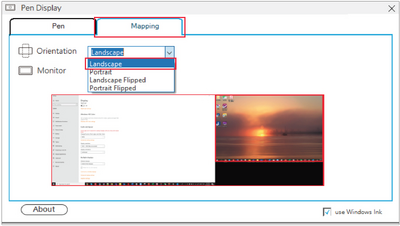
- Select the preferred Orientation, and the Monitor that will be mapped to the pen inputs.
- Select the Pen tab to adjust Tip Feel and check the Current Pressure.
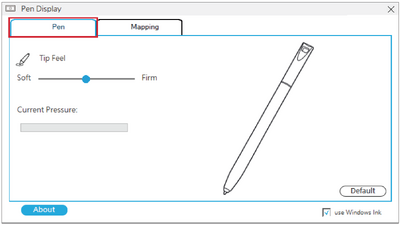


- NOTE: Tip Feel alters how much actual pressure it takes to achieve maximum pressure.
- Soft - requires less actual pressure to see a difference in pen pressure levels.
- Firm - more force is needed to see changes in pen pressure.