
PF720 Pen Input Area Mapping: Difference between revisions
From ViewSonic Documentation
| Line 24: | Line 24: | ||
:<div class="res-img">[[File:GD1330_Pen_Input_Start_Mac.png|400px]]</div> | :<div class="res-img">[[File:GD1330_Pen_Input_Start_Mac.png|400px]]</div> | ||
<li>Adjustments to the pen can be made by selecting the '''Pen''' tab.</li> | <li>Adjustments to the pen can be made by selecting the '''Pen''' tab.</li> | ||
<li>Select the '''Mapping''' tab to adjust screen orientation and display.</li></ol> | |||
<li>Select the '''Mapping''' tab to adjust screen orientation and display.</li | |||
{{#seo: | {{#seo: | ||
Revision as of 10:53, 12 June 2023
Pen Input Settings (Windows)
To adjust the pen input settings:
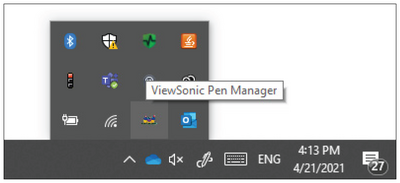
- Open ViewSonic Pen Manager either by going to: Start > ViewSonic Pen Manager or selecting the ViewSonic Pen Manager icon from the System Tray.
- Adjustments to the pen can be made by selecting the Pen tab.
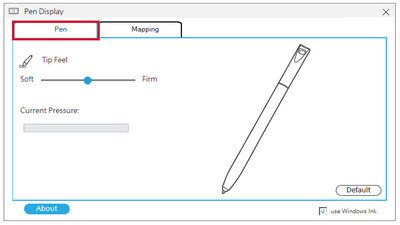
- Select the Mapping tab to adjust screen orientation and display.


Pen Input Settings (macOSX)
To adjust the pen input settings:
- Open ViewSonic Pen Manager either by going to: Start > ViewSonic Pen Manager or selecting the ViewSonic Pen Manager icon from the System Tray.
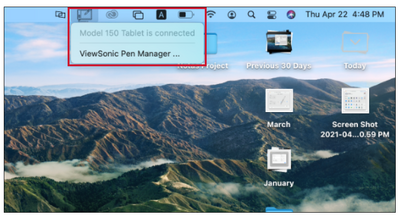
- Adjustments to the pen can be made by selecting the Pen tab.
- Select the Mapping tab to adjust screen orientation and display.
