
VG2440V Connecting Power and Devices: Difference between revisions
From ViewSonic Documentation
Created page with "<noinclude> {{Sticky_Menu_Monitor__3.0_No_Adv |1=VG2440V_Introduction |2=VG2440V_Initial_Setup |3=VG2440V_Connecting_Power_and_Devices |4=VG2440V_Adjusting_the_Viewing_Angle |..." |
|||
| (7 intermediate revisions by the same user not shown) | |||
| Line 15: | Line 15: | ||
</noinclude> | </noinclude> | ||
=Connecting to Power= | =Connecting to Power= | ||
[[File: | [[File:VG2440V_Connect_Power.svg|thumb|Connecting to Power]] | ||
# Connect the power cord to the AC IN jack at the rear of the device. | # Connect the power cord to the AC IN jack at the rear of the device. | ||
# Connect the power cord plug to a power outlet. | # Connect the power cord plug to a power outlet. | ||
=Connecting External Devices= | =Connecting External Devices= | ||
{{Connect_Note}} | |||
<gallery mode="nolines" widths=200px heights=200px> | <gallery mode="nolines" widths=200px heights=200px> | ||
VG2440V_Connect_HDMI.svg| HDMI Connection | |||
VG2440V_Connect_DP.svg| DisplayPort Connection | |||
VG2440V_Connect_VGA.svg| VGA Connection | |||
VG2440V_Connect_USB.svg| USB Connection | |||
VG2440V_Connect_Audio.svg| Audio Connection | |||
</gallery> | </gallery> | ||
===HDMI=== | ===HDMI=== | ||
| Line 39: | Line 41: | ||
:'''NOTE:''' To connect the monitor to the Thunderbolt port (v. 1&2) on your Mac, connect the mini DP end of the “mini DP to DisplayPort cable” to the Thunderbolt output of your Mac. Then connect the other end of the cable to the DisplayPort port of the monitor. | :'''NOTE:''' To connect the monitor to the Thunderbolt port (v. 1&2) on your Mac, connect the mini DP end of the “mini DP to DisplayPort cable” to the Thunderbolt output of your Mac. Then connect the other end of the cable to the DisplayPort port of the monitor. | ||
</small> | </small> | ||
===VGA=== | |||
Connect one end of a VGA cable to the VGA port of your monitor. Then connect the other end of the cable to the VGA port of your computer. | |||
===USB=== | ===USB=== | ||
| Line 49: | Line 54: | ||
|- | |- | ||
|Type A | |Type A | ||
| | |Three (3) | ||
|Connection for your Type A peripheral device(s). ( | |Connection for your Type A peripheral device(s). (e.g. storage device). | ||
:<small>'''NOTE:''' To activate the USB Type A port, ensure your computer is also connected to the monitor’s USB Type B port.</small> | |||
|- | |- | ||
|Type B | |Type B | ||
|One (1) | |One (1) | ||
|Connect the USB Type B male cable (square with 2 cut corners) to this port, and then connect the other end of the cable to the USB downstream port of your computer. | |Connect the USB Type B male cable (square with 2 cut corners) to this port, and then connect the other end of the cable to the USB downstream port of your computer. | ||
|} | |} | ||
=== | ===Audio=== | ||
Plug the audio jack of the ear-/headphones into the Audio Out port of the monitor. Additionally, you can connect the monitor to a sound bar using an audio cable. | |||
:<small>'''NOTE:''' The monitor is equipped with dual speakers.</small> | |||
{{#seo: | |||
|title=ViewSonic Monitor | |||
|title_mode=append | |||
|keywords=VG2440V, Power, HDMI, DisplayPort, Audio, Connections | |||
|description=Connect to power and other external devices with the VG2440V monitor. | |||
}} | |||
[[Category:VG2440V]] | [[Category:VG2440V]] | ||
Latest revision as of 10:22, 13 September 2022
Connecting to Power

- Connect the power cord to the AC IN jack at the rear of the device.
- Connect the power cord plug to a power outlet.
Connecting External Devices
Note: To connect the monitor to an external device (PC, laptop…etc.), please use one of the included video cables for your application and connect it to both terminals.
-
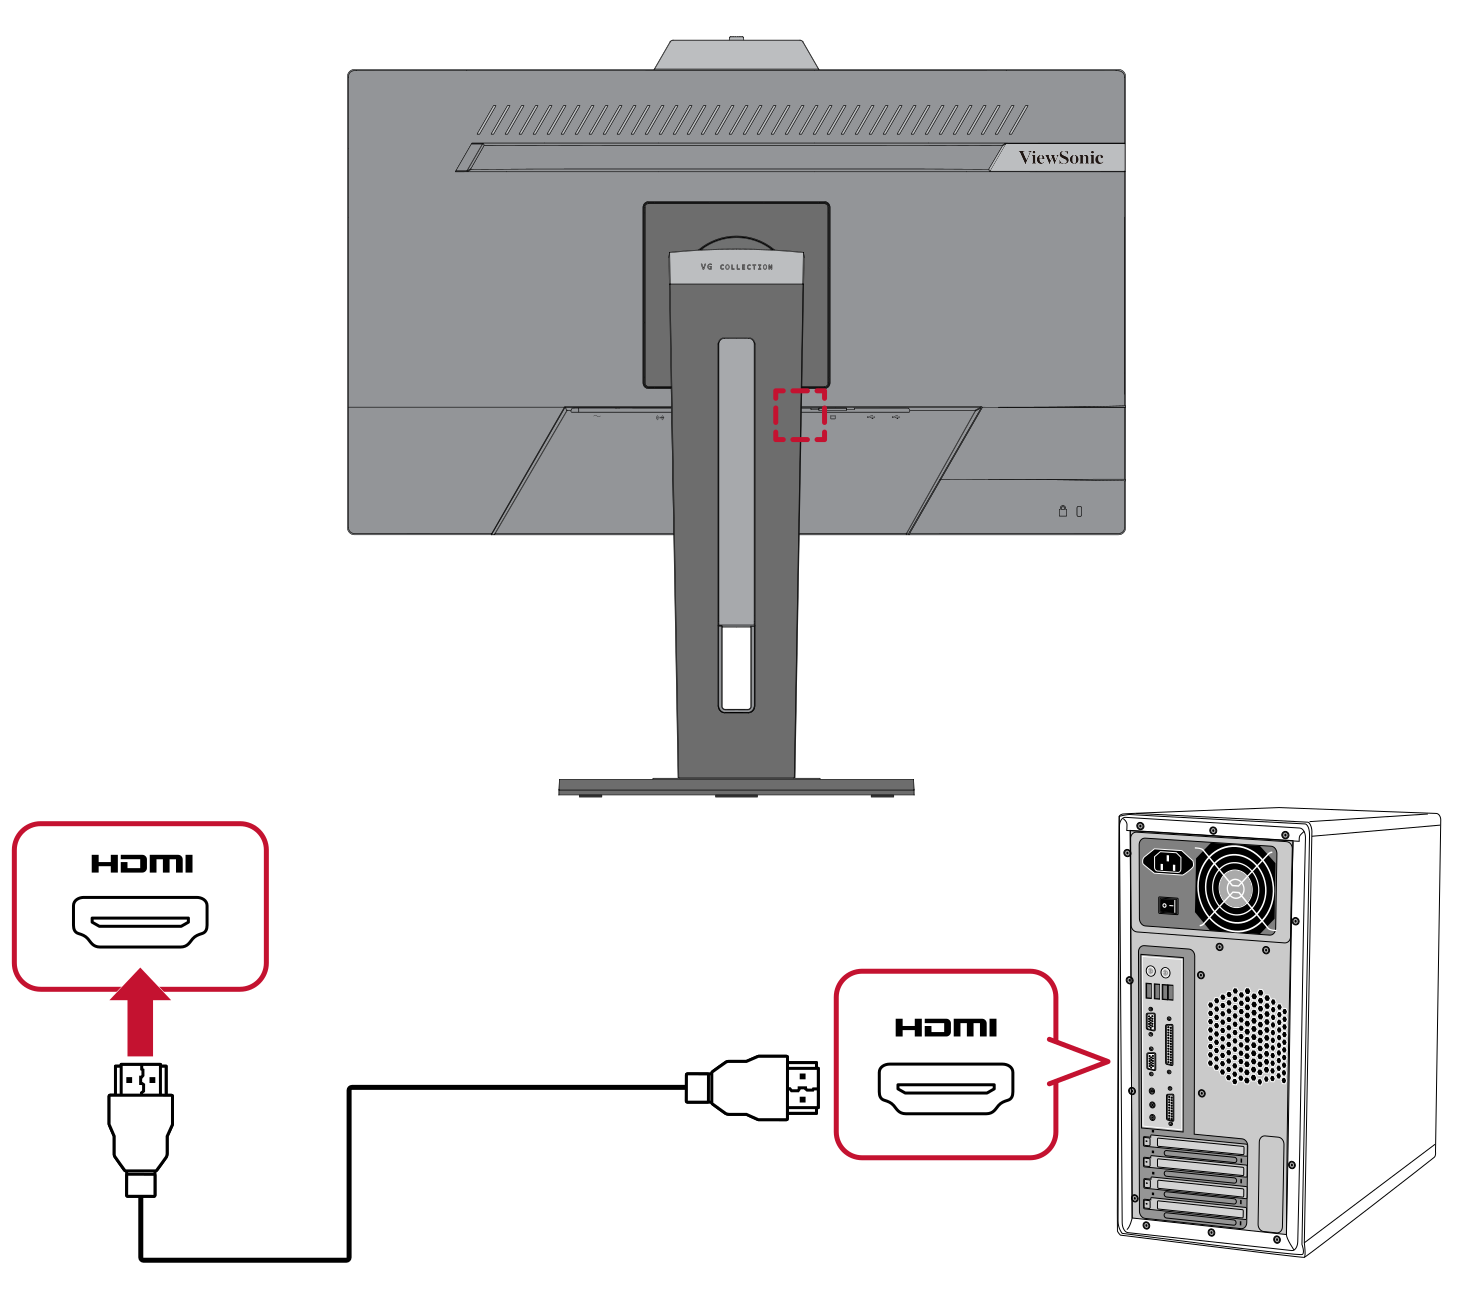 HDMI Connection
 -
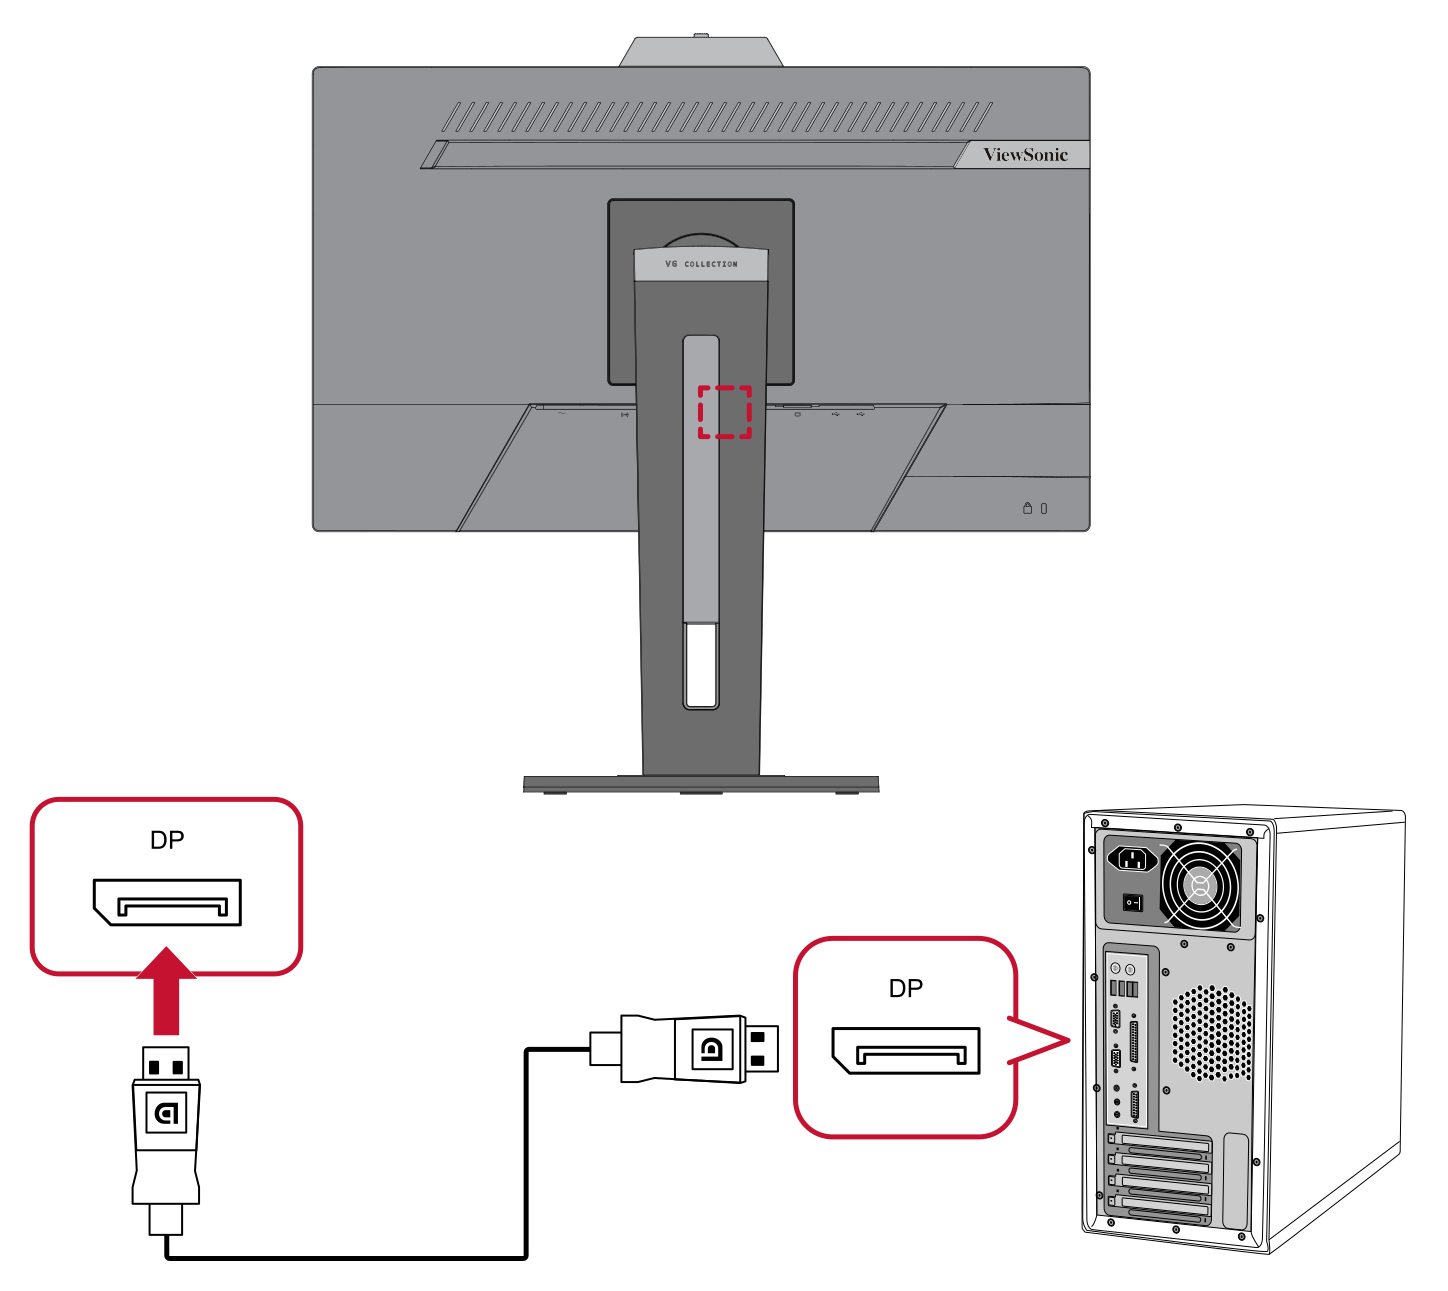 DisplayPort Connection
 -
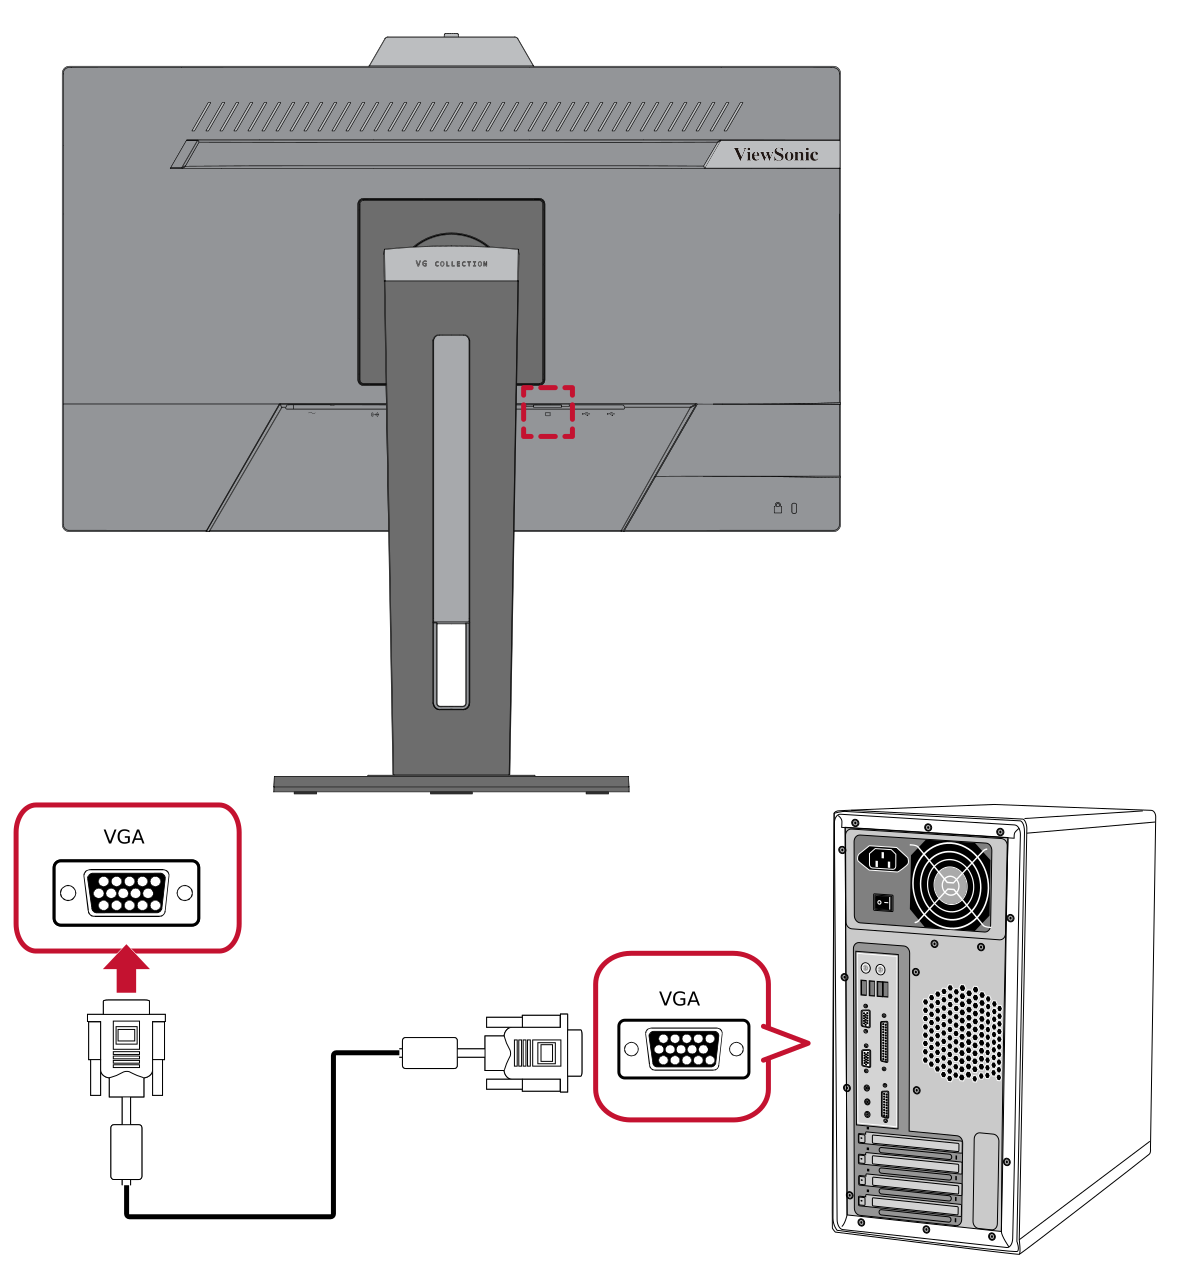 VGA Connection
 -
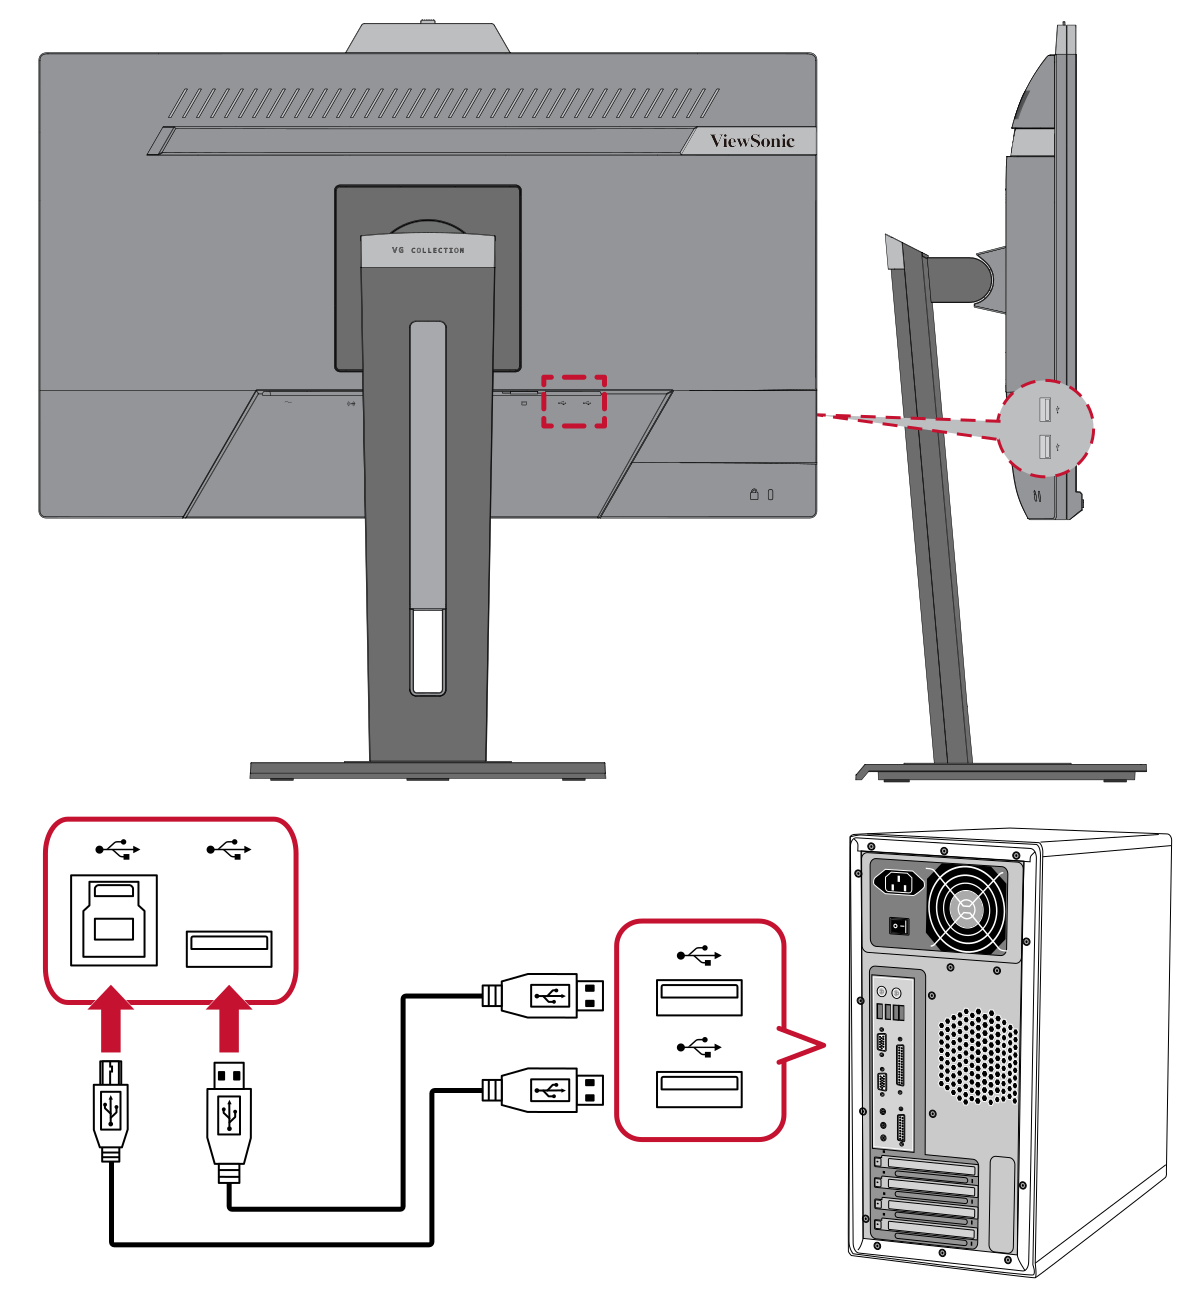 USB Connection
 -
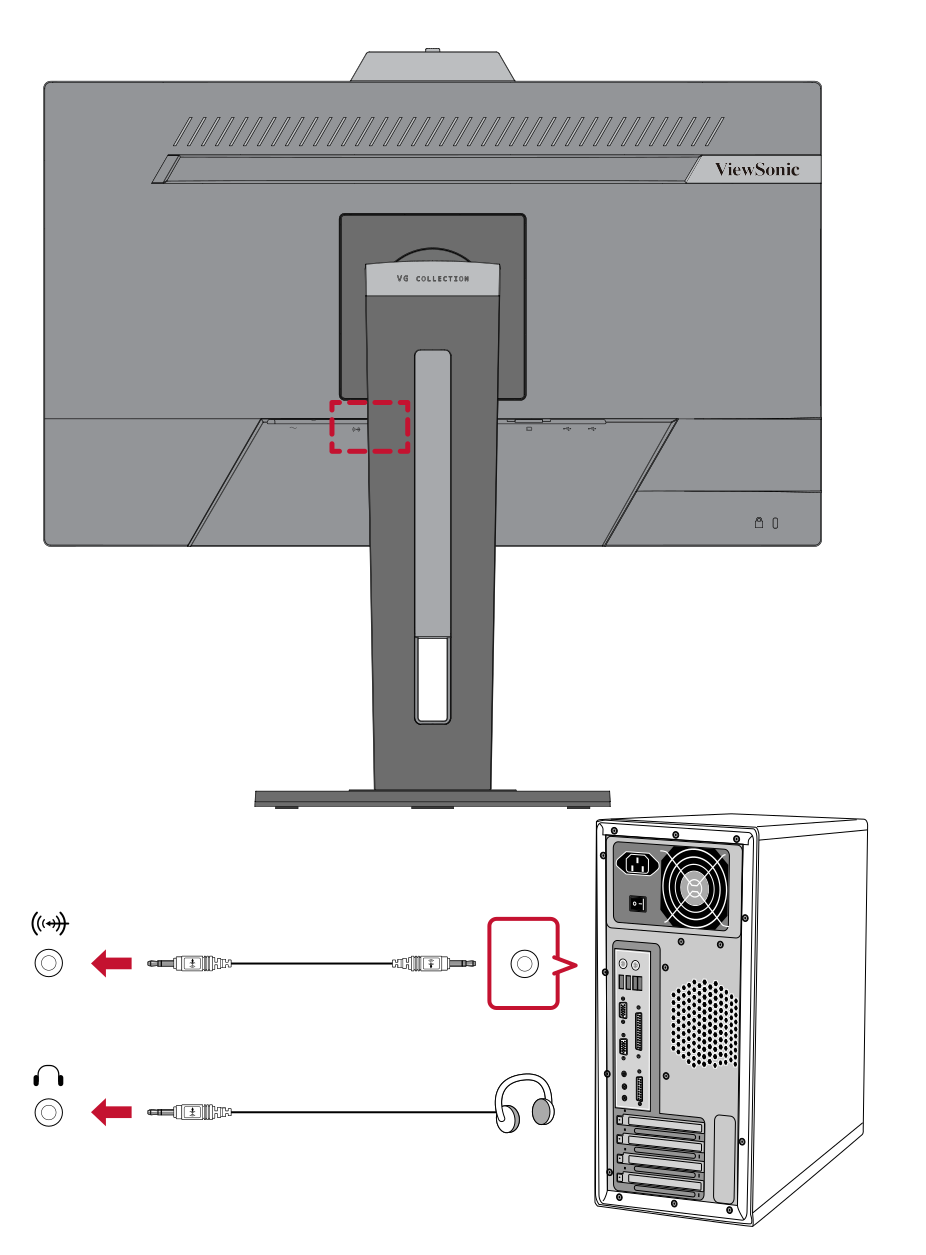 Audio Connection


HDMI
Connect one end of an HDMI cable to the HDMI port of your monitor. Then connect the other end of the cable to the HDMI port of your computer.
- NOTE: The monitor is equipped with one HDMI 1.4 port.
DisplayPort
Connect one end of a DisplayPort cable to the DisplayPort port. Then connect the other end of the cable to the DisplayPort or mini DP port of your computer.
- NOTE: To connect the monitor to the Thunderbolt port (v. 1&2) on your Mac, connect the mini DP end of the “mini DP to DisplayPort cable” to the Thunderbolt output of your Mac. Then connect the other end of the cable to the DisplayPort port of the monitor.
VGA
Connect one end of a VGA cable to the VGA port of your monitor. Then connect the other end of the cable to the VGA port of your computer.
USB
Connect one end of a USB cable to a USB port of the monitor. Then connect the other end of the cable to a USB port of your computer.
USB Number Description Type A Three (3) Connection for your Type A peripheral device(s). (e.g. storage device). - NOTE: To activate the USB Type A port, ensure your computer is also connected to the monitor’s USB Type B port.
Type B One (1) Connect the USB Type B male cable (square with 2 cut corners) to this port, and then connect the other end of the cable to the USB downstream port of your computer.
Audio
Plug the audio jack of the ear-/headphones into the Audio Out port of the monitor. Additionally, you can connect the monitor to a sound bar using an audio cable.
- NOTE: The monitor is equipped with dual speakers.