
VController Setting: Difference between revisions
From ViewSonic Documentation
No edit summary |
|||
| (32 intermediate revisions by the same user not shown) | |||
| Line 13: | Line 13: | ||
===Setting Button=== | ===Setting Button=== | ||
Press to the '''Setting Button''' [[File:vController_Source_Icon_Set.jpg]] to set the RS-232 or LAN commands. | Press to the '''Setting Button''' [[File:vController_Source_Icon_Set.jpg]] to set the RS-232 or LAN commands. | ||
:{| class="wikitable" style="font-weight:bold" width=" | :{| class="wikitable" style="font-weight:bold; background-color:#ffffff;" width="60%" | ||
|- style="text-align:center; background-color:# | |- | ||
! style="text-align:center; background-color:#DB0025; color:#ffffff; font-weight:bold; width:25%;" | Icon | |||
! style="text-align:center; background-color:# | ! style="text-align:center; background-color:#DB0025; color:#ffffff; font-weight:bold;" | Description | ||
|-style="text-align:center;" | |-style="text-align:center;" | ||
| [[File:vController_Source_Icon_Green_Set.jpg]] | | [[File:vController_Source_Icon_Green_Set.jpg]] | ||
| Line 27: | Line 27: | ||
| style="font-weight:normal; text-align:left" | Command is still processing. | | style="font-weight:normal; text-align:left" | Command is still processing. | ||
|} | |} | ||
===Getting Button=== | ===Getting Button=== | ||
Press to the '''Getting Button''' [[File:vController_Source_Icon.jpg]] to read the RS-232 or LAN commands. | Press to the '''Getting Button''' [[File:vController_Source_Icon.jpg]] to read the RS-232 or LAN commands. | ||
:{| class="wikitable" width=" | :{| class="wikitable" width="60%" style=" background-color:#ffffff;" | ||
|- | |- | ||
! style="text-align:center; background-color:# | ! style="text-align:center; background-color:#DB0025; color:#ffffff; font-weight:bold; width:25%;" | Icon | ||
! style="text-align:center; background-color:# | ! style="text-align:center; background-color:#DB0025; color:#ffffff; font-weight:bold;" | Description | ||
|- | |- | ||
|style="text-align:center;"|[[File:vController_Source_Icon_Green.jpg]] | |style="text-align:center;"|[[File:vController_Source_Icon_Green.jpg]] | ||
| Line 47: | Line 48: | ||
===Setup=== | ===Setup=== | ||
:<div class="res-img">[[File:vController_Setup_1.png|550px]]</div> | :<div class="res-img">[[File:vController_Setup_1.png|550px]]</div> | ||
:{| class="wikitable" width="60%" style="text-align:center;" | :{| class="wikitable" width="60%" style="text-align:center; background-color:#ffffff;" | ||
|- | |- | ||
! style="text-align:center; background-color:# | ! style="text-align:center; background-color:#DB0025; color:#ffffff; font-weight:bold; width:25%;" |Item | ||
! style="text-align:center; background-color:# | ! style="text-align:center; background-color:#DB0025; color:#ffffff; font-weight:bold;" |Function Description | ||
! style="text-align:center; background-color:# | ! style="text-align:center; background-color:#DB0025; color:#ffffff; font-weight:bold;" |Commands Supported | ||
! style="text-align:center; background-color:# | ! style="text-align:center; background-color:#DB0025; color:#ffffff; font-weight:bold;" |Devices Supported | ||
|- | |- | ||
| '''OSD Language''' | | '''OSD Language''' | ||
| Line 107: | Line 108: | ||
===Picture=== | ===Picture=== | ||
:<div class="res-img">[[File:vController_Setup_2.png|550px]]</div> | :<div class="res-img">[[File:vController_Setup_2.png|550px]]</div> | ||
:{| class="wikitable" width="60%" style="text-align:center;" | :{| class="wikitable" width="60%" style="text-align:center; background-color:#ffffff;" | ||
|- | |- | ||
! style="text-align:center; background-color:# | ! style="text-align:center; background-color:#DB0025; color:#ffffff; font-weight:bold; width:25%;" |Item | ||
! style="text-align:center; background-color:# | ! style="text-align:center; background-color:#DB0025; color:#ffffff; font-weight:bold;" |Function Description | ||
! style="text-align:center; background-color:# | ! style="text-align:center; background-color:#DB0025; color:#ffffff; font-weight:bold;" |Commands Supported | ||
! style="text-align:center; background-color:# | ! style="text-align:center; background-color:#DB0025; color:#ffffff; font-weight:bold;" |Devices Supported | ||
|- | |- | ||
| '''Contrast''' | | '''Contrast''' | ||
| Line 157: | Line 158: | ||
===Audio=== | ===Audio=== | ||
:<div class="res-img">[[File:vController_Setup_3.png|550px]]</div> | :<div class="res-img">[[File:vController_Setup_3.png|550px]]</div> | ||
:{| class="wikitable" width="60%" style="text-align:center;" | :{| class="wikitable" width="60%" style="text-align:center; background-color:#ffffff;" | ||
|- | |- | ||
! style="text-align:center; background-color:# | ! style="text-align:center; background-color:#DB0025; color:#ffffff; font-weight:bold; width:25%;" |Item | ||
! style="text-align:center; background-color:# | ! style="text-align:center; background-color:#DB0025; color:#ffffff; font-weight:bold;" |Function Description | ||
! style="text-align:center; background-color:# | ! style="text-align:center; background-color:#DB0025; color:#ffffff; font-weight:bold;" |Commands Supported | ||
! style="text-align:center; background-color:# | ! style="text-align:center; background-color:#DB0025; color:#ffffff; font-weight:bold;" |Devices Supported | ||
|- | |- | ||
| '''Sound''' | | '''Sound''' | ||
| Line 198: | Line 199: | ||
This function allows users to establish a large array of displays (TV walls). This function requires daisy chain connections. The maximum number of displays to be arranged horizontally/vertically would depend on the specifications of the displays used. | This function allows users to establish a large array of displays (TV walls). This function requires daisy chain connections. The maximum number of displays to be arranged horizontally/vertically would depend on the specifications of the displays used. | ||
:<div class="res-img">[[File:vController_Setup_4.png|550px]]</div> | :<div class="res-img">[[File:vController_Setup_4.png|550px]]</div> | ||
:{| class="wikitable" width="60%" style="text-align:center;" | :{| class="wikitable" width="60%" style="text-align:center; background-color:#ffffff;" | ||
|- | |- | ||
! style="text-align:center; background-color:# | ! style="text-align:center; background-color:#DB0025; color:#ffffff; font-weight:bold; width:25%;" |Item | ||
! style="text-align:center; background-color:# | ! style="text-align:center; background-color:#DB0025; color:#ffffff; font-weight:bold;" |Function Description | ||
! style="text-align:center; background-color:# | ! style="text-align:center; background-color:#DB0025; color:#ffffff; font-weight:bold;" |Commands Supported | ||
! style="text-align:center; background-color:# | ! style="text-align:center; background-color:#DB0025; color:#ffffff; font-weight:bold;" |Devices Supported | ||
|- | |- | ||
| '''Tiling-Mode''' | | '''Tiling-Mode''' | ||
| Line 228: | Line 229: | ||
===KeyPad=== | ===KeyPad=== | ||
:<div class="res-img">[[File:vController_Setup_5.png|550px]]</div> | :<div class="res-img">[[File:vController_Setup_5.png|550px]]</div> | ||
:{| class="wikitable" width="60%" style="text-align:center;" | :{| class="wikitable" width="60%" style="text-align:center; background-color:#ffffff;" | ||
|- | |- | ||
! style="text-align:center; background-color:# | ! style="text-align:center; background-color:#DB0025; color:#ffffff; font-weight:bold; width:25%;" |Item | ||
! style="text-align:center; background-color:# | ! style="text-align:center; background-color:#DB0025; color:#ffffff; font-weight:bold;" |Function Description | ||
! style="text-align:center; background-color:# | ! style="text-align:center; background-color:#DB0025; color:#ffffff; font-weight:bold;" |Commands Supported | ||
! style="text-align:center; background-color:# | ! style="text-align:center; background-color:#DB0025; color:#ffffff; font-weight:bold;" |Devices Supported | ||
|- | |- | ||
| style="text-align:center;|[[File:VController_Power_Button.jpg|50px]] <br />'''Power On Button''' | | style="text-align:center;|[[File:VController_Power_Button.jpg|50px]] <br />'''Power On Button''' | ||
| Line 290: | Line 291: | ||
<u>'''Group Name'''</u><br /> | <u>'''Group Name'''</u><br /> | ||
Key in the group name here. | Key in the group name here. | ||
<div class="res-img">[[File:vController_Macro_Group_Name.png]]</div> | :<div class="res-img">[[File:vController_Macro_Group_Name.png|300px]]</div> | ||
<u>'''Edit Macro Group Commands'''</u><br /> | <u>'''Edit Macro Group Commands'''</u><br /> | ||
<div class="res-img">Press the '''Edit Icon''' [[File:vController_Macro_Edit_Icon.png|40px|link=]] to add commands to the Macro Group Commands.</div> | <div class="res-img">Press the '''Edit Icon''' [[File:vController_Macro_Edit_Icon.png|40px|link=]] to add commands to the Macro Group Commands.</div> | ||
<div class="res-img">[[File:vController_Macro_Edit.png]]</div> | :<div class="res-img">[[File:vController_Macro_Edit.png|200px]]</div> | ||
{| class="wikitable" style="text-align:center; background-color:#ffffff;" width="60%" | |||
|- | |||
! style="font-weight:bold; background-color:#DB0025; color:#ffffff; width:25%;" | Item | |||
! style="font-weight:bold; background-color:#DB0025; color:#ffffff;" | Description | |||
|- | |||
| <div class="res-img">[[File:vController_Macro_Edit_Drop_Down_1.png|100px]]</div> | |||
| Select command. | |||
|- | |||
| <div class="res-img">[[File:vController_Macro_Edit_Drop_Down_2.png|100px]]</div> | |||
| Select command data. | |||
|- | |||
| <div class="res-img">[[File:vController_Macro_Edit_Plus_Button.png|30px]]</div> | |||
| Add command to group. | |||
|- | |||
| <div class="res-img">[[File:vController_Macro_Edit_Minus_Button.png|30px]]</div> | |||
| Remove command from group. | |||
|- | |||
| <div class="res-img">[[File:vController_Macro_Edit_Arrow_Up_Button.png|30px]]</div> | |||
| Move up the command focus. | |||
|- | |||
| <div class="res-img">[[File:vController_Macro_Edit_Arrow_Down_Button.png|30px]]</div> | |||
| Move down the command focus. | |||
|- | |||
| <div class="res-img">[[File:vController_Macro_Edit_Check_Button.png|30px]]</div> | |||
| Enable all IP addresses. | |||
|- | |||
| <div class="res-img">[[File:vController_Macro_Edit_X_Button.png|30px]]</div> | |||
| Close macro edit. | |||
|} | |||
<u>'''Run Macro Group Commands'''</u><br /> | <u>'''Run Macro Group Commands'''</u><br /> | ||
| Line 300: | Line 330: | ||
==Projector Setting== | ==Projector Setting== | ||
===Setup=== | ===Setup=== | ||
{| style="text-align:center;" | |||
|- | |||
| <div class="res-img">[[File:vController_Setup_PJ_No_Pro9.png|500px]]</div> | |||
| <div class="res-img">[[File:vController_Start_PJ_Yes_Pro9.png|500px]]</div> | |||
|- | |||
|'''Pro 9 Series Not Selected''' | |||
|'''Pro 9 Series Selected''' | |||
|} | |||
:{| class="wikitable" width="60%" style="text-align:center; background-color:#ffffff;" | |||
|- | |||
! style="text-align:center; background-color:#DB0025; color:#ffffff; font-weight:bold; width:25%;" |Item | |||
! style="text-align:center; background-color:#DB0025; color:#ffffff; font-weight:bold;" |Function Description | |||
! style="text-align:center; background-color:#DB0025; color:#ffffff; font-weight:bold;" |Commands Supported | |||
! style="text-align:center; background-color:#DB0025; color:#ffffff; font-weight:bold;" |Devices Supported | |||
|- | |||
| '''OSD Language''' | |||
| Select the language for the OSD interface. | |||
| Write | |||
| Supports Non-Pro 9 Series model. | |||
|- | |||
| '''Reset All''' | |||
| Return all settings to the default factory settings. | |||
| Write | |||
| All devices | |||
|- | |||
| '''Reset Color''' | |||
| Reset the color settings to their default values. | |||
| Write | |||
| Supports Non-Pro 9 Series model. | |||
|- | |||
|} | |||
===Picture=== | ===Picture=== | ||
:<div class="res-img">[[File:vController_Setup_PJ_Picture.png|550px]]</div> | |||
:{| class="wikitable" width="60%" style="text-align:center; background-color:#ffffff;" | |||
|- | |||
! style="text-align:center; background-color:#DB0025; color:#ffffff; font-weight:bold; width:25%;" |Item | |||
! style="text-align:center; background-color:#DB0025; color:#ffffff; font-weight:bold;" |Function Description | |||
! style="text-align:center; background-color:#DB0025; color:#ffffff; font-weight:bold;" |Commands Supported | |||
! style="text-align:center; background-color:#DB0025; color:#ffffff; font-weight:bold;" |Devices Supported | |||
|- | |||
| '''Contrast''' | |||
| Adjust contrast to improve display quality.The black portions of the image would be blacker, while the white portions would be whiter. | |||
| Write/Read | |||
| Supports Pro 9 Series only | |||
|- | |||
| '''Brightness''' | |||
| Adjust brightness of the image displayed. | |||
| Write/Read | |||
| Supports Pro 9 Series only | |||
|} | |||
===Audio=== | ===Audio=== | ||
{| style="text-align:center;" | |||
|- | |||
| <div class="res-img">[[File:vController_Audio_PJ_No_Pro9.png|500px]]</div> | |||
| <div class="res-img">[[File:vController_Audio_PJ_Yes_Pro9.png|500px]]</div> | |||
|- | |||
|'''Pro 9 Series Not Selected''' | |||
|'''Pro 9 Series Selected''' | |||
|} | |||
:{| class="wikitable" width="60%" style="text-align:center; background-color:#ffffff;" | |||
|- | |||
! style="text-align:center; background-color:#DB0025; color:#ffffff; font-weight:bold; width:25%;" |Item | |||
! style="text-align:center; background-color:#DB0025; color:#ffffff; font-weight:bold;" |Function Description | |||
! style="text-align:center; background-color:#DB0025; color:#ffffff; font-weight:bold;" |Commands Supported | |||
! style="text-align:center; background-color:#DB0025; color:#ffffff; font-weight:bold;" |Devices Supported | |||
|- | |||
| '''Volume''' | |||
| Increase or decrease the projector volume. | |||
| Write/Read | |||
| All devices | |||
|- | |||
| '''Mute''' | |||
| Mute or unmute the projector speakers. | |||
| Supports Non-Pro 9 Series | |||
| All devices | |||
|} | |||
===KeyPad=== | |||
=== | {| style="text-align:center;" | ||
|- | |||
| <div class="res-img">[[File:vController_Keypad_PJ_No_Pro9.png|500px]]</div> | |||
| <div class="res-img">[[File:vController_Keypad_PJ_Yes_Pro9.png|500px]]</div> | |||
|- | |||
|'''Pro 9 Series Not Selected''' | |||
|'''Pro 9 Series Selected''' | |||
|} | |||
:{| class="wikitable" width="60%" style="text-align:center; background-color:#ffffff;" | |||
|- | |||
! style="text-align:center; background-color:#DB0025; color:#ffffff; font-weight:bold; width:25%;" |Item | |||
! style="text-align:center; background-color:#DB0025; color:#ffffff; font-weight:bold;" |Function Description | |||
! style="text-align:center; background-color:#DB0025; color:#ffffff; font-weight:bold;" |Commands Supported | |||
! style="text-align:center; background-color:#DB0025; color:#ffffff; font-weight:bold;" |Devices Supported | |||
|- | |||
| style="text-align:center;|[[File:VController_Power_Button.jpg|50px]] <br />'''Power On Button''' | |||
| Press this button to power on device. | |||
| Write | |||
| All devices | |||
|- | |||
| style="text-align:center;|[[File:VController_PowerOff_Button.jpg|50px]]<br />'''Power Off Button''' | |||
| Press this button to power off device. | |||
| Write | |||
| All devices | |||
|- | |||
| style="text-align:center;|[[File:vController_ECO_Mode_Button.png|50px]]<br />'''ECO Mode Button''' | |||
| | |||
| Write | |||
| All devices | |||
|- | |||
| style="text-align:center;|[[File:vController_Lamp_Mode_Button.png|50px]]<br />'''Lamp Mode Button''' | |||
| Cycle between ECO, Normal, and Dynamic ECO. | |||
| Write | |||
| Supports Pro 9 Series only | |||
|- | |||
| style="text-align:center;|[[File:vController_Audio_Mode_Button.png|50px]]<br />'''Audio Mode Button''' | |||
| | |||
| Write | |||
| All devices | |||
|- | |||
| style="text-align:center;|[[File:vController_Blank_Button.png|50px]]<br />'''Blank On/Off Button''' | |||
| | |||
| Write | |||
| All devices | |||
|- | |||
| style="text-align:center;|[[File:vController_Freeze_Button.png|50px]]<br />'''Freeze On/Off Button''' | |||
| | |||
| Write | |||
| All devices | |||
|- | |||
| style="text-align:center;|[[File:VController_Volume_Down_Button.jpg|50px]]<br />'''Volume Down Button''' | |||
| Press this button to decrease the audio output level. | |||
| Write | |||
| Supports Non-Pro 9 Series | |||
|- | |||
| style="text-align:center;|[[File:VController_Volume_Up_Button.jpg|50px]]<br />'''Volume Up Button''' | |||
| Press this button to increase the audio output level. | |||
| Write | |||
| Supports Non-Pro 9 Series | |||
|- | |||
| style="text-align:center;|[[File:VController_Mute_Button.jpg|50px]]<br />'''Mute Button''' | |||
| Press this button to turn the mute function on / off. | |||
| Write | |||
| Supports Non-Pro 9 Series | |||
|- | |||
| style="text-align:center;|[[File:vController_Picture_Mode_Button.png|50px]]<br />'''Picture Mode Button''' | |||
| | |||
| Write | |||
| All devices | |||
|- | |||
| style="text-align:center;|[[File:vController_Aspect_Ratio_Button.png|50px]]<br />'''Aspect Ratio Button''' | |||
| | |||
| Write | |||
| All devices | |||
|- | |||
| style="text-align:center;|[[File:vController_Arrows_Enter_PJ_Button.png|50px]]<br />'''Arrow Buttons and Enter Button''' | |||
| | |||
*Move the selection row up/down/left/right or adjust the selected item in the OSD interface. | |||
*ENTER button confirms the action. | |||
| Write | |||
| Supports Non-Pro 9 Series | |||
|- | |||
| style="text-align:center;|[[File:vController_Source_Switch_Button.png|50px]]<br />'''Source Switch Button''' | |||
| Select the input source. | |||
| Write | |||
| Supports Non-Pro 9 Series | |||
|- | |||
| style="text-align:center;|[[File:vController_Keystone_Button.png|50px]]<br />'''Keystone Button''' | |||
| Adjust the keystone values. | |||
| Write | |||
| Supports Non-Pro 9 Series | |||
|} | |||
===Macro=== | ===Macro=== | ||
:<div class="res-img">[[File:vController_PJ_Macro.png|550px]]</div> | |||
The user can define three (3) components: | |||
# '''Group Name''' | |||
# '''Edit Macro Group Commands''' | |||
# '''Run Macro Group Commands''' | |||
<br /> | |||
<u>'''Group Name'''</u><br /> | |||
Key in the group name here. | |||
:<div class="res-img">[[File:vController_Macro_Group_Name.png|300px]]</div> | |||
<u>'''Edit Macro Group Commands'''</u><br /> | |||
<div class="res-img">Press the '''Edit Icon''' [[File:vController_Macro_Edit_Icon.png|40px|link=]] to add commands to the Macro Group Commands.</div> | |||
:<div class="res-img">[[File:vController_Macro_Edit.png|200px]]</div> | |||
{| class="wikitable" style="text-align:center; background-color:#ffffff;" width="60%" | |||
|- | |||
! style="font-weight:bold; background-color:#DB0025; color:#ffffff; width:25%;" | Item | |||
! style="font-weight:bold; background-color:#DB0025; color:#ffffff;" | Description | |||
|- | |||
| <div class="res-img">[[File:vController_Macro_Edit_Drop_Down_1.png|100px]]</div> | |||
| Select command. | |||
|- | |||
| <div class="res-img">[[File:vController_Macro_Edit_Drop_Down_2.png|100px]]</div> | |||
| Select command data. | |||
|- | |||
| <div class="res-img">[[File:vController_Macro_Edit_Plus_Button.png|30px]]</div> | |||
| Add command to group. | |||
|- | |||
| <div class="res-img">[[File:vController_Macro_Edit_Minus_Button.png|30px]]</div> | |||
| Remove command from group. | |||
|- | |||
| <div class="res-img">[[File:vController_Macro_Edit_Arrow_Up_Button.png|30px]]</div> | |||
| Move up the command focus. | |||
|- | |||
| <div class="res-img">[[File:vController_Macro_Edit_Arrow_Down_Button.png|30px]]</div> | |||
| Move down the command focus. | |||
|- | |||
| <div class="res-img">[[File:vController_Macro_Edit_Check_Button.png|30px]]</div> | |||
| Enable all IP addresses. | |||
|- | |||
| <div class="res-img">[[File:vController_Macro_Edit_X_Button.png|30px]]</div> | |||
| Close macro edit. | |||
|} | |||
<u>'''Run Macro Group Commands'''</u><br /> | |||
<div class="res-img">Press the '''Play Icon''' [[File:vController_Macro_Play_Icon.png|40px|link=]] to run the Macro Group Commands.</div> | |||
| Line 328: | Line 559: | ||
}} | }} | ||
[[Category: | [[Category:vController]] | ||
Latest revision as of 06:19, 23 January 2026
Setting
Setting / Getting Buttons
Setting Button
Press to the Setting Button  to set the RS-232 or LAN commands.
Icon Description 
Command was successfully read. 
Command was not set / command is not supported. 
Command is still processing.


Getting Button
Press to the Getting Button  to read the RS-232 or LAN commands.
Icon Description 
Command was successfully read. 
Command was not set / command is not supported. 
Command is still processing.


Monitor Setting
Setup

Item Function Description Commands Supported Devices Supported OSD Language Select the language for the OSD interface. Write All devices Power Lock Button used to activate or de-activate the power source. Write/Read All devices Button Lock Button used to activate or de-activate the control panel buttons. Write/Read All devices Menu Lock Button used to activate or de-activate the main menu buttons. Write/Read All devices DTV Channel Select the digital TV channel. Write TV types ATV Channel Select the analog TV channel Write TV types Remote Control Choose whether to switch the remote control on/off or select the IR pass through mode. When the IR pass through mode has been activated, the name of the button would be displayed in the RC display frame when the remote control is pressed. Write/Read All devices Set-Up Wizard Choose whether to switch the set-up wizard on/off (only for TV devices) Write/Read TV types Restore Default Return all settings to the default factory settings Write All devices Ack Tests the communication connections Write All devices
Picture

Item Function Description Commands Supported Devices Supported Contrast Adjust contrast to improve display quality.The black portions of the image would be blacker, while the white portions would be whiter. Write/Read All devices Brightness Adjust brightness of the image displayed. Write/Read All devices Sharpness Adjust and improve the image sharpness. Write/Read All devices Backlight Adjust the panel backlights Write/Read All devices Color Increase or decrease the color strength of the image. Write/Read All devices Tint Increase or decrease the tint of the image. Increasing tint will make the image greener, while decreasing tint will make the image appear more purple. Write/Read All devices Color Mode Select the warmth of the color used for the image. Low-warmth images would appear slightly red, while high-warmth images would appear slightly blue. Write All devices Picture Size Select picture size. Write All devices
Audio

Item Function Description Commands Supported Devices Supported Sound Switch the SRS effects on or off. Write All devices Bass Increase or decrease the bass volume. Write All devices Treble Increase or decrease the treble volume. Write All devices Balance Adjust the balance of the left and right channels. Write All devices Volume Increase or decrease the monitor volume. Write/Read All devices Mute Mute or unmute the monitor speakers. Write/Read All devices
Tiling
This function allows users to establish a large array of displays (TV walls). This function requires daisy chain connections. The maximum number of displays to be arranged horizontally/vertically would depend on the specifications of the displays used.

Item Function Description Commands Supported Devices Supported Tiling-Mode Swith on / off Tiling-Mode. Write/Read TV wall type (CDX) Tiling-Compensation Turn on / off the tiling-compensation function. When switched on, the monitors would adjust the image to compensate for the width of the border frames and provide an accurate and precise display of the images. Write/Read TV wall type (CDX) Tiling-H by V Monitors Select the number of monitors in the horizontal / vertical directions. Write/Read TV wall type (CDX) Tiling Position Designate the position of the monitor in the monitor tiling matrix. Write/Read TV wall type (CDX)
KeyPad

Item Function Description Commands Supported Devices Supported 
Power On ButtonPress this button to power on device. Write All devices 
Power Off ButtonPress this button to power off device. Write All devices 
Menu ButtonPress this button to access the OSD menu. Write All devices 
Volume Down ButtonPress this button to decrease the audio output level. Write All devices 
Volume Up ButtonPress this button to increase the audio output level. Write All devices 
Mute ButtonPress this button to turn the mute function on / off. Write All devices 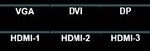
Source Switch ButtonsPress these buttons to select the input source. Write All devices 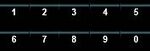
0 - 9 ButtonsSelect the desired number by pressing the 0 - 9 buttons Write All devices 
Arrow Buttons and Enter ButtonUse to Arrow Buttons to adjust the selected item in the OSD interface. Press the ENTER Button to confirm the action. Write All devices


Macro

The user can define three (3) components:
- Group Name
- Edit Macro Group Commands
- Run Macro Group Commands
Group Name
Key in the group name here.

Edit Macro Group Commands
Press the Edit Icon  to add commands to the Macro Group Commands.
to add commands to the Macro Group Commands.
| Item | Description |
|---|---|
 |
Select command. |
 |
Select command data. |
 |
Add command to group. |
 |
Remove command from group. |
 |
Move up the command focus. |
 |
Move down the command focus. |
 |
Enable all IP addresses. |
 |
Close macro edit. |
Run Macro Group Commands
Press the Play Icon  to run the Macro Group Commands.
to run the Macro Group Commands.Projector Setting
Setup
 |
 |
| Pro 9 Series Not Selected | Pro 9 Series Selected |
Item Function Description Commands Supported Devices Supported OSD Language Select the language for the OSD interface. Write Supports Non-Pro 9 Series model. Reset All Return all settings to the default factory settings. Write All devices Reset Color Reset the color settings to their default values. Write Supports Non-Pro 9 Series model.
Picture

Item Function Description Commands Supported Devices Supported Contrast Adjust contrast to improve display quality.The black portions of the image would be blacker, while the white portions would be whiter. Write/Read Supports Pro 9 Series only Brightness Adjust brightness of the image displayed. Write/Read Supports Pro 9 Series only
Audio
 |
 |
| Pro 9 Series Not Selected | Pro 9 Series Selected |
Item Function Description Commands Supported Devices Supported Volume Increase or decrease the projector volume. Write/Read All devices Mute Mute or unmute the projector speakers. Supports Non-Pro 9 Series All devices
KeyPad
 |
 |
| Pro 9 Series Not Selected | Pro 9 Series Selected |
Item Function Description Commands Supported Devices Supported
Power On ButtonPress this button to power on device. Write All devices
Power Off ButtonPress this button to power off device. Write All devices 
ECO Mode ButtonWrite All devices 
Lamp Mode ButtonCycle between ECO, Normal, and Dynamic ECO. Write Supports Pro 9 Series only 
Audio Mode ButtonWrite All devices 
Blank On/Off ButtonWrite All devices 
Freeze On/Off ButtonWrite All devices
Volume Down ButtonPress this button to decrease the audio output level. Write Supports Non-Pro 9 Series
Volume Up ButtonPress this button to increase the audio output level. Write Supports Non-Pro 9 Series
Mute ButtonPress this button to turn the mute function on / off. Write Supports Non-Pro 9 Series 
Picture Mode ButtonWrite All devices 
Aspect Ratio ButtonWrite All devices 
Arrow Buttons and Enter Button- Move the selection row up/down/left/right or adjust the selected item in the OSD interface.
- ENTER button confirms the action.
Write Supports Non-Pro 9 Series 
Source Switch ButtonSelect the input source. Write Supports Non-Pro 9 Series 
Keystone ButtonAdjust the keystone values. Write Supports Non-Pro 9 Series


Macro

The user can define three (3) components:
- Group Name
- Edit Macro Group Commands
- Run Macro Group Commands
Group Name
Key in the group name here.
Edit Macro Group Commands
Press the Edit Icon to add commands to the Macro Group Commands.
to add commands to the Macro Group Commands.| Item | Description |
|---|---|
|
Select command. |
|
Select command data. |
|
Add command to group. |
|
Remove command from group. |
|
Move up the command focus. |
|
Move down the command focus. |
|
Enable all IP addresses. |
|
Close macro edit. |
Run Macro Group Commands
Press the Play Icon to run the Macro Group Commands.
to run the Macro Group Commands.