

| Sub-menu |
|---|
| HDMI |
| DisplayPort |
| Type C |
VG2709-2K-MHDU-2: Difference between revisions
From ViewSonic Documentation
// via Wikitext Extension for VSCode |
Marked this version for translation |
||
| Line 1: | Line 1: | ||
{{DISPLAYTITLE:VG2709-2K-MHDU-2}} | {{DISPLAYTITLE:VG2709-2K-MHDU-2}} | ||
{{Print}} | {{Print}} | ||
=<translate> Introduction</translate>= | =<translate> <!--T:1--> Introduction</translate>= | ||
==<translate> Package Contents</translate>== | ==<translate> <!--T:2--> Package Contents</translate>== | ||
<ol style="list-style-type:square;"> | <ol style="list-style-type:square;"> | ||
<li><translate> Monitor</translate></li> | <li><translate> <!--T:3--> Monitor</translate></li> | ||
<li><translate> Power Cord</translate></li> | <li><translate> <!--T:4--> Power Cord</translate></li> | ||
<li><translate> Video Cable</translate></li> | <li><translate> <!--T:5--> Video Cable</translate></li> | ||
<li><translate> USB Cable</translate></li> | <li><translate> <!--T:6--> USB Cable</translate></li> | ||
<li><translate> Quick Start Guide</translate></li> | <li><translate> <!--T:7--> Quick Start Guide</translate></li> | ||
</ol> | </ol> | ||
{{Note|<translate> The cables included in your package may vary depending on your country. Please contact your local reseller for more information.</translate>}} | {{Note|<translate> <!--T:8--> The cables included in your package may vary depending on your country. Please contact your local reseller for more information.</translate>}} | ||
==<translate> Product Overview</translate>== | ==<translate> <!--T:9--> Product Overview</translate>== | ||
<gallery widths="400" heights="400" mode="nolines"> | <gallery widths="400" heights="400" mode="nolines"> | ||
File:VG2709-2K-MHDU-2_Front_View.png|<translate> Front View</translate>|<div style="font-style:normal; text-align:center"><translate> Front View</translate></div> | File:VG2709-2K-MHDU-2_Front_View.png|<translate> <!--T:10--> Front View</translate>|<div style="font-style:normal; text-align:center"><translate> <!--T:11--> Front View</translate></div> | ||
File:VG2709-2K-MHDU-2_Rear_View.png|<translate> Rear View</translate>|<div style="font-style:normal; text-align:center"><translate> Rear View</translate></div> | File:VG2709-2K-MHDU-2_Rear_View.png|<translate> <!--T:12--> Rear View</translate>|<div style="font-style:normal; text-align:center"><translate> <!--T:13--> Rear View</translate></div> | ||
</gallery> | </gallery> | ||
==<translate> I/O Ports</translate>== | ==<translate> <!--T:14--> I/O Ports</translate>== | ||
<div class="res-img">[[File:VG2709-2K-MHDU-2_IO.png|700px|alt=I/O ports|<translate> VG2709-2K-MHDU-2's I/O Ports</translate>]]</div> | <div class="res-img">[[File:VG2709-2K-MHDU-2_IO.png|700px|alt=I/O ports|<translate> <!--T:15--> VG2709-2K-MHDU-2's I/O Ports</translate>]]</div> | ||
{| class="wikitable" style="text-align:center; width:50%; background-color:#ffffff;" | {| class="wikitable" style="text-align:center; width:50%; background-color:#ffffff;" | ||
! style="background-color:#DB0025; color:#ffffff; width:20%;" | <translate> Number</translate> !! style="background-color:#DB0025; color:#ffffff;" | <translate> Description</translate> | ! style="background-color:#DB0025; color:#ffffff; width:20%;" | <translate> <!--T:16--> Number</translate> !! style="background-color:#DB0025; color:#ffffff;" | <translate> <!--T:17--> Description</translate> | ||
|- | |- | ||
|'''1''' || <translate> HDMI</translate> | |'''1''' || <translate> <!--T:18--> HDMI</translate> | ||
|- | |- | ||
|'''2''' || <translate> DisplayPort</translate> | |'''2''' || <translate> <!--T:19--> DisplayPort</translate> | ||
|- | |- | ||
|'''3''' || <translate> USB Type C</translate> | |'''3''' || <translate> <!--T:20--> USB Type C</translate> | ||
|- | |- | ||
|'''4''' || <translate> USB Upstream</translate> | |'''4''' || <translate> <!--T:21--> USB Upstream</translate> | ||
|- | |- | ||
|'''5''' || <translate> USB Downstream</translate> | |'''5''' || <translate> <!--T:22--> USB Downstream</translate> | ||
|- | |- | ||
|'''6''' || <translate> Audio Out</translate> | |'''6''' || <translate> <!--T:23--> Audio Out</translate> | ||
|- | |- | ||
|'''7''' || <translate> AC IN</translate> | |'''7''' || <translate> <!--T:24--> AC IN</translate> | ||
|} | |} | ||
{{Note|<translate> For more information about the</translate> ''' 1 ★ / 2 / 3 / 4 / 5 [[File:Power_Switch.svg|20px|alt=power switch icon|link=]]''' <translate> key and its functions, refer to</translate> [[#Hot_Keys|<translate> Hot Keys</translate>]].}} | {{Note|<translate> <!--T:25--> For more information about the</translate> ''' 1 ★ / 2 / 3 / 4 / 5 [[File:Power_Switch.svg|20px|alt=power switch icon|link=]]''' <translate> <!--T:26--> key and its functions, refer to</translate> [[#Hot_Keys|<translate> <!--T:27--> Hot Keys</translate>]].}} | ||
=<translate> Initial Setup</translate>= | =<translate> <!--T:28--> Initial Setup</translate>= | ||
==<translate> Installing the Stand</translate>== | ==<translate> <!--T:29--> Installing the Stand</translate>== | ||
<div class="res-img">[[File:VG2709-2K-MHDU-2_Stand_Installation.png|550px|alt=The installation of the monitor's stand|<translate> Stand Installation</translate>]]</div> | <div class="res-img">[[File:VG2709-2K-MHDU-2_Stand_Installation.png|550px|alt=The installation of the monitor's stand|<translate> <!--T:30--> Stand Installation</translate>]]</div> | ||
{{Note|<translate> For safety and to ensure optimal performance, please position the monitor on a flat, stable surface. Failure to do so may lead to the monitor falling, causing damage to the monitor itself and/or posing a risk of personal injury.</translate>}} | {{Note|<translate> <!--T:31--> For safety and to ensure optimal performance, please position the monitor on a flat, stable surface. Failure to do so may lead to the monitor falling, causing damage to the monitor itself and/or posing a risk of personal injury.</translate>}} | ||
==<translate> Removing the Stand and Mounting the Monitor</translate>== | ==<translate> <!--T:32--> Removing the Stand and Mounting the Monitor</translate>== | ||
<translate> Refer to the table below for the standard dimensions for mounting kits.</translate> | <translate> <!--T:33--> Refer to the table below for the standard dimensions for mounting kits.</translate> | ||
{{Note|<translate> For use only with a UL certified mounting kit/bracket. To obtain a wall mounting kit or height adjustment base, contact ViewSonic® or your local dealer.</translate>}} | {{Note|<translate> <!--T:34--> For use only with a UL certified mounting kit/bracket. To obtain a wall mounting kit or height adjustment base, contact ViewSonic® or your local dealer.</translate>}} | ||
{| class="wikitable" style="text-align: center; width:60%; background-color:#ffffff;" | {| class="wikitable" style="text-align: center; width:60%; background-color:#ffffff;" | ||
! style="background-color:#DB0025; color:#ffffff;" | <translate> Maximum Loading</translate> | ! style="background-color:#DB0025; color:#ffffff;" | <translate> <!--T:35--> Maximum Loading</translate> | ||
! style="background-color:#DB0025; color:#ffffff;" | <translate> Pad Patten<br>(W x H)</translate> | ! style="background-color:#DB0025; color:#ffffff;" | <translate> <!--T:36--> Pad Patten<br>(W x H)</translate> | ||
! style="background-color:#DB0025; color:#ffffff;" | <translate> Pad Hole</translate> | ! style="background-color:#DB0025; color:#ffffff;" | <translate> <!--T:37--> Pad Hole</translate> | ||
! style="background-color:#DB0025; color:#ffffff;" | <translate> Screw Specification</translate> | ! style="background-color:#DB0025; color:#ffffff;" | <translate> <!--T:38--> Screw Specification</translate> | ||
! style="background-color:#DB0025; color:#ffffff;" | <translate> Screw Quantity</translate> | ! style="background-color:#DB0025; color:#ffffff;" | <translate> <!--T:39--> Screw Quantity</translate> | ||
|- | |- | ||
|<translate> 14 kg</translate> | |<translate> <!--T:40--> 14 kg</translate> | ||
|<translate> 100 x 100 mm</translate> | |<translate> <!--T:41--> 100 x 100 mm</translate> | ||
|<translate> Ø 5 mm</translate> | |<translate> <!--T:42--> Ø 5 mm</translate> | ||
|<translate> M4 x 10 mm</translate> | |<translate> <!--T:43--> M4 x 10 mm</translate> | ||
|<translate> 4 screws</translate> | |<translate> <!--T:44--> 4 screws</translate> | ||
|} | |} | ||
{{Note|<translate> Mounting kits are sold separately.</translate>}} | {{Note|<translate> <!--T:45--> Mounting kits are sold separately.</translate>}} | ||
<td><div class="res-img">[[File:VG2709-2K-MHDU-2_Stand_Disassembly.png|350px|alt= the preparation of the monitor for the wall mounting |<translate> Stand Disassembly</translate>]]</div> | <td><div class="res-img">[[File:VG2709-2K-MHDU-2_Stand_Disassembly.png|350px|alt= the preparation of the monitor for the wall mounting |<translate> <!--T:46--> Stand Disassembly</translate>]]</div> | ||
{{Important|<translate> Before removing the stand, please turn off the monitor, disconnect all cables, and place the monitor on a flat, stable surface with the screen facing down.</translate>}} | {{Important|<translate> <!--T:47--> Before removing the stand, please turn off the monitor, disconnect all cables, and place the monitor on a flat, stable surface with the screen facing down.</translate>}} | ||
<ol> | <ol> | ||
<li><translate> Remove the stand.</translate></li> | <li><translate> <!--T:48--> Remove the stand.</translate></li> | ||
<li><translate> Attach the mounting bracket to the VESA mounting holes at the rear of the monitor. Then secure it with four screws (M4 x 10 mm).</translate></li> | <li><translate> <!--T:49--> Attach the mounting bracket to the VESA mounting holes at the rear of the monitor. Then secure it with four screws (M4 x 10 mm).</translate></li> | ||
<li><translate> Follow the instructions that come with the purchased mounting kit to mount the monitor.</translate></li> | <li><translate> <!--T:50--> Follow the instructions that come with the purchased mounting kit to mount the monitor.</translate></li> | ||
</ol> | </ol> | ||
==<translate> Using the Security Slot</translate>== | ==<translate> <!--T:51--> Using the Security Slot</translate>== | ||
<div class="res-img">[[File:VG2709-2K-MHDU-2_Security_Slot.png|500px|alt=the mounting slots|<translate> Using the security slot</translate>]]</div> | <div class="res-img">[[File:VG2709-2K-MHDU-2_Security_Slot.png|500px|alt=the mounting slots|<translate> <!--T:52--> Using the security slot</translate>]]</div> | ||
<translate> To help prevent the monitor from being stolen, use a security slot locking device to secure the monitor to a fixed object.</translate> | <translate> <!--T:53--> To help prevent the monitor from being stolen, use a security slot locking device to secure the monitor to a fixed object.</translate> | ||
<translate> Additionally, fastening the monitor to a wall or fixed object using a security cable can help support the weight of the monitor in order to prevent the monitor from falling over.</translate> | <translate> <!--T:54--> Additionally, fastening the monitor to a wall or fixed object using a security cable can help support the weight of the monitor in order to prevent the monitor from falling over.</translate> | ||
=<translate> Making Connections</translate>= | =<translate> <!--T:55--> Making Connections</translate>= | ||
==<translate> Connecting to Power</translate>== | ==<translate> <!--T:56--> Connecting to Power</translate>== | ||
<div class="res-img">[[File:VG2709-2K-MHDU-2_Connect_Power.png|400px|alt=the location of the AC IN jack|<translate> Connecting to power</translate>]]</div> | <div class="res-img">[[File:VG2709-2K-MHDU-2_Connect_Power.png|400px|alt=the location of the AC IN jack|<translate> <!--T:57--> Connecting to power</translate>]]</div> | ||
<ol><li><translate> Connect the power cord to the '''AC IN''' jack at the rear of the monitor.</translate></li> | <ol><li><translate> <!--T:58--> Connect the power cord to the '''AC IN''' jack at the rear of the monitor.</translate></li> | ||
<li><translate> Plug the power cord plug into a power outlet.</translate></li></ol> | <li><translate> <!--T:59--> Plug the power cord plug into a power outlet.</translate></li></ol> | ||
==<translate> Display Connection</translate>== | ==<translate> <!--T:60--> Display Connection</translate>== | ||
===<translate> HDMI</translate>=== | ===<translate> <!--T:61--> HDMI</translate>=== | ||
<div class="res-img">[[File:VG2709-2K-MHDU-2_Connect_HDMI.png|450px|alt=the location of the HDMI port|<translate> Connecting through HDMI</translate>]]</div> | <div class="res-img">[[File:VG2709-2K-MHDU-2_Connect_HDMI.png|450px|alt=the location of the HDMI port|<translate> <!--T:62--> Connecting through HDMI</translate>]]</div> | ||
<ol><li><translate> Connect one end of an HDMI cable to an '''HDMI''' port of the monitor.</translate></li> | <ol><li><translate> <!--T:63--> Connect one end of an HDMI cable to an '''HDMI''' port of the monitor.</translate></li> | ||
<li><translate> Plug the other end of the cable into the HDMI port of your computer.</translate></li></ol> | <li><translate> <!--T:64--> Plug the other end of the cable into the HDMI port of your computer.</translate></li></ol> | ||
===<translate> DisplayPort</translate>=== | ===<translate> <!--T:65--> DisplayPort</translate>=== | ||
<div class="res-img">[[File:VG2709-2K-MHDU-2_Connect_DP.png|420px|alt= the location of the DP port|<translate> Connecting through DisplayPort</translate>]]</div> | <div class="res-img">[[File:VG2709-2K-MHDU-2_Connect_DP.png|420px|alt= the location of the DP port|<translate> <!--T:66--> Connecting through DisplayPort</translate>]]</div> | ||
<ol><li><translate> Connect one end of a DisplayPort cable to the '''DisplayPort In''' port of the monitor.</translate></li> | <ol><li><translate> <!--T:67--> Connect one end of a DisplayPort cable to the '''DisplayPort In''' port of the monitor.</translate></li> | ||
<li><translate> Plug the other end of the cable into the DisplayPort or Mini DisplayPort port of your computer.</translate></li></ol> | <li><translate> <!--T:68--> Plug the other end of the cable into the DisplayPort or Mini DisplayPort port of your computer.</translate></li></ol> | ||
{{Note|<translate> To connect the monitor to the Thunderbolt port (v. 1 & 2) on your Mac, connect the Mini DisplayPort end of a “Mini DisplayPort to DisplayPort cable” to the Thunderbolt output port of your Mac. Then connect the other end of the cable to the DisplayPort port of the monitor.</translate>}} | {{Note|<translate> <!--T:69--> To connect the monitor to the Thunderbolt port (v. 1 & 2) on your Mac, connect the Mini DisplayPort end of a “Mini DisplayPort to DisplayPort cable” to the Thunderbolt output port of your Mac. Then connect the other end of the cable to the DisplayPort port of the monitor.</translate>}} | ||
===<translate> Type C</translate>=== | ===<translate> <!--T:70--> Type C</translate>=== | ||
<div class="res-img">[[File:VG2709-2K-MHDU-2_Connect_Type_C.png|450px|alt=the location of the USB Type C port|<translate> Connecting through USB Type C</translate>]]</div> | <div class="res-img">[[File:VG2709-2K-MHDU-2_Connect_Type_C.png|450px|alt=the location of the USB Type C port|<translate> <!--T:71--> Connecting through USB Type C</translate>]]</div> | ||
<ol><li><translate> Connect one end of a USB Type C cable to the '''USB Type C''' port of the monitor.</translate></li> | <ol><li><translate> <!--T:72--> Connect one end of a USB Type C cable to the '''USB Type C''' port of the monitor.</translate></li> | ||
<li><translate> Plug the other end of the cable into the USB Type C port of your computer.</translate></li></ol> | <li><translate> <!--T:73--> Plug the other end of the cable into the USB Type C port of your computer.</translate></li></ol> | ||
{{Note|<translate> For video output use, make sure your USB Type C output device (e.g., laptop) and cable support video signal transmission.</translate>}} | {{Note|<translate> <!--T:74--> For video output use, make sure your USB Type C output device (e.g., laptop) and cable support video signal transmission.</translate>}} | ||
==<translate> USB Connection</translate>== | ==<translate> <!--T:75--> USB Connection</translate>== | ||
<translate> The monitor supports two types of USB ports, upstream and downstream. When making connection(s), observe the following guideline.</translate> | <translate> <!--T:76--> The monitor supports two types of USB ports, upstream and downstream. When making connection(s), observe the following guideline.</translate> | ||
<div class="res-img">[[File:VG2709-2K-MHDU-2_Connect_USB.png|500px|alt=the location of the USB ports|<translate> Connecting the monitor to your PC via the upstream/downstream USB ports</translate>]]</div> | <div class="res-img">[[File:VG2709-2K-MHDU-2_Connect_USB.png|500px|alt=the location of the USB ports|<translate> <!--T:77--> Connecting the monitor to your PC via the upstream/downstream USB ports</translate>]]</div> | ||
{| class="wikitable" style=" text-align: center; width: 60%; background-color:#ffffff;" | {| class="wikitable" style=" text-align: center; width: 60%; background-color:#ffffff;" | ||
! style="background-color:#DB0025; color:#ffffff;" colspan="2" |<translate> USB Type</translate> | ! style="background-color:#DB0025; color:#ffffff;" colspan="2" |<translate> <!--T:78--> USB Type</translate> | ||
! style="background-color:#DB0025; color:#ffffff;" | <translate> Connection Type</translate> | ! style="background-color:#DB0025; color:#ffffff;" | <translate> <!--T:79--> Connection Type</translate> | ||
! style="background-color:#DB0025; color:#ffffff;" | <translate> Description</translate> | ! style="background-color:#DB0025; color:#ffffff;" | <translate> <!--T:80--> Description</translate> | ||
|- | |- | ||
| [[File:Number1.svg|25px|alt= 1|link=|<translate> No. 1</translate>]] | | [[File:Number1.svg|25px|alt= 1|link=|<translate> <!--T:81--> No. 1</translate>]] | ||
| rowspan="3" |<translate>'''Upstream'''</translate> | | rowspan="3" |<translate><!--T:82--> '''Upstream'''</translate> | ||
|<translate>Type B</translate> | |<translate><!--T:83--> Type B</translate> | ||
|style="text-align:left;" | <translate> Transfers data between the computer and the USB devices connected to the monitor.</translate> | |style="text-align:left;" | <translate> <!--T:84--> Transfers data between the computer and the USB devices connected to the monitor.</translate> | ||
|- | |- | ||
| rowspan="2" | [[File:Number2.svg|25px|alt= 1|link=|<translate> No. 2</translate>]] | | rowspan="2" | [[File:Number2.svg|25px|alt= 1|link=|<translate> <!--T:85--> No. 2</translate>]] | ||
| rowspan="2" |<translate>Type C</translate> | | rowspan="2" |<translate><!--T:86--> Type C</translate> | ||
|style="text-align:left;" |<translate> Transfers audio, video, and power.</translate> | |style="text-align:left;" |<translate> <!--T:87--> Transfers audio, video, and power.</translate> | ||
|- | |- | ||
|style="text-align:left;" | Supports 5V/3A, 9V/3A, 12V/3A, 15V/3A, 20V/4.9A (LPS) charging. | |style="text-align:left;" | Supports 5V/3A, 9V/3A, 12V/3A, 15V/3A, 20V/4.9A (LPS) charging. | ||
|- | |- | ||
| rowspan="2" | [[File:Number3.svg|25px|alt= 1|link=|<translate> No. 3</translate>]] | | rowspan="2" | [[File:Number3.svg|25px|alt= 1|link=|<translate> <!--T:88--> No. 3</translate>]] | ||
| rowspan="2" |<translate>'''Downstream'''</translate> | | rowspan="2" |<translate><!--T:89--> '''Downstream'''</translate> | ||
| rowspan="2" |<translate>Type A</translate> | | rowspan="2" |<translate><!--T:90--> Type A</translate> | ||
|style="text-align:left;" |<translate> For peripheral device(s) (e.g., storage device, keyboard, mouse, etc.).</translate> | |style="text-align:left;" |<translate> <!--T:91--> For peripheral device(s) (e.g., storage device, keyboard, mouse, etc.).</translate> | ||
|- | |- | ||
|style="text-align:left;" |<translate> Supports 5V/2A charging.</translate> | |style="text-align:left;" |<translate> <!--T:92--> Supports 5V/2A charging.</translate> | ||
|} | |} | ||
{{Note|<translate> | {{Note|<translate> | ||
<!--T:93--> | |||
:*To use peripheral devices with the USB Type A port, please also connect your computer to the monitor’s USB Type B or Type C port.</translate> | :*To use peripheral devices with the USB Type A port, please also connect your computer to the monitor’s USB Type B or Type C port.</translate> | ||
<translate>:*Due to the product’s USB Type C power delivery design, do not connect the laptops’ power adapter at the same time. This can cause power distribution conflicts with the laptop, resulting in flashing screens or the forced shutdown of the laptop. | <translate><!--T:94--> | ||
:*Due to the product’s USB Type C power delivery design, do not connect the laptops’ power adapter at the same time. This can cause power distribution conflicts with the laptop, resulting in flashing screens or the forced shutdown of the laptop. | |||
</translate>}} | </translate>}} | ||
===<translate> Using the USB Ports</translate>=== | ===<translate> <!--T:95--> Using the USB Ports</translate>=== | ||
<div class="res-img">[[File:VG2709-2K-MHDU-2_Upstream_Downstream-1.png|500px|alt=the location of the USB ports and the connection detail|<translate> Using the USB downstream ports</translate>]]</div> | <div class="res-img">[[File:VG2709-2K-MHDU-2_Upstream_Downstream-1.png|500px|alt=the location of the USB ports and the connection detail|<translate> <!--T:96--> Using the USB downstream ports</translate>]]</div> | ||
<ol><li><translate> To use the downstream USB Type A ports, connect one end of the USB Type B cable to the upstream '''USB Type B''' port of the monitor. Plug the other end of the cable, USB Type A, into a USB port of your computer.</translate></li> | <ol><li><translate> <!--T:97--> To use the downstream USB Type A ports, connect one end of the USB Type B cable to the upstream '''USB Type B''' port of the monitor. Plug the other end of the cable, USB Type A, into a USB port of your computer.</translate></li> | ||
<li><translate> Connect your peripheral device(s) to a downstream USB Type A port of the monitor.</translate></li></ol> | <li><translate> <!--T:98--> Connect your peripheral device(s) to a downstream USB Type A port of the monitor.</translate></li></ol> | ||
==<translate> Audio Connection</translate>== | ==<translate> <!--T:99--> Audio Connection</translate>== | ||
<div class="res-img">[[File:VG2709-2K-MHDU-2_Connect_Audio.png|450px|alt=the location of the audio jack|<translate> Connecting to audio</translate>]]</div><br /> | <div class="res-img">[[File:VG2709-2K-MHDU-2_Connect_Audio.png|450px|alt=the location of the audio jack|<translate> <!--T:100--> Connecting to audio</translate>]]</div><br /> | ||
<translate> Plug the audio jack of the audio device into the '''Audio Out''' port of the monitor.</translate> | <translate> <!--T:101--> Plug the audio jack of the audio device into the '''Audio Out''' port of the monitor.</translate> | ||
{{Note|<translate> The monitor is also equipped with dual speakers.</translate>}} | {{Note|<translate> <!--T:102--> The monitor is also equipped with dual speakers.</translate>}} | ||
=<translate> Using the Monitor</translate>= | =<translate> <!--T:103--> Using the Monitor</translate>= | ||
==<translate> Adjusting the Viewing Angle</translate>== | ==<translate> <!--T:104--> Adjusting the Viewing Angle</translate>== | ||
===<translate> Height Adjustment</translate>=== | ===<translate> <!--T:105--> Height Adjustment</translate>=== | ||
<div class="res-img">[[File:VG2709-2K-MHDU-2_Adjust_Height.png|400px|alt=slide upward or downward|<translate> Adjusting the height</translate>]]</div><br /> | <div class="res-img">[[File:VG2709-2K-MHDU-2_Adjust_Height.png|400px|alt=slide upward or downward|<translate> <!--T:106--> Adjusting the height</translate>]]</div><br /> | ||
<translate> Lower or raise the monitor to the desired height (0 to 130 mm).</translate> | <translate> <!--T:107--> Lower or raise the monitor to the desired height (0 to 130 mm).</translate> | ||
{{Note|<translate> When adjusting, press down firmly along the adjustment track.</translate>}} | {{Note|<translate> <!--T:108--> When adjusting, press down firmly along the adjustment track.</translate>}} | ||
===<translate> Screen Orientation Adjustment (Monitor Pivot)</translate>=== | ===<translate> <!--T:109--> Screen Orientation Adjustment (Monitor Pivot)</translate>=== | ||
<div class="table-responsive"> | <div class="table-responsive"> | ||
<table class="table table-borderless"> | <table class="table table-borderless"> | ||
<tr> | <tr> | ||
<td><div class="res-img">[[File:VG2709-2K-MHDU-2_Adjust_Pivot_1.svg|link=|200px|<translate> Monitor Pivot</translate>]]</div></td> | <td><div class="res-img">[[File:VG2709-2K-MHDU-2_Adjust_Pivot_1.svg|link=|200px|<translate> <!--T:110--> Monitor Pivot</translate>]]</div></td> | ||
<td><div class="res-img">[[File:VG2709-2K-MHDU-2_Adjust_Pivot_2.svg|link=|<translate> Monitor Pivot</translate>]]</div></td> | <td><div class="res-img">[[File:VG2709-2K-MHDU-2_Adjust_Pivot_2.svg|link=|<translate> <!--T:111--> Monitor Pivot</translate>]]</div></td> | ||
</tr> | </tr> | ||
<tr> | <tr> | ||
<td><div class="res-img">[[File:VG2709-2K-MHDU-2_Adjust_Pivot_3.svg|link=|<translate> Monitor Pivot</translate>]]</div></td> | <td><div class="res-img">[[File:VG2709-2K-MHDU-2_Adjust_Pivot_3.svg|link=|<translate> <!--T:112--> Monitor Pivot</translate>]]</div></td> | ||
</tr> | </tr> | ||
</table> | </table> | ||
</div> | </div> | ||
<ol><li><translate> Adjust the monitor height to the highest position. Then tilt the monitor backwards to the full tilt position.</translate></li> | <ol><li><translate> <!--T:113--> Adjust the monitor height to the highest position. Then tilt the monitor backwards to the full tilt position.</translate></li> | ||
<li><translate> Rotate the monitor 90° clockwise or counterclockwise from landscape to portrait orientation.</translate></li></ol> | <li><translate> <!--T:114--> Rotate the monitor 90° clockwise or counterclockwise from landscape to portrait orientation.</translate></li></ol> | ||
{{Note| | {{Note| | ||
:*<translate> When adjusting, make sure to hold both sides of your monitor firmly with both hands.</translate> | :*<translate> <!--T:115--> When adjusting, make sure to hold both sides of your monitor firmly with both hands.</translate> | ||
:*<translate> To rotate the screen image, manually change the system’s display orientation settings.</translate> | :*<translate> <!--T:116--> To rotate the screen image, manually change the system’s display orientation settings.</translate> | ||
}} | }} | ||
===<translate> Swivel Adjustment</translate>=== | ===<translate> <!--T:117--> Swivel Adjustment</translate>=== | ||
<div class="res-img">[[File:VG2709-2K-MHDU-2_Adjust_Swivel.png|450px|alt=swivel to the left or right|<translate> Swivel adjustment</translate>]]</div><br /> | <div class="res-img">[[File:VG2709-2K-MHDU-2_Adjust_Swivel.png|450px|alt=swivel to the left or right|<translate> <!--T:118--> Swivel adjustment</translate>]]</div><br /> | ||
<translate> Swivel the monitor to the left or right for the desired viewing angle (± 360˚).</translate> | <translate> <!--T:119--> Swivel the monitor to the left or right for the desired viewing angle (± 360˚).</translate> | ||
===<translate> Tilt Adjustment</translate>=== | ===<translate> <!--T:120--> Tilt Adjustment</translate>=== | ||
<div class="res-img">[[File:VG2709-2K-MHDU-2_Adjust_Tilt.png|200px|alt=tile forward or backward|<translate> Adjusting the tilt</translate>]]</div><br /> | <div class="res-img">[[File:VG2709-2K-MHDU-2_Adjust_Tilt.png|200px|alt=tile forward or backward|<translate> <!--T:121--> Adjusting the tilt</translate>]]</div><br /> | ||
<translate> Tilt the monitor forwards or backwards to the desired viewing angle (-3.5˚ to 28˚).</translate> | <translate> <!--T:122--> Tilt the monitor forwards or backwards to the desired viewing angle (-3.5˚ to 28˚).</translate> | ||
{{Note| <translate> When adjusting, support the stand firmly with one hand while tilting the monitor forwards or backwards with the other hand.</translate>}} | {{Note| <translate> <!--T:123--> When adjusting, support the stand firmly with one hand while tilting the monitor forwards or backwards with the other hand.</translate>}} | ||
==<translate> Turning the Monitor On/Off</translate>== | ==<translate> <!--T:124--> Turning the Monitor On/Off</translate>== | ||
<div class="res-img">[[File:VG2709-2K-MHDU-2_Power_Button.png|400px|alt=the location of the Power button|<translate> The location of the monitor's Power button</translate>]]</div> | <div class="res-img">[[File:VG2709-2K-MHDU-2_Power_Button.png|400px|alt=the location of the Power button|<translate> <!--T:125--> The location of the monitor's Power button</translate>]]</div> | ||
<ol><li><translate> Plug the power cord into a power outlet.</translate></li> | <ol><li><translate> <!--T:126--> Plug the power cord into a power outlet.</translate></li> | ||
<li><translate> Press the '''Power'''</translate> <i class='fas fa-power-off' style="font-size:22px;></i> <translate>button to turn on the monitor.</translate></li> | <li><translate> <!--T:127--> Press the '''Power'''</translate> <i class='fas fa-power-off' style="font-size:22px;></i> <translate><!--T:128--> button to turn on the monitor.</translate></li> | ||
<li><translate> To turn the monitor off, press the '''Power'''</translate> <i class='fas fa-power-off' style="font-size:22px;></i> <translate> button again.</translate></li></ol> | <li><translate> <!--T:129--> To turn the monitor off, press the '''Power'''</translate> <i class='fas fa-power-off' style="font-size:22px;></i> <translate> <!--T:130--> button again.</translate></li></ol> | ||
{{Note|<translate> The monitor will still consume some power as long as the power cord is connected to the power outlet. If the monitor is not being used for a long period of time, please disconnect the power plug from the power outlet.</translate>}} | {{Note|<translate> <!--T:131--> The monitor will still consume some power as long as the power cord is connected to the power outlet. If the monitor is not being used for a long period of time, please disconnect the power plug from the power outlet.</translate>}} | ||
==<translate> Using the Control Panel Keys</translate>== | ==<translate> <!--T:132--> Using the Control Panel Keys</translate>== | ||
<translate> Use the '''Control Panel Keys ( 1 <span style="font-size:22px;>★</span> / 2 / 3 / 4 / 5 <i class='fas fa-power-off' style="font-size:20px;></i> )'''</translate> <translate>to access the Quick Menu, activate Hot Keys, navigate the On-Screen Display (OSD) Menu, and change the settings.</translate> | <translate> <!--T:133--> Use the '''Control Panel Keys ( 1 <span style="font-size:22px;>★</span> / 2 / 3 / 4 / 5 <i class='fas fa-power-off' style="font-size:20px;></i> )'''</translate> <translate><!--T:134--> to access the Quick Menu, activate Hot Keys, navigate the On-Screen Display (OSD) Menu, and change the settings.</translate> | ||
<div class="res-img">[[File:VG2709-2K-MHD_Control_Panel.PNG|400px|alt=the location of the Control Panel keys|<translate> The location of the Control Panel Keys</translate>]]</div> | <div class="res-img">[[File:VG2709-2K-MHD_Control_Panel.PNG|400px|alt=the location of the Control Panel keys|<translate> <!--T:135--> The location of the Control Panel Keys</translate>]]</div> | ||
==<translate> Quick Menu</translate>== | ==<translate> <!--T:136--> Quick Menu</translate>== | ||
<translate> Press the '''1'''</translate> <span style="font-size:22px;>★</span> <translate>key to activate the Quick Menu.</translate> | <translate> <!--T:137--> Press the '''1'''</translate> <span style="font-size:22px;>★</span> <translate><!--T:138--> key to activate the Quick Menu.</translate> | ||
<div class="res-img">[[File:VG3209-4K_Quick_Menu.png|350px|alt=the ViewMode quick Menu|<translate> the ViewMode quick menu</translate>]]</div> | <div class="res-img">[[File:VG3209-4K_Quick_Menu.png|350px|alt=the ViewMode quick Menu|<translate> <!--T:139--> the ViewMode quick menu</translate>]]</div> | ||
{{Note|<translate>Follow the key guide that appears on the screen to select the option or make adjustments.</translate>}} | {{Note|<translate><!--T:140--> Follow the key guide that appears on the screen to select the option or make adjustments.</translate>}} | ||
{| class="wikitable" style="text-align:center; width:50%; background-color:#ffffff;" | {| class="wikitable" style="text-align:center; width:50%; background-color:#ffffff;" | ||
! colspan="2" style="background-color:#DB0025; color:#ffffff;" |<translate> Menu</translate> !! style="background-color:#DB0025; color:#ffffff;" | <translate> Description</translate> | ! colspan="2" style="background-color:#DB0025; color:#ffffff;" |<translate> <!--T:141--> Menu</translate> !! style="background-color:#DB0025; color:#ffffff;" | <translate> <!--T:142--> Description</translate> | ||
|- | |- | ||
|[[File:Icon_ViewMode.svg|50px|link=| ViewMode]] | |[[File:Icon_ViewMode.svg|50px|link=| ViewMode]] | ||
|'''ViewMode''' || <translate> Select one of the preset color settings.</translate> | |'''ViewMode''' || <translate> <!--T:143--> Select one of the preset color settings.</translate> | ||
|- | |- | ||
|[[File:Icon_Volume.svg|50px|link=|Volume]] | |[[File:Icon_Volume.svg|50px|link=|Volume]] | ||
|'''Volume''' || <translate> Adjust the level, or mute the volume.</translate> | |'''Volume''' || <translate> <!--T:144--> Adjust the level, or mute the volume.</translate> | ||
|- | |- | ||
|[[File:Icon_Contrast_Brightness.png|50px|link=|Contrast/Brightness]] | |[[File:Icon_Contrast_Brightness.png|50px|link=|Contrast/Brightness]] | ||
|'''Contrast/Brightness''' || <translate> Adjust the contrast or brightness level.</translate> | |'''Contrast/Brightness''' || <translate> <!--T:145--> Adjust the contrast or brightness level.</translate> | ||
|- | |- | ||
|[[File:Icon_Input_Select.png|50px|link=| Input Select]] | |[[File:Icon_Input_Select.png|50px|link=| Input Select]] | ||
|'''Input Select''' || <translate> Select the input source.</translate> | |'''Input Select''' || <translate> <!--T:146--> Select the input source.</translate> | ||
|- | |- | ||
|[[File:Icon_Exit.png|50px|link=| Exit]] | |[[File:Icon_Exit.png|50px|link=| Exit]] | ||
|'''Exit''' || <translate> Exit the Quick Menu.</translate> | |'''Exit''' || <translate> <!--T:147--> Exit the Quick Menu.</translate> | ||
|} | |} | ||
==<translate> Hot Keys</translate>== | ==<translate> <!--T:148--> Hot Keys</translate>== | ||
<translate> When the On-Screen Display (OSD) Menu is off, you can quickly access special functions by using the '''Control Panel Keys'''.</translate> | <translate> <!--T:149--> When the On-Screen Display (OSD) Menu is off, you can quickly access special functions by using the '''Control Panel Keys'''.</translate> | ||
{| class="wikitable" style="text-align:left; width:60%;" | {| class="wikitable" style="text-align:left; width:60%;" | ||
|- | |- | ||
! style="background-color:#DB0025; color:#ffffff; width:20%;"|<translate> Key</translate> | ! style="background-color:#DB0025; color:#ffffff; width:20%;"|<translate> <!--T:150--> Key</translate> | ||
! style="background-color:#DB0025; color:#ffffff;"|<translate> Description</translate> | ! style="background-color:#DB0025; color:#ffffff;"|<translate> <!--T:151--> Description</translate> | ||
|- | |- | ||
|style="background-color:#ffffff; text-align:center;"|'''1 <span style="font-size:22px;>★</span> + 2''' | |style="background-color:#ffffff; text-align:center;"|'''1 <span style="font-size:22px;>★</span> + 2''' | ||
|style="background-color:#ffffff;"|<p><translate> Press and hold the keys to lock/unlock the OSD Menu.</translate><p><translate>When the menu appears on the screen, continue holding both keys for 10 seconds to lock/unlock the OSD Menu</translate> | |style="background-color:#ffffff;"|<p><translate> <!--T:152--> Press and hold the keys to lock/unlock the OSD Menu.</translate><p><translate><!--T:153--> When the menu appears on the screen, continue holding both keys for 10 seconds to lock/unlock the OSD Menu</translate> | ||
<div class="res-img" style="text-align:center;">[[File:Monitor_Hot_Key_OSD.png|250px|<translate>OSD Lock/Unlock popup</translate>|alt=<translate>OSD Lock/Unlock popup</translate>]]</div> | <div class="res-img" style="text-align:center;">[[File:Monitor_Hot_Key_OSD.png|250px|<translate><!--T:154--> OSD Lock/Unlock popup</translate>|alt=<translate><!--T:155--> OSD Lock/Unlock popup</translate>]]</div> | ||
<p><translate>If the OSD Menu is locked, the below message will appear on the screen:</translate></p><div class="res-img" style="text-align:center;">[[File:Monitor_Hot_Key_OSD_Locked.PNG|250px|alt=|<translate>OSD Locked popup message</translate>|alt=<translate>OSD Locked popup message</translate>]]</div> | <p><translate><!--T:156--> If the OSD Menu is locked, the below message will appear on the screen:</translate></p><div class="res-img" style="text-align:center;">[[File:Monitor_Hot_Key_OSD_Locked.PNG|250px|alt=|<translate><!--T:157--> OSD Locked popup message</translate>|alt=<translate><!--T:158--> OSD Locked popup message</translate>]]</div> | ||
|- | |- | ||
|style="background-color:#ffffff; text-align:center;"|'''2 + 3''' | |style="background-color:#ffffff; text-align:center;"|'''2 + 3''' | ||
|style="background-color:#ffffff;"|<p><translate> Press and hold the keys to lock/unlock the '''Power '''</translate> <i class='fas fa-power-off' style="font-size:22px;></i> <translate> button.</translate></p> | |style="background-color:#ffffff;"|<p><translate> <!--T:159--> Press and hold the keys to lock/unlock the '''Power '''</translate> <i class='fas fa-power-off' style="font-size:22px;></i> <translate> <!--T:160--> button.</translate></p> | ||
<p><translate> When the menu appears on the screen, continue holding the key for 10 seconds to lock/unlock the '''Power'''</translate> <i class='fas fa-power-off' style="font-size:22px;></i> <translate> button.</translate></p> | <p><translate> <!--T:161--> When the menu appears on the screen, continue holding the key for 10 seconds to lock/unlock the '''Power'''</translate> <i class='fas fa-power-off' style="font-size:22px;></i> <translate> <!--T:162--> button.</translate></p> | ||
<div class="res-img" style="text-align:center;">[[File:Monitor_Hot_Key_Power.png|250px]]</div> | <div class="res-img" style="text-align:center;">[[File:Monitor_Hot_Key_Power.png|250px]]</div> | ||
<p><translate> If the '''Power'''</translate> <i class='fas fa-power-off' style="font-size:22px;></i> <translate> button is locked, the below message will appear on the screen.</translate> | <p><translate> <!--T:163--> If the '''Power'''</translate> <i class='fas fa-power-off' style="font-size:22px;></i> <translate> <!--T:164--> button is locked, the below message will appear on the screen.</translate> | ||
<div class="res-img" style="text-align:center;">[[File:Monitor_Hot_Key_Power_Locked.PNG|250px]]</div> | <div class="res-img" style="text-align:center;">[[File:Monitor_Hot_Key_Power_Locked.PNG|250px]]</div> | ||
|- | |- | ||
|style="background-color:#ffffff; text-align:center;"|'''2 + 4''' | |style="background-color:#ffffff; text-align:center;"|'''2 + 4''' | ||
|style="background-color:#ffffff;"|<p><translate> Press the keys to display/hide the Boot up Screen or Message OSD when the device is turned on.</translate></p> | |style="background-color:#ffffff;"|<p><translate> <!--T:165--> Press the keys to display/hide the Boot up Screen or Message OSD when the device is turned on.</translate></p> | ||
<div class="res-img" style="text-align:center;">[[File:Monitor_Hot_Key_Boot_Message.png|250px]]</div> | <div class="res-img" style="text-align:center;">[[File:Monitor_Hot_Key_Boot_Message.png|250px]]</div> | ||
|} | |} | ||
==<translate> Configuring the Settings</translate>== | ==<translate> <!--T:166--> Configuring the Settings</translate>== | ||
===<translate> General Operations</translate>=== | ===<translate> <!--T:167--> General Operations</translate>=== | ||
<ol> | <ol> | ||
<li><translate>Press the '''2 / 3 / 4''' key to display the On-Screen Display (OSD) Menu.</translate></li> | <li><translate><!--T:168--> Press the '''2 / 3 / 4''' key to display the On-Screen Display (OSD) Menu.</translate></li> | ||
<div class="res-img">[[File:VX2767U-2K_Main_Menu.png|500px|alt=Input Select menu|<translate> Display the OSD Menu</translate>]]</div> | <div class="res-img">[[File:VX2767U-2K_Main_Menu.png|500px|alt=Input Select menu|<translate> <!--T:169--> Display the OSD Menu</translate>]]</div> | ||
<li><translate>Press the '''1''' </translate><span style="font-size:22px;>★</span> <translate>or '''2''' key to select the main menu. Then press the '''3''' key to enter the selected menu.</translate></li> | <li><translate><!--T:170--> Press the '''1''' </translate><span style="font-size:22px;>★</span> <translate><!--T:171--> or '''2''' key to select the main menu. Then press the '''3''' key to enter the selected menu.</translate></li> | ||
<div class="res-img">[[File:VX2767U-2K_OSD_Operation_2.png|500px|alt=Color Adjust menu|<translate> Navigate the OSD Menu</translate>]]</div> | <div class="res-img">[[File:VX2767U-2K_OSD_Operation_2.png|500px|alt=Color Adjust menu|<translate> <!--T:172--> Navigate the OSD Menu</translate>]]</div> | ||
<li><translate>Press the '''1''' </translate><span style="font-size:22px;>★</span> <translate>or '''2''' key to select the desired menu option. Then press the '''3''' key to enter the sub-menu.</translate></li> | <li><translate><!--T:173--> Press the '''1''' </translate><span style="font-size:22px;>★</span> <translate><!--T:174--> or '''2''' key to select the desired menu option. Then press the '''3''' key to enter the sub-menu.</translate></li> | ||
<div class="res-img">[[File:VX2767U-2K_OSD_Operation_3.png|500px|alt=the submenu of the Color Adjust menu|<translate> Navigate the OSD Menu</translate>]]</div> | <div class="res-img">[[File:VX2767U-2K_OSD_Operation_3.png|500px|alt=the submenu of the Color Adjust menu|<translate> <!--T:175--> Navigate the OSD Menu</translate>]]</div> | ||
<li><translate>Press the '''1 ''' </translate><span style="font-size:22px;>★</span> <translate>or '''2''' key to adjust/select the setting. Then press the '''3''' key to confirm.</translate></li> | <li><translate><!--T:176--> Press the '''1 ''' </translate><span style="font-size:22px;>★</span> <translate><!--T:177--> or '''2''' key to adjust/select the setting. Then press the '''3''' key to confirm.</translate></li> | ||
<div class="res-img">[[File:VX2767U-2K_OSD_Operation_4.png|500px|alt=the Brightness menu option under the COlor Adjust menu|<translate> Make adjustments as needed</translate>]]</div> | <div class="res-img">[[File:VX2767U-2K_OSD_Operation_4.png|500px|alt=the Brightness menu option under the COlor Adjust menu|<translate> <!--T:178--> Make adjustments as needed</translate>]]</div> | ||
{{Note|<translate>Certain menu option adjustments do not require the user to press the '''3''' key to confirm the selection. Follow the key guide that appears on the screen to select the option or make adjustments.</translate>}} | {{Note|<translate><!--T:179--> Certain menu option adjustments do not require the user to press the '''3''' key to confirm the selection. Follow the key guide that appears on the screen to select the option or make adjustments.</translate>}} | ||
<li><translate>Press the '''4''' key to return to the previous menu.</translate></li> | <li><translate><!--T:180--> Press the '''4''' key to return to the previous menu.</translate></li> | ||
{{Note|<translate>To exit the OSD menu, Press the '''5''' [[File:Power_Switch.svg|20px|alt=power switch icon|link=]] key.</translate>}} | {{Note|<translate><!--T:181--> To exit the OSD menu, Press the '''5''' [[File:Power_Switch.svg|20px|alt=power switch icon|link=]] key.</translate>}} | ||
</ol> | </ol> | ||
=<translate> Appendix</translate>= | =<translate> <!--T:182--> Appendix</translate>= | ||
==<translate> Product Specifications</translate>== | ==<translate> <!--T:183--> Product Specifications</translate>== | ||
{| class="wikitable" style="background-color:#ffffff; width:auto%;" | {| class="wikitable" style="background-color:#ffffff; width:auto%;" | ||
! style="background-color:#DB0025; color:#ffffff; width:20%;" | <translate> Item</translate> | ! style="background-color:#DB0025; color:#ffffff; width:20%;" | <translate> <!--T:184--> Item</translate> | ||
! style="background-color:#DB0025; color:#ffffff; width:20%;" | <translate> Category</translate> | ! style="background-color:#DB0025; color:#ffffff; width:20%;" | <translate> <!--T:185--> Category</translate> | ||
! style="background-color:#DB0025; color:#ffffff;" | <translate> Specifications</translate> | ! style="background-color:#DB0025; color:#ffffff;" | <translate> <!--T:186--> Specifications</translate> | ||
|- | |- | ||
| rowspan="5" style="font-weight:bold; text-align:center;" | LCD | | rowspan="5" style="font-weight:bold; text-align:center;" | LCD | ||
| Line 275: | Line 277: | ||
| Anti-Glare (Haze 25%), Hard Coating (3H) | | Anti-Glare (Haze 25%), Hard Coating (3H) | ||
|- | |- | ||
| style="font-weight:bold; text-align:center;" | <translate> Input Signal</translate> | | style="font-weight:bold; text-align:center;" | <translate> <!--T:187--> Input Signal</translate> | ||
| style="text-align:center;"|Video Sync | | style="text-align:center;"|Video Sync | ||
| <u>TMDS digital (100 Ω)</u> | | <u>TMDS digital (100 Ω)</u> | ||
| Line 282: | Line 284: | ||
:'''USB Type C''': f<sub>h</sub>: 30~152 kHz, f<sub>v</sub>: 48~100 Hz | :'''USB Type C''': f<sub>h</sub>: 30~152 kHz, f<sub>v</sub>: 48~100 Hz | ||
|- | |- | ||
| rowspan="2" style="font-weight:bold; text-align:center;" | <translate> Compatibility</translate> | | rowspan="2" style="font-weight:bold; text-align:center;" | <translate> <!--T:188--> Compatibility</translate> | ||
| style="text-align:center;"|PC | | style="text-align:center;"|PC | ||
| up to 2560 x 1440 | | up to 2560 x 1440 | ||
| Line 289: | Line 291: | ||
| up to 2560 x 1440 | | up to 2560 x 1440 | ||
|- | |- | ||
| rowspan="2" style="font-weight:bold; text-align:center;"|Resolution and Timings<ref><translate>Do not set the graphics card in your computer to exceed these timing modes; doing so may result in permanent damage to the display.</translate></ref> | | rowspan="2" style="font-weight:bold; text-align:center;"|Resolution and Timings<ref><translate><!--T:189--> Do not set the graphics card in your computer to exceed these timing modes; doing so may result in permanent damage to the display.</translate></ref> | ||
| style="text-align:center;"|Recommended | | style="text-align:center;"|Recommended | ||
|2560 x 1440 @ 60 Hz | |2560 x 1440 @ 60 Hz | ||
|- | |- | ||
| style="text-align:center;"|<translate> Supported</translate> | | style="text-align:center;"|<translate> <!--T:190--> Supported</translate> | ||
| | | | ||
*2560 x 1440 @ 60, 75, 100 Hz | *2560 x 1440 @ 60, 75, 100 Hz | ||
| Line 328: | Line 330: | ||
*640 x 350 @ 70 Hz | *640 x 350 @ 70 Hz | ||
|- | |- | ||
| style="font-weight:bold; text-align:center;" | <translate> Power</translate><ref><translate>Please use the power adapter from ViewSonic® or an authorized source only.</translate></ref> | | style="font-weight:bold; text-align:center;" | <translate> <!--T:191--> Power</translate><ref><translate><!--T:192--> Please use the power adapter from ViewSonic® or an authorized source only.</translate></ref> | ||
| style="text-align:center;"|Input Voltage | | style="text-align:center;"|Input Voltage | ||
| AC 100-240V, 50/60 Hz (auto switch) | | AC 100-240V, 50/60 Hz (auto switch) | ||
|- | |- | ||
| rowspan="2" style="font-weight:bold; text-align:center;" | <translate> Display Area</translate> | | rowspan="2" style="font-weight:bold; text-align:center;" | <translate> <!--T:193--> Display Area</translate> | ||
| rowspan="2" style="text-align:center;" |Active Size<br />(H x V) | | rowspan="2" style="text-align:center;" |Active Size<br />(H x V) | ||
| 596.74 x 335.66 mm | | 596.74 x 335.66 mm | ||
| Line 338: | Line 340: | ||
|23.49” x 13.21” | |23.49” x 13.21” | ||
|- | |- | ||
| rowspan="5" style="font-weight:bold; text-align:center;" | <translate> Operating Conditons</translate> | | rowspan="5" style="font-weight:bold; text-align:center;" | <translate> <!--T:194--> Operating Conditons</translate> | ||
| rowspan="2" style="text-align:center;" |Altitude | | rowspan="2" style="text-align:center;" |Altitude | ||
| 5 km | | 5 km | ||
| Line 352: | Line 354: | ||
|32° F to 104° F | |32° F to 104° F | ||
|- | |- | ||
| rowspan="5" style="font-weight:bold; text-align:center;" | <translate> Storage Conditions</translate> | | rowspan="5" style="font-weight:bold; text-align:center;" | <translate> <!--T:195--> Storage Conditions</translate> | ||
| rowspan="2" style="text-align:center;" |Altitude | | rowspan="2" style="text-align:center;" |Altitude | ||
| 12 km | | 12 km | ||
| Line 366: | Line 368: | ||
| -4° F to 140° F | | -4° F to 140° F | ||
|- | |- | ||
| rowspan="2" style="font-weight:bold; text-align:center;" | <translate> Dimensions</translate> | | rowspan="2" style="font-weight:bold; text-align:center;" | <translate> <!--T:196--> Dimensions</translate> | ||
(with stand) | (with stand) | ||
| rowspan="2" style="text-align:center;" |Physical<br />(W x H x D) | | rowspan="2" style="text-align:center;" |Physical<br />(W x H x D) | ||
| Line 373: | Line 375: | ||
| 24.2” x 21.2” x 9.2” | | 24.2” x 21.2” x 9.2” | ||
|- | |- | ||
| rowspan="2" style="font-weight:bold; text-align:center;" | <translate> Weight</translate> | | rowspan="2" style="font-weight:bold; text-align:center;" | <translate> <!--T:197--> Weight</translate> | ||
(with stand) | (with stand) | ||
| rowspan="2" style="text-align:center;" | Physical | | rowspan="2" style="text-align:center;" | Physical | ||
| Line 380: | Line 382: | ||
|14.8 lb | |14.8 lb | ||
|- | |- | ||
| style="font-weight:bold; text-align:center;" | <translate> Wall Mount</translate> | | style="font-weight:bold; text-align:center;" | <translate> <!--T:198--> Wall Mount</translate> | ||
| style="text-align:center;"|Dimensions | | style="text-align:center;"|Dimensions | ||
| 100 x 100 mm | | 100 x 100 mm | ||
|- | |- | ||
| rowspan="3" style="font-weight:bold; text-align:center;" | <translate> Power Consumption</translate> | | rowspan="3" style="font-weight:bold; text-align:center;" | <translate> <!--T:199--> Power Consumption</translate> | ||
| style="text-align:center;" |On<ref><translate> ECO Mode set to Standard. Power consumption is without audio and with all USB ports loading.</translate></ref> | | style="text-align:center;" |On<ref><translate> <!--T:200--> ECO Mode set to Standard. Power consumption is without audio and with all USB ports loading.</translate></ref> | ||
| 32W (Typical) | | 32W (Typical) | ||
|- | |- | ||
| Line 521: | Line 523: | ||
|16:10 | |16:10 | ||
|- | |- | ||
| rowspan="2" style="font-weight:bold;" | Overscan<ref><translate> The Overscan function only supports a refresh rate below 60 Hz. If the refresh rate is more than 60 Hz, please do not turn on this function.</translate></ref> | | rowspan="2" style="font-weight:bold;" | Overscan<ref><translate> <!--T:201--> The Overscan function only supports a refresh rate below 60 Hz. If the refresh rate is more than 60 Hz, please do not turn on this function.</translate></ref> | ||
| On | | On | ||
|- | |- | ||
| Line 633: | Line 635: | ||
| Conserve | | Conserve | ||
|- | |- | ||
| rowspan="2" |USB Charging<ref><translate>This function is off by default. If the monitor is in power saving mode, USB downstream charging will not be active. To enable charging in power saving mode, it is recommended to turn on this feature. Please note that this setting will not affect the USB Type C charging on the rear side of the monitor.</translate></ref> | | rowspan="2" |USB Charging<ref><translate><!--T:202--> This function is off by default. If the monitor is in power saving mode, USB downstream charging will not be active. To enable charging in power saving mode, it is recommended to turn on this feature. Please note that this setting will not affect the USB Type C charging on the rear side of the monitor.</translate></ref> | ||
|On | |On | ||
|- | |- | ||
|Off | |Off | ||
|- | |- | ||
| rowspan="2" style="font-weight:bold;" | DisplayPort Version<ref><translate> If no DisplayPort connection is detected, this option will be grayed out.</translate></ref> | | rowspan="2" style="font-weight:bold;" | DisplayPort Version<ref><translate> <!--T:203--> If no DisplayPort connection is detected, this option will be grayed out.</translate></ref> | ||
| 1.1 | | 1.1 | ||
|- | |- | ||
| 1.2 | | 1.2 | ||
|- | |- | ||
| rowspan="2" style="font-weight:bold;" | USB 3.2<ref><translate>When using USB Type C as the connection input source : If USB 3.2 is on, it will prioritize high-speed data transfer, but the resolution will only support 2560 x 1440 @ 75 Hz (maximum). If USB 3.2 is off, the resolution can support 2560 x 1440 @ 100 Hz, but due to bandwidth limitation, data transfer will be limited to the USB 2.0 standard.</translate></ref> | | rowspan="2" style="font-weight:bold;" | USB 3.2<ref><translate><!--T:204--> When using USB Type C as the connection input source : If USB 3.2 is on, it will prioritize high-speed data transfer, but the resolution will only support 2560 x 1440 @ 75 Hz (maximum). If USB 3.2 is off, the resolution can support 2560 x 1440 @ 100 Hz, but due to bandwidth limitation, data transfer will be limited to the USB 2.0 standard.</translate></ref> | ||
| On | | On | ||
|- | |- | ||
Revision as of 07:22, 7 November 2024
Introduction
Package Contents
- Monitor
- Power Cord
- Video Cable
- USB Cable
- Quick Start Guide
Note: The cables included in your package may vary depending on your country. Please contact your local reseller for more information.
Product Overview
-
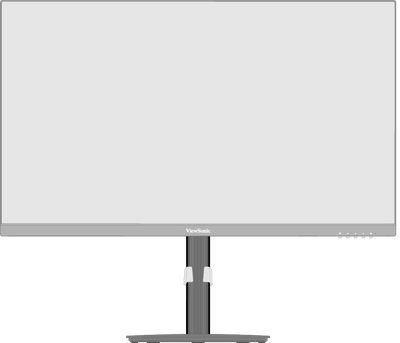 Front View
 -
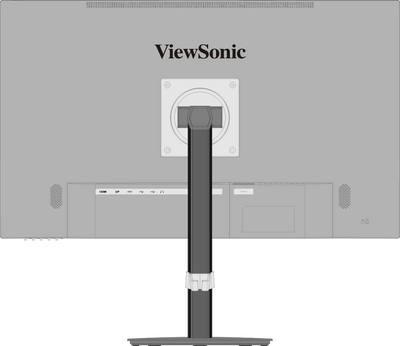 Rear View
I/O Ports

| Number | Description |
|---|---|
| 1 | HDMI |
| 2 | DisplayPort |
| 3 | USB Type C |
| 4 | USB Upstream |
| 5 | USB Downstream |
| 6 | Audio Out |
| 7 | AC IN |
Note: For more information about the 1 ★ / 2 / 3 / 4 / 5  key and its functions, refer to Hot Keys.
Initial Setup
Installing the Stand

Note: For safety and to ensure optimal performance, please position the monitor on a flat, stable surface. Failure to do so may lead to the monitor falling, causing damage to the monitor itself and/or posing a risk of personal injury.
Removing the Stand and Mounting the Monitor
Refer to the table below for the standard dimensions for mounting kits.
Note: For use only with a UL certified mounting kit/bracket. To obtain a wall mounting kit or height adjustment base, contact ViewSonic® or your local dealer.
| Maximum Loading | Pad Patten (W x H) |
Pad Hole | Screw Specification | Screw Quantity |
|---|---|---|---|---|
| 14 kg | 100 x 100 mm | Ø 5 mm | M4 x 10 mm | 4 screws |
Note: Mounting kits are sold separately.

Important: Before removing the stand, please turn off the monitor, disconnect all cables, and place the monitor on a flat, stable surface with the screen facing down.
- Remove the stand.
- Attach the mounting bracket to the VESA mounting holes at the rear of the monitor. Then secure it with four screws (M4 x 10 mm).
- Follow the instructions that come with the purchased mounting kit to mount the monitor.
Using the Security Slot

To help prevent the monitor from being stolen, use a security slot locking device to secure the monitor to a fixed object.
Additionally, fastening the monitor to a wall or fixed object using a security cable can help support the weight of the monitor in order to prevent the monitor from falling over.
Making Connections
Connecting to Power

- Connect the power cord to the AC IN jack at the rear of the monitor.
- Plug the power cord plug into a power outlet.
Display Connection
HDMI

- Connect one end of an HDMI cable to an HDMI port of the monitor.
- Plug the other end of the cable into the HDMI port of your computer.
DisplayPort

- Connect one end of a DisplayPort cable to the DisplayPort In port of the monitor.
- Plug the other end of the cable into the DisplayPort or Mini DisplayPort port of your computer.
Note: To connect the monitor to the Thunderbolt port (v. 1 & 2) on your Mac, connect the Mini DisplayPort end of a “Mini DisplayPort to DisplayPort cable” to the Thunderbolt output port of your Mac. Then connect the other end of the cable to the DisplayPort port of the monitor.
Type C

- Connect one end of a USB Type C cable to the USB Type C port of the monitor.
- Plug the other end of the cable into the USB Type C port of your computer.
Note: For video output use, make sure your USB Type C output device (e.g., laptop) and cable support video signal transmission.
USB Connection
The monitor supports two types of USB ports, upstream and downstream. When making connection(s), observe the following guideline.

| USB Type | Connection Type | Description | |
|---|---|---|---|
| Upstream | Type B | Transfers data between the computer and the USB devices connected to the monitor. | |
| Type C | Transfers audio, video, and power. | ||
| Supports 5V/3A, 9V/3A, 12V/3A, 15V/3A, 20V/4.9A (LPS) charging. | |||
| Downstream | Type A | For peripheral device(s) (e.g., storage device, keyboard, mouse, etc.). | |
| Supports 5V/2A charging. | |||
Note:
- To use peripheral devices with the USB Type A port, please also connect your computer to the monitor’s USB Type B or Type C port.
- Due to the product’s USB Type C power delivery design, do not connect the laptops’ power adapter at the same time. This can cause power distribution conflicts with the laptop, resulting in flashing screens or the forced shutdown of the laptop.
Using the USB Ports

- To use the downstream USB Type A ports, connect one end of the USB Type B cable to the upstream USB Type B port of the monitor. Plug the other end of the cable, USB Type A, into a USB port of your computer.
- Connect your peripheral device(s) to a downstream USB Type A port of the monitor.
Audio Connection

Plug the audio jack of the audio device into the Audio Out port of the monitor.
Note: The monitor is also equipped with dual speakers.
Using the Monitor
Adjusting the Viewing Angle
Height Adjustment

Lower or raise the monitor to the desired height (0 to 130 mm).
Note: When adjusting, press down firmly along the adjustment track.
Screen Orientation Adjustment (Monitor Pivot)
 |
 |
 |
- Adjust the monitor height to the highest position. Then tilt the monitor backwards to the full tilt position.
- Rotate the monitor 90° clockwise or counterclockwise from landscape to portrait orientation.
Note:
- When adjusting, make sure to hold both sides of your monitor firmly with both hands.
- To rotate the screen image, manually change the system’s display orientation settings.
Swivel Adjustment

Swivel the monitor to the left or right for the desired viewing angle (± 360˚).
Tilt Adjustment

Tilt the monitor forwards or backwards to the desired viewing angle (-3.5˚ to 28˚).
Note: When adjusting, support the stand firmly with one hand while tilting the monitor forwards or backwards with the other hand.
Turning the Monitor On/Off

- Plug the power cord into a power outlet.
- Press the Power button to turn on the monitor.
- To turn the monitor off, press the Power button again.
Note: The monitor will still consume some power as long as the power cord is connected to the power outlet. If the monitor is not being used for a long period of time, please disconnect the power plug from the power outlet.
Using the Control Panel Keys
Use the Control Panel Keys ( 1 ★ / 2 / 3 / 4 / 5 ) to access the Quick Menu, activate Hot Keys, navigate the On-Screen Display (OSD) Menu, and change the settings.

Quick Menu
Press the 1 ★ key to activate the Quick Menu.

Note: Follow the key guide that appears on the screen to select the option or make adjustments.
| Menu | Description | |
|---|---|---|
| ViewMode | Select one of the preset color settings. | |
| Volume | Adjust the level, or mute the volume. | |
| Contrast/Brightness | Adjust the contrast or brightness level. | |
| Input Select | Select the input source. | |
| Exit | Exit the Quick Menu. | |
Hot Keys
When the On-Screen Display (OSD) Menu is off, you can quickly access special functions by using the Control Panel Keys.
| Key | Description |
|---|---|
| 1 ★ + 2 | Press and hold the keys to lock/unlock the OSD Menu. When the menu appears on the screen, continue holding both keys for 10 seconds to lock/unlock the OSD Menu  If the OSD Menu is locked, the below message will appear on the screen:  |
| 2 + 3 | Press and hold the keys to lock/unlock the Power button. When the menu appears on the screen, continue holding the key for 10 seconds to lock/unlock the Power button.  If the Power button is locked, the below message will appear on the screen.  |
| 2 + 4 | Press the keys to display/hide the Boot up Screen or Message OSD when the device is turned on.  |
Configuring the Settings
General Operations
- Press the 2 / 3 / 4 key to display the On-Screen Display (OSD) Menu.
- Press the 1 ★ or 2 key to select the main menu. Then press the 3 key to enter the selected menu.
- Press the 1 ★ or 2 key to select the desired menu option. Then press the 3 key to enter the sub-menu.
- Press the 1 ★ or 2 key to adjust/select the setting. Then press the 3 key to confirm.
- Press the 4 key to return to the previous menu.


Note: Certain menu option adjustments do not require the user to press the 3 key to confirm the selection. Follow the key guide that appears on the screen to select the option or make adjustments.
Note: To exit the OSD menu, Press the 5 key.
Appendix
Product Specifications
| Item | Category | Specifications |
|---|---|---|
| LCD | Type | VA, Color a-Si TFT Active Matrix 3840 x 2160 (UHD) LCD;
0.18159 (H)mm x 0.18159 (V)mm pixel pitch |
| Display Size | 68.6 cm | |
| 27” viewable | ||
| Color Filter | RGB Vertical Stripe | |
| Glass Surface | Anti-Glare (Haze 25%), Hard Coating (3H) | |
| Input Signal | Video Sync | TMDS digital (100 Ω)
|
| Compatibility | PC | up to 2560 x 1440 |
| Macintosh | up to 2560 x 1440 | |
| Resolution and Timings[1] | Recommended | 2560 x 1440 @ 60 Hz |
| Supported |
| |
| Power[2] | Input Voltage | AC 100-240V, 50/60 Hz (auto switch) |
| Display Area | Active Size (H x V) |
596.74 x 335.66 mm |
| 23.49” x 13.21” | ||
| Operating Conditons | Altitude | 5 km |
| 16,404.2 ft | ||
| Relative Humidity | 20% to 90% (non-condensing) | |
| Temperature | 0° C to 40° C | |
| 32° F to 104° F | ||
| Storage Conditions | Altitude | 12 km |
| 39,370.1 ft | ||
| Relative Humidity | 5% to 90% (non-condensing) | |
| Temperature | -20° C to 60° C | |
| -4° F to 140° F | ||
| Dimensions
(with stand) |
Physical (W x H x D) |
613.8 x 538 x 233.3 mm |
| 24.2” x 21.2” x 9.2” | ||
| Weight
(with stand) |
Physical | 6.7 kg |
| 14.8 lb | ||
| Wall Mount | Dimensions | 100 x 100 mm |
| Power Consumption | On[3] | 32W (Typical) |
| Off | < 0.3W |
- ↑ Do not set the graphics card in your computer to exceed these timing modes; doing so may result in permanent damage to the display.
- ↑ Please use the power adapter from ViewSonic® or an authorized source only.
- ↑ ECO Mode set to Standard. Power consumption is without audio and with all USB ports loading.
On-Screen Display (OSD) Menu Tree
| Sub-menu | Menu Option | |
|---|---|---|
| Volume | On | (-/+, 0~100)/1/1 |
| Mute | ||
| Sub-menu |
|---|
| Standard |
| Game |
| Movie |
| Web |
| Text |
| MAC |
| Mono |
| Sub-menu | Menu Option | ||
|---|---|---|---|
| Contrast/Brightness | Contrast | (-/+, 0~100)/1 | |
| Brightness | (-/+, 0~100)/1 | ||
| Color Temperature | sRGB | ||
| Bluish | |||
| Cool | |||
| Native | |||
| Warm | |||
| User Color | Red | (-/+, 0~100)/1 | |
| Green | (-/+, 0~100)/1 | ||
| Blue | (-/+, 0~100)/1 | ||
| Color Space | Auto | ||
| RGB | |||
| YUV | |||
| Color Range | Auto | ||
| Full Range | |||
| Limited Range | |||
| HDR | Auto | ||
| Off | |||
| Sub-menu | Menu Option |
|---|---|
| Sharpness | (-/+, 0~100)/25 |
| Blue Light Filter | (-/+, 0~100)/1 |
| Aspect Ratio | 4:3 |
| 5:4 | |
| 16:9 | |
| 16:10 | |
| Overscan[1] | On |
| Off | |
| Black Stabilization | (-/+, 0~100)/10 |
| Advanced DCR | (-/+, 0~100)/25 |
| Response Time | Standard |
| Advanced | |
| Ultra Fast |
- ↑ The Overscan function only supports a refresh rate below 60 Hz. If the refresh rate is more than 60 Hz, please do not turn on this function.
| Sub-menu | Menu Option | |
|---|---|---|
| Language | English | |
| Français | ||
| Deutsch | ||
| Español | ||
| Italiano | ||
| Suomi | ||
| Русский | ||
| Türkçe | ||
| Česká | ||
| Tiếng Việt | ||
| 日本語 | ||
| 한국어 | ||
| 繁體中文 | ||
| 简体中文 | ||
| Variable Refresh Rate | On | |
| Off | ||
| Information | ||
| OSD Size | Native | |
| Large | ||
| OSD Timeout | (-/+, 5/15/30/60) | |
| OSD Background | On | |
| Off | ||
| OSD Pivot | 0˚ | |
| 90˚ | ||
| -90˚ | ||
| Power Indicator | On | |
| Off | ||
| Auto Power Off | On | |
| Off | ||
| Sleep | 30 minutes | |
| 45 minutes | ||
| 60 minutes | ||
| 120 minutes | ||
| Off | ||
| ECO Mode | Standard | |
| Optimize | ||
| Conserve | ||
| USB Charging[1] | On | |
| Off | ||
| DisplayPort Version[2] | 1.1 | |
| 1.2 | ||
| USB 3.2[3] | On | |
| Off | ||
| DDC/CI | On | |
| Off | ||
| Memory Recall | ||
- ↑ This function is off by default. If the monitor is in power saving mode, USB downstream charging will not be active. To enable charging in power saving mode, it is recommended to turn on this feature. Please note that this setting will not affect the USB Type C charging on the rear side of the monitor.
- ↑ If no DisplayPort connection is detected, this option will be grayed out.
- ↑ When using USB Type C as the connection input source : If USB 3.2 is on, it will prioritize high-speed data transfer, but the resolution will only support 2560 x 1440 @ 75 Hz (maximum). If USB 3.2 is off, the resolution can support 2560 x 1440 @ 100 Hz, but due to bandwidth limitation, data transfer will be limited to the USB 2.0 standard.
VG2709-2K-MHDU-2_UG_ENG_1b_20240905