VP2468a 初始安装
安装底座
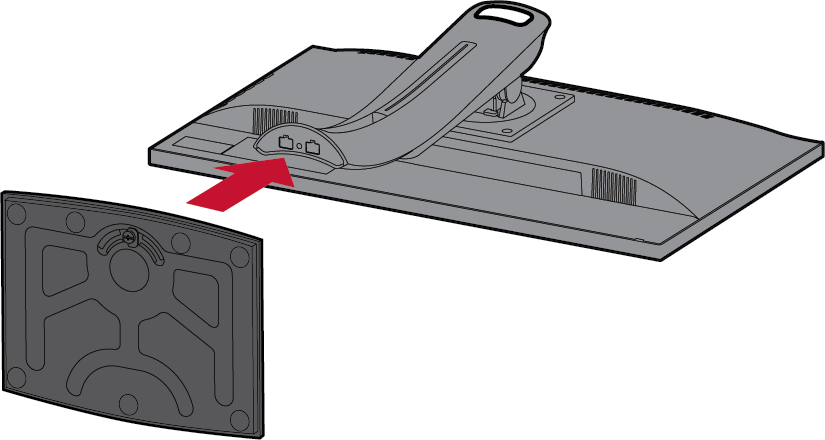
- 将显示器放在平坦、稳定的表面上,使屏幕朝下。
- 将显示器底座底板上的两 (2) 个点与显示器底座顶部对齐并进行连接。
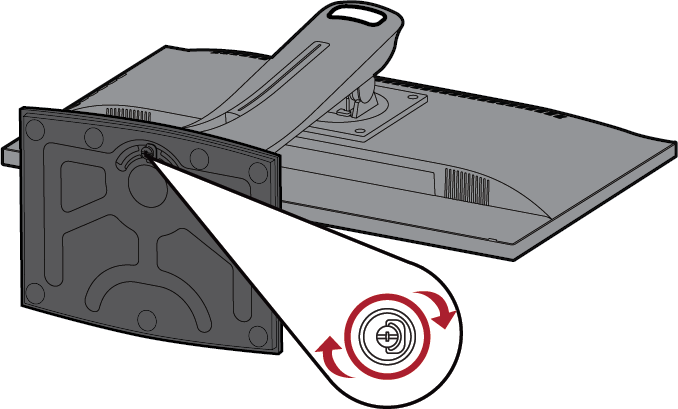
- 在显示器底座的底板中使用外加螺丝,并将其固定到显示器底座的顶部。
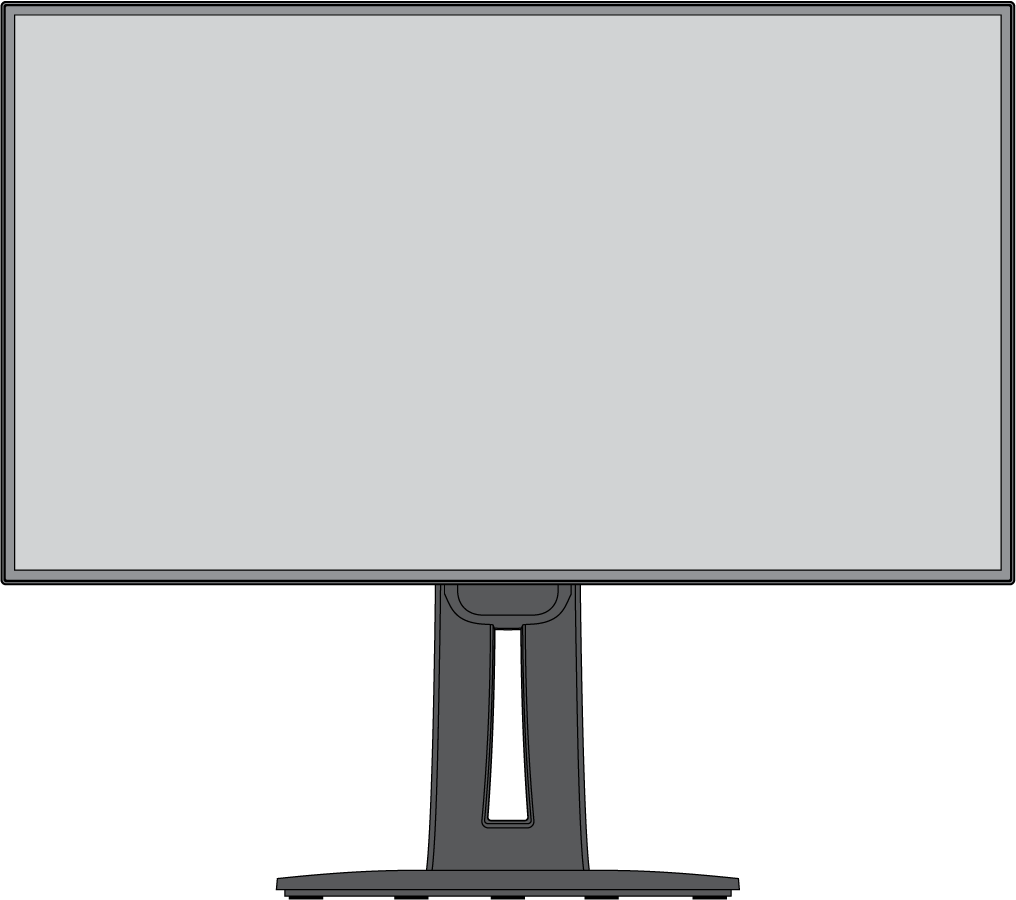
- 将设备放在平坦、稳定的表面,使设备处于直立位置。
- Always place the device on a flat, stable surface. Failure to do so may cause the device to fall and damage the device and/or result in personal injury.
Wall Mounting
Refer to the table below for the standard dimensions for wall mount kits.
- For use only with a UL certified wall mount kit/bracket. To obtain a wall-mounting kit or height adjustment base, contact ViewSonic® or your local dealer.
| Maximum Loading | Hole Pattern (W x H) | Interface Pad (W x H x D) | Pad Hole | Screw Specification & Quantity |
|---|---|---|---|---|
| 14 kg | 100 x 100 mm | 115 x 115 x 2.6 mm | Ø 5 mm | M4 x 10 mm - 4 pieces |
- Turn off the device and disconnect all cables.
- Place the device on a flat, stable surface with the screen facing down.
- Remove the four (4) screws.
- Pull down slightly to disengage the hooks and remove the stand.
- Attach the mounting bracket to the VESA mounting holes at the rear of the monitor. Then secure it with four (4) screws (M4 x 10 mm).
- Follow the instructions that come with the wall mounting kit to mount the monitor onto the wall.


