VDisplayManager Advanced Features
Screen Split
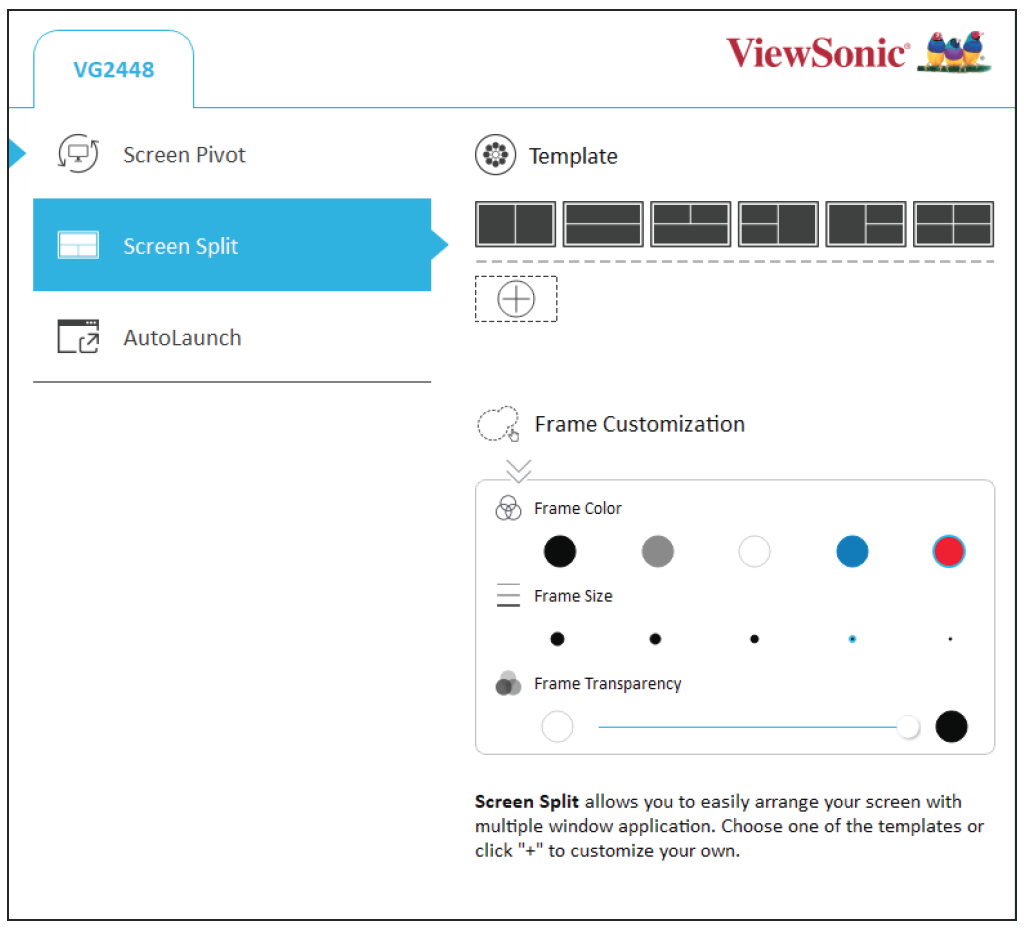
Allows the user to divide the screen into several windows. Some default templates are provided, however, customized templates can also be created and saved.
Additionally the frames of the templates can be customized by adjusting the Frame Color, Frame Size, and Frame Transparency. To create a custom template:
- Click the “+”.
- Then draw your custom frames on-screen.
- NOTE: Only vertical and horizontal lines can be drawn.
- At anytime you can Save, Delete, Undo, or Redo with the icons at the top of the screen:
- NOTE: You can Edit or Delete any custom template by right clicking on it in the template selection area.
AutoLaunch
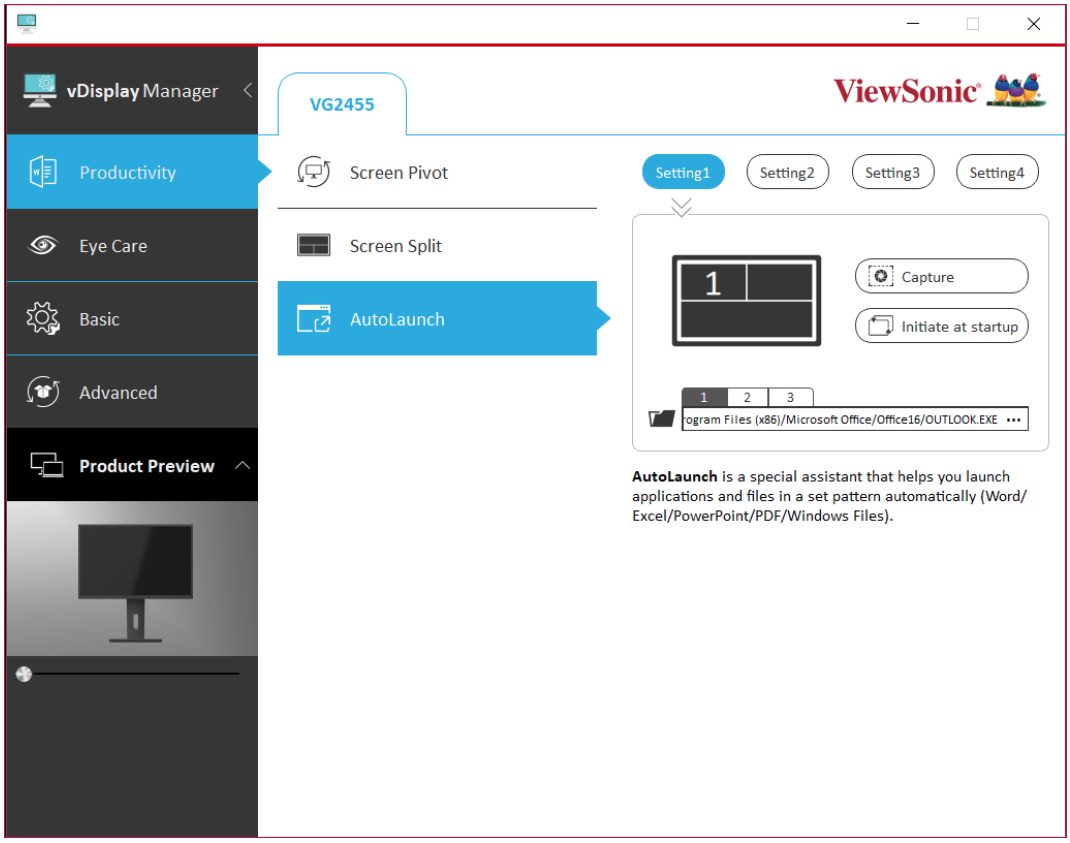
The user can capture and automatically launch several windows in a set pattern with certain applications already open within them.
- NOTE
- AutoLaunch supports capturing Office 2010/2013/2016 (Word/Excel/PowerPoint), PDF, and Windows Files.
- If the file is not supported for direct capturing, the user can designate the file via “...”.
- After using “Screen Split” to divide the screen, drag and drop your preferred applications into each frame.
- Choose the preferred “Setting” (Setting 1/2/3/4).
- Click “Capture” to save your screen setup. You can click “Initiate at Startup” to have your preferred screen setup load at startup.
- NOTE: You can adjust which program opens in which window by clicking the “1, 2, ..” and “....”.
Smart Backlight
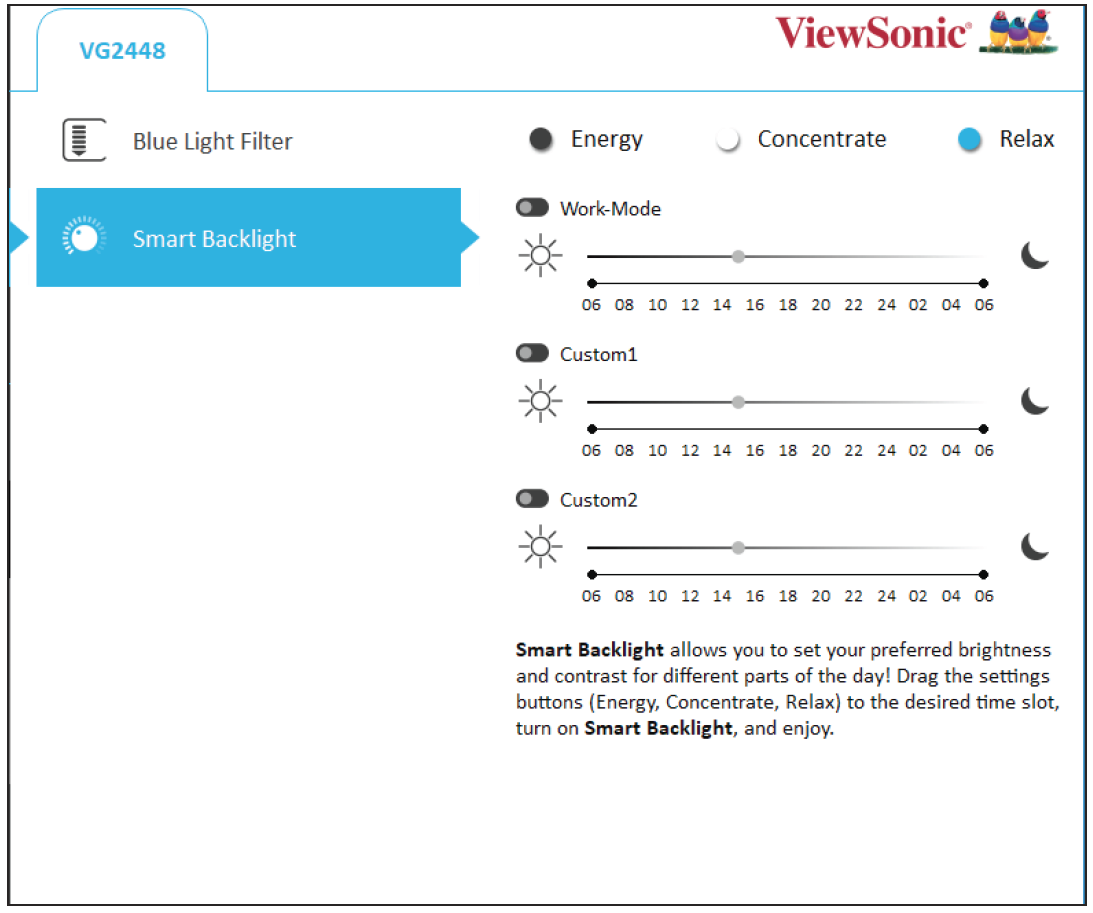
This feature allows the user to set preferred brightness and contrast for different times of the day.
- Drag and drop the preferred settings button: Energy, Concentrate, and/or Relax, to the desired time slot.
- NOTE: You can also right click on the time line to add the settings.
- To adjust the settings button, left click on the word. Then you will be able to adjust the brightness and contrast.
- Once your preferred settings are finalized, turn on Smart Backlight by left clicking the toggle switch.


