LCD-WPD-001-TX
Introduction
Package Contents
- Transmitter
- Note: If anything is missing or damaged, please contact your local reseller for more information.
Product Overview
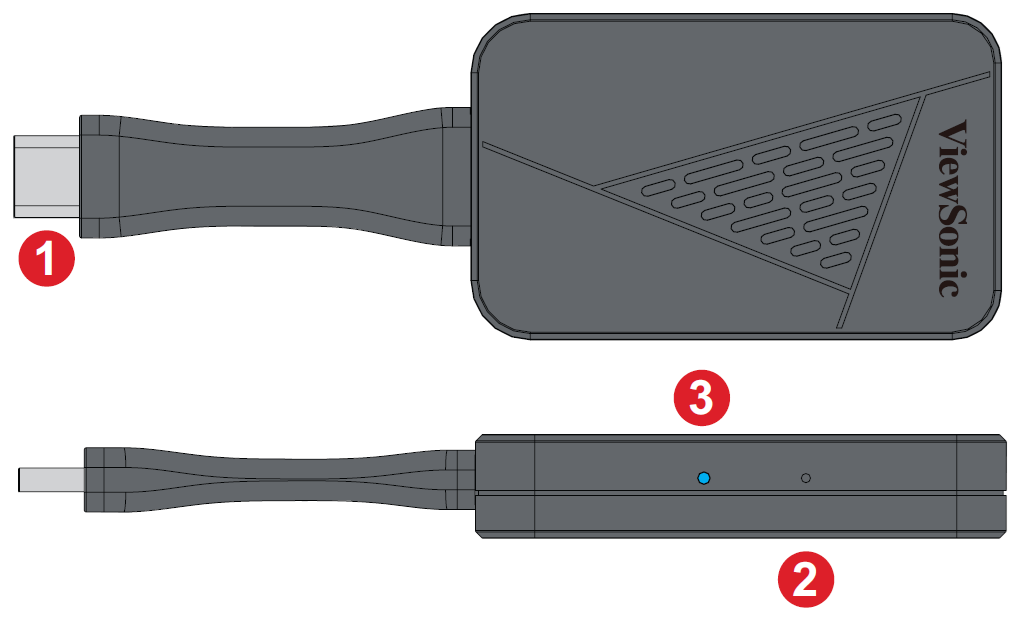
| Number | Item | Description |
|---|---|---|
| 1 | USB Type C[1] Input | Display input; connect to the casting device (e.g., laptop, mobile phone, tablet). |
| 2 | Re-Pair Button | Using a paper clip or SIM-eject tool, press and hold for five seconds to re-pair the device. |
| 3 | LED Indicator | Indicates the power and connection status. |
- ↑ Compatible with USB Type C. Ensure your device supports video output and power delivery via a USB Type C port (DisplayPort Alternative Mode on USB Type C).
Making Connections
Connecting the Transmitter
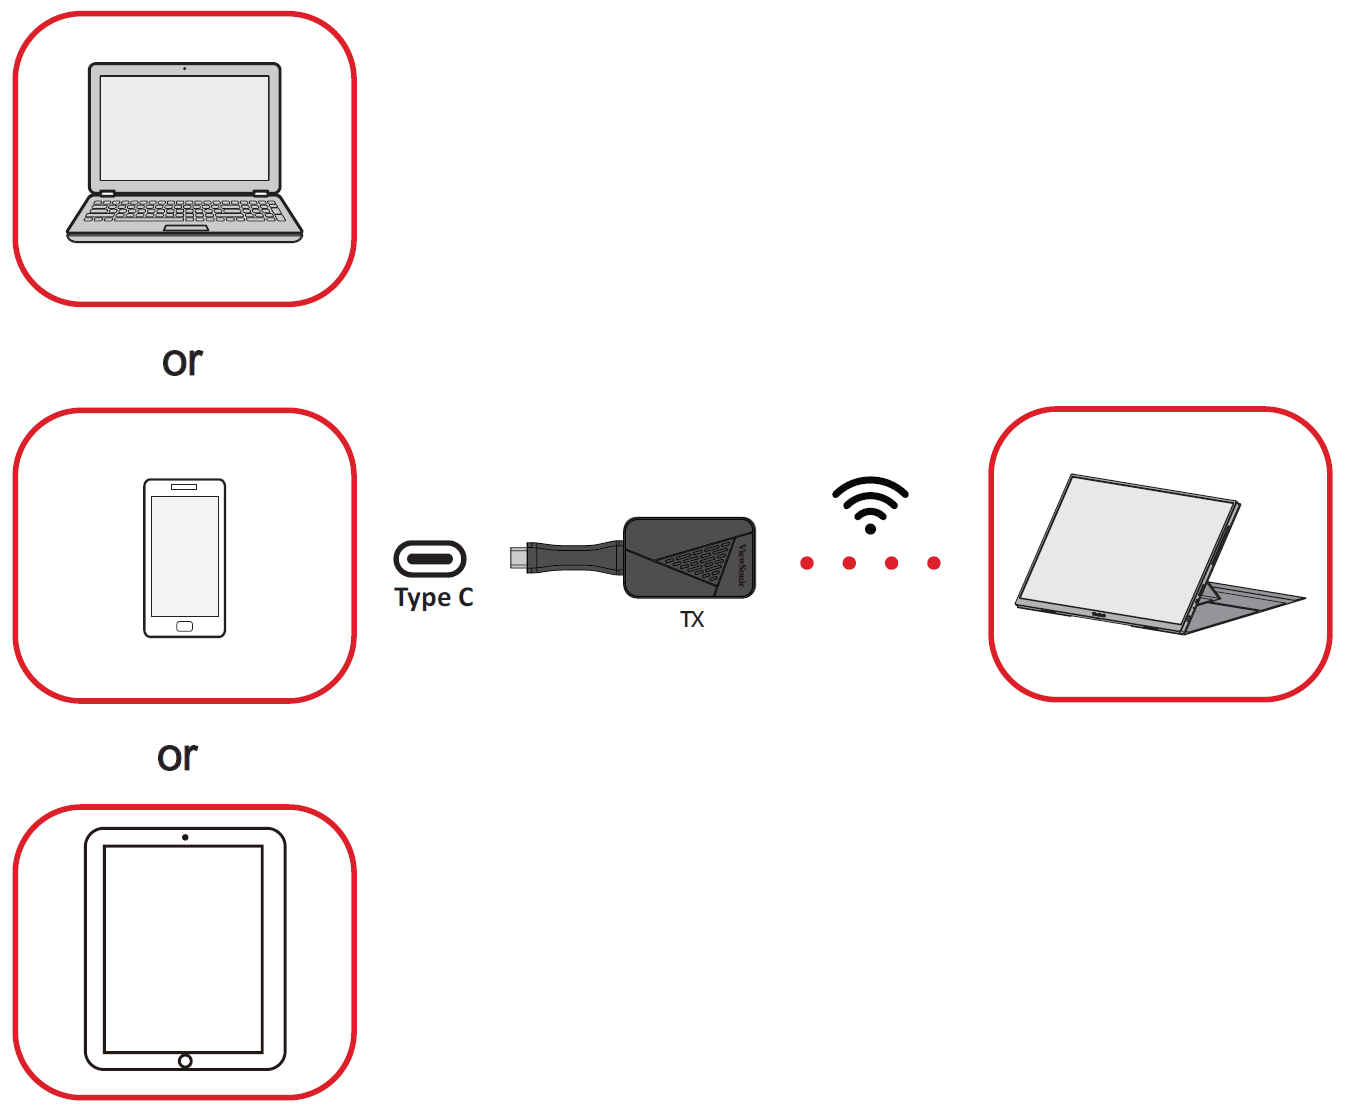
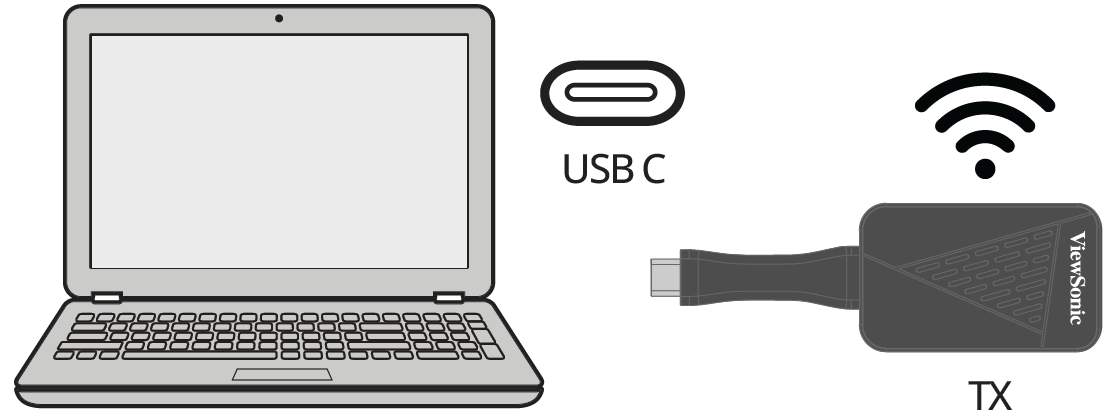
- Connect the Transmitter’s USB Type C Input to a USB Type C port of the casting device (e.g. laptop, mobile phone, tablet).
- Once connected, the Transmitter’s LED Indicator will flash for a few seconds then stop. At this time, the casting device’s screen will cast automatically.
- Note:
- Ensure your device supports video output and power delivery via a USB Type C port (DisplayPort Alternative Mode on USB Type C).
- Casting is supported for all laptops, including those running Windows and macOS, as well as Android and Apple devices with DP Alt output.
- Duplicate and Extend mode for Windows/macOS systems are supported.
- Genuine HDCP (High-bandwidth Digital Content Protection) for DRM (Digital Rights Management) streaming is supported.
Wi-Fi Display
Direct Wireless Cast
- Connect the Wi-Fi TX Dongle to your external device.
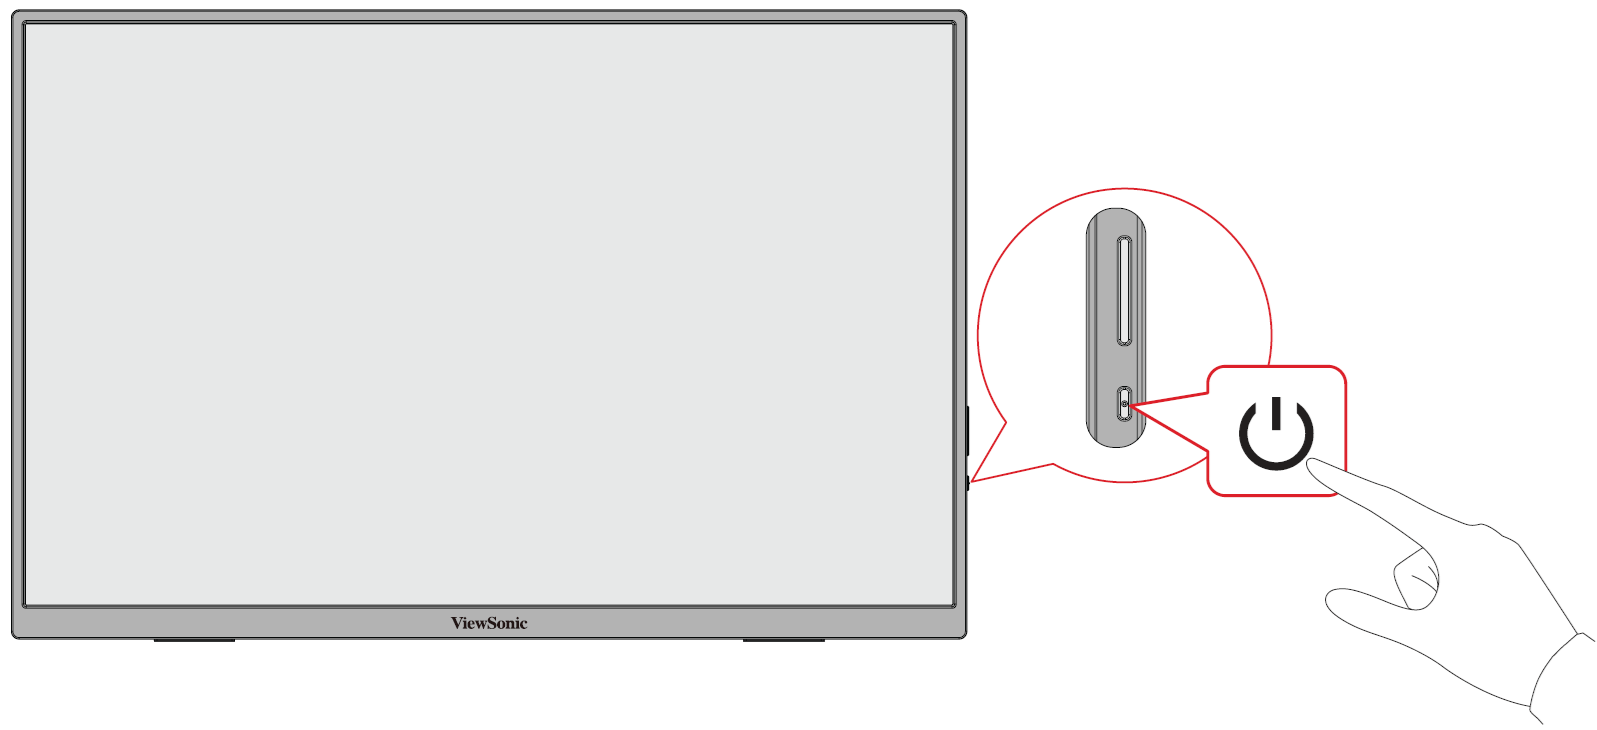
- Turn on the VG1656N by pressing the Power ( ) button.
- Press ▲ Up or ▼ Down to open the On-Screen Display (OSD) Menu.
- Press ▲ Up or ▼ Down to select WiFi Display. Then press the Power ( ) button.
- The VG1656N can now directly wirelessly cast its screen.
USB Type C Signal Input
- Connect the Wi-Fi TX Dongle to your external device.
- On the monitor, press the Power ( ) button to open the On-Screen Display (OSD) Menu.
- Press ▲ Up or ▼ Down to select Input Select. Then press the Power ( ) button to enter the menu.
- Press ▲ Up or ▼ Down to select WiFi Display. Then press the Power ( ) button.
- Note: Make sure your device is equipped with a USB Type C port that supports DisplayPort Alternate Mode for video output and power delivery capabilities.
Re-Pairing the Transmitter
- Note: Re-pairing is only required when the user’s TX dongle is not the original TX dongle.
- Connect the Transmitter’s USB Type C Input to a USB Type C port of the casting device (e.g. laptop, mobile phone, tablet).
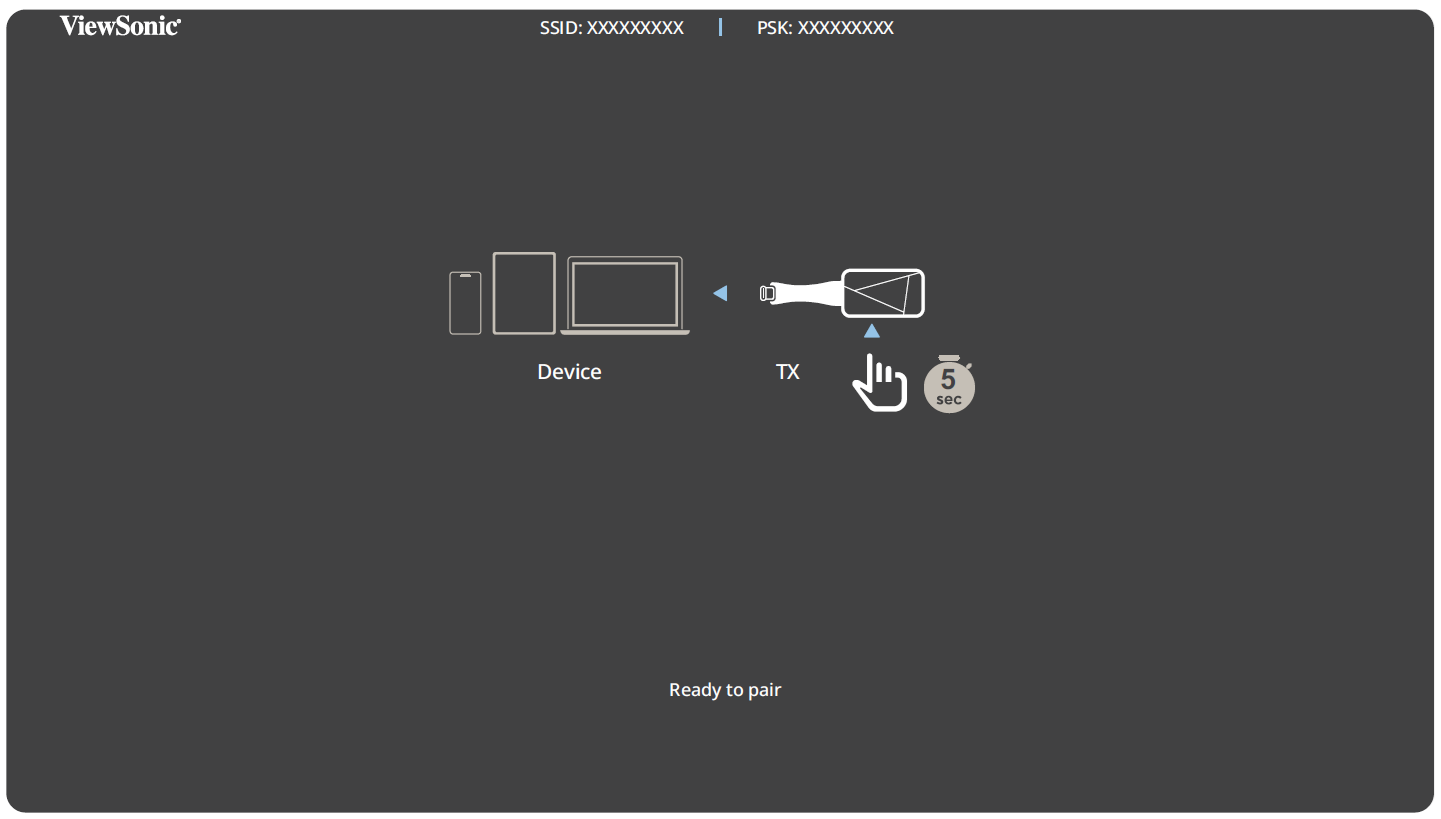
- While the screen image displays, “Ready to Pair”, use a paper clip or SIM-eject too to press and hold the Re-Pair button on the Transmitter for five seconds. Once paired, casting will start automatically.
Updating the Receiver Firmware
Open the OSD Menu and Select WiFi Re-Pair
- Press the Power ( ) button on the right side of the VG1656N monitor to open the On-Screen Display (OSD) menu.
- In the OSD menu, select Input Select then WiFi Re-Pair.
- Note: Do not connect the TX dongle to the laptop at this time.
Connect the Laptop to the Monitor
- After selecting WiFi Re-Pair, the VG1656N will display the below screen.
- Make note of the SSID and PSK numbers located at the top of the screen.
- Note: Each VG1656N monitor has its own SSID and PSK number.
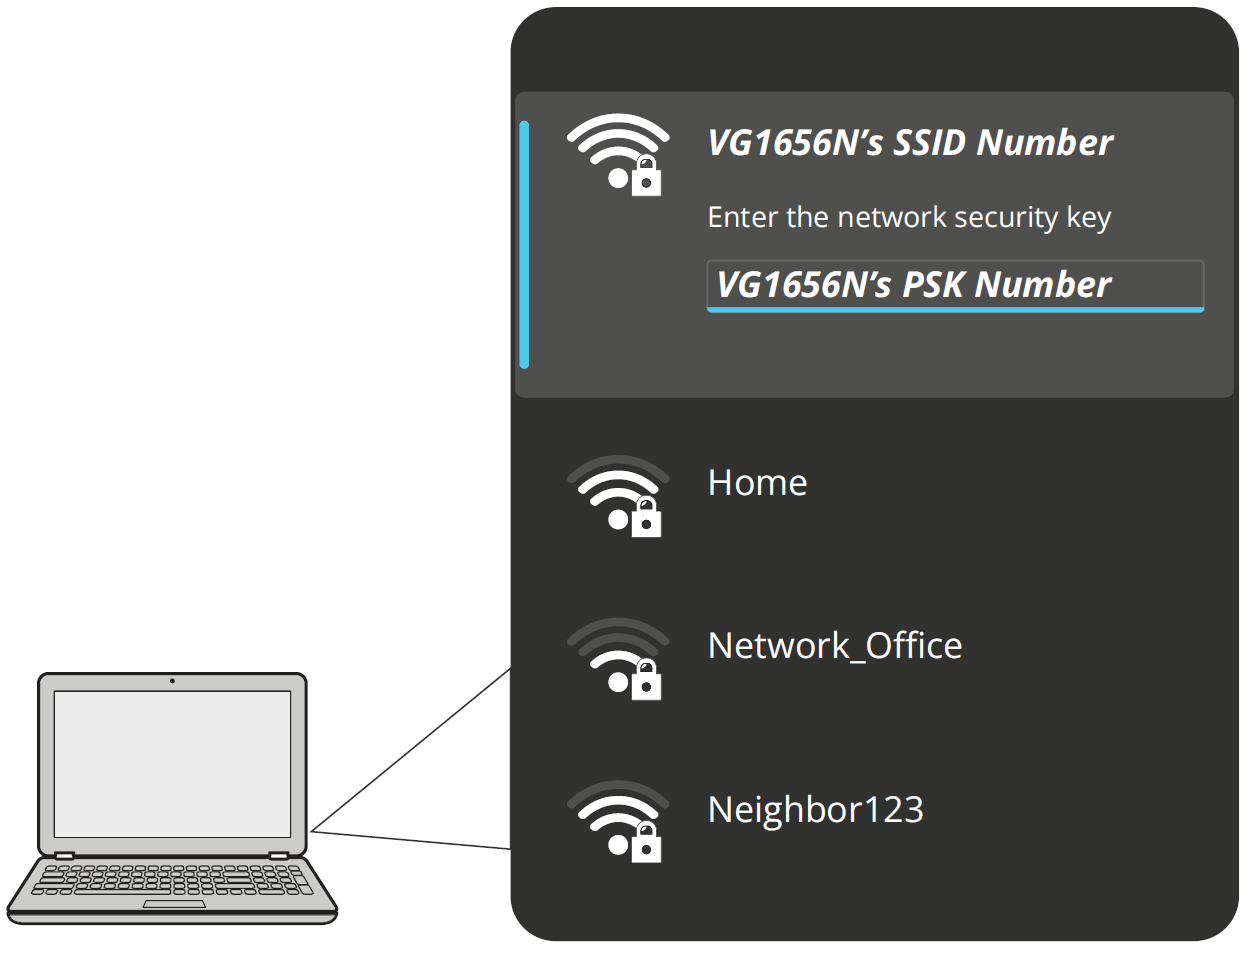
- Go to the laptop’s network settings and select the VG1656N’s SSID. Then enter the VG1656N’s PSK number to wirelessly connect to the VG1656N.
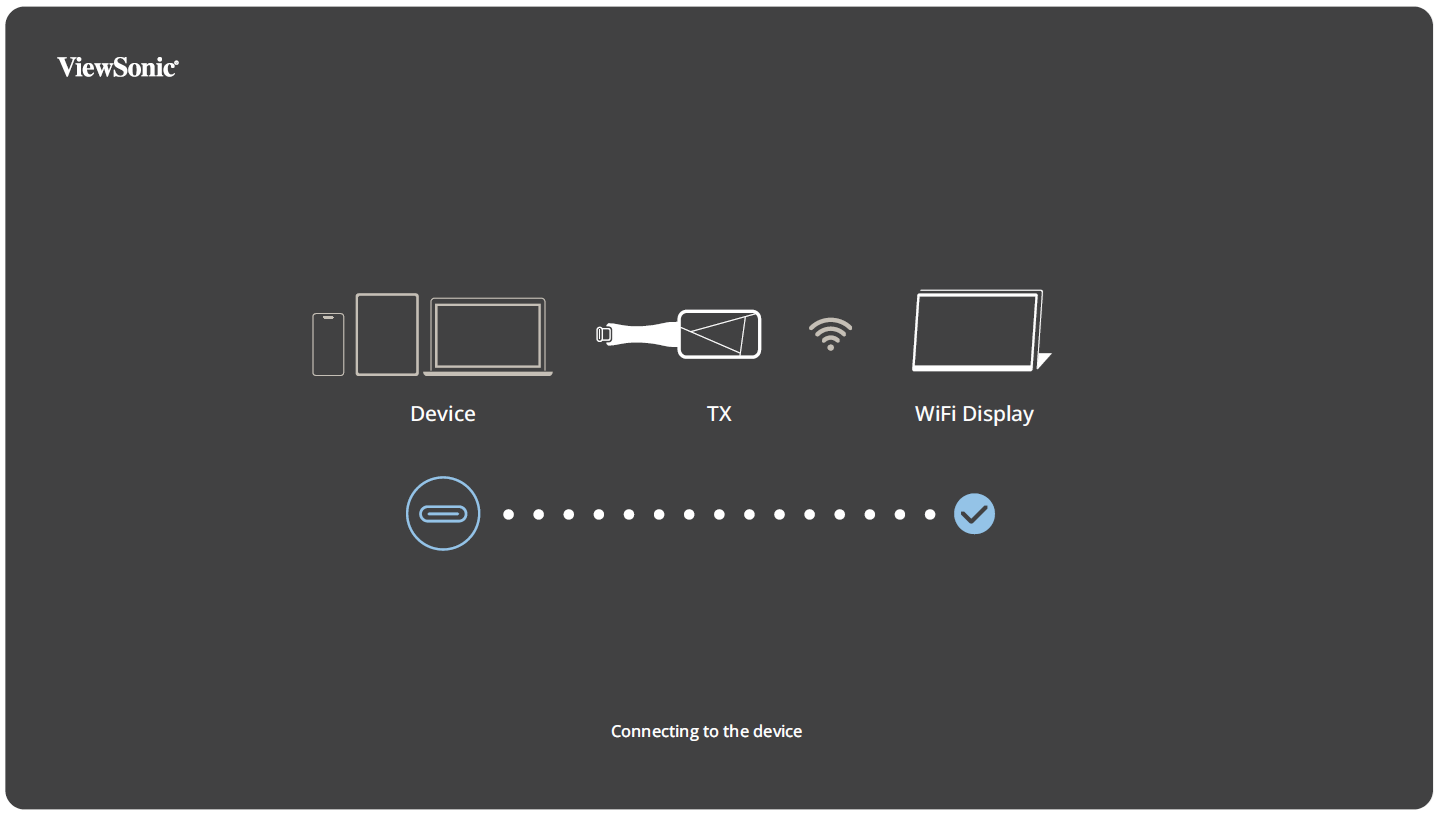
- After the laptop successfully connects to the VG1656N monitor, the VG1656N screen will show the below connection screen.
Updating the Receiver Firmware
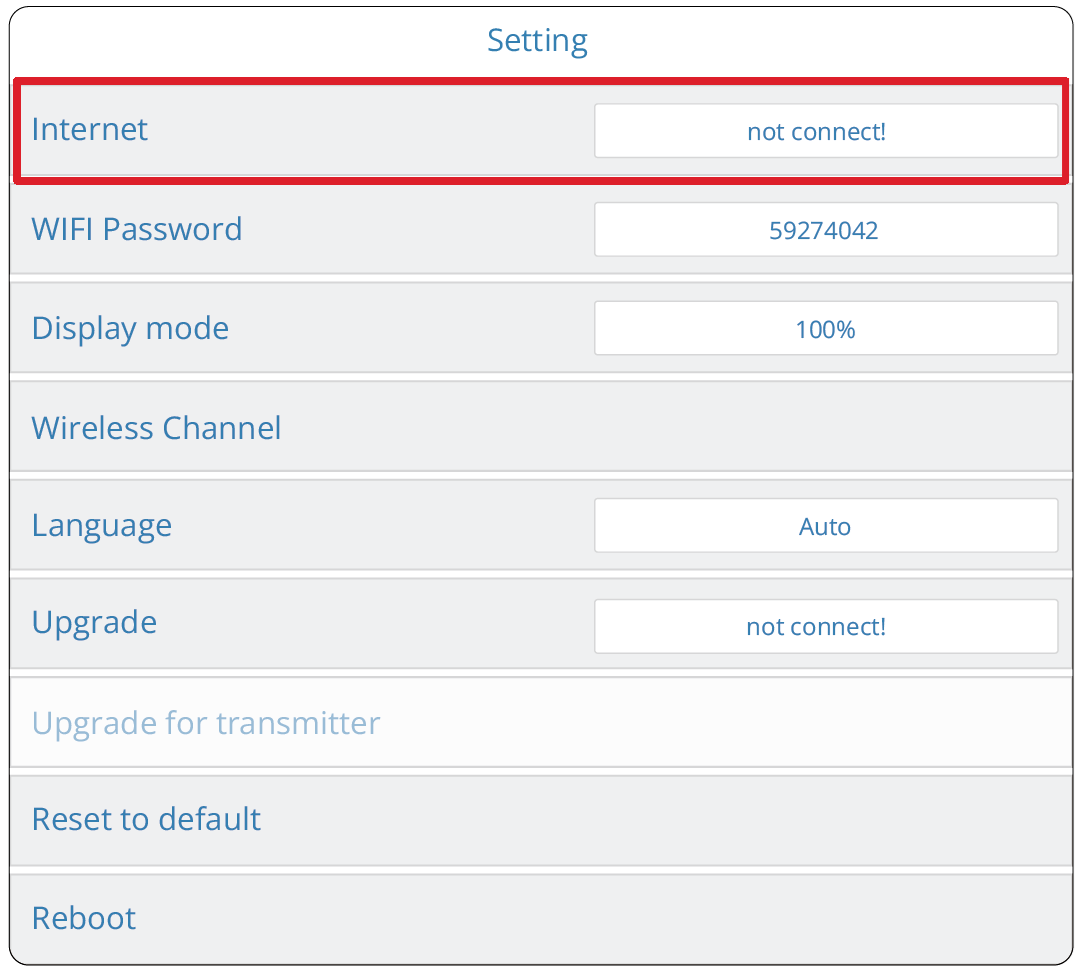
- On the laptop, open a web browser and enter 192.168.203.1 in the address bar to access the Settings page.
- On the Settings page, click on Internet and connect to a local wireless network.
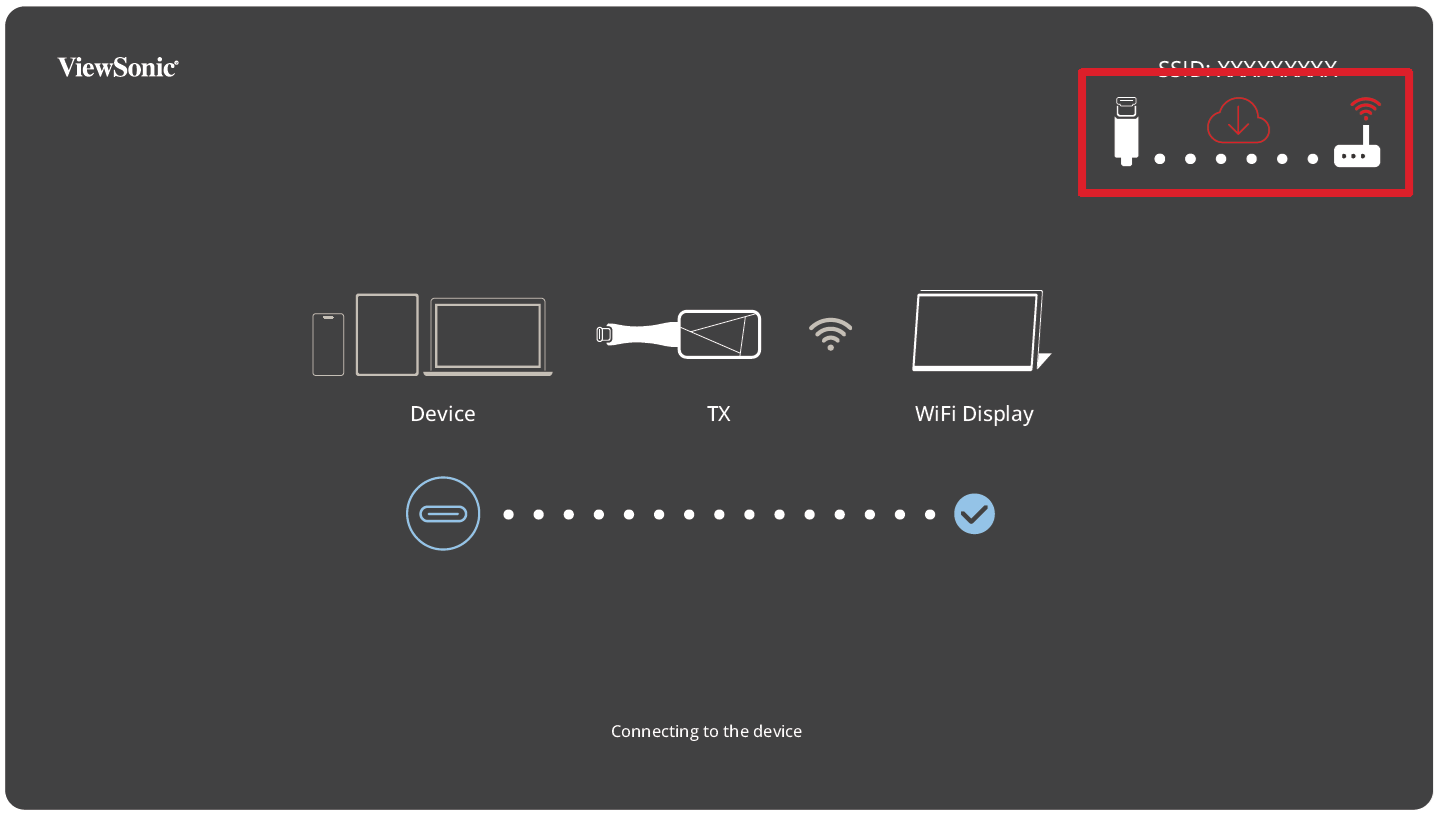
- On the VG1656N’s screen, in the upper-right corner, will be the server connection status. If a red cloud is present, it means that a firmware update is available.
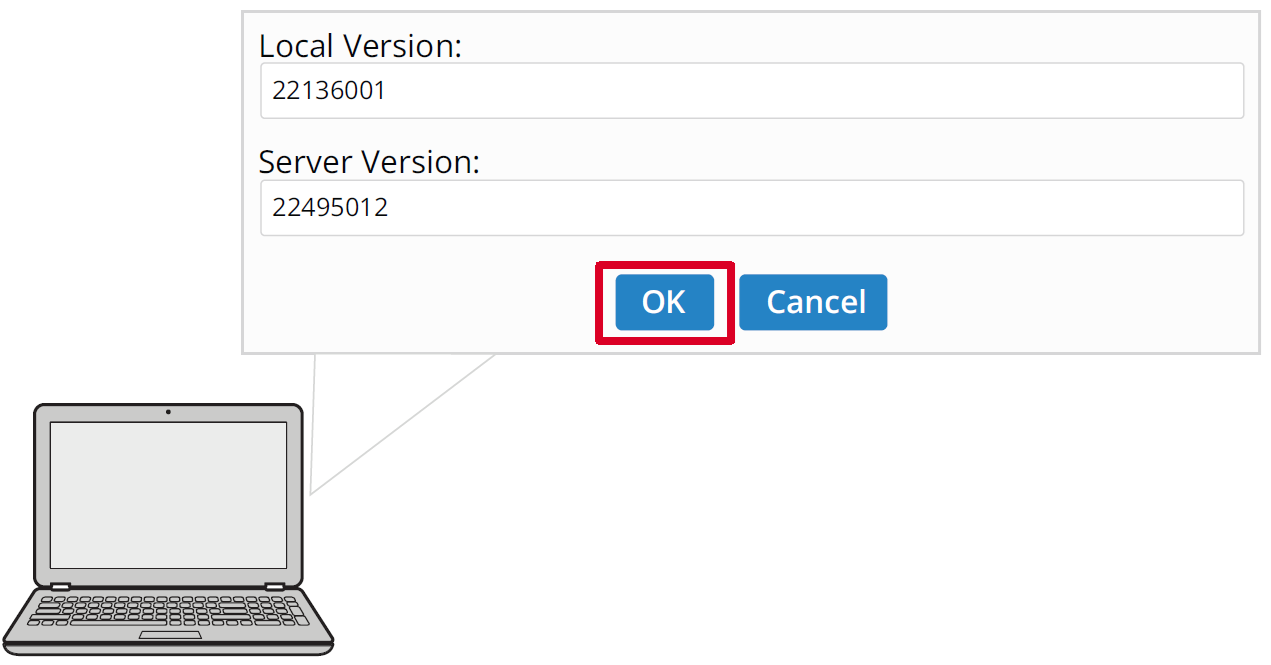
- On the laptop, if a firmware update is available the system will notify you. Click OK to update the firmware.
- After clicking OK, the firmware update will begin. On the VG1656N’s screen a progress bar will be displayed.
- Important: During the update process, please ensure that the power remains on and that the devices stay connected.
- The VG1656N will restart and return to its initial screen after the update process is complete. The firmware update for the WiFi receiver of the VG1656N has now been completed.
Updating the Transmitter Firmware
- Note: Ensure the laptop supports video output and power delivery via USB Type C (DisplayPort Alternate Mode).
- Connect the laptop to the VG1656N monitor. Follow the steps in Open the OSD Menu and Select WiFi Re-Pair and Connect the Laptop to the Monitor.
- On the laptop, open a web browser and enter 192.168.203.1 in the address bar to access the Settings page.
- On the Settings page, click on Internet and connect to a local wireless network.
- Insert the TX dongle into the laptop.
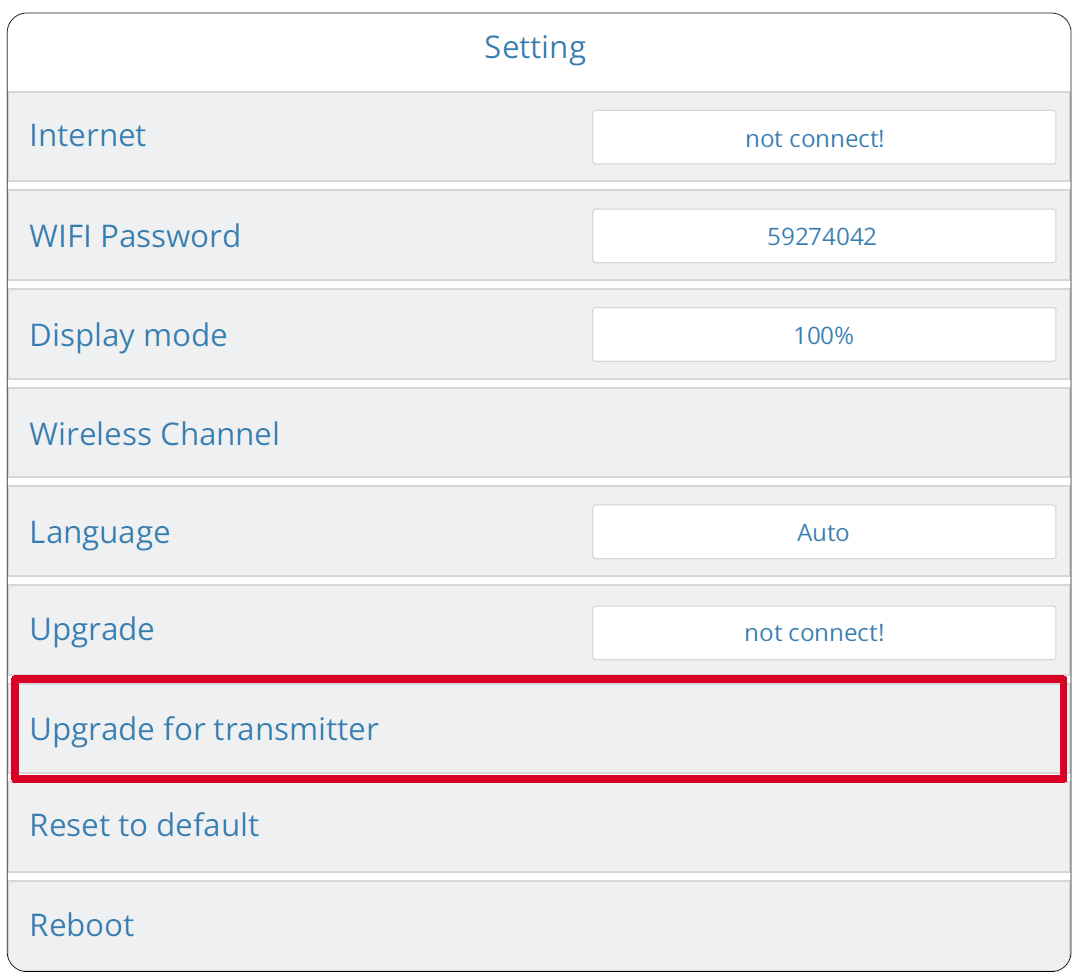
- After connecting to a wireless network, click on Upgrade for transmitter.
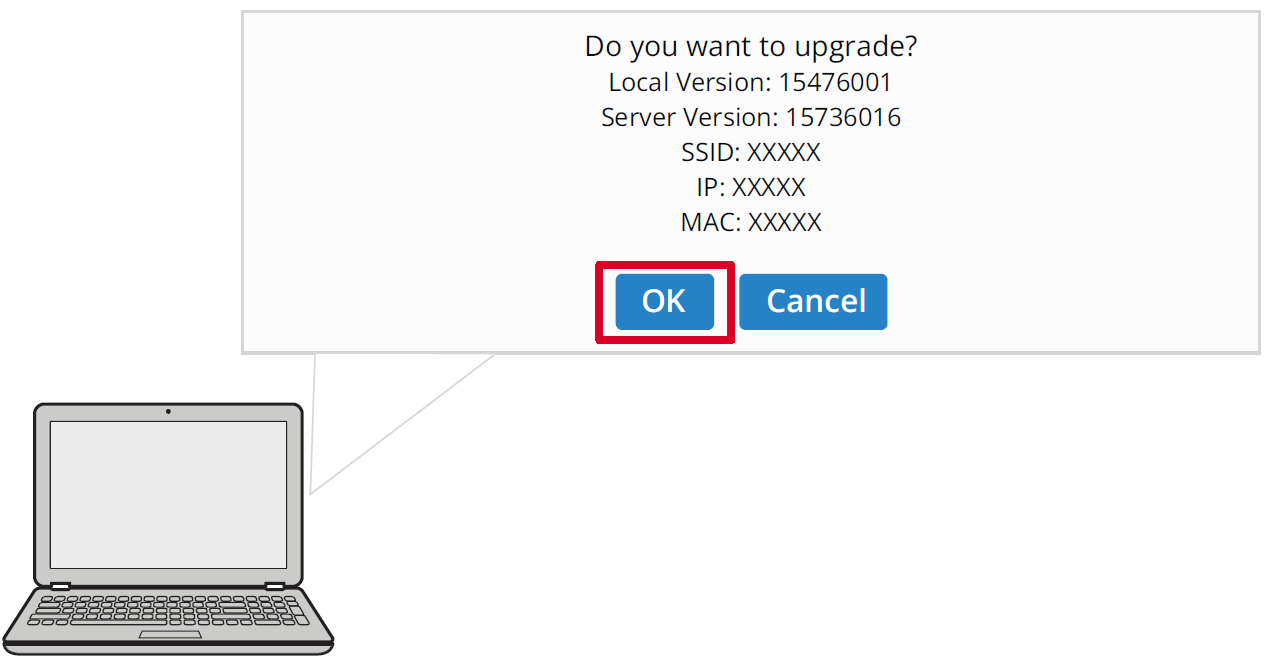
- On the laptop, if a firmware update is available the system will notify you. Click OK to update the firmware.
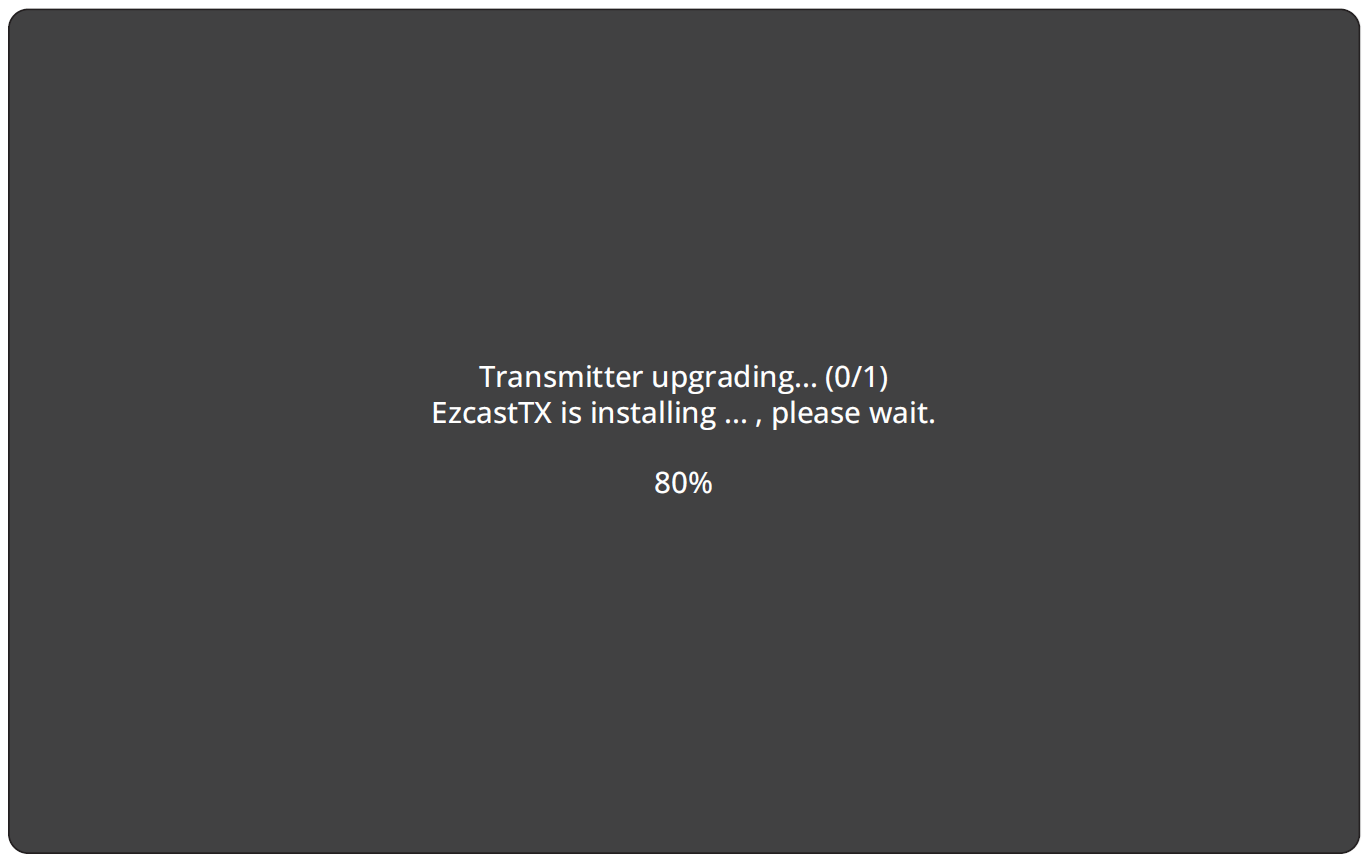
- After clicking OK, the firmware update will begin. On the VG1656N’s screen the installation progress will be displayed.
- Note: During the update process, please ensure that the power remains on and that the devices stay connected.
- The VG1656N will restart and return to its initial screen after the update process is complete. The firmware update for the WiFi transmitter, the TX dongle, has now been completed.
Appendix
Specifications
| Category | Specifications | |
|---|---|---|
| Function | Transmitter | |
| Main Chip | AM8360D | |
| Wi-Fi | 5 GHz 1T1R | |
| HDCP Support | HDCP 1.4 | |
| Video Support | 1920 x 1200 @ rb | |
| Audio Support | 2 channels, PCM | |
| Latency | 50ms~100ms | |
| Distance | 15 m (VG1656N) | |
| Antenna | Antenna Type | Printed Antenna |
| Manufacturer | Actionsmicro | |
| Model Name | AM9421 | |
| Antenna Gain | 2dBi | |
| EIRP Max Power | 13dBm | |
| Connector Type | N/A | |
| Interface | Specifications | |
| USB C[1] | 1 x | |
| Physical Buttons | Specifications | |
| Re-Pair Button | 1 x | |
| Miscellaneous | Specifications | |
| Power Input | 5V/0.9A | |
| Power Consumption | 4.5W | |
| Physical Dimensions (W x H x D) | 170 x 40 x 16 mm | |
| 6.69" x 1.57" x 0.63" | ||
| Weight | 37.5 g | |
| 0.08 lb | ||
| Operating Temperature | 0° C to 35° C | |
| 32° F to 95° F | ||
| Operating Relative Humidity | 10% to 90% (non-condensing) | |
- Note: When connecting the mobile phone/tablet to the TX dongle, it may not be able to power the TX dongle if the battery level of the mobile phone/tablet is lower than 20%. Therefore, it is suggested that users fully charge the mobile phone/tablet first.
- ↑ Ensure your device supports video output and power delivery via a USB Type C port (DisplayPort Alternative Mode on USB Type C).
LED Indicator
Transmitter
| Light | Description |
|---|---|
| Solid White | The Transmitter is connected to the Receiver successfully and is operating normally. |
| Flashing (Slowly) | The Transmitter is ready to pair with the Receiver when the receiver is powered up. |
| Flashing (Quickly) | The Transmitter is connecting with the Receiver. |
| Off | The Transmitter is not working properly; or there is no power input. |

