ViewSign Professional
User Guide
Sign a Document
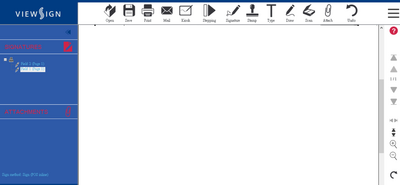
Step 1: Start the Client Application

- Open the client application on your device.
- Choose the required signing method. Either sign with your mouse, mobile device or signature pad.
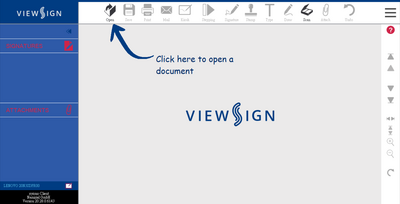
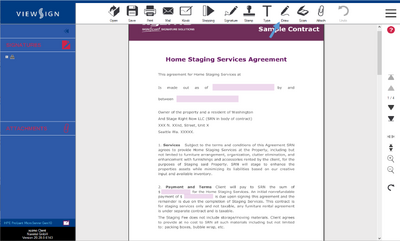
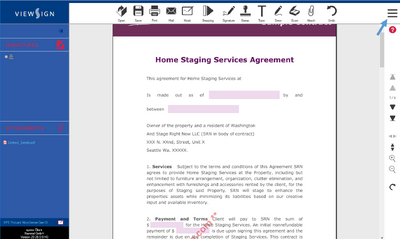
Step 2: Open a Document

- Open a document locally. The application supports PDF files only.

Step 3: Add a Signature Field

- If the system does not auto detect any signature fields you can add them by yourself.
- Use the Signature tool to place a new signature field anywhere onto the document.
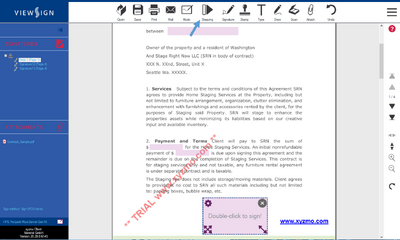
Step 4: Start the Signing Process
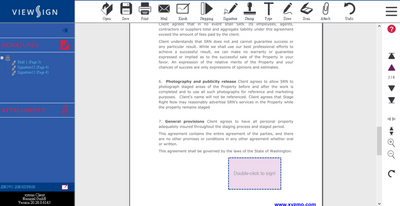
- Open the signing task with a double click.

Step 5: Sign the Document

- Sign the document with the device you have chosen at the beginning.

Stamp a Document
Step 1: Start the Client Application

- Open the client application on your device.
- Choose the required signing method. Either sign with your mouse, mobile device or signature pad.
Step 2: Open a Document
- Open a document locally. The application supports PDF files only.

Step 3: Add a Stamp Tag
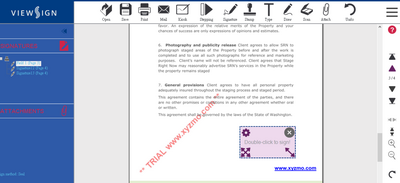
- Use the Stamp tool to place a stamp tag anywhere onto the document.

Step 4: Start the Signing Process

- Open the signing task with a double click.

Step 5: Sign with a Stamp
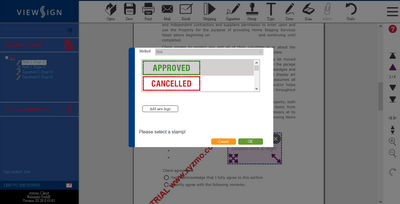
- Use one of the default stamps or add a new one by clicking Add New Logo.

Save, Send, and Print a Document
Step 1: Save a Document

- Click on the Save tool to open the Save As dialog.
- Browse the desired directory and type in a file name. Click Save to save the document.
Step 2: Send your Document via Email

- Click on the Email tool to send an email to any recipiant.
- A new message opens in your standard email client with the signed document attached.
Step 3: Print a Document

- Click on the Print tool to start the printing process.
- A print dialog pops up, where you can select the desired printer.
Add an Attachment
Step 1: Start the Attach Tool

- Click on the Attach tool to open the browse dialog.

Step 2: Open a File from Storage

- Choose the file you want to attach to the document and click Open.

Step 3: Add Different Types of Attachments

- In the attachment dialog you can replace the chosen document again through using the Open button.
- Choose whether you want to add the file as an additional page or as an attached file.
Step 4: Attach a Document Through Scanning

- Use the Scan tool to open the scan dialog.

Step 5: Attach a Scan

- In the dialog select the source to scan/snapshot from. Choose whether you want to add the file as additional page, as an attached file or as new PDF.

Step 6: View the Attachments

- The file is either attached as an additional page at the end of the current document or if it is an attached file, you can view it in the left side bar.

Use Additional Features: Text, Draw, Stepping, Undo
Step 1: Add Text to the Document

- Click on the Text tool to add a text annotation to the document. Type in your text.
- Place it in position and resize it by clicking the diagonal arrow icons. Leave annotation mode by clicking any button.
Step 2: Activate the Drawing Tool
- Click on the Draw tool to start the draw mode.

Step 3: Draw

- From the menu choose the color and define the width of your drawing stencil.
- Draw using your mouse in a freehand mode within the document. To exit this mode click another function.
Step 4: Work with the Stepping Tool
- Click on the Stepping tool to start the first signing task automatically. The stepping tool allows you to step through all signature dialogs.

Step 5: Use the Previous Action
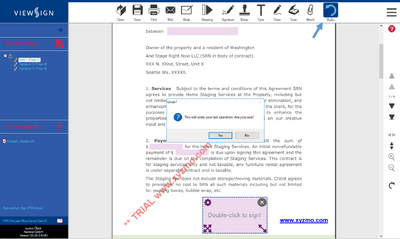
- By pressing the Undo button, a pop-up appears that allows you to confirm the undo of the last action.

Add Date to Signing Dialog
Step 1: Find All Additional Functionalities
- Open the menu by clicking the Menu button on the top right.

Step 2: Get to the Date Functionality

- From the drop-down menu choose the Options entry.

Step 3: Specify the Date Format

- The options dialog will appear. Under the section General chose the date format from the drop-down box.
- If you want the time to be shown in UTC (Coordinated Universal Time), mark the UTC checkbox.
Step 4: Activate the Date Functionality

- Under the section Details activate the Show time check-box and save all the settings by clicking OK.

Step 5: Display the Time and Date
- Finish the signing task and view the date and time at the bottom left corner of the signature field.

Protect a Document with a Password
Step 1: Find All Additional Functionalities

- Open the menu by clicking the Menu button on the top right.

Step 2: Get to the Password Protection Function

- From the drop-down menu choose the entry Set PDF password.

Step 3: Set a Password

- In the pop-up enter your password twice. Click OK to set the password.

Edit the Options
Step 1: Find All Additional Functionalities

- Open the menu by clicking the Menu button on the top right.
Step 2: Get to the Options

- From the drop-down menu choose the Options entry.
Step 3: Adjust General Settings

- Select the system language from the drop-down and define the format of the date and time underneath.
- To choose a default signing/sealing certificate click the ... icon. To deselect a chosen certificate click the X icon.
Step 4: Adjust the Appearance of the Signature

- In the Signature section you can customize your signature settings.
- Set the resolution, language, color, font and thickness. Define the thickness and size of the signature field.
Step 5: Add Details to the Signature Dialog

- In the Details section you can add optional details to the signature dialog.
- Choose whether signer, time, reason and location are shown in the signature.
Configure a License
Step 1: Find the License Input Field

- Open the menu by clicking the Menu button on the top right.
Step 2: Get to the License Input Field

- From the drop-down menu choose the entry Configure license.
Step 3: Configure the License

- In the pop-up enter your license voucher and click Redeem Voucher. If you have not bought a license yet, click Shop to order one. Click OK to configure your license.
Contact our Support
Step 1: Find All Additional Functionalities

- Open the menu by clicking the Menu button on the top right.
Step 2: Get to the Support Function

- From the drop-down menu choose the entry Contact support.

Step 3: Contact our Support Team
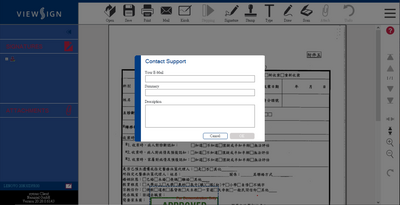
- In the pop-up enter your email address, add a short summary and describe your issue. Click OK to post your request to our support team.

Administration Guide
Installation
Installation Steps
- Start the installation file. Click Next.
- We have adopted a "silent installation" for this application. Therefore, you will not see any installation steps unless it requires your permission to do something.
Licensing

ViewSign Professional can be licensed in three different ways.
1. Manual registration using a voucher code
You will receive a voucher code from ViewSonic (feel free to request a demo or development license from your technical account manager).
Steps to license ViewSign Professional:
- Start ViewSign Professional.
- Select 'Configure License' from the menu.
- Enter your voucher code and click 'Redeem voucher'.
2. Automatic Licensing using SIGNificant License Server 5
This licensing option requires an installed and configured SIGNificant License Server 5. You can use this command line It is recommended to use this licensing when performing a rollout, e.g. by using an installation script which runs the following command directly after a silent setup:
SIGNificantOfflineClient.exe /license /lic_server=UrlToYourLicenseServer
Example:
C:\Program Files (x86)\viewsign pro\SIGNificantOfflineClient.exe" /license /lic_server=http://<SERVER>:51001/License/LicenseService.asmx
Error-Handling:
- If application does not start with this parameters, please check the logfile (%APPDATA%\SIGNificant Client\log\user.log and %APPDATA%\SIGNificant Client\log\licenseEXE.log) for error messages.
- Please check the port of the license server. Typically the port is 51001 (see example above) and test your connection the service in a browser.
3. Enterprise Licensing
This licensing mechanism requres ViewSign Pro 20.28 or later.
- You will receive a voucher code from ViewSonic (Note: this voucher is of a different type than for regular licensing as described above).
- Please contact ViewSonic to help you setup the Enterprise Licensing environment.
Integration Guide
Client Integration Guide
This guide describes integration scenarios for the Client. It is intended for the integrator (software developer/customizer) at your organization.
Command Line
You can start xyzmo Client via the command line.
To start xyzmo Client
- Run the following command:
SIGNificantOfflineClient.exe filename
The following parameters are supported:
| Parameter | Description |
|---|---|
| -b64 | Mark filename as base64 encoded. Must be before the filename. This is useful for filenames containing special characters.
Example: SignificantOfflineClient.exe -b64 "ASDLFKJASLDFKJ ALSK==" |
| filename | The full path and filename of the file that xyzmo Client should open.
Example: c:\Temp\document.pdf |
| /DisableStringRemoving | Disables the removing of Sig-/Ord-/Attachment-/… Strings from the document when it’s loaded. |
| /disablesigstringparsing | Disables Sig String parsing. |
| /disableordstringparsing | Disables Ord String parsing. |
| /signatureTemplate | This parameter tells the client to take the Signature Template XML given with its full path to create and position signature fields. Refer to the appropriate chapter for more details. |
| /config | This parameter takes an alternative _global.xml from a given path.
|
| /attachAsFile | This parameter takes a file and attaches it as file attachment. A full qualified path name is required.
Example: /attachAsFile c:\testfiles\test.pdf /attachAsFile "\\testres.trosoft.local\testfiles\test.xml" => this would attach the file c:\testfiles\test.pdf and c:\test2\test.doc |
| /attachAsPage | This parameter takes a file and attaches it as additional page. A full qualified path name is required.
Example: /attachAsPage "\\testres.trosoft.local\testfiles\test.pdf" /attachAsPage c:\test2\test.jpg => This would attach the file c:\testfiles\test.pdf and c:\test2\test.jpg as additional pages. |
| /sq | This parameter limits signing to a certain signature field given by the given sequence number (only for stepping and autostep)
Example (doc. contains fields with sq=1 to sq=10): /sq 1 /sq 2 /sq 5 => this limits signing to the signature fields with sq=1, 2 and 5. Example (doc. contains fields with no sq numbers): /sq 1 /sq 2 /sq 5 => this effectively disables signing of existing signature fields. Example (doc. contains fields with sq=1 to sq=10): /sq 1 /sq 2 /sq 15 => this limits signing to the signature fields with sq=1, 2; 15 is ignored |
| /username | This parameter limits signing to the signature fields of a specific user
Example: /username userA /username LoggedOnUser - the logged on user; which is "userA" for example. => If a username is given, the user is only allowed to sign the signature fields for the given username. |
| /cbv1; /cbv2; /cbv3 | Additional cmd parameters, will be passed to a custom action. |
Signature Strings
Signature Strings (short: “sig-strings”) are markers you can place in your document to position a signature field. Example: `sig` - this will place a signature field at exactly that position.
Available options for the sig-strings:
sig: creates a signature field in the PDF. This field is mandatory. Example:
`sig`
fd: text description of the signature (= field description). The description cannot contains commas. This field is optional. If no field description is given, a default text will be used. Example:
`sig, fd=Please sign this document immediately`
uid: the signer's user ID. Example:
`sig, uid=JohnS`
sq: the signature's sequence number within the document. Example:
`sig, sq=1`
bio: indicates whether biometric authentication is required for this signature. When using biometric authentication, a user id is required. The following values are accepted:
- 0 (default): no biometric authentication required
- 1: biometric authentication requiredExample:
`sig, uid=JohnS, bio=1`
req: indicates whether a signature field is mandatory. The following values are accepted:
- 0 (default): the signature field is not required
- 1: the signature field is required
ck1, ck2, ck3: the label of the custom key field 1, 2, and 3 ckv1, ckv2, ckv3: the value of the custom key field 1, 2, and 3. Example:
`sig, ck1=customID, ckv1= 123456`
sm: sign method
- Tablet: sign and use the default signing certificate
- Tablet_AND_Certificate: sign on the signature tablet and let the user choose which signing certificate to use
- Stamp: seal and use the default signing certificate
- Stamp_AND_Certificate: seal and let the user choose which signing certificate to use
- Stamp_AND_Tablet: sign on the signature tablet, seal and use the default signing certificate
- Stamp_AND_Tablet_AND_Certificate: sign on the signature tablet, seal and let the user choose which signing certificate to use
- TabletPOSinline
Example:
`sig,uid=JohnS, sm=Tablet_AND_Certificate`
signImg: name of the signing background image which is displayed on the signature tablet (provided the tablet supports this functionality). Note that the image has to present separately for every tablet in the dedicated directory (i.e. in DeviceImages/Wacom_STU500, DeviceImages\Wacom_STU520, ...) Example:
`sig,uid=JohnSm,signImg=signform1.bmp
ord: use this parameter to let the application rename the openend Pdf file. Example:
`ord, fn=contract.pdf`
att: the attachment strings allow the customer to define the files which are added as attachment, either as a file or as an additional page.
- `att, fn=test.xml,type=asFile` => this attaches the file called test.xml as file attachment.
- `att, fn=test.pdf,type=asPage` => this attaches the file as additional page(s).
- `att, fn=c:\testfiles\test.jpg, type = asFile` => this takes the file from the given path; attention the file path and file name must not contain commas!
ly: the name of the signature layout (defined in <install-dir>\config\SignatureLayouts.xml) which is used for signing. Example:
`sig, ly=myLayout`
fna: the name of the signature field. Example:
`sig, fna=SignField123`
sfw: the width of the signature field. Example:
`sig, sfw=100`
sfh: the height of the signature field. Example:
`sig, sfh=100`
Signature Templates
Signature templates are XML files which can be used to predefine signature fields (or signature field properties) for a document. This is helpful if you encounter scenarios where you cannot add sig-strings to your original documents (e.g. because your customer does not allow it).
To use this functionality, follow the following steps:
- Create a signature template
- Call the xyzmo Client from the command line by providing the path to the document and the signature template
Create a signature template
Create an XML file according to the following example:
<signatureTemplate>
 <version>1.2.0.0</version>
 <positionUnits>pdfUnits</positionUnits>
 <positionReferenceCorner>Lower_Left</positionReferenceCorner>
 <!-- If you need to convert values using a different reference corner, follow these steps:
 * Find out the physical size of the page of your document. If you are using i.e. A4 paper size, the physical size of the paper is 297 x 210 mm (see  http://www.papersizes.org/a-paper-sizes.htm)
 * Convert the physical size to postscript points (for the A4 paper size, just google: "297 mm to postscript points" and "210 mm to postscript points")
 * The converted values without the decimal values (841 postscript points / 595 postscript points) is the value of the Upper Right position corner. Use these values to convert your coordinates according to the reference corner they are using.
 -->
 <sig>
  <param name="uid"></param>
  <param name="fd">Plase sign here to confirm to the Terms and Conditions:</param>
  <height>50</height>
  <width>40</width>
  <positionX>30</positionX>
  <positionY>150</positionY>
  <positionPage>1</positionPage>
 </sig>
 <sig>
  <param name="uid">backoffice</param>
  <param name="fd">Please sign to confirm the customers insurance policy</param>
  <height>20</height> <width>40</width>
  <positionX>30</positionX>
  <positionY>50</positionY>
  <positionPage>1</positionPage>
 </sig>
</signatureTemplate>
Explanation:
- positionUnits: The units in which the height, width and positions are provides.
- Possible values: “pdfUnits”.
- positionReferenceCorner: the corner of the document from which the positionX and positionY values are calculated.
- Possible values: "Lower_Left"
- sig: 1-n signature fields.
- param name=xxx: defines a parameter/property of the signature field. Example: <param name=uid>backoffice</param> This will cause the client to use "backoffice" as the signatory’s UID/name. Any of the parameters used in sig-strings can be added to the signature layout using this syntax.
- width/height: the width and height of the signature field. If ommited the default value will be used.
- positionX/positionY: the x-y coordinate of the lower left corner of the signature field on the page.
- positionPage: the page where the signature field is positioned.
Call the xyzmo Client from the command line by providing the path to the document and the signature template
Example:
SIGNificantOfflineClient.exe c:\temp\document.pdf /signatureTemplate c:\temp\sigTemp.xml
The result in the client will look like the following:
Signature Template with References
The capability to use and modify a signature template was alredy described in the previous chapter. In addition to that you can combine the means of sig-strings and signature template XML in one step.
The idea is to use the sig-strings in the document just for positioning the signature fields and have everything else (size, field description etc.) in the signature template. This enables you to use special characters and large text elements in the field which might be troublesome when used directly in the sig-strings in the document.
To make use of this feature follow these steps:
- position the signature fields in your document with sig-string which contain references to the signature template; Examples: `sig,ref=customer` `sig,ref=type_10`
- Create a signature template XML according to the following example:
<signatureTemplate>
  <version>1.2.0.0</version>
  <positionUnits>pdfUnits</positionUnits>
  <positionReferenceCorner>Lower_Left</positionReferenceCorner>

  <sig ref="customer">
      <param name="uid"> </param>
      <param name="fd">Plase sign here to confirm to the Terms and Conditions:</param>
      <height>50</height>
      <width>40</width>
  </sig>
  <sig ref="type_10">
      <param name="uid">backoffice</param>
      <param name="fd">Please sign to confirm the customers insurance poolicy</param>
      <height>20</height>
      <width>40</width>
  </sig>
</signatureTemplate>
Explanation:
o <sig ref="customer">: This attribute is matched with the “ref” option in the sig-string.
o Call the client from the command line by providing the path to the document and the signature template. Example:
SIGNificantOfflineClient.exe c:\temp\document.pdf /signatureTemplate c:\temp\sigTemp_ref.xml
The result in the client looks like the screen below:
Signature Template for field modification
A Signature Template can also be used for altering an alredy existing field in a PDF. The idea is to use any PDF form designer for just for positioning the signature fields and have everything else (field description etc.) in the signature template.
To make use of this feature follow these steps:
- Position the signature fields in your document with a PDF form designer and remember the field names
- Create a signature template XML according to the following example:
<signatureTemplate>
  <version>1.2.0.0</version>
  <positionUnits>pdfUnits</positionUnits>
  <positionReferenceCorner>Lower_Left</positionReferenceCorner>

  <sig existingfield="field1"> <!-- this is an existing field extension entry, it will extend parameters for an existing signature field "field1" -->
    <param name="uid">Test</param>
  </sig>
</signatureTemplate>
Explanation:
o <sig existingfield="field1">: This attribute is matched with a field with name “existingfield”.
o Call the client from the command line by providing the path to the document and the signature template. Example:
SIGNificantOfflineClient.exe c:\temp\document.pdf /signatureTemplate c:\temp\sigTemp_existingFields.xml
- Hint: create one large signature template XML for all your document types and reference it from your documents.
Customization
Configure Size of Signing-Dialogue
Available since version 20.14
In the global.xml file in the section "signatureScreen" the size of the signature screen can be specified in percent.
In detail, the size for "Sign (POS inline)" and all other signing methods can be configured separately. The reason is that the Sign (POS inline) gets signed on the pdf and all other signing method in a separate window.
Sign (POS inline)
Here the attributes posWidth and posHeight are used, whereby width and height can be configured individually, both or nothing(default size).
Only whole numbers between 10 and 100 can be set, whereby the values indicate the percentage on the pdf-page/viewer.
Limitations:
- max zoom level is 9
- min width/height is 400pt/300pt
- when both are placed width overrules the height attribute
All others
Here the attributes signWidth and signHeight are used, whereby width and height can be configured individually, both or nothing(default size).
Here also only whole numbers between 10 and 100 set, whereby the values indicate the percentage on the program window.
Limitations: Here only the window gets enlarged.
FAQ
This chapter lists some common integration questions.
How can I define a signature field and have the user enter his name later?
- Use a sig-string without “uid”, e.g. ‘sig,fd=Please enter your name and sign’ . The system will create a signature field but the signer’s name is changeable.
How can I check if the Offline Client is still running?
- Check if the process “SIGNificantOfflineClient” with different command line arguments than "/runservice" is running. A "SIGNificantOfflineClient" process with command line arguments "/runservice" is the xyzmo Client background service.
How can I check which of the signature fields where signed?
- Analyze the Document Status Report XML. This report is written when you click a custom button or can be written every time the document is opened or changed. Refer to the Admin Guide for Details.
How can I return to the Offline Client in case the user did not sign the required signature fields?
- Just open the PDF directly with the Offline Client.
How can I change the text elements in the Offline Client?
- Change the text in the language XML (ProgramFiles\xyzmo Client\LanguageFiles\<language>.xml. Attention: These files are overwritten during update – therefore you have to restore and update them again manually.
Appendix: Custom Button Example
This is a very simple example for a custom button command line but it shows what it is all about. The xyzmo client currently supports two custom buttons. The customButton1 is shown in the top toolbar, where customButton2 is located near the bottom right corner of the application window. At the moment, only customButton1 supports displaying a button text and overlay text (i.e. tooltip). More samples can be found in the xyzmo Client installation directory in the file Samples\CustomActions.txt
_global.xml configuration section:
<customButton1>
    <enableIf values="pdfOpened;requiredFieldsSigned">pdfOpened</enableIf>
    <buttonText>Button Tester</buttonText>
    <overlayText>Button Tester</overlayText>
    <saveSignatureFieldsBeforeAction values="0;1">0</saveSignatureFieldsBeforeAction>
    <command>C:\Program Files\xyzmo Client\button_tester.cmd</command>
    <arguments>%FILENAME% %DocStatusReport%</arguments>
    <postCommandAction values="none;reloadPdf;closeClient">closeClient</postCommandAction>
</customButton1>
The command is called with the arguments FILENAME and DocStatusReport. You can also use those variables also as part of another argument. e.g. /f:%filename% /ds:%DocStatusReport% . For details refer to the Admin Guide.
button_tester.cmd:
 @echo off
 echo CUSTOM BUTTON TESTER
 echo ---------------------
 echo - FILENAME %1
 echo - DocStatusReport %2
 echo .
 echo press any key to open these files
 pause

 echo analyze the Document Status XML Report:
 notepad %2

 echo send the signed file back to the customer app
%1Explanation:
| Item | Explanation |
|---|---|
| echo – FILENAME 1 | The batch files takes the received arguments (%1, %2) - %FILENAME and $DocStatusReport% and print it to the console. |
| pause | It waits for a key press. |
| notepad 2 | The %DocStatusReport XML is opened in the notepad for viewing. In reality you analyze the XML here. |
| %1 | The document itself is opened by the registered default application (typical Acrobat Reader). In reality you transfer the signed file back to you Customer App. After this step is complete, the script exits and closes the Offline Client. |
Appendix: Create a PDF Printer with pdfCreator 2.X
This chapter will show you how to create a Pdf Printer using PdfCreator, which will print PDFs directly to the xyzmo Client. Of course you can use other Pdf Printers too.
- Download and install PdfCreator
- Start PDFCreator
- Click Application Settings, select Printers, click Add Printer. Name the new printer e.g. xyzmo Client Printer. Click Save.
- Click Profile Settings, add a new profile using +. Name the new profile e.g. Open in xyzmo Client.
- Go to Document (of the new profile), use <InputFileName> as Title.
- Go to Auto-Save (of the new profile), check Enable automatic saving, configure Target Folder to your desired save directory.
- Go to Actions (of the new profile), uncheck Open Document, check Run script, apply the settings below. Click Save.
- Script File: C:\Program Files (x86)\xyzmo Client\SIGNificantOfflineClient.exe
- Uncheck Wait until script execution has ended
- Click Application Settings, select Printers, select xyzmo Client Printer, set Profile to Open in xyzmo Client. Click Save.
- Test your Pdf Printer
Appendix: Create a PDF Printer with pdfCreator 4.X
This chapter will show you how to create a Pdf Printer using PdfCreator, which will print PDFs directly to the xyzmo Client. Of course you can use other Pdf Printers too.
- Download and install PdfCreator.
- Start PDFCreator.
- Click Printer, click Add Printer. Name the new printer e.g. xyzmo Client Printer. Click OK.
- Click Profiles, add a new profile using Add. Name the new profile e.g. Open in xyzmo Client.
- Select the new profile in the listbox, click on the wrench icon beside Destination Folder.
- In this window, select Automatic on the top selection and use <InputFileName> for Filename,
- insert your desired save directory as Target directory (must not left empty!) and
- uncheck the Open file after saving option and press OK
- Click on the Add Action-button (see screenshots above)
- In this window, select Run Program
- Now, enter C:\Program Files (x86)\xyzmo Client\SIGNificantOfflineClient.exe for the Program File and uncheck Wait Until the program has ended.
- Click Printer, check the xyzmo Client printer as primary printer and select the new created profile Open in xyzmo Client for that printer.
- Test your Pdf Printer.
If you want to open PDF files directly with xyzmo client for cases where you want to sign them, but you probably don't want to change the default program used to open PDF files, you can add an "Open with xyzmo client" entry in the context menu of your PDF files.
Following menu entry can be added to the context menu, shown when clicking a PDF file with the right mouse button:
Manual installation in Registry Editor
You should do this only if you are aware of the risks of manually editing the Windows Registry!
- Manually search in Windows Registry Editor for the reference key used to manage .pdf files (HKEY_CLASSES_ROOT\.pdf - if Adobe Acrobat Reader DC is your standard application for PDF, it will refer to AcroExch.Document.DC
- In _HKEY_CLASSES_ROOT\AcroExch.Document.DC create the folder "shell", and subfolder "xyzmo"
- In the folder "xyzmo", set Default value to "Open with xyzmo client"
- create a sub folder "command"
- In the folder "command", set Default value to
"C:\Program Files (x86)\xyzmo Client\SIGNificantOfflineClient.exe" "%1"
Install via prepared .reg file
- Download the file from AddXyzmoClientToContextMenu.reg
- Double-click the .reg file and confirm dialogs from Registry Editor
Appendix: DMS Integration via DMS-Printer
When your archive / document management system (DMS) provides a "Print to DMS" printer driver, where the printer driver "uploads" the document to the DMS and perhaps lets you fill meta data for the archive document, you can integrate a "send to DMS" functionality as custom button (e.g. CustomButton2) and with printing features of Adobe Acrobat Reader. The CustomButton2 will then be displayed in the bottom right corner of the xyzmo Client's application window.
First of all, check the printer name. Acrobat Reader DC may have some limitations regarding printer driver name. It seems the printer driver name must have a name not longer than 10 characters and without spaces. Therefore, the printer name can easily be renamed in Windows' "Devices and Printers" view, in printer preferences (you probably have to enable the "edit preferences" button first).
Then, configure the CustomButton2 (See Appendix for details). Suggested configuration:
  <customButton2>
           <enableIf values="pdfOpened;requiredFieldsSigned">requiredFieldsSigned</enableIf>
           <overlayText>
           </overlayText>
           <saveSignatureFieldsBeforeAction values="0;1">1</saveSignatureFieldsBeforeAction>
           <command>C:\Program Files (x86)\Adobe\Acrobat Reader DC\Reader\AcroRd32.exe</command>
           <arguments>/t %FILENAME% ##DMS-PRINTER##</arguments>
           <postCommandAction values="none;reloadPdf;closeClient">reloadPdf</postCommandAction>
         </customButton2>
You have to replace ##DMS-PRINTER## with your printer name, e.g. PrintToDMS
You can also replace the bu_custom2.png and bu_custom2_over.png (in xyzmo Client's \config\skin folder) by an "to DMS" icon, or any other icon of your choice.
Troubleshooting
This guide provides helpful hints and solutions for troubleshooting the above products as well as scenarios for possible hardware and software problems.
My tablet is not detected correctly, what can I do?
Check if the tablet driver is installed
Download and install the latest driver for you tablet. Make sure that drivers for other signature tablets are removed from the system as they might interfere.
Disable/Override the tablet detection
To override the automatic tablet detection and enforce a specific tablet edit the tag <tabletConfig> in the _global.xml.
Example for enforcing a Wacom STU-500:
<tabletConfig>Wacom_STU500</tabletConfig>
Example for enforcing the mouse mode:
<tabletConfig>Mouse</tabletConfig>
Clear the temporary director
Look at the file user.log, if you can see a similar error:
System.IO.IOException: File already exists.
   in System.IO.__Error.WinIOError(Int32 errorCode, String maybeFullPath)
   in System.IO.__Error.WinIOError()
   in System.IO.Path.GetTempFileName()
   ...
Your temporary directory is probably full. Clear it (to do it, simply enter temp in the Windows File Explorer)
FAQ
Does ViewSign Professional install all drivers for my signature capturing tablet?
- No, ViewSign Professional does not install any tablet drivers. You have to install them on your own. For ViewSonic tablets, you can visit https://www.viewsonic.com/tw/products/pendisplay to download the drivers.
How can I create a PDF Printer?
- The Integration Guide contains an example which creates a PDF printer for ViewSign Professional using PdfCreator. Of course you can use any other available PDF printer too.
SDK
The SIGNificant Kiosk SDK enables an interactive customer communication, advertising and e-signature capturing at the Point of Sales / Service (POS). Using stylus-based displays or screens at the POS offers many advantages (e.g., customers can read documents on the display, capture electronic signatures and use the display for advertising). The SIGNificant Kiosk SDK with its intelligent screen handling makes use of all the advantages such displays can offer.
Features
- Display the document on the whole screen - enables the customer to read the document at their own pace on the screen.
- Sign directly on the document - better acceptance of the signing solution as the customer signs directly on the document.
- Assistance mode - the operator can guide the user (change page, trigger signature fields, highlight information, etc.) from their monitor.
- Simultaneous usage - the operator can continue their work on their computer while the customer signs the document.
- Advertisement - play advertisements for customers (image slideshow & videos) on the signature screen while it is not in use.
- High level integration with easy to integrate .NET and Java SDK.
- Skinning of the user interface by XML configuration.
- Search for text markers ("sig-strings") to find the positions where to put the signature. Optionally the markers can be removed (this is depending on the PDF structure).
- Digitally sign with or without biometric signature data.
- Standard: Adobe Pdf Reference PDF 32000-1:2008 12.8.3.3 PKCS#7 Signatures as used in ISO 32000.
- optionally: PDF/A-1 conformant signature
- optionally: RFC 3161 Timestamping
- Real-time biometric signature verification in combination with our SIGNificant Biometric Server.
Operating System & Development Environment
- Operating systems supported:
- Windows Vista
- Windows 7
- Windows 8
- Windows 10
- Integration via .NET or JAVA, or from the web
Deliverables
The latest version is always downloadable via xyzmo’s partner network.
The provided MS installer will deploy the following:
- Kiosk SDK
- Kiosk SDK Demo (a precompiled sample integration)
- .NET SDK library for accessing the Kiosk SDK (.NET2 / .NET4 / x86 / x64)
- Java SDK library for accessing the Kiosk SDK
- Sample code for both the .NET and Java SDK library
Note regarding encryption
All signature data is encrypted with xyzmo's default certificates. In unlicensed mode this is a (unsecure) demo certificate where the private key is available to everybody for the purpose of testing. In licensed mode xyzmo's production certificate is used for which xyzmo manages the private key. If you want to use a specific key for encryption/decryption (a requirement for Biometric Server use) you will get a specific build (dll/jar) for that purpose.
Signature Tablets
Currently, the following signature screens are supported and recommended when used with Windows devices:
- Namirial NT10011
- Namirial NT10012
- Namirial NT10013
Also, the following devices are supported:
- Wacom DTU 1031
- Wacom DTU 1031X
- Wacom DTU 1141B
Other manufacturer's models are supported on request if they provide sufficient drivers and signature quality. For a detailed list refer to the release notes of the specific version.