

| Sub-menu |
|---|
| HDMI 1 |
| HDMI 2 |
| DisplayPort |
VG3208-4K Full Guide
From ViewSonic Documentation
Introduction
Package Contents
- Monitor
- Power Cord
- Power Adapter
- Video Cable
- Quick Start Guide
Note: The cables included in your package may vary depending on your country. Please contact your local reseller for more information.
Product Overview
-
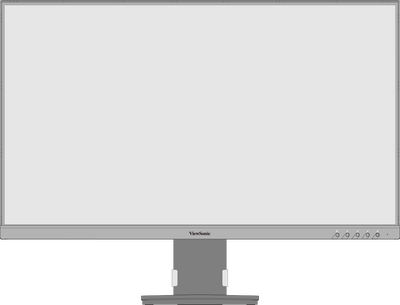 Front View
 -
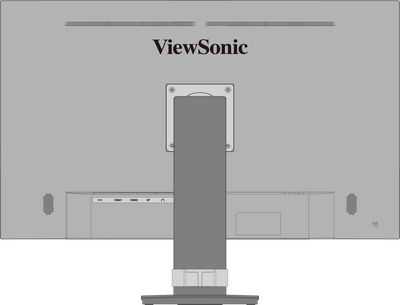 Rear View
I/O Ports

| Number | Description |
|---|---|
| 1 | DC IN |
| 2 | HDMI |
| 3 | DP (DisplayPort) |
| 4 | Audio Out |
Note: For more information about the 1 ★ / 2 / 3 / 4 / 5  key and its functions, refer to Hot Keys.
Initial Setup
Installing the Stand

Note: For safety and to ensure optimal performance, please position the monitor on a flat, stable surface. Failure to do so may lead to the monitor falling, causing damage to the monitor itself and/or posing a risk of personal injury.
Removing the Stand and Mounting the Monitor
Refer to the table below for the standard dimensions for mounting kits.
Note: For use only with a UL certified mounting kit/bracket. To obtain a wall mounting kit or height adjustment base, contact ViewSonic® or your local dealer.
| Maximum Loading | Pad Patten (W x H) |
Pad Hole | Screw Specification | Screw Quantity |
|---|---|---|---|---|
| 14 kg | 100 x 100 mm | Ø 5 mm | M4 x 10 mm | 4 screws |
Note: Mounting kits are sold separately.

Important: Before removing the stand, please turn off the monitor, disconnect all cables, and place the monitor on a flat, stable surface with the screen facing down.
- Remove the stand.
- Attach the mounting bracket to the VESA mounting holes at the rear of the monitor. Then secure it with four screws (M4 x 10 mm).
- Follow the instructions that come with the purchased mounting kit to mount the monitor.
Using the Security Slot

To help prevent the monitor from being stolen, use a security slot locking device to secure the monitor to a fixed object.
Additionally, fastening the monitor to a wall or fixed object using a security cable can help support the weight of the monitor in order to prevent the monitor from falling over.
Making Connections
Connecting to Power

- Connect the power adapter to the DC IN jack at the rear of the monitor.
- Plug the power cord plug into a power outlet.
Connecting to External Devices

Using the Monitor
Adjusting the Viewing Angle
Height Adjustment

Lower or raise the monitor to the desired height (0 to 90 mm).
Note: When adjusting, press down firmly along the adjustment track.
Swivel Adjustment

Swivel the monitor to the left or right for the desired viewing angle (± 360˚).
Tilt Adjustment

Tilt the monitor forwards or backwards to the desired viewing angle (-4˚ to 20˚).
Note:
- When adjusting, support the stand firmly with one hand while tilting the monitor forwards or backwards with the other hand.
- The monitor must be lifted to the highest position, then it can support 40° tilt.
Turning the Monitor On/Off

- Plug the connected power adapter into a power outlet.
- Press the Power button to turn on the monitor.
- To turn the monitor off, press the Power button again.
Note: The monitor will still consume some power as long as the power cord is connected to the power outlet. If the monitor is not being used for a long period of time, please disconnect the power plug from the power outlet.
Using the Control Panel Keys
Use the Control Panel Keys ( 1 ★ / 2 / 3 / 4 / 5 ) to access the Quick Menu, activate Hot Keys, navigate the On-Screen Display (OSD) Menu, and change the settings.

Quick Menu
Press the 1 ★ key to activate the Quick Menu.

Note: Follow the key guide that appears on the screen to select the option or make adjustments.
| Menu | Description | |
|---|---|---|
| ViewMode | Select one of the preset color settings. | |
| Volume | Adjust the level, or mute the volume. | |
| Contrast/Brightness | Adjust the contrast or brightness level. | |
| Input Select | Select the input source. | |
| Exit | Exit the Quick Menu. | |
Hot Keys
When the On-Screen Display (OSD) Menu is off, you can quickly access special functions by using the Control Panel Keys.
| Key | Description |
|---|---|
| 1 ★ + 2 | Press and hold the keys to lock/unlock the OSD Menu. When the menu appears on the screen, continue holding both keys for 10 seconds to lock/unlock the OSD Menu  If the OSD Menu is locked, the below message will appear on the screen:  |
| 1 ★ + 4 | Press and hold the keys to lock/unlock the Power button. When the menu appears on the screen, continue holding the key for 10 seconds to lock/unlock the Power button.  If the Power button is locked, the below message will appear on the screen.  |
| 3 + 4 | Press and hold the keys to display/hide the boot up screen when the device is turned on.  |
Configuring the Settings
General Operations
- Press the 2 / 3 / 4 key to display the On-Screen Display (OSD) Menu.
- Press the 1 ★ or 2 key to select the main menu. Then press the 3 key to enter the selected menu.
- Press the 1 ★ or 2 key to select the desired menu option. Then press the 3 key to enter the sub-menu.
- Press the 1 ★ or 2 key to adjust/select the setting. Then press the 3 key to confirm.
- Press the 4 key to return to the previous menu.


Note: Certain menu option adjustments do not require the user to press the 3 key to confirm the selection. Follow the key guide that appears on the screen to select the option or make adjustments.
Note: To exit the OSD menu, Press the 5 key.
Appendix
Product Specifications
| Item | Category | Specifications |
|---|---|---|
| LCD | Type | VA, Color a-Si TFT Active Matrix 3840 x 2160 (UHD)
LCD; 0.18159 (H)mm x 0.18159 (V)mm pixel pitch |
| Display Size | 80 cm | |
| 31.5” | ||
| Color Filter | RGB Vertical Stripe | |
| Glass Surface | Anti-Glare (Haze 25%), Hard Coating (3H) | |
| Input Signal | Video Sync | TMDS digital (100 Ω)
|
| Compatibility | PC | up to 3840 x 2160 |
| Macintosh | up to 3840 x 2160 | |
| Resolution and Timings[1] | Recommended | 3840 x 2160 @ 60 Hz |
| Supported |
| |
| Power[2] | Input Voltage | AC 100-240V, 50/60 Hz (auto switch) |
| Display Area | Active Size (H x V) |
697.31 x 392.23 mm |
| 27.45” x 15.44” | ||
| Operating Conditons | Altitude | 5 km |
| 16,404.2 ft | ||
| Relative Humidity | 20% to 90% (non-condensing) | |
| Temperature | 0° C to 40° C | |
| 32° F to 104° F | ||
| Storage Conditions | Altitude | 12 km |
| 39,370.1 ft | ||
| Relative Humidity | 5% to 90% (non-condensing) | |
| Temperature | -20° C to 60° C | |
| -4° F to 140° F | ||
| Dimensions
(with stand) |
Physical (W x H x D) |
714.3 x 546 x 213 mm |
| 28.1” x 21.5” x 8.4” | ||
| Weight
(with stand) |
Physical | 7.9 kg |
| 17.4 lb | ||
| Wall Mount | Dimensions | 100 x 100 mm |
| Power Consumption | On[3] | 185W (Typical) without audio |
| Standby/Sleep | < 0.5W | |
| Off | < 0.3W (Maximum) |
On-Screen Display (OSD) Menu Tree
| Sub-menu | Menu Option |
|---|---|
| Volume | (-/+, 0~100) |
| Mute | On |
| Off |
| Sub-menu |
|---|
| Standard |
| Game |
| Movie |
| Web |
| Text |
| MAC |
| Mono |
| Sub-menu | Menu Option | ||
|---|---|---|---|
| Contrast/Brightness | Contrast | (-/+, 0~100) | |
| Brightness | (-/+, 0~100) | ||
| Color Temperature | sRGB | ||
| Bluish | |||
| Cool | |||
| Native | |||
| Warm | |||
| User Color | Red | (-/+, 0~100) | |
| Green | (-/+, 0~100) | ||
| Blue | (-/+, 0~100) | ||
| Color Space | Auto | ||
| RGB | |||
| YUV | |||
| Color Range | Auto | ||
| Full Range | |||
| Limited Range | |||
| HDR | Auto | ||
| Off | |||
| Sub-menu | Menu Option |
|---|---|
| Sharpness | (-/+, 0/25/50/75/100) |
| Blue Light Filter | (-/+, 0~100) |
| Aspect Ratio | 4:3 |
| 5:4 | |
| 16:9 | |
| 16:10 | |
| Overscan | On |
| Off | |
| Black Stabilization | (-/+, 0/10/20/30/40/50/60/70/80/90/100) |
| Advanced DCR | (-/+, 0/25/50/75/100) |
| Response Time | Standard |
| Advanced | |
| Ultra Fast |
| Sub-menu | Menu Option | |
|---|---|---|
| Language | English | |
| Français | ||
| Deutsch | ||
| Español | ||
| Italiano | ||
| Suomi | ||
| Русский | ||
| Türkçe | ||
| Česká | ||
| Tiếng Việt | ||
| 日本語 | ||
| 한국어 | ||
| 繁體中文 | ||
| 简体中文 | ||
| Information | ||
| OSD Size | Native | |
| Large | ||
| OSD Timeout | (-/+, 5/15/30/60) | |
| OSD Background | On | |
| Off | ||
| Power Indicator | On | |
| Off | ||
| Auto Power Off | On | |
| Off | ||
| Sleep | 30 minutes | |
| 45 minutes | ||
| 60 minutes | ||
| 120 minutes | ||
| Off | ||
| ECO Mode | Standard | |
| Optimize | ||
| Conserve | ||
| Auto Detect | On | |
| Off | ||
| DDC/CI | On | |
| Off | ||
| Memory Recall | ||
VG3208-4K_UG_ENG_1a_20240830